My Easy Moroccan Preserved Lemons recipe is a gentle introduction to fermentation with no scary bits!
It’s a perfect recipe for those Australians and New Zealanders who have a lemon tree in their garden. And there’s no problem using the same technique for limes.
When you think your dish needs a squeeze of lemon, think twice and choose preserved lemons. They still deliver the citrus flavour but combined with the floral notes of the lemon peel and a good hit of umami that comes with the fermentation process.
And salt preserved lemons deliver a big punch of flavour when used in salads or sprinkled across a dish. But they really come into their own as a flavour enhancer in virtually every category of dish, whether it be dressings, marinade, pasta dishes, stews, savoury bakes, the list goes on!
For vegetarians and vegans looking for a way to add unique depth to their cooking, preserved lemons hits all the marks.
Lacto-fermentation
Don’t worry this is not going to get too technical!
Moroccan preserved lemons are made through a process known as lacto-fermentation. Its name is derived from the chemical reaction that results in lactic acid being created.
The fermentation process occurs over two stages. Initially the brine created with the large amount of salt and lemon juice kills off harmful bacteria and allowing the good bacteria, Lactobacillus, to thrive. During the second stage, the Lactobacillus goes to work converting the lactose and other sugars present in the lemons into lactic acid. The lactic acid then does its work pickling the lemons and creating an acidity very different than a typical pickle.
Let me show you how to make lacto-fermented lemons.
Preserved lemon ingredients
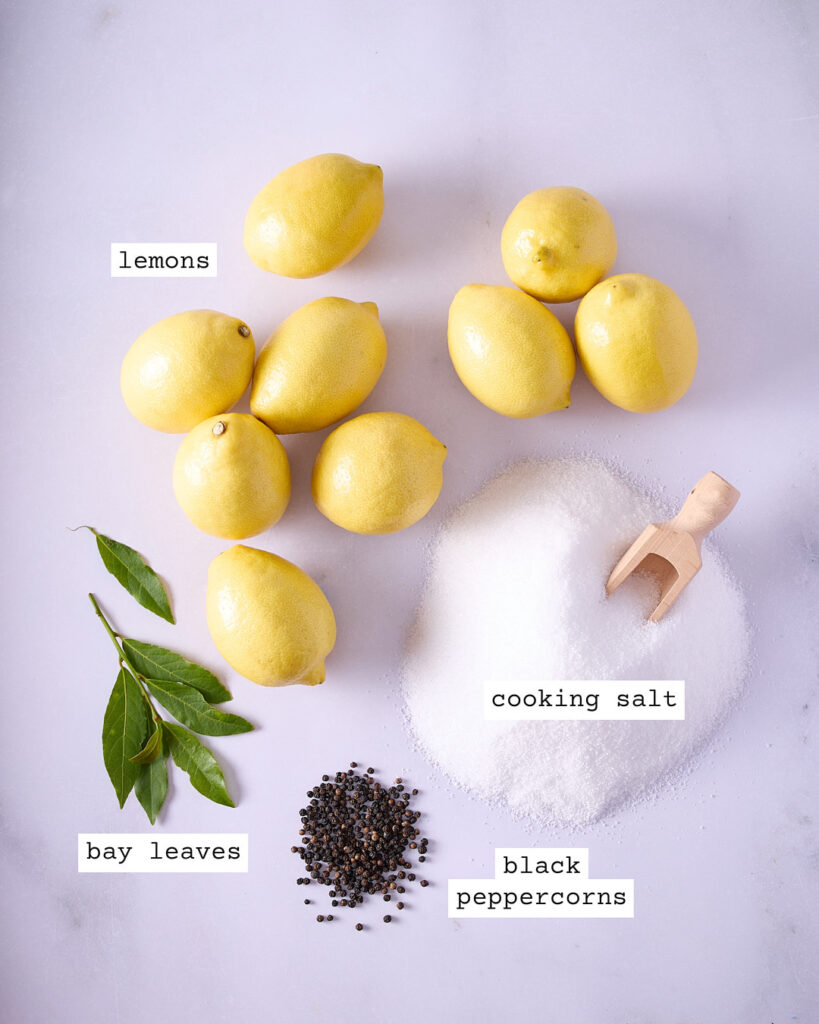
There is no right lemon to pick for this easy fermented lemons recipe. Most recipes say to use unwaxed lemons. That’s fine if you, or someone you know, are looking to offload their lemons from a backyard tree. And I expect you can also source unwaxed lemons from a farmer’s market when they are in season.
Also, it is possible to remove the wax by scrubbing the lemons under hot water with a food safe brush and a little salt. In my experience, this has never resulted in the lemons feeling any less ‘waxy.’
Rest assured the wax used in Australia is food grade. The lemons I’ve used in the photos are waxed. It is my routine to use waxed lemons, and I cannot see any difference to those I’ve tried made from unwaxed lemons.
Enough said about waxed lemons!
Please don’t be tempted to use expensive sea salt in this recipe, as it needs 500g of salt. I use cooking salt, which is just a coarser version of table salt. Kosher salt is very similar but is pricey in Australia. Don’t buy rock salt, it’s meant for salt grinders.
As a Canadian expat, I still get a buzz out of going to my herb garden and picking fresh bay leaves off my bay tree. Of course, dried bay leaves are perfectly fine.
Both the bay leaves and the black peppercorns can be swapped out with other dried whole spices. Examples include white peppercorns, coriander seeds, mustard seeds, and cloves.
Sterilising the preserving jar
You need a 1 litre sealed container for this Moroccan preserved lemons recipe.
I prefer to use a glass jar when making preserved lemons. Don’t use anything made of metal. Metal will react with the lactic acid. But a sealed plastic container is acceptable.
Make sure you wash the jar, lid, and any seal in hot soapy water and rinse them well.
I never leave my preserves out of the fridge. I can never find a consistently cool enough spot in our Queensland home. If you keep the preserved lemons in the fridge, there is no absolute requirement to sterilise the jar. It’s fine, as long it is super clean and the lemons well washed. But as we are trying to deter the ‘bad’ bacteria, sterilising the jar is a good idea. There are some super simple ways to do this.
The steaming method
As I have a big built in steamer in my kitchen, I use the steaming method. I steam the jars, lids and sealing ring (if using) at 100°C for 5 10 minutes. I then remove the jar (not touching the inside or rim) and let it cool right side up on a clean tea towel.
The boiling water method
A super simple way to sterilise the jar is by filling it with boiling water. Then leave it to cool on the bench. Put the lid and any silicone/rubber seal in a container and pour boiling water over them. Again leave them to cool in the water
The oven method
Another method (not for plastic!) is oven sterilisation. Preheat the oven to 135°C. Place the clean jar and lid on a baking tray. Heat in the oven for 20 minutes, turn off the oven and leave the jar and lid in the oven to cool. If you are using a rubber sealing ring, don’t put it in the oven. As above, put it in a bowl and pour boiling water over it and then leave it to cool.
I know, enough of the boring stuff, let’s get onto the salt preserved lemons technique!
Preparing the lemons
This recipe calls for 9 large lemons. If you are using small or medium sized lemons, you will need more. I used 6 large lemons to pack into the preserving jar. The remaining 3 lemons are used (as juice) 5 days later.
Prepare the lemons, by washing them well and drying them with a clean tea towel.
Using a sharp knife, cut a small slice off each end of the lemon. This way the lemon will stand steady on the cutting board. Stand each lemon up on end, cut through the lemon, stopping about 2 centimetres short of the other end. Cut the lemon again so the lemon is (almost) cut into quarters.
Repeat so 6 lemons are (almost) cut into quarters. You will be packing the gaps in the quarters created with salt.
Yes, that’s a lot of salt!
Lacto-fermented lemons need a lot of salt, start with 500g of cooking salt. You will most likely have some left over.
Packing the lemons
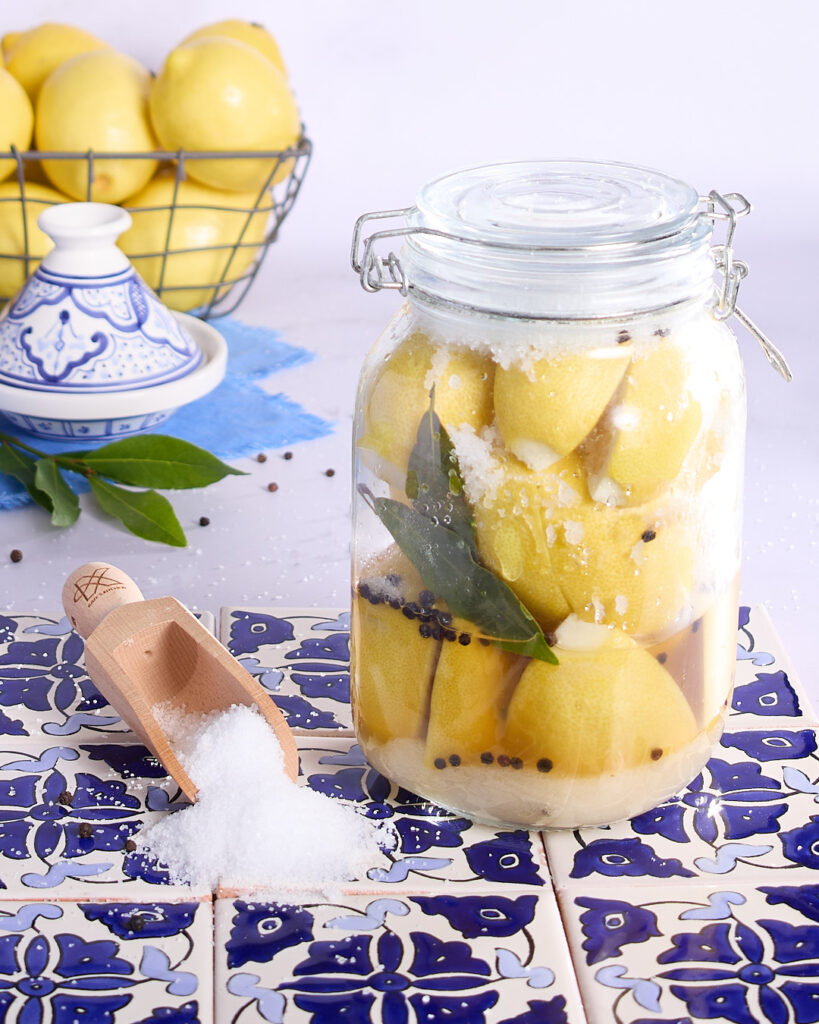
Pack the gaps between the lemon sections with salt and then add to the jar. The goal is to have the lemons as tightly packed as possible. This is easier if your lemons are a small to medium size. If they are larger, as in the photo above, you may need to cut some lemons in half as you pack them into the jar.
As you pack in the lemons, use a wooden spoon or rolling pin to press out as much juice as possible.
Add a bay leaf and peppercorns, along with a generous amount of salt before packing in the next layer of lemons.
I finish with a half of a lemon, leaving about a 1 centimetre gap at the top of the jar. Seal tightly with the lid, using a rubber or silicone sealing ring if it comes with the jar you have chosen. Remember you will be turning the jar upside down regularly in the first 5 days.
At this stage the liquid will not go to the top of the jar of preserved lemons.
The lacto-fermentation process
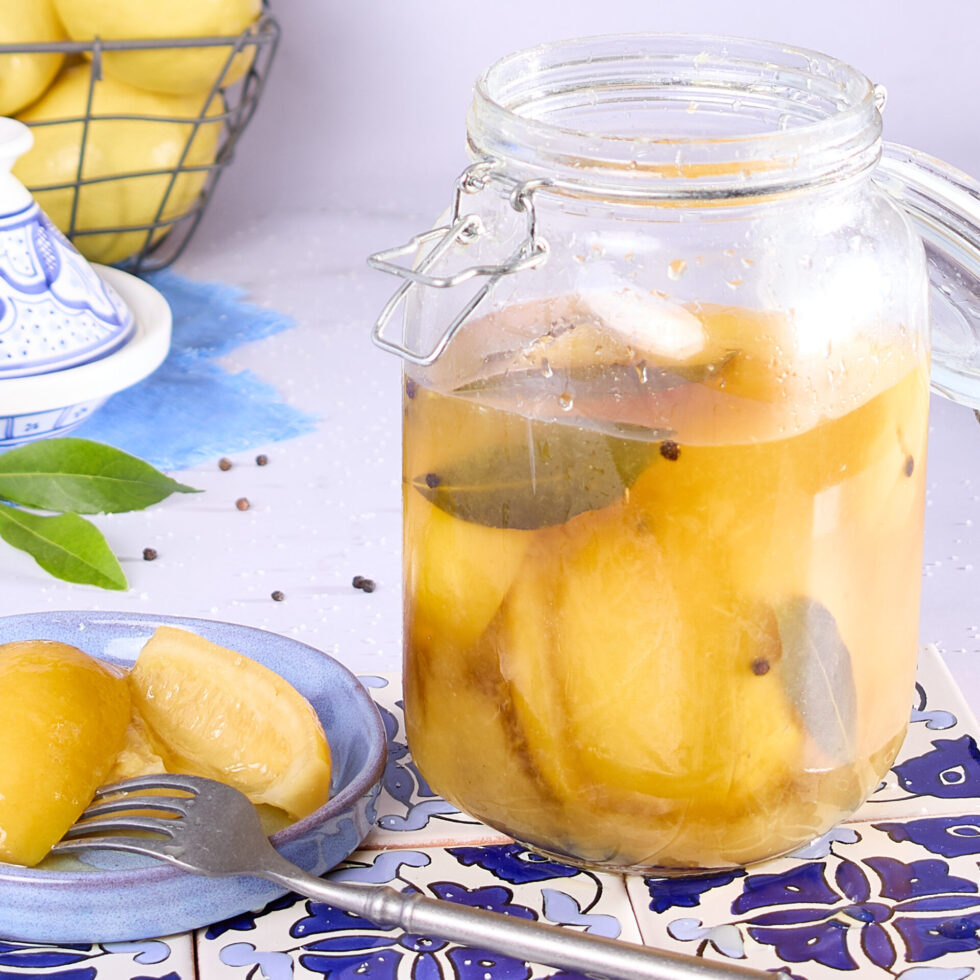
And here’s a jar of Moroccan preserved lemons I prepared in advance!
The first five days
Put the sealed jar of salt packed lemons in the fridge for 5 days. Turn upside down and back upright once a day. Make sure its sealed well. I do this over the sink as a precaution!
The lemons will start to release their juice and create a lemony brine.
On day 5, squeeze the remaining 3 lemons. Use the juice only to top up the jar 1 centimetre from the top. You may need more than 3 lemons. The goal is to have all the lemons in the jar submerged. It’s OK if a bit of peel is above the brine.
Make sure you tip the jar over a couple of times. This makes sure the existing brine thoroughly mixes with the new lemon juice. Now you’re well on the way to creating lacto-fermented lemons!
Completing the lacto-fermentation process
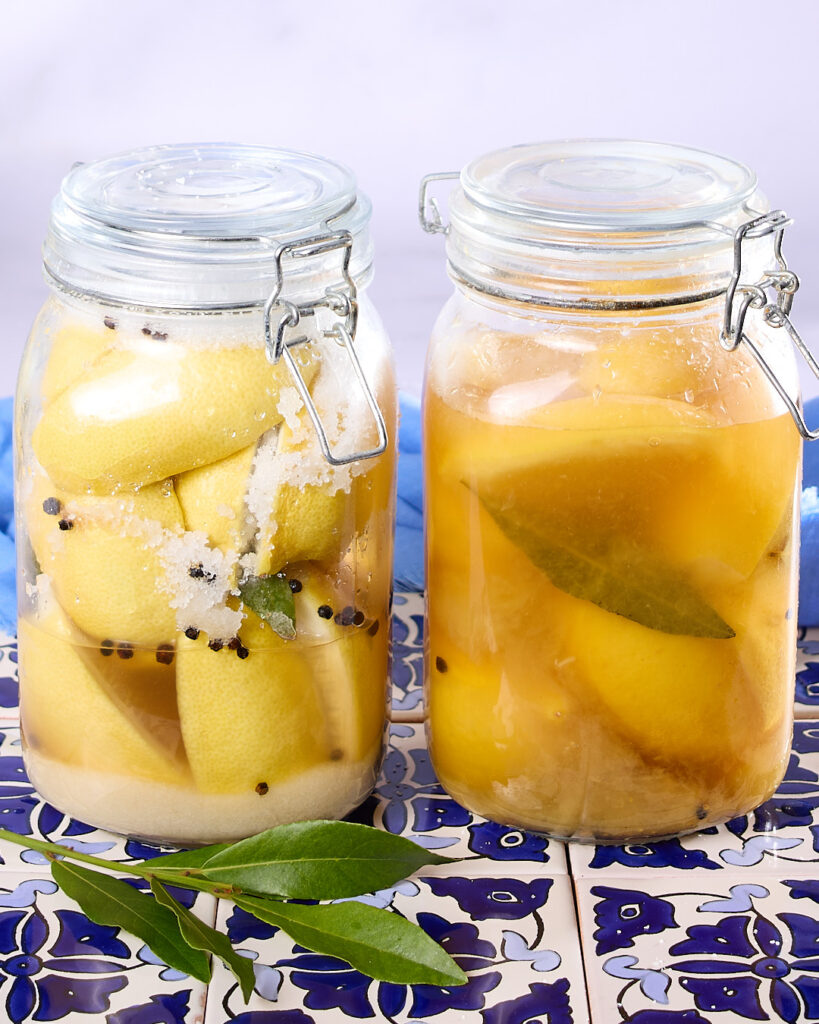
The jar on the left in the image above, is about to go into the fridge for the first time. Fully fermented preserved lemons are in the jar on the right. I took this photo when that jar had been in the fridge for 8 weeks but you can certainly start using the lemons a lot earlier.
Some Moroccan preserved lemons recipes that suggest you can ferment the lemons at room temperature. I have seen recommended temperatures ranging from 10°C to 24°C. But this doesn’t represent room temperature on a hot summer Queensland day!
The fermentation process will work in the fridge. It will just take longer than at room temperature. The bonus is that, especially in warmer climates, keeping the fermented lemons in the fridge will lengthen their shelf life.
I recommend using your eyes to determine when the preserved lemons are ready to use in your cooking. You want to see that the lemons are a deep yellow, there are no grains of salt visible, and the brine looks thick and slightly opaque. Most importantly, the lemon peel texture has clearly transformed into a soft and slightly plump texture.
I have kept my refrigerated preserved lemons for over 6 months but, if you get into a routine of using them in your everyday cooking, you’ll be back making another batch in no time!
Now put those preserved lemons to good use!
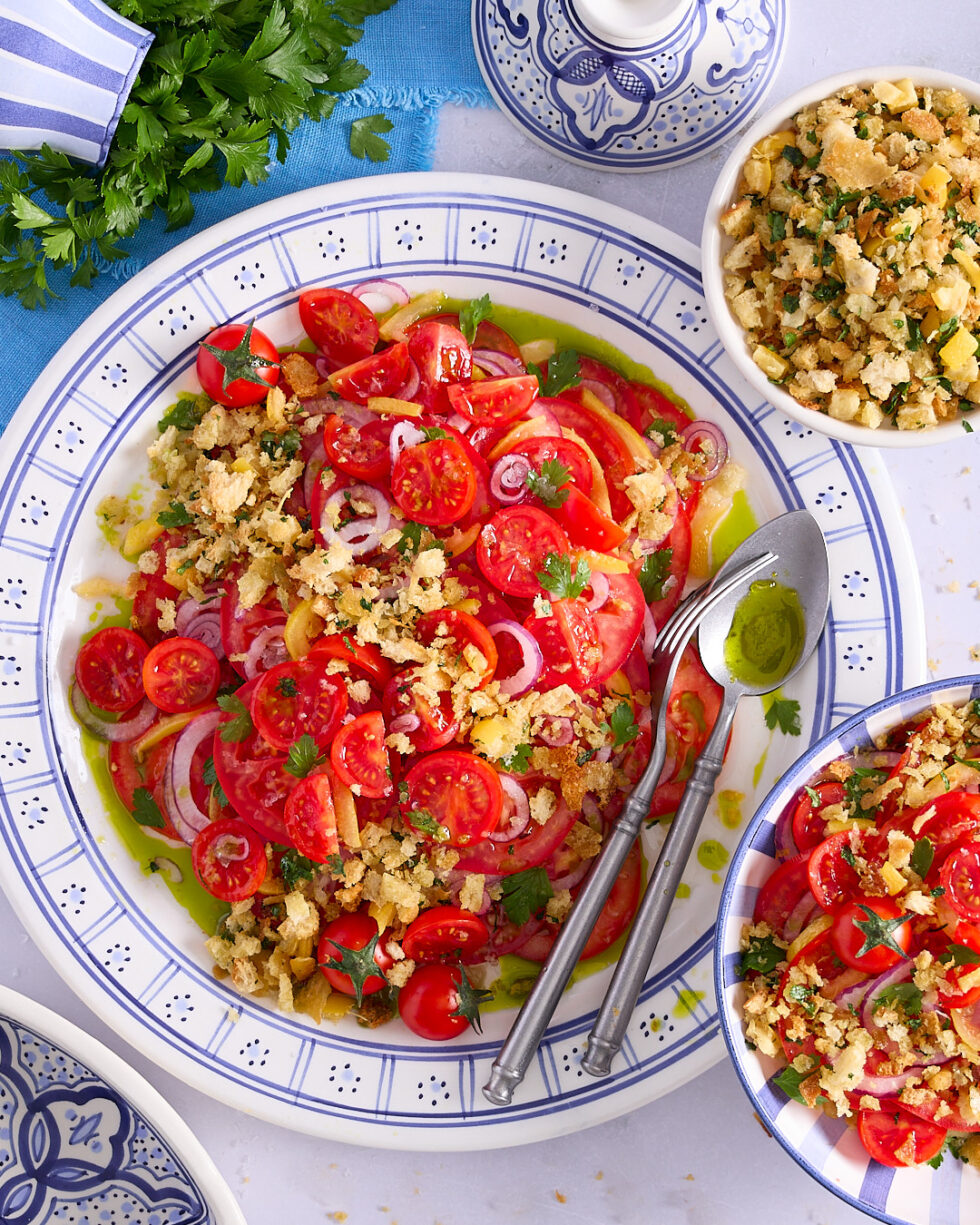
If you want to ease into using salt preserved lemons, why not try my Tomato and Preserved Lemon Salad.
Easy Moroccan Preserved Lemons

Equipment
- 1 litre preserving jar with lid
Ingredients
- 6 large lemons
- 3 large lemons (for juice)
- 3 bay leaves
- 2 tablespoons black peppercorns
- 500 g cooking salt
Instructions
- Assemble ingredients.
- Sterilise preserving jar, lid and sealing ring (if using) according to your preferred method (see notes).
- Wash and dry lemons.
- Start with 6 lemons. Using a sharp knife, cut a small slice off each end of the lemon. Stand each lemon up on end, cut through the lemon, stopping about 2 centimetres short of the other end. Make another cut so the lemon is (almost) cut into quarters. Repeat for each lemon.
- Pack the gaps between the lemon sections with cooking salt and then add to the jar.
- Pack the lemons as tight as possible. You may need to cut some lemons in half as you pack them into the jar.
- As you pack in the lemons, use a wooden spoon or rolling pin to press out as much juice as possible.
- Add a bay leaf and peppercorns, along with a generous amount of salt before packing in the next layer of lemons.
- Leave a 1 centimetre gap at the top of the jar. Seal the jar tightly with its lid. At this stage the lemon juice will not fill the jar.
- Put the sealed jar of lemons in the fridge for 5 days. Turn upside down and back upright once a day or so.
- On day 5, squeeze the remaining 3 lemons and use the juice only to top up the jar 1 centimetre from the top. You may need more than 3 lemons. Tip the jar over a couple of times to make sure the existing brine thoroughly mixes with the new lemon juice.
- Leave the jar in the fridge for 3-4 weeks, there is no need to keep turning the contents.
- The preserved lemons are ready to use when the lemons are a deep yellow, the brine looks thick and slightly opaque and the lemon peel texture has transformed into a soft and slightly plump texture.
Just before you cook with abandon…
- Steaming method. Steam the jars, lids and sealing ring (if using) at 100°C for 5 to 10 minutes. Carefully remove the jar and let it cool right side up on a clean tea towel.
- Boiling water method. Use boiling water from a kettle and fill the jar, leaving it to cool on the bench. Put the lid and any silicone/rubber seal in a heat proof container and pour boiling water over them, again leaving them to cool in the water.
- Oven method. Preheat the oven to 135°C and place the clean jar and lid on a baking tray. Heat in the oven for 20 minutes, turn off the oven and leave the jar and lid in the oven to cool. If you are using a rubber sealing ring, don’t put it in the oven. As above, put it in a bowl and pour boiling water over it and then leave it to cool in the water.