Recipes

Low Sugar Raspberry Jam
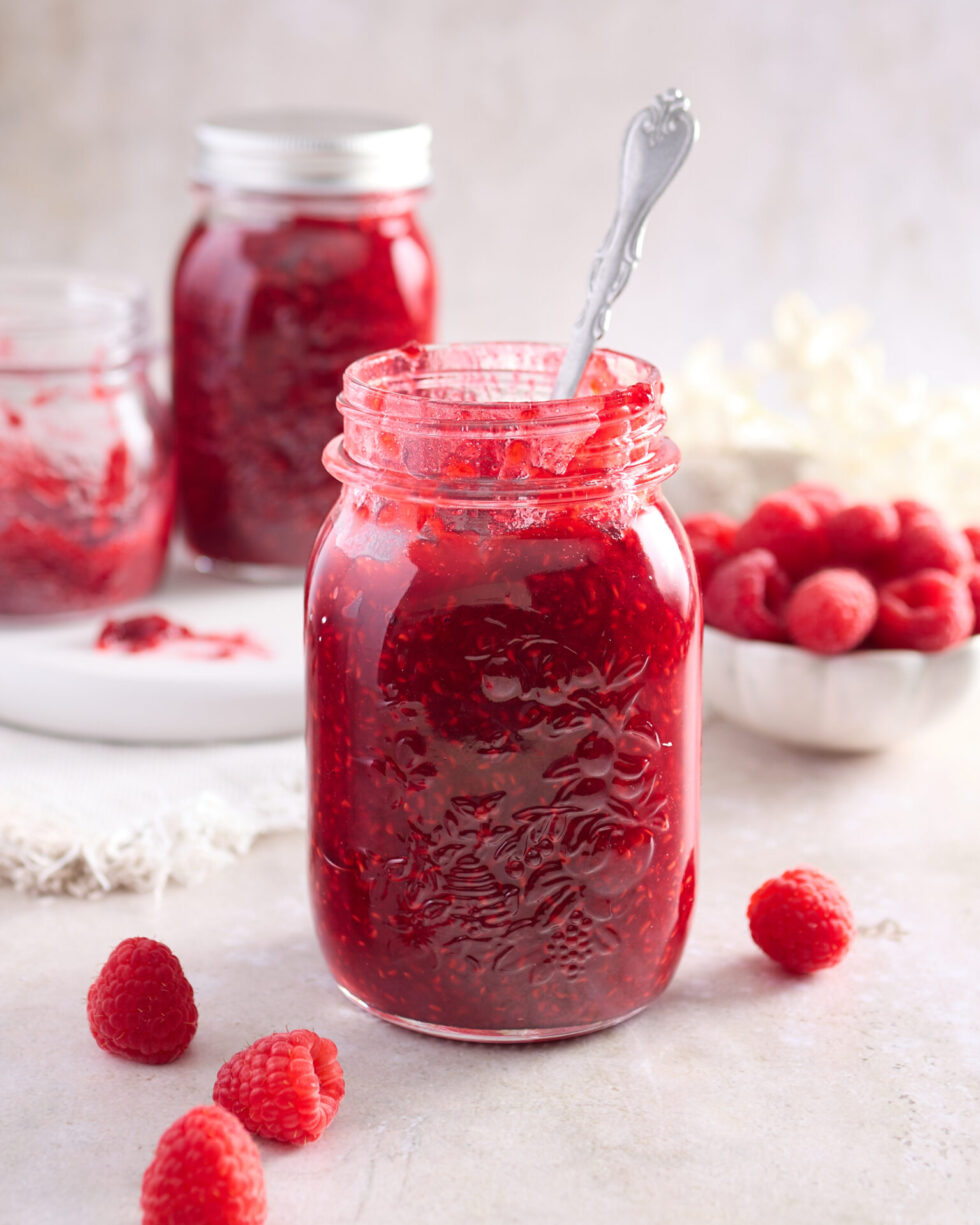
Jarred and ready to enjoy low sugar raspberry jam.

If you’re looking for a way to capture the pure flavour of raspberries without tipping a truckload of sugar into the mix, my low sugar raspberry jam recipe is the answer. 

Most raspberry jam recipes lean heavily on sugar, not just for sweetness but to help the jam set and preserve. That’s because they use high methoxyl pectin (HM), also known as high methyl ester pectin. The same type you’ll find in supermarket “jam sugar.” Without enough sugar, HM pectin simply won’t work. 

If you want a jam that doesn’t rely on sugar to behave itself, you need low methoxyl pectin (LM), or low methyl ester pectin. LM pectin sets through a reaction with calcium and acid—typically lemon juice—rather than sugar. It’s the key to making a low carb raspberry jam. It will set even a completely sugar-free jam. 

All pectins, whether HM or LM, are naturally plant-derived and vegan.  

This low sugar raspberry jam recipe captures the sharp, vibrant taste of raspberries without masking it under layers of sweetness. It’s ideal for spreading on toast, but equally good as a raspberry jam filling in your baking. I use it regularly in a classic Victoria sponge or as a filling for a rich chocolate cake. For a slightly different take, try it in my Gluten Free Chocolate Raspberry Mini Cakes

This recipe is designed to be flexible. Make a small batch and store it in the fridge or freezer, no canning required. If you’re planning a larger batch, I’ve also included the boiling water bath method to make sure your jam has a longer ‘shelf’ life. 

If you’re serious about jam that lets the fruit speak for itself, without the sugar shouting over the top. You’re in the right place. Let’s make some raspberry jam! 

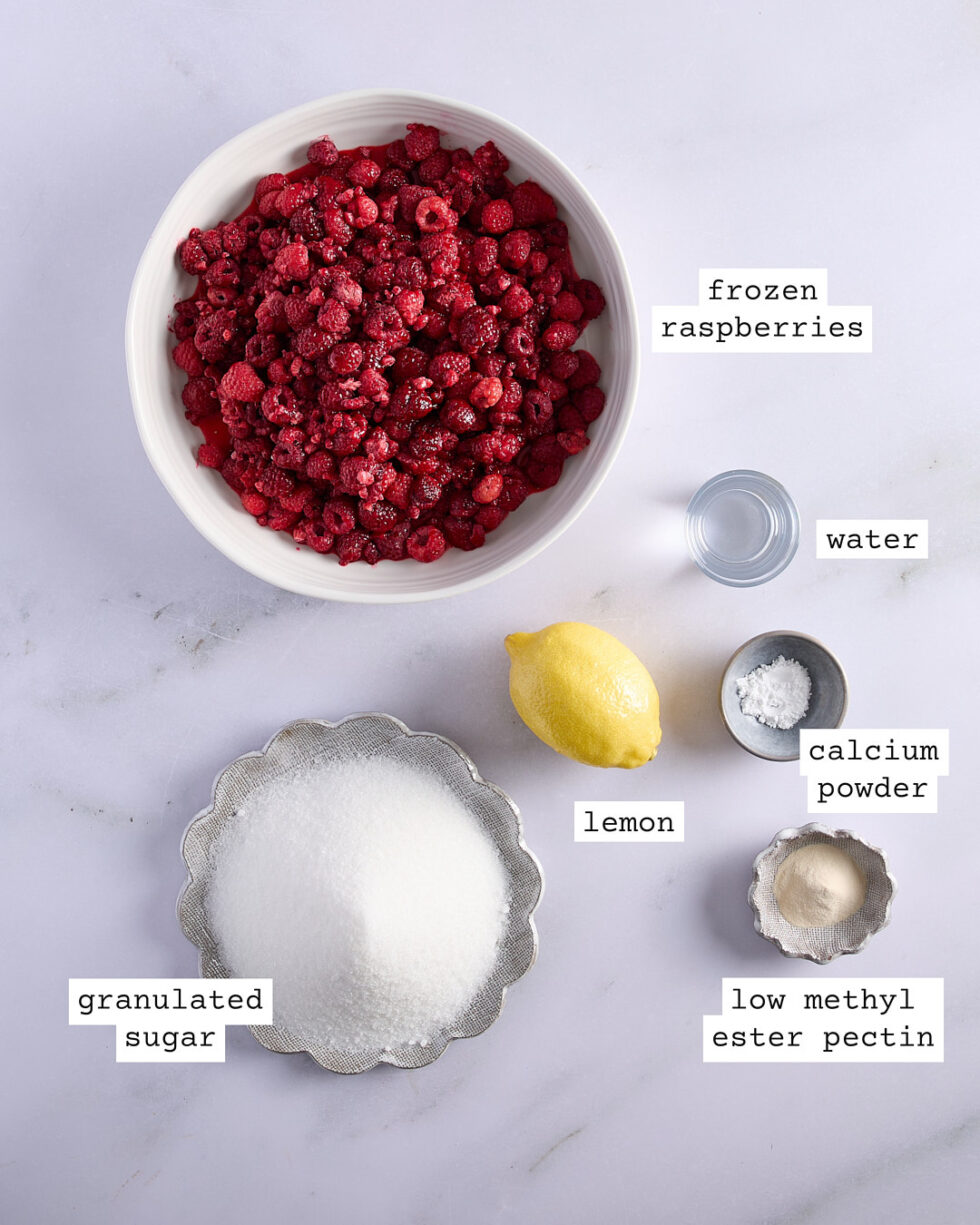
Raspberry jam ingredients

Low sugar Raspberry Jam ingredients on a white marble bench top.

Frozen raspberries are best for this recipe

Yes, in this case fresh is not best and what a relief considering how much fresh raspberries cost. And those raspberries have been hand selected for their perfection so why would you want to mash them into a jam! You want the berries that didn’t make the cut and ended up frozen in your jam.   

And there’s a solid reason for using frozen berries in your homemade raspberry jam. The freezing causes the cells of the berries to rupture, allowing the juice to be released and softening the berry. This means that it will take less cooking time to break down the fruit, thereby preserving its fresh taste in the final product.

Low methoxyl pectin with calcium

My low sugar raspberry jam recipe does have one specialty product that you’re not going to find on the supermarket shelves – the low methoxyl pectin.   

The best known brand is Pomona’s Universal Pectin and comes from the USA. It is available on Amazon in Australia. 

But we have a local Australian supplier that imports the LM pectin from Europe and creates their own low methoxyl pectin products. Green Living is a local Queensland business. They can supply all your needs if you want to take a dive into preserving. They sell a low methoxyl pectin with calcium.  It’s available in a variety of sizes and it has a super long shelf life (that I generally ignore). 

Exactly how low sugar can I go?

The low methoxyl pectin method of making low carb raspberry jam leaves it up to you to decide how much sugar you wish to add. 

The recipe does need some sugar (or granulated sugar substitute like xylitol) so that the pectin can be evenly distributed through the fruit and avoid clumping.   

Traditional jams call for a 1:1 ratio of fruit to sugar. In this low sugar raspberry jam recipe, I’ve adopted a 1:0.4 ratio of fruit to sugar (1kg raspberries and 400g sugar). I think this ratio brings out the fresh taste of raspberries while balancing out the tartness of the berries.   

You can also use sugar substitutes and I have had an OK result with xylitol. But xylitol does leave an aftertaste in the jam so I have chosen to focus on lowering the sugar and not swapping in a sugar substitute.   

You can use other sugars like coconut sugar, honey, maple syrup, raw sugar, etc. But you will need to experiment with the volumes as they all have their own level of sweetness. This depends on your palate and what level of sweetness you’re used to.

Get organised!

If you’ve never made jam before you’ll be pleasantly surprised how easy it is if you get yourself organised before you start cooking. 

What equipment do I need?

This raspberry jam recipe makes approximately 1 litre of jam if you use my fruit to sugar ratio of 1:0.4.   

If you’re planning to use the jam right away for some baking, you don’t need to use jam jars. 

The same goes for making freezer jam. You can use straight out of the dishwasher clean freezer containers or freezer bags.   

If you want to process the jam so it will keep longer, you will need two 500ml or four 250ml preserving jars and lids.   

This recipe can be comfortably made in a 4-5 litre heaving bottomed soup or pasta pot. Stainless-steel is best. Do not use aluminium as the acid will react with the pot. A wide bottom pan also enables the jam to cook more efficiently and quicker to ensure fresher tasting result.   

ladle is important if you are going to be putting your jam in jars, as is a wide mouth jam funnel. You can make do without but be careful not to burn yourself as you go. If you don’t have wide mouth funnel, I would recommend transferring the jam into a large pouring jug in batches and pour from the jug into the jars. 

Pick your ‘shelf life’

If you want to lengthen the ‘shelf life’ of the jam, you will need to use glass jars and process them in a boiling water bath. The method for this is included in the recipe notes, along with the necessary equipment. I have used quotation marks around the term ‘shelf life’ as I never store my preserves outside of the fridge. I can never find a consistently cool enough spot in our Queensland home. So I err on the side of caution and keep all my preserves refrigerated. This way my processed low sugar raspberry jam will safely last a year. But not that it ever lasts that long! 

If you’re going to process the raspberry jam, get your processing equipment assembled and the pot of water boiling before you start making the jam.   

Do I need to sterilise all the equipment?

There is no requirement that you sterilise the equipment you use while making the raspberry jam but it’s super important that your spoon, pot, ladle, funnel, and pouring jug are super clean. If they are all stainless-steel or glass, I do recommend sterilising them if you have the capacity to do so.   

Regarding whether you need to sterilise the containers or jars you are using depends on how you plan to use the jam. If the jam is to be consumed within 2 weeks or frozen there is no need to sterilise the containers.  

If you plan to keep this low carb raspberry jam in the fridge for longer than 2 weeks, you should be sterilising the preserving jars and processing the filled jars in a boiling water bath. This canning method is in the recipe notes. 

You can sterilise the preserving jars using the steaming method, boiling water method, or oven method. Have the sterilised jars ready before you start making the jam. 

Steaming method

As I have a big built in steamer in my kitchen, I use the steaming method. I steam the clean jars, lids and sealing ring (if using) at 100°C for 5 to 10 minutes. I then remove the jar (not touching the inside or rim) and let it cool right side up on a clean tea towel. A steam oven will have instructions on how to sterilise jars. 

Boiling water method

A super simple way to sterilise clean jars is by filling them with boiling water. Then leave the jars to cool on the bench sitting on a clean tea towel. Put the metal lids in a heat proof container and pour boiling water over them. Again, leave them to cool in the water. 

Oven method

Another method is oven sterilisation. Preheat the oven to 135°C. Place the clean jars and lids on a baking tray. Heat in the oven for 20 minutes, turn off the oven and leave the jars and metal lids in the oven to cool. If you are using a rubber sealing ring, don’t put it in the oven but use the boiling water method above. 

Prep the raspberry jam ingredients

I usually take the frozen raspberries out of the freezer the night before I make my jam and let them defrost in the fridge. Otherwise, take them out when you’re assembling everything you need.   

Low methoxyl (LM) pectin is sold with a packet of calcium powder. There are instructions on the package about how to prepare the calcium water. I use boiled and cooled water and a clean plastic sealed container or glass jar with a lid. Measure 125ml of water into the container and add ½ teaspoon of calcium powder. Shake well. Also, remember to shake the container well, just before adding the calcium water to the jam.   

Juice the lemon and set aside the lemon juice.    

Stir 2 teaspoons of LM pectin into 100g of sugar (sugar No2) and mix well to distribute the pectin through the sugar.   

Now you’re ready to make raspberry jam! 

The best low sugar raspberry jam

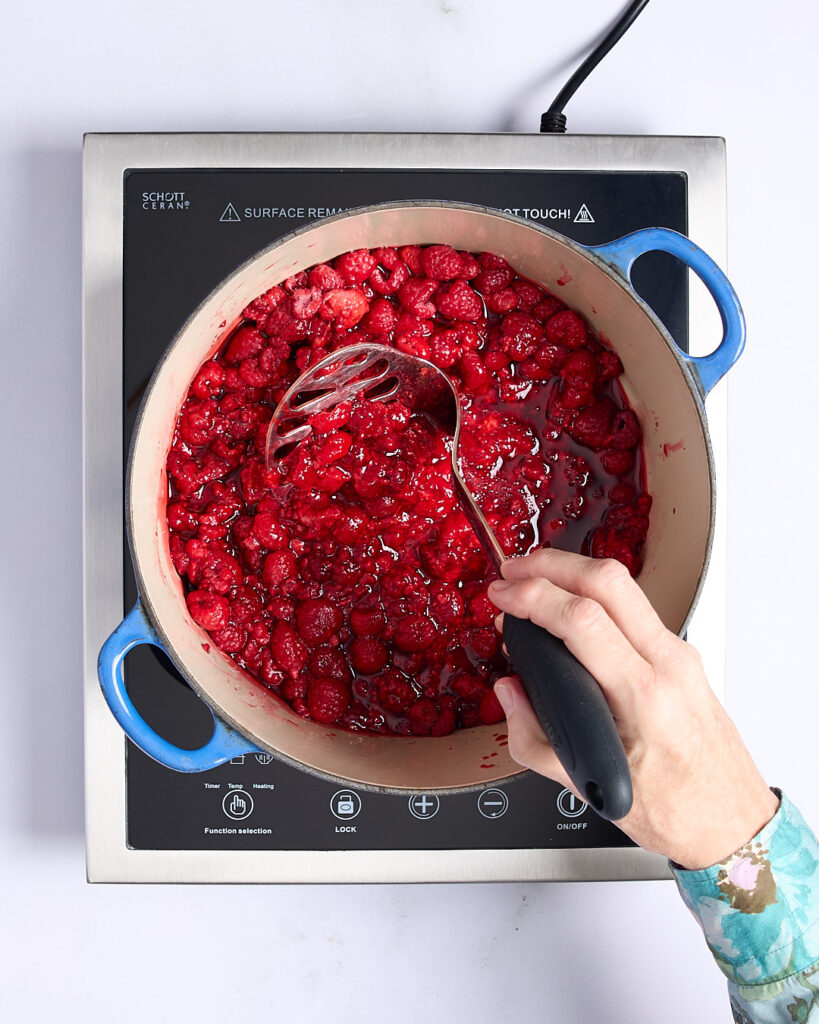
Place the defrosted raspberries in a 4-5 litre heaving bottomed stainless-steel soup or pasta pot over medium high heat. As the berries come to a boil, crush the berries with a potato masher. I crush all the berries for a smooth consistency in my raspberry jam with no lumps or whole raspberries. So keep mashing until all the raspberries are gently broken up. They will continue to break down as the jam cooks. 

Once boiling and the raspberry juice has started to release, turn the temperature to high. Gradually add sugar No1 (with low methoxyl pectin) stirring well with a wooden spoon or spatula. You want to ensure the pectin is evenly distributed.   

Preset a timer for 90 seconds.   

Next add 2 teaspoons of calcium water and 2 tablespoons of lemon juice and stir through well. Keep stirring as you add Sugar No2. Bring the raspberry jam to a rolling boil. And a ‘rolling boil’ is a technical term when you’re making jam! You’ve achieved a rolling boil at the point when the jam keeps boiling even though you are stirring it.   

Unlike high methoxyl pectin, low methoxyl (LM) pectin doesn’t require a high heat to set. It’s set point varies between 50°C and 70°C.  LM pectin sets because of the addition of calcium not by reaching a certain temperature. So, you only need to boil the jam enough to the point the berries are cooked and broken down and all the sugar has dissolved.

This easy raspberry jam shows you when its ready!

Raspberry jam reaching a boil in a heavy bottom pot.
Low methoxyl pectin raspberry jam reaching a boil.
Sandra stirring the jam in a heavy bottom pan checking for a rolling boil.
Sandra stirring the jam to check for a rolling boil.

Start the timer and keep stirring so the jam doesn’t catch. The jam will thicken and turn a glossy bright red. There should be no sign of any sugar granules. Take the pan off the stove after 90 seconds of a full rolling boil. This will ensure that jam keeps the taste of fresh raspberries.   

A foam will develop on the top of the jam. I generally just skim it off the top before I ladle the low sugar raspberry jam into the preserving jars. Alternatively, you can add 1 teaspoon of butter that will disperse the foam and, of course, the jam will no longer be vegan. Whoops! Maybe just skim it off.  

Ladle the hot jam into the prepared sterilised jars or containers, leaving about 5mm to 10mm of headspace at the top. Wipe the rims clean with a damp cloth to ensure a good seal, place the lids on and tighten the lid firmly until just sealed. If you are planning to consume the jam within 2 weeks, leave the hot bottles of jam on a tea towel on the kitchen bench to cool and then keep them in the fridge.   

You can simply make it freezer raspberry jam

If you plan to freeze the jam, I recommend sealed plastic containers or freezer bags. When using freezer bags, cool the jam in the pot until it’s just warm. I stand the freezer bag up in a large drink cup, draping the edge of the bag over the rim of the cup, and then spoon the jam in. Carefully seal the bag, letting out as much air as possible as you go. I then lie the bags flat on a rimmed baking sheet before placing it in the freezer.  Stack the frozen raspberry jam filled bags in the freezer.   

Processing the jars of low sugar raspberry jam

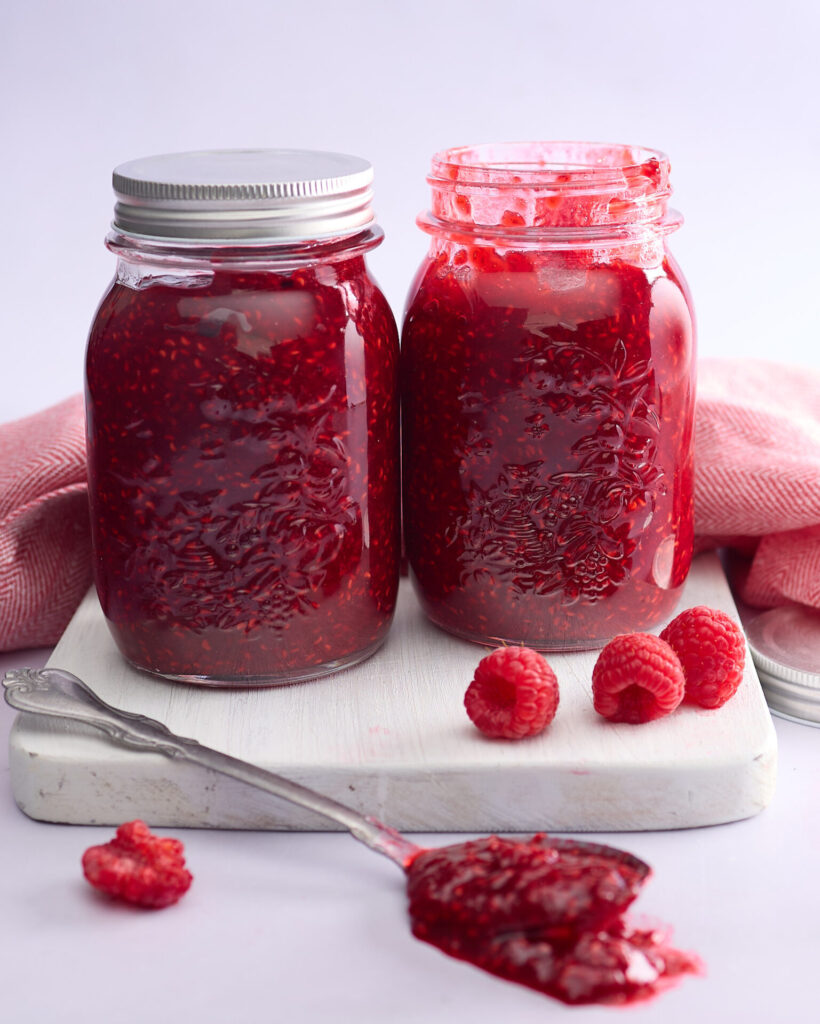
Two jars of raspberry jam ready to store and eat.

If you’re planning to store your low sugar raspberry jam for more than a few weeks, you need to process the jars in a boiling water bath. This last step will ensure your jam stays safe, shelf-stable, and delicious for months. 

1. Assemble your equipment

You’ll need a large, deep pot with a lid. Large enough to hold the jars and enough boiling water to cover the jars by at least 3cm. Find a rack for the bottom of the pot (or a folded tea towel). This prevents the jars from rattling and bumping each other. You can use a cake rack. I use a stainless-steel steamer insert from a rice cooker.   

The jars should be submerged by at least 2.5 cm (1 inch) of water. Cover the pot and bring the water to a boil before you start your jam, keep it simmering. Bring it to a full rolling boil as you finish the jam.   

Have a clean tea towel on the kitchen bench ready for the finished jars.   

Keep the kettle boiled in case you need to top up the pot of boiling water. 

2. Process the jars

Lower the jars filled with raspberry jam into the simmering water, using a jar lifter or jar tongs. Make sure they are fully submerged and that the water is back to a rolling boil once all jars are in. Process for 5 minutes for 250ml jars and 10 minutes for 500ml jars. 

Adjust the processing time for altitude as the temperature at which water boils changes with altitude. I live at sea level and I am not a scientist!  May I suggest Googling this question if needed? 

3. Cool jars and check seals

Use the jar tongs to lift the jars out and carefully set them upright on the clean tea towel. Leave them undisturbed for 12–24 hours. As they cool, you should hear the lids ‘pop,’ indicating the lid has sealed. After cooling, check the seals by pressing the centre of each lid—it should not flex up and down. Refirdgerate any jars that haven’t sealed properly and eat them first. 

4. Label and store

Once sealed, label and date jars of low sugar raspberry jam. Store them in a cool, dark place. Properly processed and sealed jars of jam can last up to 1 year. In my Queensland home in the subtropics, I can never find a room where the temperature is consistently cool. To be sure, I still refrigerate my processed jars of jam. They’re usually fighting it out with the beer and wine for space in our extra fridge! 

Why not try some raspberry chocolate bakes

This fruit-forward, lightly tart, low sugar raspberry jam recipe is a perfect foil for the richness of chocolate in your baking. One batch of my jam will quickly disappear in some super delicious raspberry chocolate bake.   

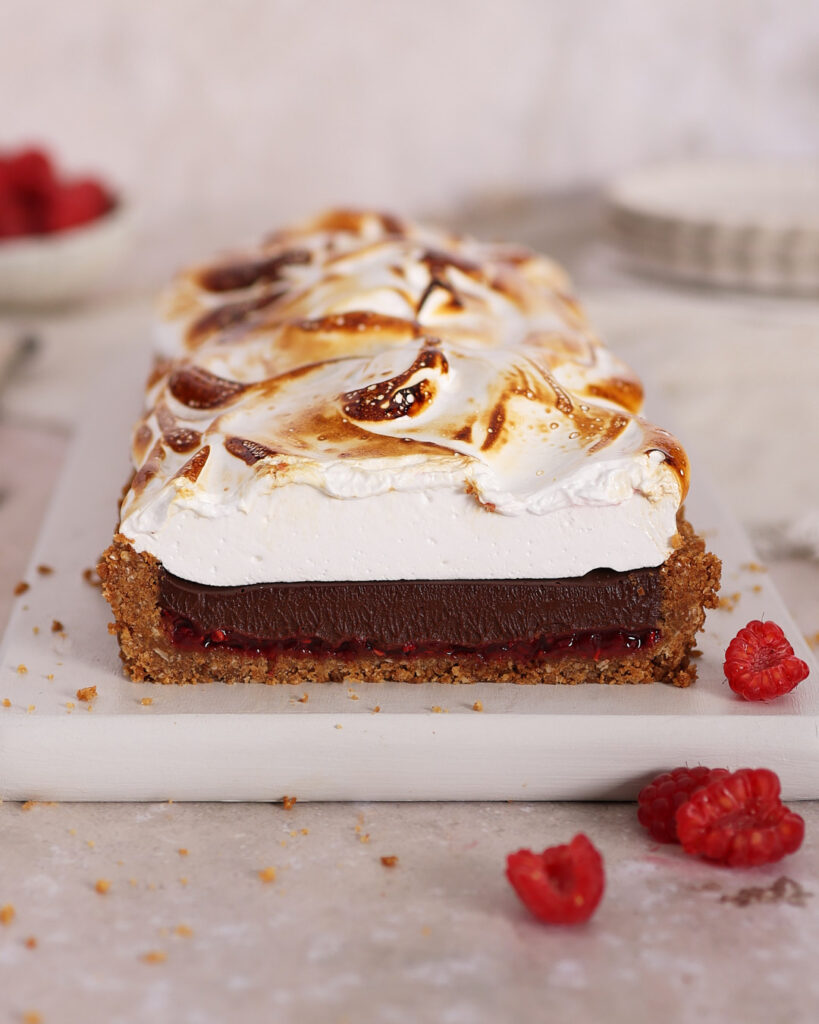
I’ve taken my childhood memories of making campfire Smores during our Candian summers and turned it into a tart. The raspberry jam cuts through the richness of the dark chocolate ganache. So, you’ll be good for a second slice of S’mores Tart – Chocolate Raspberry Marshmallow Tart.

Smore tart cut on a white board showing the layers of crumb base, raspberry jam, chocolate ganache and fluffy meringue.

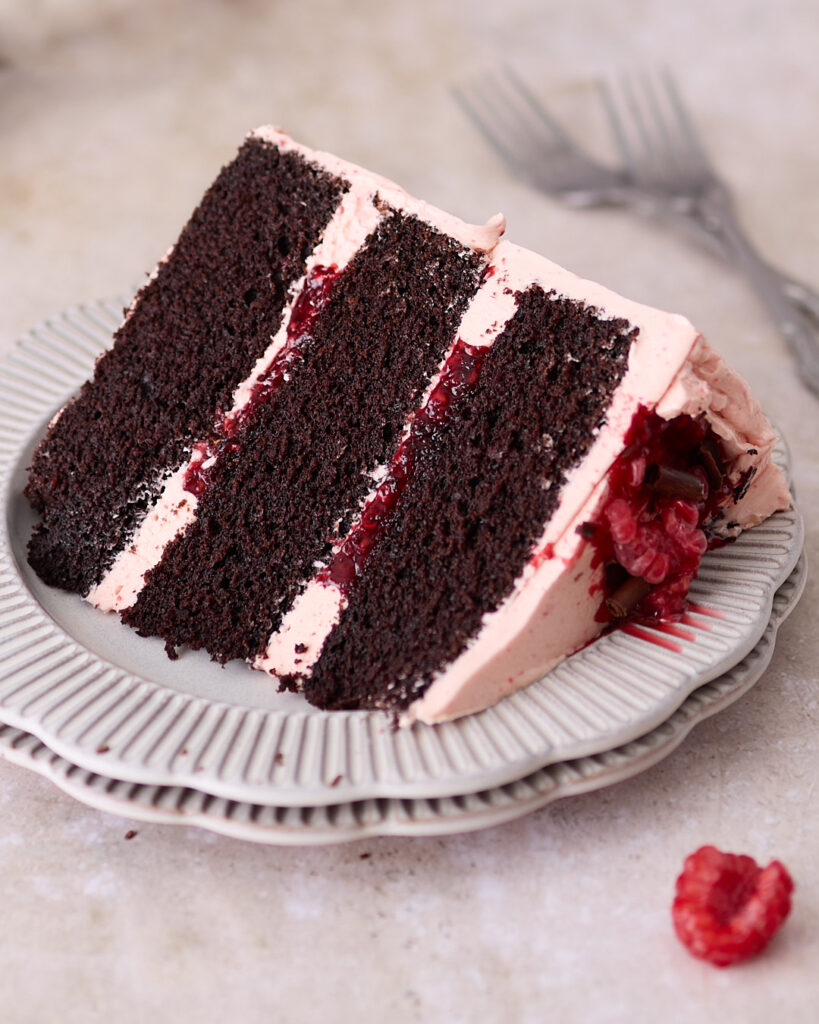
The combination of the fresh raspberry Swiss meringue buttercream and the homemade raspberry jam has turned my family favourite Devil’s food cake into my new favourite celebration cake.  And this Pretty In Pink Devil’s Food Cake is simpler than it looks!

Three-layered Devil's food cake with fresh raspberry Swiss meringue buttercream served on a fluted white plate.

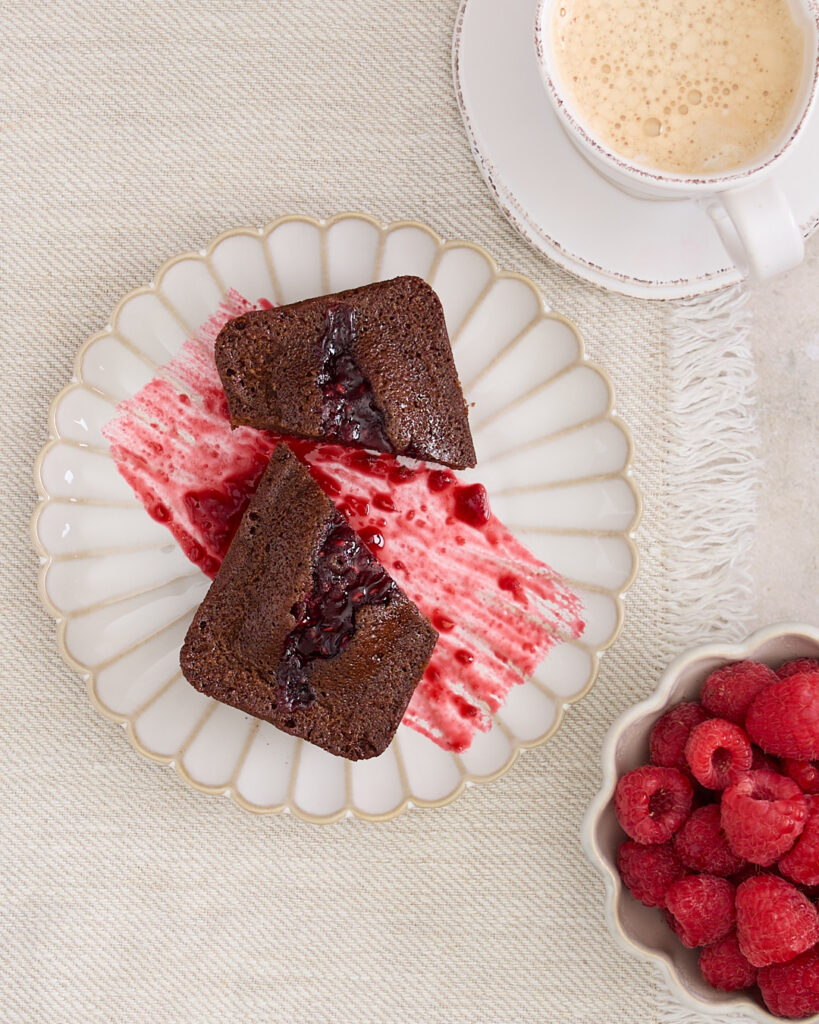
And are you looking for a simple gluten free dessert that’s 100% homemade, then why not make a batch of this low carb raspberry jam for these Gluten Free Chocolate Raspberry Cakes. 

Gluten free chocolate and raspberry financier served with coffee and fresh raspberries.

Low Sugar Raspberry Jam

If you’re looking for a way to capture the pure flavour of raspberries without tipping a truckload of sugar into the mix, my low sugar raspberry jam recipe is the answer.
If you want a jam that doesn’t rely on sugar to behave itself, you need low methoxyl pectin (LM), or low methyl ester pectin. LM pectin sets through a reaction with calcium and acid—typically lemon juice—rather than sugar.
Prep Time 20 minutes
Cook Time 20 minutes
Course Breakfast, Condiment, Dessert, Jam
Cuisine American, Australian, European
Servings 1 litre

Equipment

  • 2 x 500ml or 4 x 250ml preserving jars and lids (optional)
  • Freezer containers with lids or freezer bags (if freezing)
  • 4-5 litre heavy bottomed soup or pasta pot
  • large ladle
  • wide mouth jam funnel or large pouring jug
  • potato masher
  • kitchen timer
  • If processing jam for longer shelf life:
  • Large deep pot with lid (large enough to hold jars covered with boiling water)
  • Round cake rack (optional)
  • jar lifter or jar tongs

Ingredients  

  • 1 kg frozen raspberries (defrosted)
  • 400 g white granulated sugar
  • 2 teaspoons low methoxyl pectin
  • 2 tablespoons fresh squeezed lemon juice
  • 1 teaspoon butter (optional)

2 teaspoons calcium water

  • 125 ml boiled and cooled water
  • ½ teaspoon calcium powder

Instructions 

  • Defrost the frozen raspberries overnight in the fridge.
  • Assemble equipment and ingredients.
  • Sterilise the preserving jars and lids if using jars (see notes).
  • If you plan to process the jars of jam, get the pot of boiling water going.

Make calcium water

  • Measure 125ml water that has been boiled and cooled into a clean container with a lid.
  • Add ½ teaspoon of calcium powder.
  • Shake well.
  • Juice the lemon and set aside the lemon juice.

Divide sugar into two bowls and mix in pectin

  • 100g (sugar No1)
  • 300g (sugar No2)
  • Stir 2 teaspoons of low methoxyl pectin into sugar No1 and mix well to distribute the pectin.

Raspberry jam

  • Place the defrosted raspberries in a 4-5 litre pot over medium high heat.
  • As the berries come to a boil, crush the berries with a potato masher, leaving no lumps or whole berries.
  • Once boiling and the raspberry juice has started to release, turn the temperature to high.
  • Gradually add sugar No1 stirring well.
  • Preset a timer for 90 seconds.
  • Then add two teaspoons of calcium water and 2 tablespoons of lemon juice and stir through well.
  • Keep stirring as you add sugar No2.
  • Bring the raspberry jam to a rolling boil over high heat.
  • Start the timer and keep stirring. The jam will thicken and turn a glossy bright red. There should be no sign of any sugar granules.
  • Take the pan off the stove after 90 seconds of a full rolling boil.
  • Skim off any foam that collects on top of the jam with a dessert spoon. Alternatively, add a teaspoon of butter and stir to disperse the foam.
  • Ladle the hot jam into the prepared sterilised jars or containers, leaving about 5mm to 10mm of headspace at the top.
  • Wipe the rims clean with a damp cloth.
  • Tighten the lid firmly until just sealed.

Storage methods

  • To process the jars of jam, see recipe notes.
  • If you are planning to consume the jam within 2 weeks, leave the hot bottles of jam on a tea towel on the kitchen bench to cool. Then refrigerate and consume it within 2 weeks.

To freeze the jam

  • Use sealed plastic containers or freezer bags.
  • When using freezer bags, cool the jam in the pot until it’s just warm.
  • Stand the freezer bag up in a large drink cup, draping the edge of the bag over the rim of the cup, Spoon the jam in.
  • Carefully seal the bag, letting out as much air as possible as you go. Lie the bags flat on a rimmed baking sheet before placing it in the freezer.
  • Once frozen the frozen the raspberry jam filled bags can be stacked in the freezer.

Just before you cook with abandon…

Why use frozen raspberries? In this case fresh is not best. There’s a good reason for using frozen berries in your homemade raspberry jam. The freezing causes the cells of the berries to rupture, allowing the juice to be released and softening the berry. This means that it will take less cooking time to break down the fruit, thereby preserving its fresh taste in the final product.
Can I use bottled lemon juice? Bottled lemon juice is absolutely fine. And, many recipes recommend using bottled juice as the lemon juice helps maintain the right level of acidity and bottled juice will have a consistent Ph level while the Ph level of fresh lemon juice can vary.
What’s low methoxyl pectin? Most raspberry jam recipes lean heavily on sugar, not just for sweetness but to help the jam set and preserve. That’s because they use high methoxyl (HM) pectin, also known as high methyl ester pectin—the same type you’ll find in supermarket "jam sugar." Without enough sugar, HM pectin simply won’t work.
If you want a jam that doesn’t rely on sugar to behave itself, you need low methoxyl (LM) pectin, or low methyl ester pectin. LM pectin sets through a reaction with calcium and acid—typically lemon juice—rather than sugar. It’s the key to making a low carb raspberry jam, or even a completely sugar-free jam, without compromising on texture or structure.
All pectins, whether HM or LM, are naturally plant-derived and vegan.
Unlike HM pectin, LM pectin doesn’t require a high heat to set. It’s set point varies between 50°C and 70°C. LM pectin sets because of the addition of calcium not by reaching a certain temperature. So, you only need to boil the jam enough to the point the berries are cooked and broken down and all the sugar has dissolved.
How do I make calcium water? Low methoxyl pectin is sold with a packet of calcium powder. There are instructions on the package about how to prepare the calcium water. I use boiled and cooled water in a clean plastic sealed container or glass jar with a lid. Measure 125ml of water into the container and add ½ teaspoon of calcium powder. Shake well. Also, remember to shake the container well, just before adding the calcium water to the jam.
Exactly how low sugar can I go? The low methoxyl pectin method of making low carb raspberry jam leaves it up to you to decide how much sugar you wish to add.
The recipe does need some sugar (or granulated sugar substitute like xylitol) so that the pectin can be evenly distributed through the fruit and avoid clumping.
Traditional jams call for a 1:1 ratio of fruit to sugar. In this low sugar raspberry jam recipe, I’ve adopted a 1:0.4 ratio of fruit to sugar (1kg raspberries and 400g sugar). I think this ratio brings out the fresh taste of raspberries while balancing out the tartness of the berries.
Can I swap out the white sugar? You can use other sugars such as coconut sugar, honey, maple syrup, raw sugar, etc. But you will need to experiment with the volumes as they all have their own level of sweetness and much will depend on your palate and what level of sweetness you’re used to.
You can also use sugar substitutes and I have had an OK result with xylitol. But xylitol does leave an aftertaste in the jam so I have chosen to focus on lowering the sugar and not swapping in a sugar substitute.
What is a rolling boil? A ‘rolling boil’ is a technical term when you’re making jam! You’ve achieved a rolling boil at the point when the jam keeps boiling even though you’re stirring it. You want the heat on high and it the jam needs to stay at a full rolling boil for 90 seconds—that’s all.
How long will low sugar raspberry jam last? The shelf life of your jam will depend on the method of storage you choose and how much effort you want to go to. If you plan on using your low sugar raspberry jam within 2 weeks, you just need to ladle it into clean, sealable containers and store it in the fridge. This method is fine if you’re planning to use up in some baking you have planned.
But if you’re not going to get through 1 litre in 2 weeks, it’s best you use the freezer jam method or use pre-sterilised jars and process them using a boiling water bath. This last step will ensure your jam stays safe, shelf-stable, and delicious for months.
Properly processed and sealed jam jars can last up to a year. In my Queensland home in the subtropics, I can never find a room where the temperature is consistently cool. To be sure, I still refrigerate my processed jars of jam. They’re usually fighting it out with the beer and wine for space in our extra fridge!
Boiling water bath processing method
1. Assemble the equipment
Bring water to boil in large, deep pot with a lid. The pot needs to be large enough to hold the jars and enough boiling water to cover the jars by at least 3cm once they’re submerged. Find a rack for the bottom of the pot (or a folded tea towel) to prevent the jars from rattling and bumping each other. You can use a cake rack. I use a stainless-steel steamer insert from a rice cooker.
Fill the pot with enough water to cover the jars by at least 2.5 cm (1 inch) once they’re submerged. Cover and bring the water to a boil before you start your jam, keep it simmering. Bring it to a full rolling boil as you finish the jam.
Have a clean tea towel on the kitchen bench ready for the finished jars.
Keep the kettle boiled in case you need to top up the pot of boiling water.
2. Process the jars
Lower the jars filled with raspberry jam into the simmering water, using a jar lifter or jar tongs. Make sure they are fully submerged and that the water is back to a rolling boil once all jars are in. Process for 5 minutes for 250ml jars and 10 minutes for 500ml jars.
The processing time may need to be adjusted for altitude as the temperature at which water boils changes with altitude. I live at sea level and I am not a scientist! May I suggest Googling this question if needed?
3. Cool jars and check seals
Use the jar tongs to lift the jars out and carefully set them upright on the clean tea towel. Leave them undisturbed for 12–24 hours. As they cool, you should hear the lids ‘pop,’ indicating the lid has sealed. After cooling, check the seals by pressing the centre of each lid—it should not flex up and down. Any jars that haven't sealed properly should be refrigerated and eaten first.
4. Label and store
Once sealed, label and the date jars of low sugar raspberry jam. Store them in a cool, dark place.

Keyword easy raspberry jam, low carb jam, raspberry jam recipe

Leave a Reply

Your email address will not be published. Required fields are marked *

Recipe Rating


Hi, I'm Sandra!

I live by the words of Harriet Van Horne and I will be exploring every possible way to bring Harriet’s words to life in my kitchen.

Recipes

Discover delicious featured food recipes! From quick meals to gourmet delights, Sandra offer inspiring dishes for every occasion. Explore, cook, and enjoy flavorful creations today.

You might also like..

S’mores Tart – Chocolate Raspberry Marshmallow Tart

Thai Green Pawpaw Salad

Peppermint Bark Shortbread Biscuits

Gluten Free Chocolate Raspberry Cakes

Subscribe

Subscribe to my newsletter for a chance to win a FREE APRON (drawn monthly) as well as cooking tips, recipes, offers and exclusive content.

"*" indicates required fields