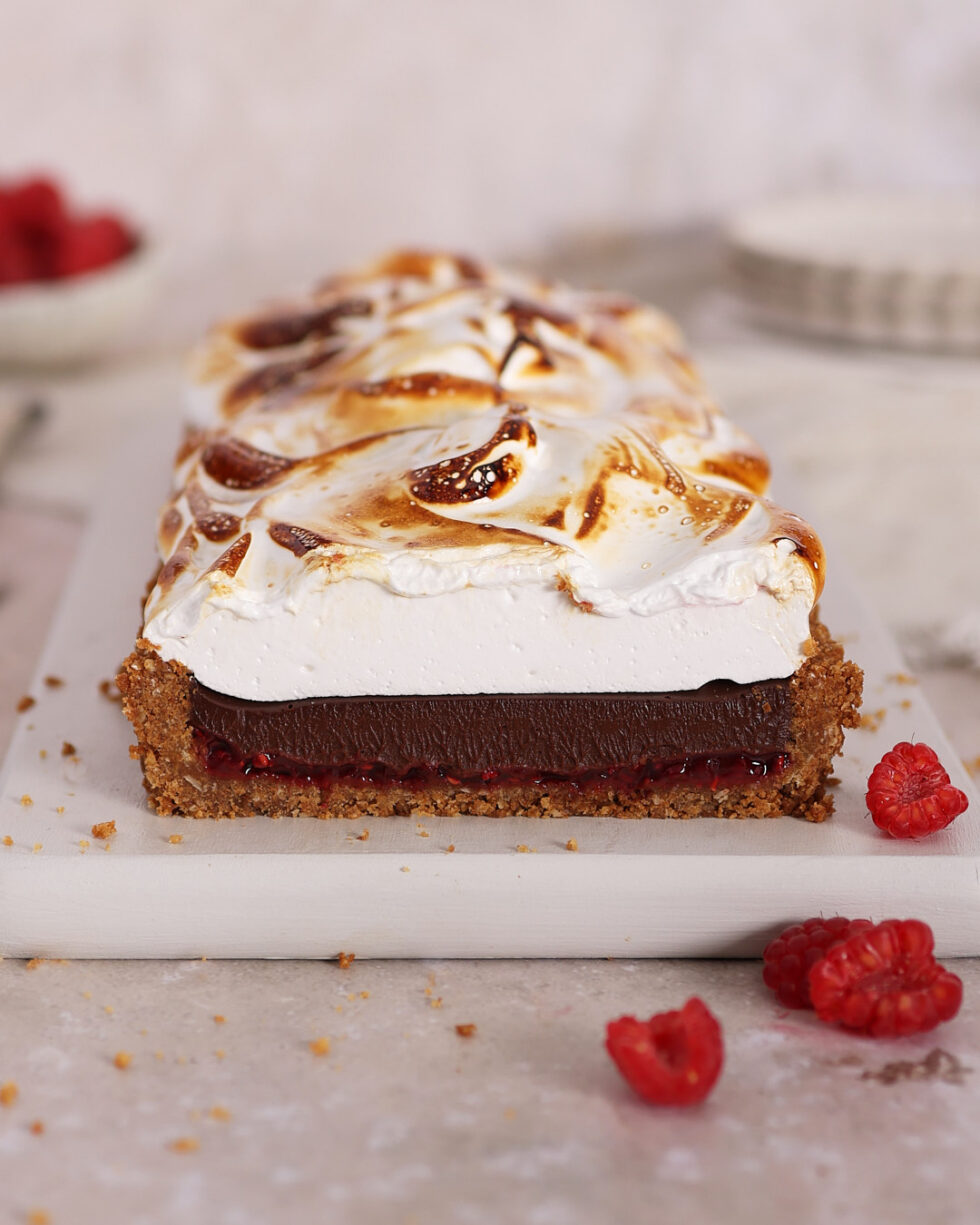
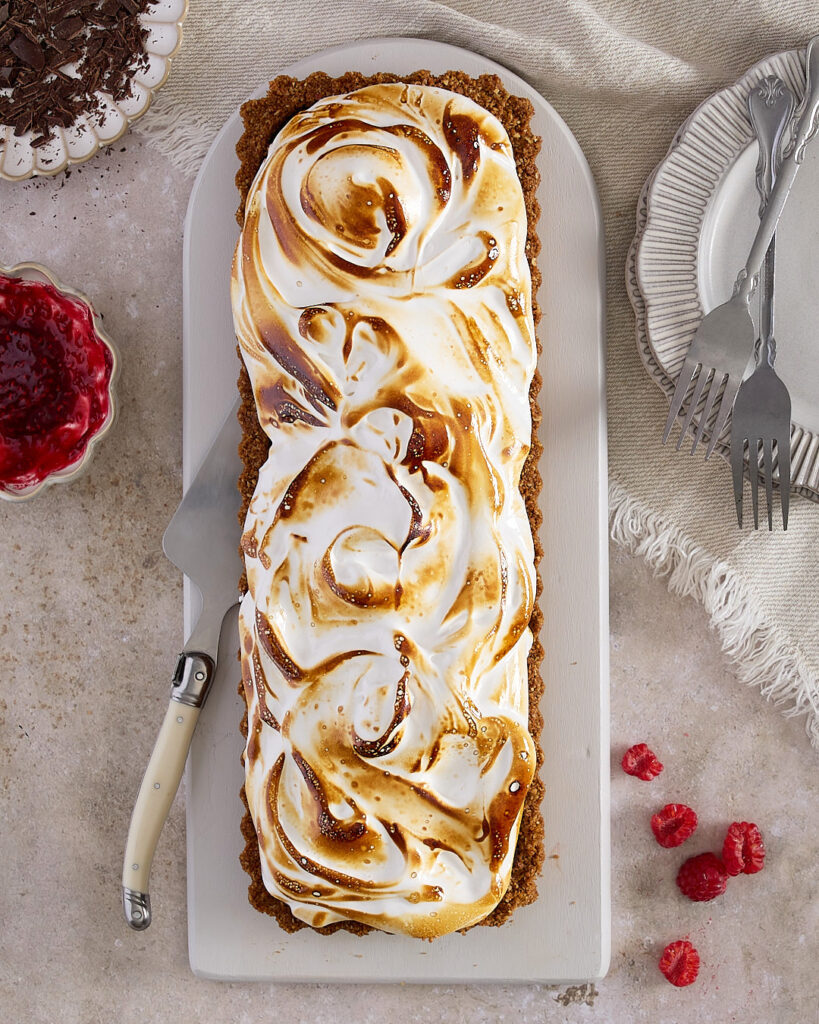
Look, I think the hero of my chocolate raspberry marshmallow tart recipe is the raspberry jam—particularly my low sugar raspberry jam. But I’ve had some pushback on that from my kids—adult kids, mind you. They say, “You’ve got to come clean, Mum. You’ve got to admit this is really your version of a s’mores tart.”
And I say, “Come on, how is that going to fly with my decidedly Australian and New Zealand audience?”
So, in what was truly a watershed moment, Mum compromised—and I renamed this recipe to my S’mores Tart – Chocolate Raspberry Marshmallow Tart.
Crystal clear now, right? Yeah… not so much. But trust me—it’s going to be delicious.
And yes, this is going to be one of those wistful, “when I was a kid in Canada” segues…
When I was a kid in Canada—think crisp summer nights when you could actually have a fire by the lake because it ain’t Australia, and we’re still wearing sweaters at night in Saskatchewan in mid-July. Where was I? Oh yeah—the fire, the night, the lake, the being a kid.
There was this summer treat, this thing of joy, that made a campfire so special it became childhood lore: the s’more. A toasted marshmallow taken off your stick just in time—before it’s lost to the fire—and immediately smoodged between two pieces of thin milk chocolate bar (you know, back in the thin chocolate bar days) and two graham crackers. I’ll explain the crackers later—read biscuits.
This oozy, sweet, crunchy sandwich of sugary and chocolatey joy was so deliciously addictive that you couldn’t just have one. You always had to have some more.
Who was that genius who coined them s’mores?
From fireside kid chaos at the late to Mum with a blowtorch
I’ve taken my magical childhood memories and channelled those flavours in a more grown-up way. A rich dark chocolate ganache anchors my s’mores tart recipe, and the super fresh, sharp raspberry jam plays the perfect foil to all that richness.
And let’s be honest—no one’s sourcing graham crackers down under, and I doubt you’re up for making them from scratch. So, the biscuit (cookie) crumb base leans into what’s on the grocery store shelf and nods to the campfire vibes with burnt butter, or as the French so elegantly call it, beurre noisette.
And let me tell you—it’s just as fun wielding my son’s blowtorch over the marshmallow topping as it was roasting one on a stick over a fire in the ’70s.
If you’re up for a spectacularly sticky, delicious ride—let me break it down for you.
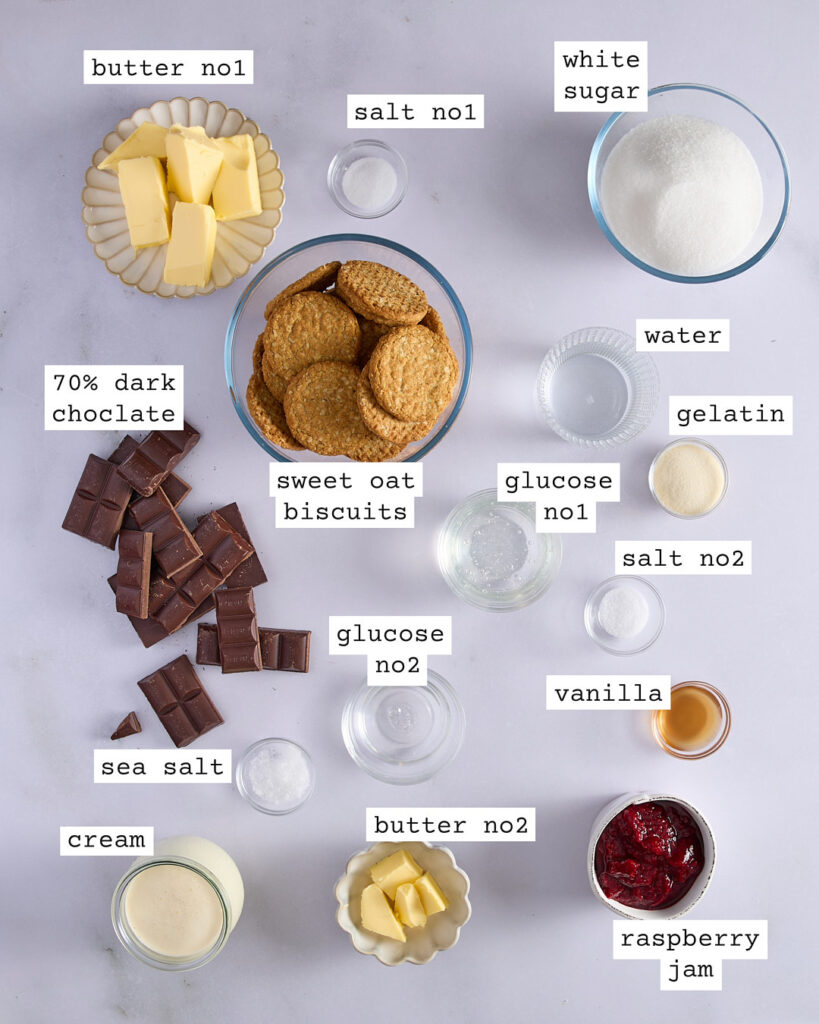
S’mores tart ingredients
What you’ll need for this chocolate raspberry marshmallow tart
My version of a s’mores tart recipe keeps the 3 essential components of the classic—biscuit, chocolate, marshmallow—but adds 1 very welcome extra: a particularly tart and fresh layer of low sugar raspberry jam. That jam cuts through the richness beautifully and adds something uniquely grown-up to this nostalgic dessert.
Biscuit crumb base
Whether you go with my rectangular s’mores tart shape or opt for a round pan and lean into more of a s’mores pie vibe, you’ll need the right biscuit for the job. Graham crackers are the obvious choice if you’re making this in North America. And yes, you can find graham crackers in specialty stores here—but honestly, there are plenty of good local alternatives.
Graham crackers are made from graham flour (a type of whole wheat flour), and per 100g, they have around 10g fat and 31g sugar. Arnott’s Shredded Wheatmeal biscuits bring that wholewheat flavour too, with wheatmeal and bran, and they’re slightly lower in sugar at 17g and have about 12g fat. McVitie’s Digestives use some wholewheat flour but are noticeably richer—21g fat and just 15g sugar.
I trialled both the Arnott’s Shredded Wheatmeal—which I found a bit too plain—and the McVitie’s Digestives, which created a crumb base that was too fine and delicate. Third time lucky: McVitie’s HobNobs. They’ve got slightly higher fat (20g) than graham crackers and 22g sugar, but what won me over was their oaty nuttiness from a blend of whole wheat flour and rolled oats. It gives the base a great texture and flavour without being overly sweet.
That said, use what you prefer or what’s easy to find. You might just need to tweak the butter quantity to get that perfect clumpy crumb texture, and maybe a touch more sugar if you’re using a less sweet biscuit. But I like keeping the sugar low—especially in view of the marshmallow layer to come.
Oh, and about that butter—this tart uses beurre noisette, also known as brown butter or nut butter. It’s just butter melted until the milk solids toast and turn golden. It takes a simple cookie crumb tart base to a whole other level. I’ll show you how easy it is to make.
Raspberry jam
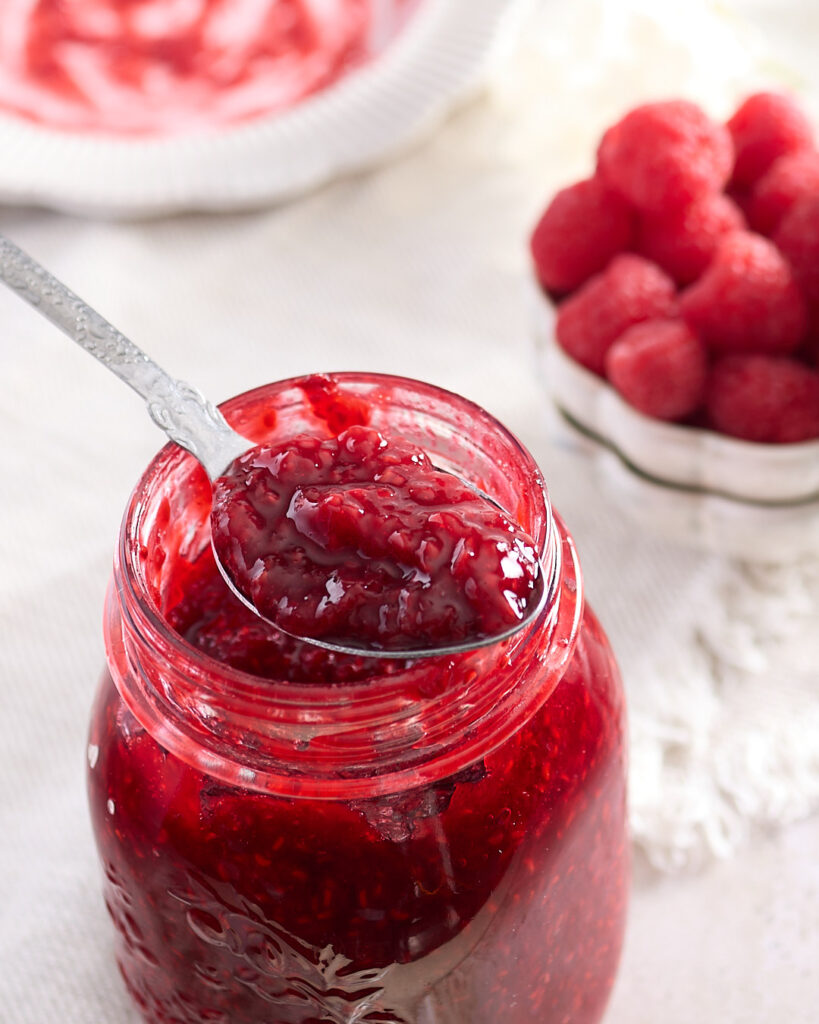
Why I use my raspberry jam (you’ve got to hear me out on this one)
The point of adding a thin raspberry jam layer in this s’mores tart is twofold: first, it cuts through the richness of the dark chocolate ganache, and second, it tones down the overall sweetness just enough to make way for the marshmallow layer.
My low sugar raspberry jam recipe captures the sharp, vibrant flavour of raspberries without the sugar overload. It’s a small batch recipe—about 1 litre total—and it’s designed to be flexible: store it in the fridge or freezer, no canning required.
For this chocolate raspberry tart recipe, I use just under 1 cup, or 200ml, of jam. Any leftover will keep in the fridge for up to 2 weeks—or stash it in the freezer for your next baking session. Why not try it in my gluten free chocolate raspberry mini cakes.
Shortcut options
No time for homemade? A good quality raspberry jam from the shops works just fine. Just check the label—some brands lean heavily on the sugar, which can throw the flavour balance off.
Dark chocolate ganache
The melted pieces of a milk chocolate bar in a classic s’more are replaced with a rich and silky dark chocolate ganache in my s’mores tart recipe.
I’m a true believer in using the best quality wine in your cooking, and that philosophy carries straight across to baking—especially when it comes to ganache. The quality of your chocolate will make or break this layer.
If I’m going all out, I use what any patisserie chef would reach for first: Callebaut’s 70% Belgian dark chocolate callets. They melt like a dream, have a deep cocoa flavour, and give a ganache that sets beautifully.
But when I’m being a little more budget-conscious, Nestlé’s Plaistowe 70% dark chocolate is a solid option. It’s formulated specifically for baking, which means it melts smoothly and doesn’t split or seize like some eating chocolates can.
I would generally avoid using standard eating chocolate for ganache—brands like Old Gold (around 45% cocoa solids) or Lindt Excellence 70% will just do in a pinch if you chop them finely and handle the melting gently. But they can be unpredictable. Old Gold is on the sweeter side and contains milk solids, while Lindt, although higher in cocoa, is designed to melt in the mouth, not in a ganache bowl.
That said, if you’re working with what’s in the pantry, look for chocolate that’s 70% cocoa or close, with minimal added ingredients. And whatever you do, skip the compound chocolate—it won’t give you the smooth finish you want here.
Brown butter biscuit crumb crust
Shortcut options
I don’t know about you, but I tend to get a little twitchy when I read a recipe that drops a French term like it’s no big deal. If it’s in French, it must be complicated, right? Is it going to be worth the fuss?
Well, good news on both fronts: making beurre noisette is absolutely worth it—and there’s actually no fuss at all.
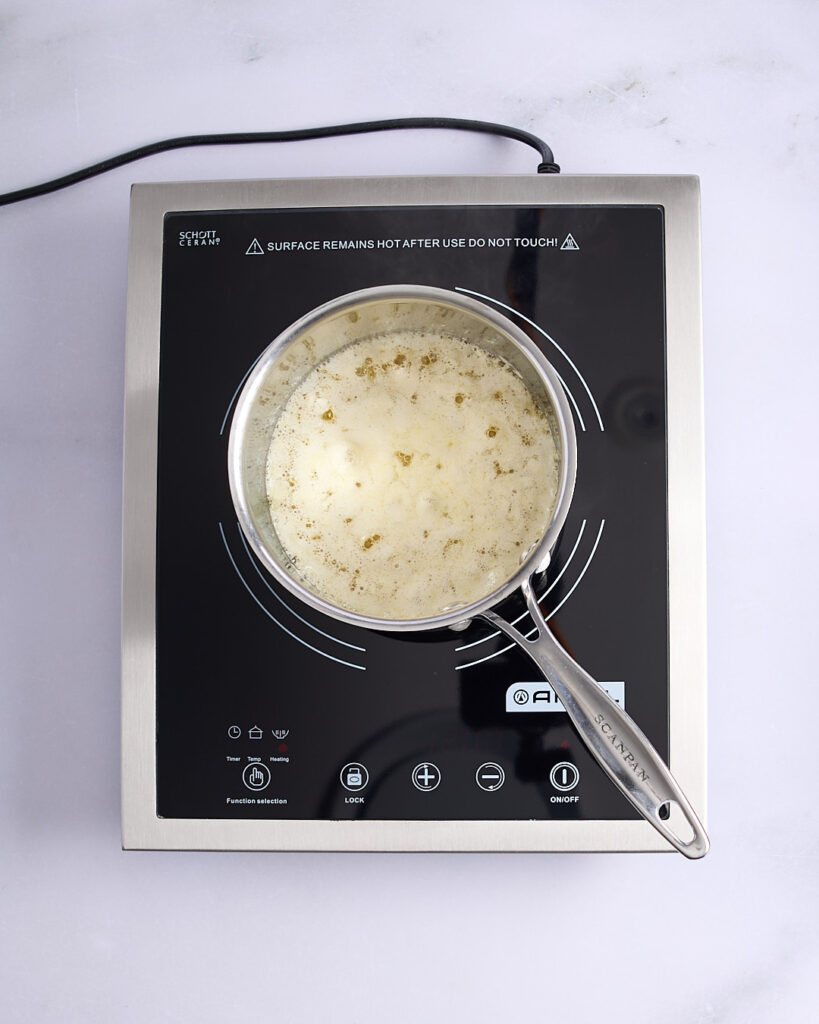
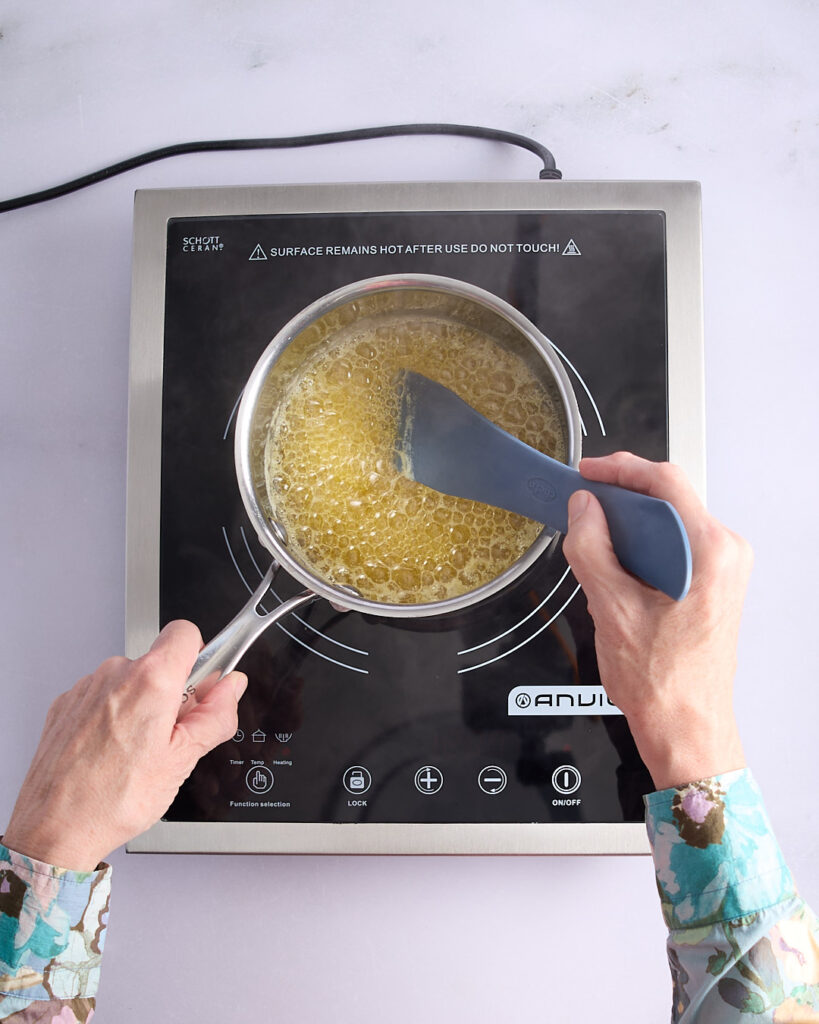
Beurre noisette, or nut butter, is just butter gently heated until the milk solids toast and release a rich, nutty aroma. That’s it. The only non-negotiable is that you stand there and keep it company. Don’t walk away. I mean it. Walk away and you’re guaranteed burnt butter and regrets.
Butter is about 80–82% butterfat, 16–18% water, and 1–2% milk solids. You’ll need to boil off the water before those solids can brown. Do this over medium-high heat in a wide-bottomed stainless steel pan with a wooden spoon or spatula in hand. Start with 150g of unsalted butter. First, it’ll foam and hiss while the water evaporates. Then it’ll settle down, and the bubbles will become smaller and clearer. That’s your cue. Keep stirring and scraping the bottom so nothing catches.
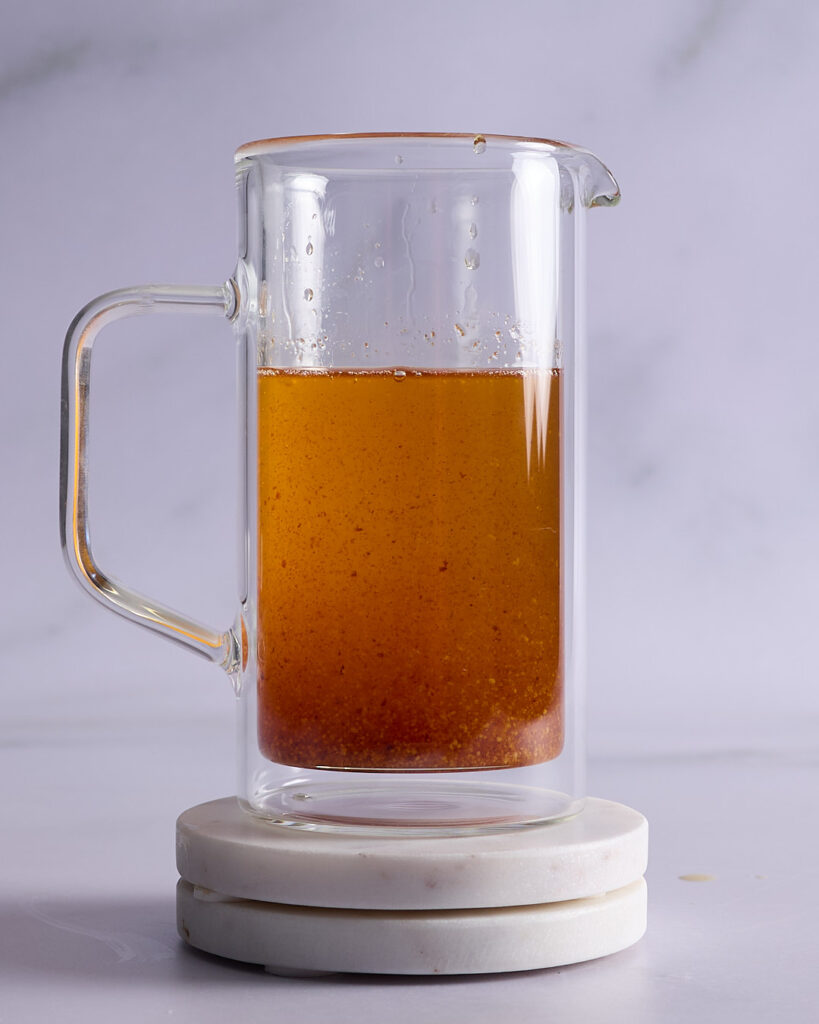
Once the milk solids are golden brown and smell like toasted hazelnuts and ambition, take the pan off the heat immediately. Pour the brown butter into a heatproof jug to stop the cooking—and voilà, beurre noisette.
Simple, right? Definitely no need to fear the French here.
Measure out 115g of the brown butter for the biscuit crumb base, reserve the rest in a separate container.
Don’t skip this step—this golden brown butter adds an extra layer of campfire toastiness to this s’mores dessert recipe. You go from, “Oh, a cheesecake base,” to “Wait… that’s gotta be a s’more!”
Assembling the crumb crust
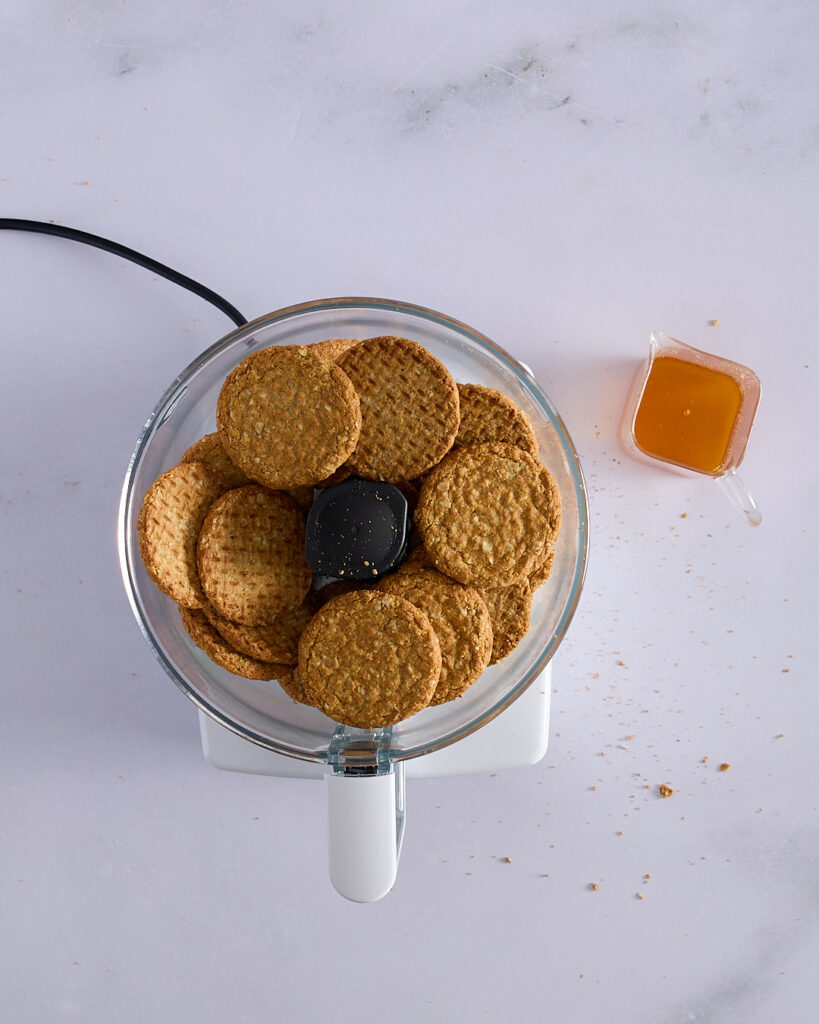
Once the beurre noisette has cooled slightly, process 350g of McVitie’s HobNob biscuits (or the biscuits of your choice) in a food processor until you’ve got a fine, sandy crumb.
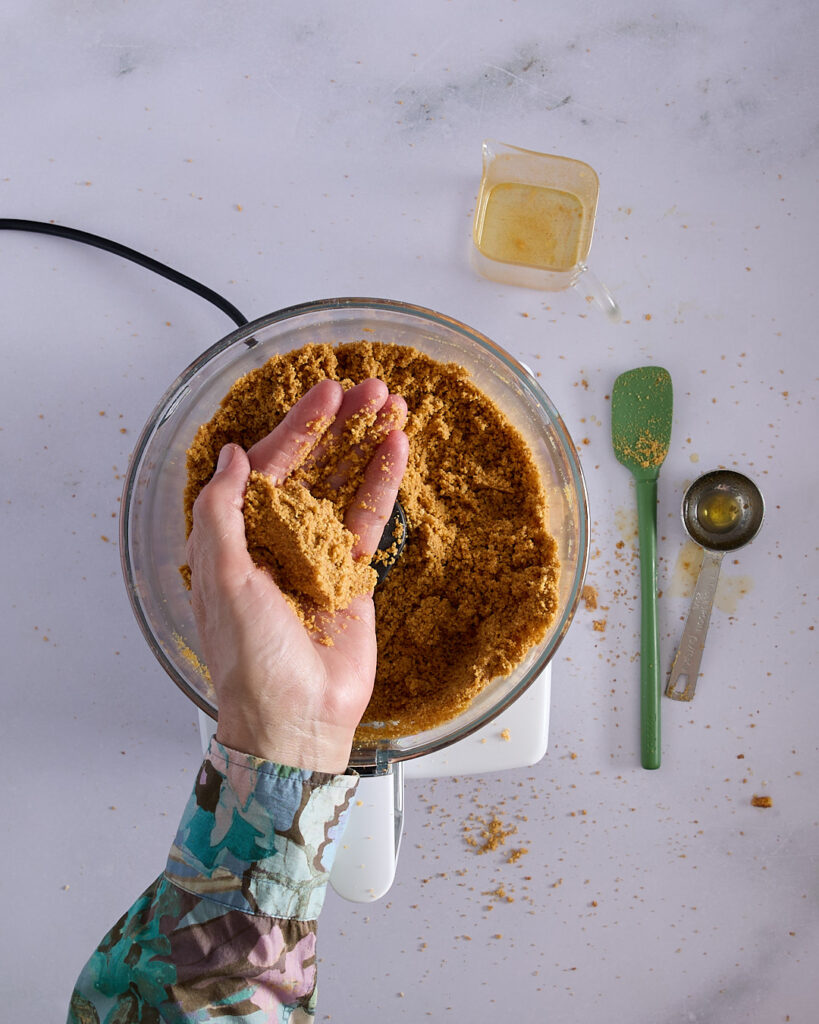
With the processor running, gradually add 115g of brown butter. You’re aiming for the texture of wet sand—when you squeeze a handful, it should hold together in a clump. If it’s still too dry, add more brown butter one tablespoon at a time, pulsing between additions and checking the texture again.
Preheat the oven to 175°C (conventional) or 155°C (fan forced).
I’ve used a 36cm x 13cm fluted non-stick rectangular tart tin for this s’mores tart recipe. If you want a more traditional s’mores pie look, go for a 23–25cm round tart pan with low sides. In either case, make sure the tin is non-stick and has a loose bottom.
Use the base of your tart tin to trace a baking paper liner. It may seem like a fussy step but trust me—it’ll make it much easier to remove the base later when the butter has set firm.
Now, I know biscuit crumb bases are often labelled as beginner-level baking. But honestly? I find them a bit fiddly. Getting those crumbs to stay put can be a challenge—and the last thing you want is to perfectly assemble your crust only to have the base flip up as you’re heading to the fridge.
So, I take precautions. Optional, of course—but don’t come crying to me later if you skip them.
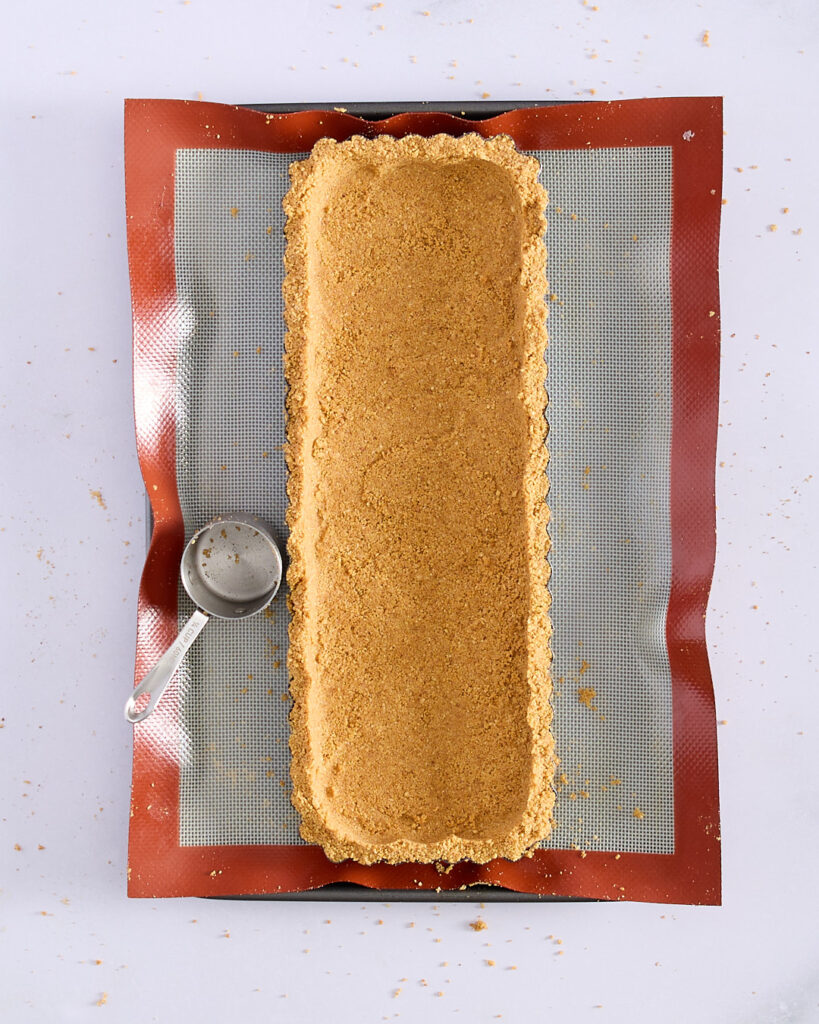
I place a silicone mat on a sturdy baking tray and build the tart directly on top. It gives you a non-slip surface to move the whole thing from bench to fridge to oven without drama.
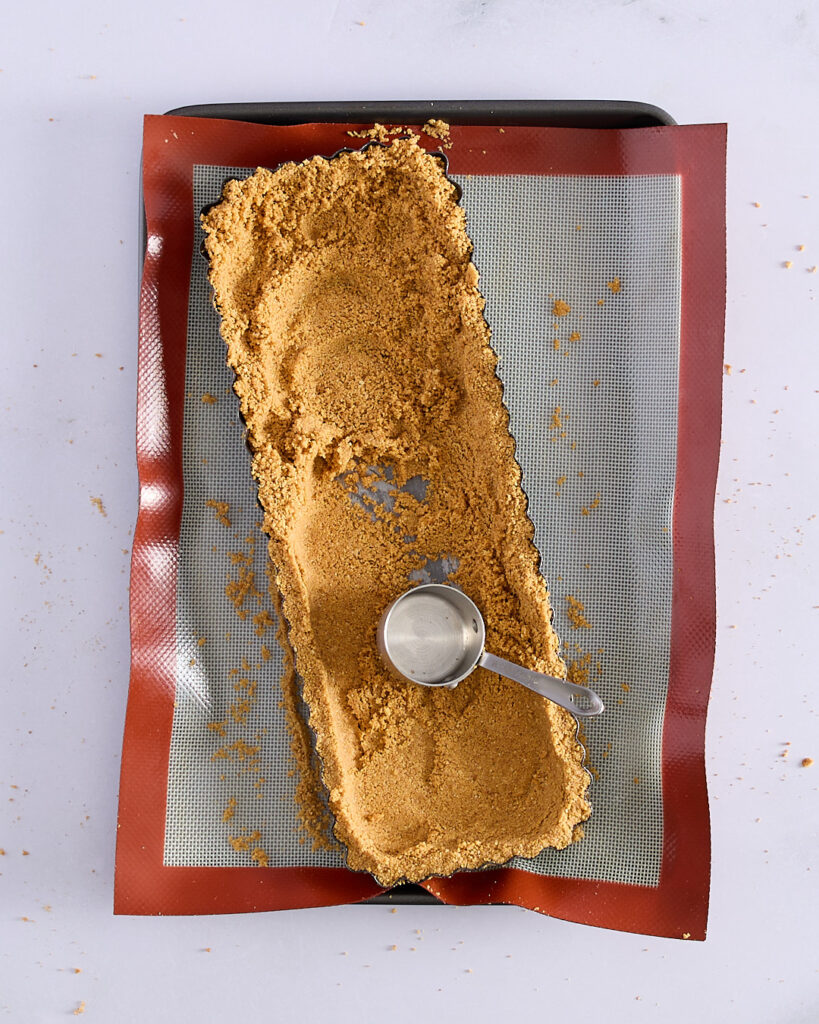
When pressing the crumbs in, start with the sides of the tin and finish with the base. Use your fingers to gently work the crumbs into the flutes, and a small metal measuring cup works beautifully as a tamper to press the base evenly. You want a compact, even layer—not too hard-packed, but firmly in place.
Freeze the base on the tray for 15–20 minutes, just to help the butter firm up.
Then bake for 15 minutes, remove, and let it cool completely to room temperature. I usually pop it back into the freezer until I’m ready to add the next layer—this helps keep everything exactly where it should be when the ganache and jam go in.
Adding the jam layer
I never used to think of piping bags as essential kitchen equipment. But now? I can’t imagine not having at least two sizes—medium and large—on hand. They take the mess out of so many recipes.
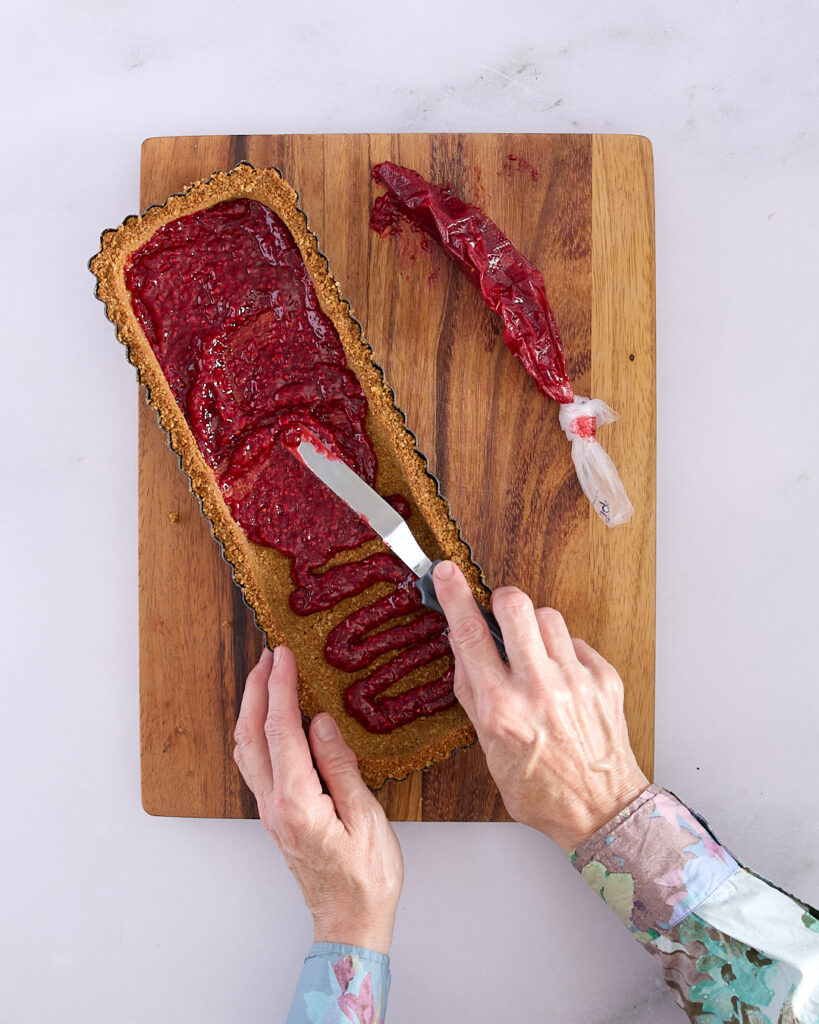
For this s’mores tart recipe, a piping bag and a small offset spatula make a surprisingly good team. The piping bag lets you get the raspberry jam evenly across the base without disturbing the crumb, and the offset spatula finishes the job beautifully—level, smooth, and right to the edges.
That said, if you don’t have either on hand, a spoon will do the trick. Spoon the jam in, then smooth it with the back of the spoon. It’ll still taste just as good.
Keep the tart base in the fridge until you’re ready to pour the ganache so the jam stays firm.
Dark chocolate ganache glory – let’s step it out
If you’re going all-in with this chocolate raspberry marshmallow tart, I highly recommend Callebaut’s 70% Belgian dark chocolate callets. They’re dark chocolate heaven—deep, smooth, and made in perfect little discs that melt straight into cream without any fuss. No chopping. No drama.
But I’ve kept things a bit more down-to-earth for this s’mores tart recipe. After all, we’re channelling a nostalgic campfire treat here, not a luxury brand soirée. So I’m using Nestlé’s Plaistowe 70% dark chocolate—a solid baking chocolate with great flavour. It just requires a little more effort.
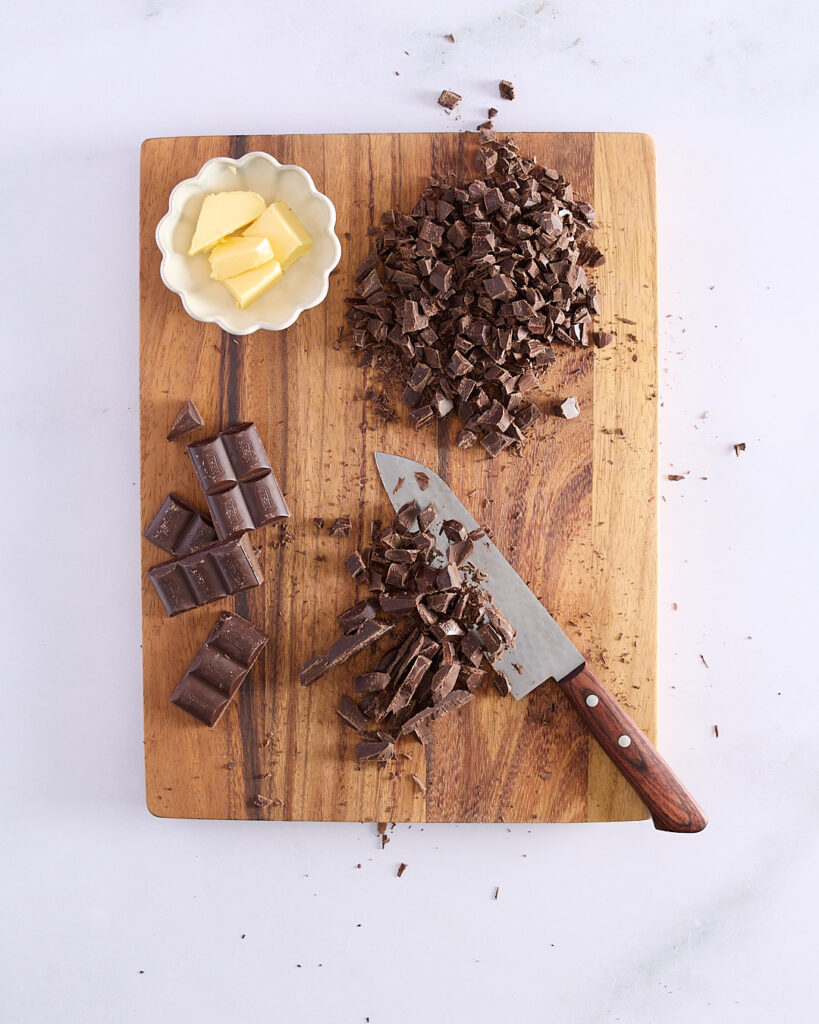
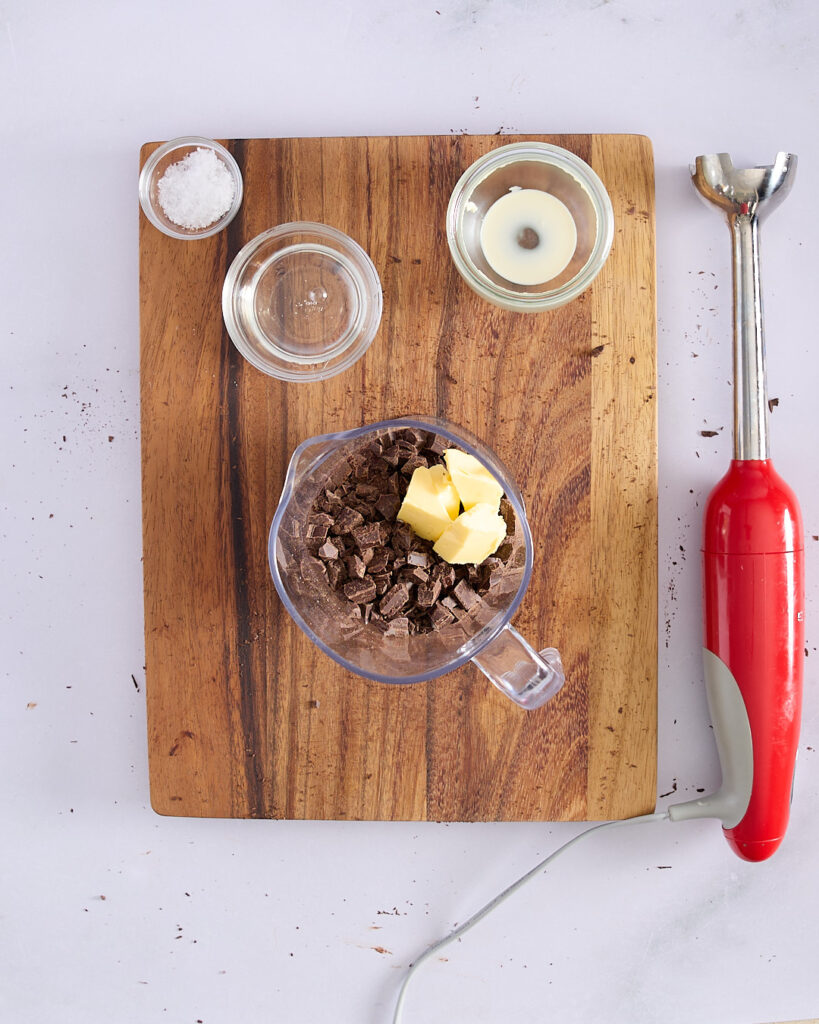
You’ll need to chop the chocolate into even pieces—around 5mm if you can. This ensures it melts smoothly and evenly when you pour in the hot cream. The goal is to get everything fully melted before the mixture cools too much—any stubborn lumps that don’t melt quickly will likely stay that way.
You need 300g of chopped chocolate or chocolate callets.
Making the ganache
Add the chopped chocolate and 40g of room temperature unsalted butter to a tall heatproof jug.
Heat 340g pure cream (minimum 35% fat) in a small saucepan and stir until it comes to a boil. Immediately pour over the butter and chocolate, making sure they’re completely submerged. Leave sit for 5 minutes.
You will need ¾ teaspoon sea salt and I grind it into a fine powder using a spice grinder, mortar and pestle, or even using the side of a large kitchen knife on a wooden board. I prefer the sea salt as it has a much gentler refined saltiness over normal table salt. You can also use Kosher salt in the same way.
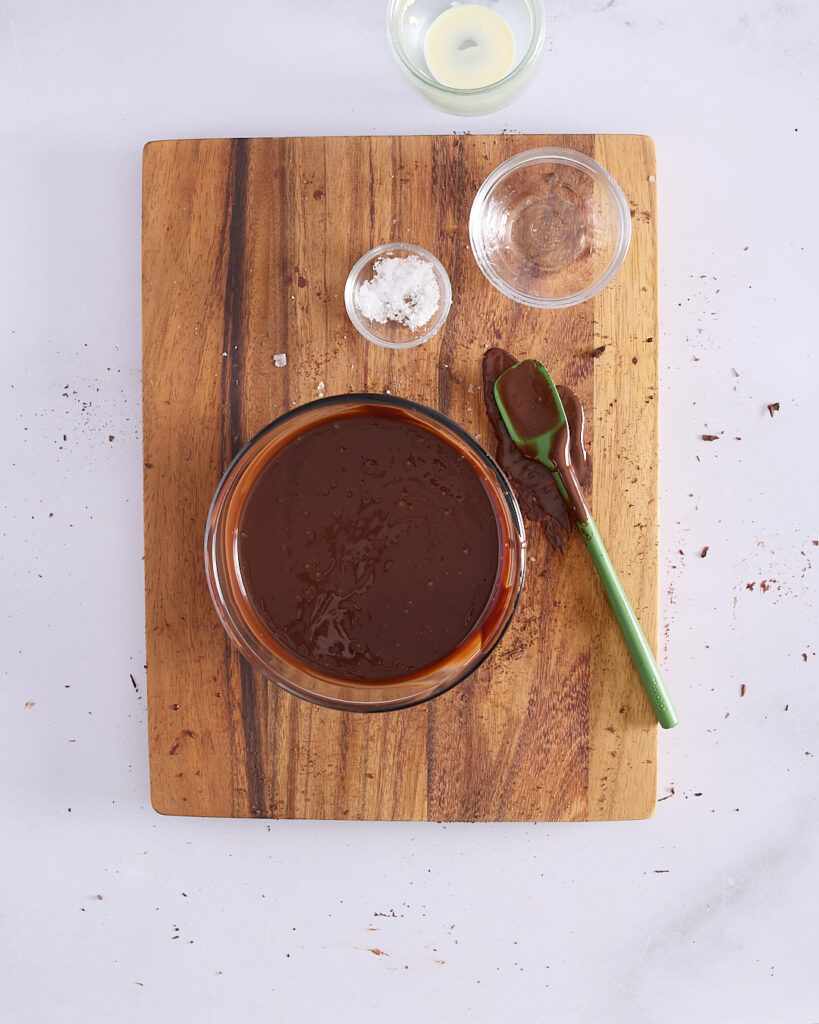
Add the salt and 40g of glucose to the jug. Using an immersion blender, blend the ganache until it becomes a shiny and smooth. Keep the blender at the bottom of the jug, don’t move it up and down as you will create bubbles in your ganache. If you don’t have an immersion blender don’t use a whisk or you’ll produce a lot of bubbles—use a wooden spoon or spatula instead, stirring vigorously but not beating to incorporate air.
Pouring in the ganache
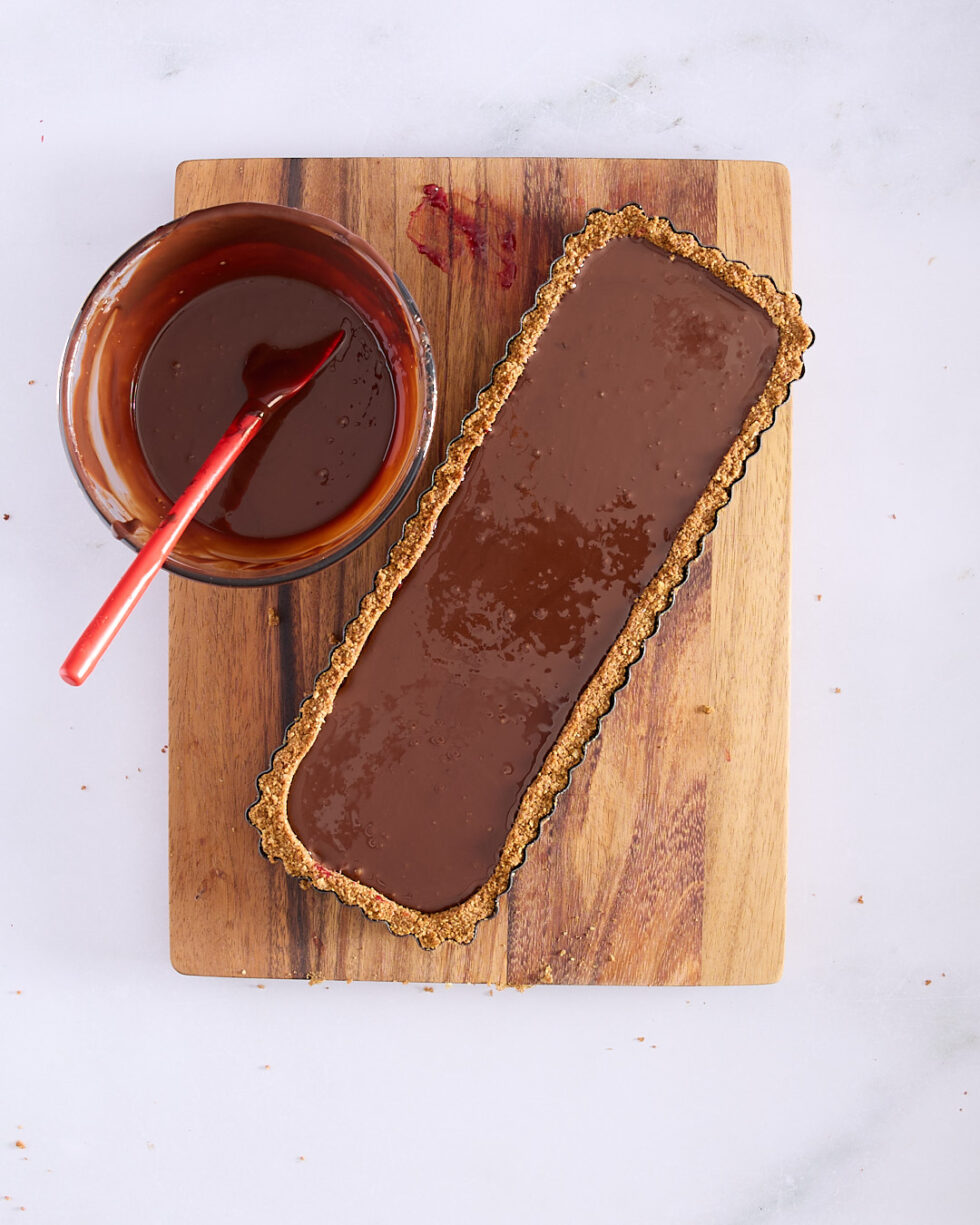
Once your ganache is glossy and smooth, pour it into the tart shell—directly over the raspberry jam layer. Go slowly and aim for a steady pour to avoid disturbing the jam underneath.
If you’ve used a tall jug for blending, it’ll give you good control. Start at one end and let the ganache spread naturally across the base of your s’mores tart. Use a small offset spatula or the back of a spoon to gently nudge it into the corners if needed, but don’t overwork it—let gravity do the work.
Tap the tin gently on the bench to release any trapped air bubbles.
Then place the chocolate raspberry marshmallow tart in the fridge, uncovered, for at least 4 hours or overnight to allow the ganache to fully set. Once chilled, you’ll have that perfect firm-but-silky finish you want in any good chocolate raspberry tart recipe.
It’s not a s’more without the marshmallow!
Look, I’m not going to judge you if you’re thinking of ditching the homemade marshmallow layer and just going with a raspberry dark chocolate tart. I won’t tell. No one will know. And yes, they’ll still love it.
But you’ll know.
You’ll know you passed on the chance to go full s’mores. That you could have nailed the marshmallow component. That it could have been a s’mores-y, marshmallow-y, campfire-y piece of nostalgic, toasty perfection.
So go on—get out your stand mixer, and let’s get this done.
Decide how you want to decorate the tart before you start
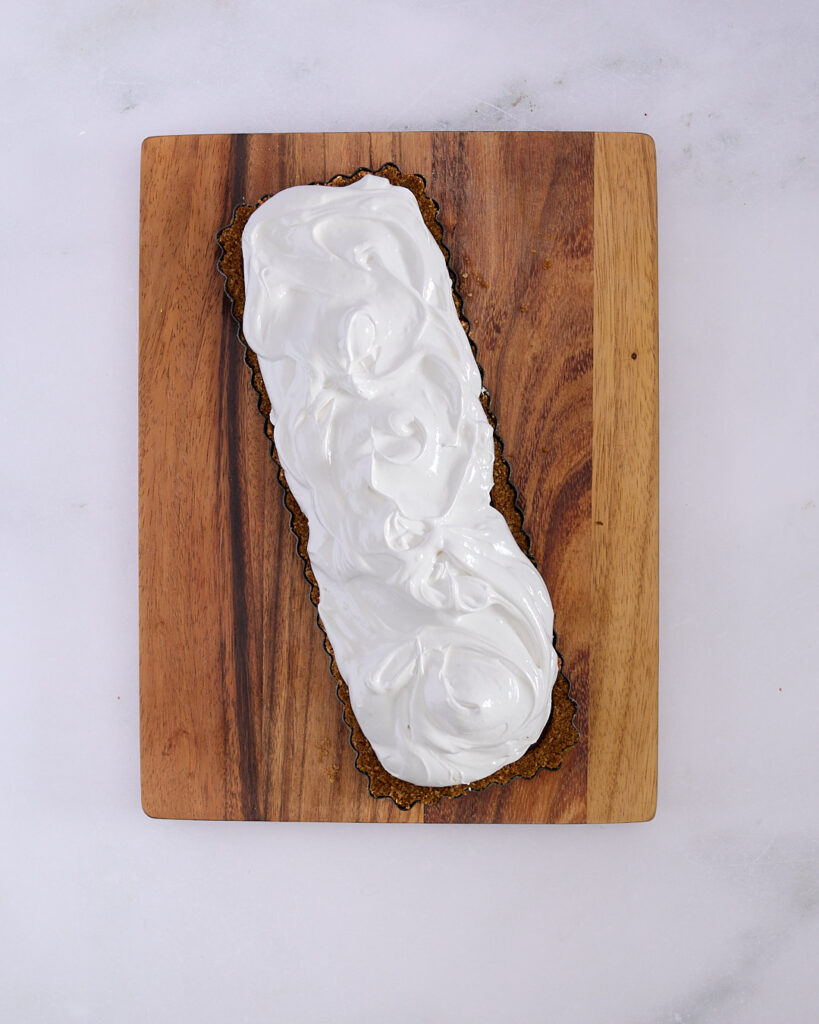
Before you dive into making the marshmallow layer for this chocolate raspberry tart recipe, take a moment to decide how you want to finish the top. I’ve gone with a freeform approach—dolloping the marshmallow straight onto the tart and swirling it into soft peaks. It’s rustic, dramatic, and lets the blowtorch do its best work.
But if you’re after something more precise, you can absolutely pipe the marshmallow. A large star tip works beautifully, giving you those classic ridges and valleys that toast up with flair.
It’s those uneven edges and swirled peaks that give the marshmallow something to toast—without them, it’s just not giving s’mores.
You can make marshmallow with an electric hand mixer, but just know it’ll be a bit trickier. Make sure the bowl is secure on a non-slip mat before you attempt to pour in the sugar syrup—safety first, always.
In the bowl of a stand mixer, add 120ml room temperature water and sprinkle over 15g gelatine powder. Attach the whisk and set the mixer to low. Leave it running while the gelatine blooms and you make the sugar syrup for the marshmallow layer of this s’mores tart recipe.
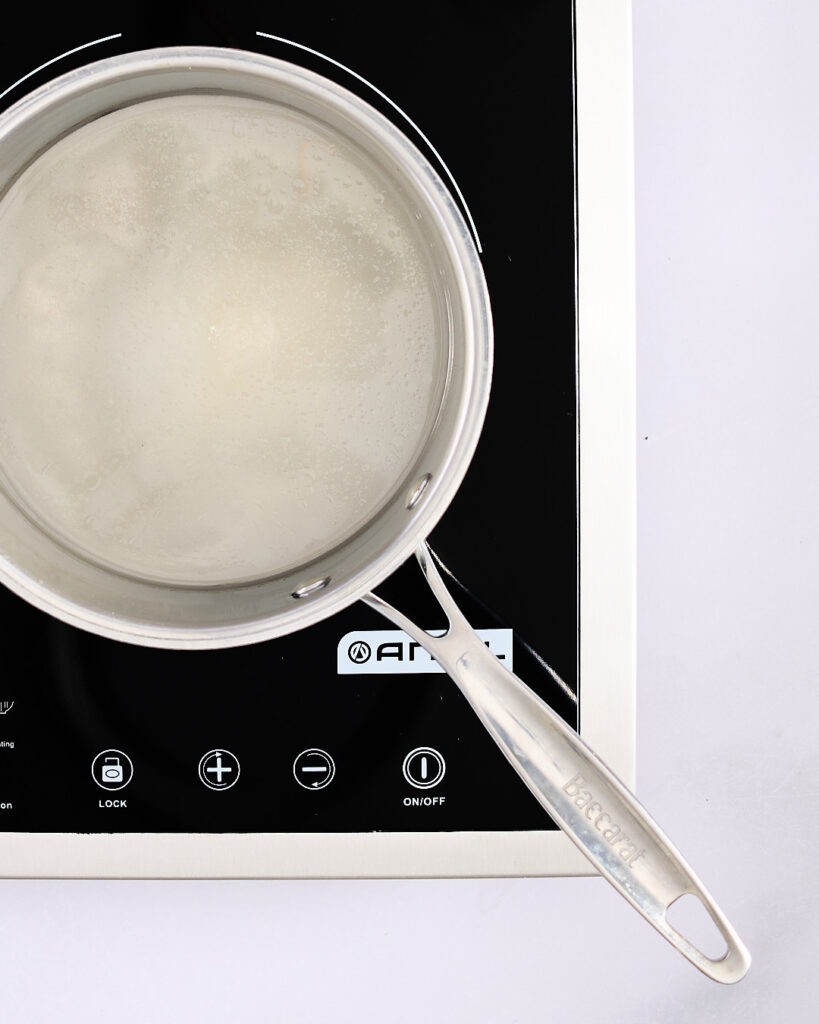
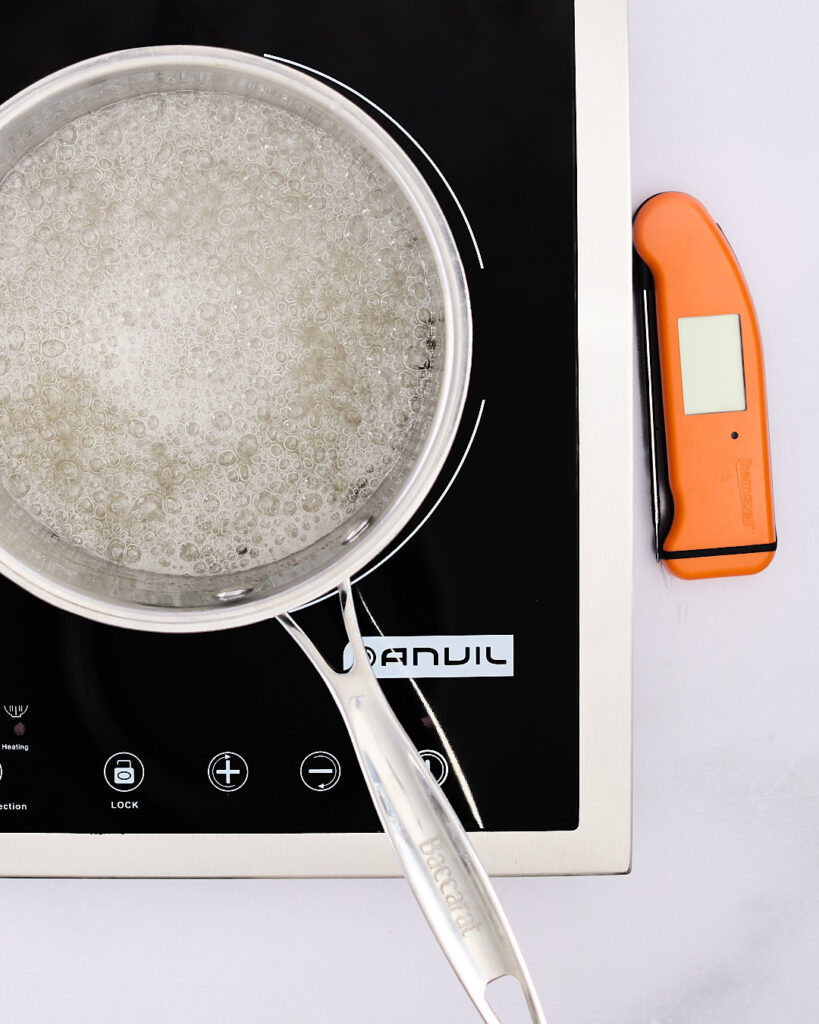
In a medium saucepan, combine 120ml water, 340g granulated white sugar, 165g glucose, and ½ teaspoon salt. Cook over medium-high heat. I gently swirl the pan to help the sugar dissolve—but be careful: hot sugar syrup burns are no joke.
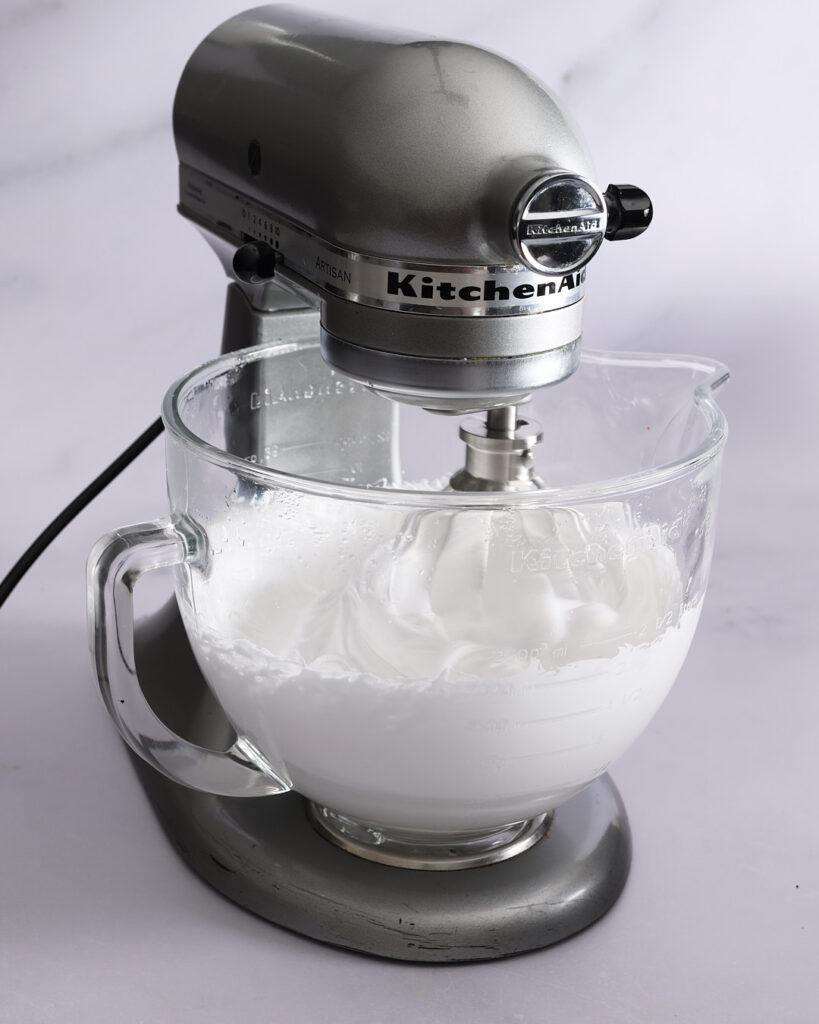
Boil the syrup until it reaches 122°C. Wearing an oven mitt, carefully take the pan to your mixer. Slowly pour the syrup down the side of the bowl (not directly onto the whisk or it’ll spin everywhere). As you pour, gradually increase the mixer speed from low to high.
And this is when the marshmallow magic begins. How is it that some gelatine, sugar, and water can transform into a big cloud of marshmallowy fun?
Beat the mixture for about 13 minutes, until it’s thick, glossy, and forming stiff peaks. When you stop the mixer and lift the whisk, the marshmallow should cling, not plop.
If you’re piping, set up a large piping bag with your tip in place and fold it over the sides of a tall jug ready to fill. For the freeform approach, have a large spoon and a small offset spatula or silicone spatula ready. You’ll need to clean the spatula as you go and occasionally wet it under the tap to keep the marshmallow from sticking while you swirl.
Go as high as you like
And now, you need a strategy: a mix of patience and speed. Yes—they can co-exist.
If you pipe or pile the marshmallow before it’s firmed up enough, your beautiful shapes will slump. Ask me how I know—one of my early attempts had the marshmallow sliding off the tart in slow motion.
Wait too long, though, and the marshmallow sets firm in the bowl and refuses to pipe, swirl, or move at all.
The trick is to test it. I use a dinner plate and dollop or pipe a small amount. If it holds its shape, you’re good to go. If it slumps or deflates, wait a minute and test again.
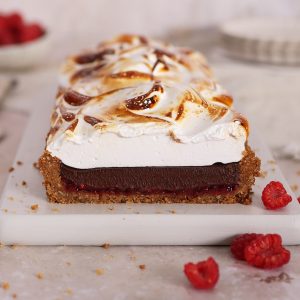
This marshmallow recipe makes more than you’ll need for your chocolate raspberry marshmallow tart. Don’t feel you have to use it all—you want a good marshmallow-to-ganache ratio. I recommend going no more than three times the height of the ganache layer. You want to balance the richness, not bury it.
The reason for the generous quantity? Smaller batches are tricky to whip and temper correctly. Just have a baking paper–lined dish or tray ready to catch the leftovers. Once it’s set, cut it up and toss the pieces in cornflour or a cornflour–icing sugar mix to keep them from sticking.
Finish with the signature campfire toastiness
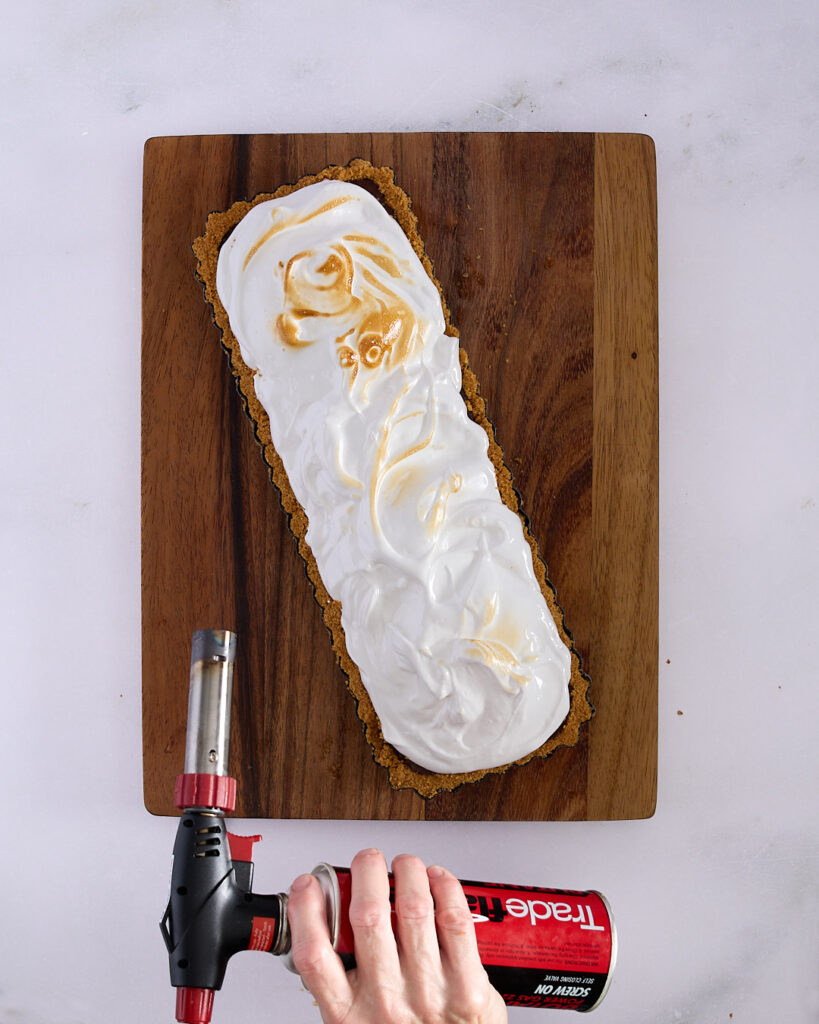
There’s nothing quite so satisfying in the kitchen as wielding a blowtorch. And let’s be clear—I’m not talking about those dainty little kitchen torches. Go to the hardware store and get a proper one.
That said—be careful. I do my torching on top of a stainless-steel cooktop and make sure nothing flammable is within range. You can also use a solid wooden board to keep the tart steady while you work.
For the perfect toast, come in at different angles and move the flame around. You’re aiming for golden peaks with a few charred edges—not a fireball. And knowing when to turn the torch off? Crucial.
This tart keeps well in the fridge for up to three days—just use a hot knife wiped clean between slices to keep those ganache and marshmallow layers looking sharp.
Not just any old campfire song!
Sure, there’s no smoky pine forest or lakeside fire pit here—but this chocolate raspberry marshmallow tart still sings all the right campfire notes. It’s nostalgic, a little bit dramatic, and way more elegant than anything we ever balanced on a stick as kids.
Between the buttery biscuit crust, the sharp raspberry jam, that glossy dark chocolate ganache and the toasted marshmallow topping, this isn’t just a s’mores tart—it’s your new signature dessert recipe.
And the best part? You can take it in whatever direction you like. Pipe the marshmallow or swirl it on with a spoon. Toast it lightly or go full char. Or even skip the marshmallow entirely and serve it as a sleek chocolate raspberry tart. It’s flexible, forgiving, and guaranteed to get people hovering for a second slice.
Ready to make your own?
S’mores Tart - Chocolate Raspberry Marshmallow Tart
Equipment
- Food processor
- 36cm x 13cm fluted non-stick rectangular tart tin (or 23–25cm round loose-bottom tart tin)
- Silicone baking mat
- Offset spatula (small)
- Stand mixer with whisk attachment
- Digital thermometer
- Immersion blender
- Large piping bag with star tip (optional)
- Blowtorch (hardware-store strength recommended)
Ingredients
- 350 g HobNob biscuits (or similar)
- 150 g unsalted butter no. 1 (115g brown butter)
- 200 g low sugar raspberry jam
- 300 g dark chocolate (75%)
- 340 g pure cream (minimum 35% fat)
- 40 g glucose no. 1
- 40 g unsalted butter no. 2
- ¾ teaspoon sea salt
- 240 ml water
- 15 g gelatine powder
- 340 g granulated white sugar
- ½ teaspoon table salt
- 165 g glucose no. 2
Instructions
Assemble ingredients and equipment
- This recipe moves through several steps and layers, so having everything measured out and ready will make the whole process smoother.
Make the brown butter
- In a wide-bottomed stainless steel pan, melt 150g unsalted butter over medium-high heat.
- Cook, stirring occasionally, until the milk solids turn golden brown and it smells nutty and toasted.
- Pour into a heatproof jug and set aside to cool slightly.
Make the biscuit base
- In a food processor, blitz 350g HobNob biscuits (or similar) to a fine crumb.
- While pulsing, gradually add 115g of the brown butter until the mixture reaches a wet sand consistency and clumps when squeezed.
- Press the mixture into a lined tart tin, starting with the sides and finishing with the base.
- Use a small offset spatula or a measuring cup to smooth and tamp it down.
- Freeze for 15–20 minutes, then bake at 175°C conventional (155°C fan) for 15 minutes.
- Cool completely, then return to the freezer until ready to assemble.
Add the raspberry jam layer
- Pipe or spoon 200g raspberry jam onto the cold tart base and smooth with a small offset spatula. Keep the tart in the fridge while you make the ganache.
Make the ganache
- Place 300g chopped dark chocolate and 40g unsalted butter in a tall heatproof jug.
- In a saucepan, bring 340g cream to a boil and pour it over the chocolate and butter. Let sit for 5 minutes.
- Add 40g glucose and ¾ teaspoon sea salt (finely ground).
- Blend with an immersion blender until glossy and smooth. Keep the blender at the bottom to avoid introducing bubbles.
- Pour the ganache into the tart shell over the jam layer. Use an offset spatula to gently nudge it into the corners, then tap the tin on the bench to release any air bubbles.
- Chill uncovered for at least 4 hours or overnight.
Make the marshmallow
- In the bowl of a stand mixer, add 120ml room temperature water and sprinkle over 15g gelatine.
- Set the mixer on low with the whisk attachment.
- In a medium saucepan, combine 120ml water, 340g sugar, 165g glucose, and ½ teaspoon salt.
- Bring to a boil and cook until the syrup reaches 122°C.
- Carefully pour the syrup down the side of the mixing bowl, gradually increasing mixer speed to high.
- Beat for 13 minutes until thick, fluffy, and forming stiff peaks.
Top the tart with marshmallow
- If piping, transfer the marshmallow to a prepared piping bag.
- Let the marshmallow set for a few minutes. Test with a small piped amount or a spoonful onto a plate. If the marshmallow holds its shape, it's ready to go. Otherwise, wait a minute and test again.
- For a freeform style, dollop it onto the tart and use an offset spatula to swirl into peaks. Work quickly before the marshmallow sets.
- Limit height to no more than three times the ganache layer.
Torch the marshmallow
- Use a blowtorch to toast the marshmallow, moving the flame across the surface at varying angles.
- Aim for golden swirls with a few darker tips for that signature campfire finish.