Recipes

Gluten Free Chocolate Raspberry Cakes
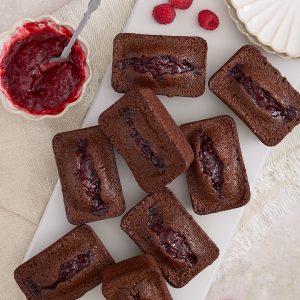
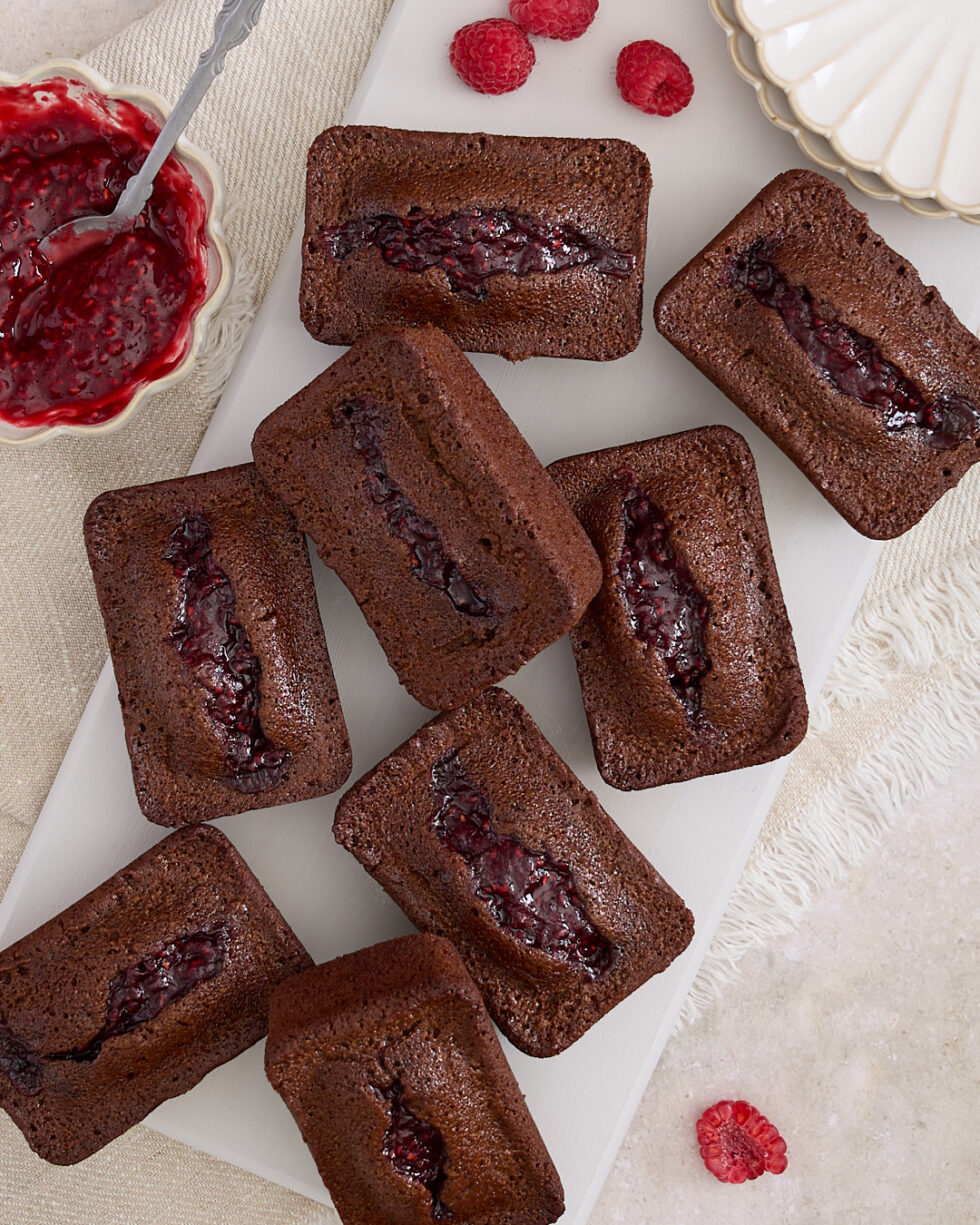
A tray of chocolate raspberry financiers, each topped with a swirl of raspberry jam, surrounded by fresh raspberries and a bowl of jam on a cream cloth.

My gluten free chocolate raspberry cakes are my take on the French classic, the financier. 

Traditionally, financiers are petite rectangular cakes made with nut meal and browned butter—naturally gluten free (vive la France indeed). While I’ve nudged them from the tea trolley onto the dessert plate, they still deliver that signature crisp edge, tender crumb, and satisfying chew. 

Admittedly, adding chocolate isn’t exactly traditional—but trust me, no one’s complaining once they’ve had a bite of these dessert-sized gluten free mini cakes. A centre of my low sugar raspberry jam adds just enough brightness to cut through the richness, making each mouthful feel balanced and indulgent. 

This isn’t one of those complicated French pastry recipes. All you need is a bowl and a whisk. The batter actually improves with a rest in the fridge, so it’s a dream make-ahead dessert. And if homemade jam isn’t on the cards, go with a good-quality store-bought one—or simply press in a few fresh raspberries before baking. 

Heads up: for results edging toward perfection, this recipe is best made the day before baking so the batter can rest overnight in the fridge. If you’re short on time, give it at least 3 hours.  

It’s the kind of recipe you’ll come back to again and again—simple, deeply satisfying, and unapologetically gluten free. 

Let me break it down for you.

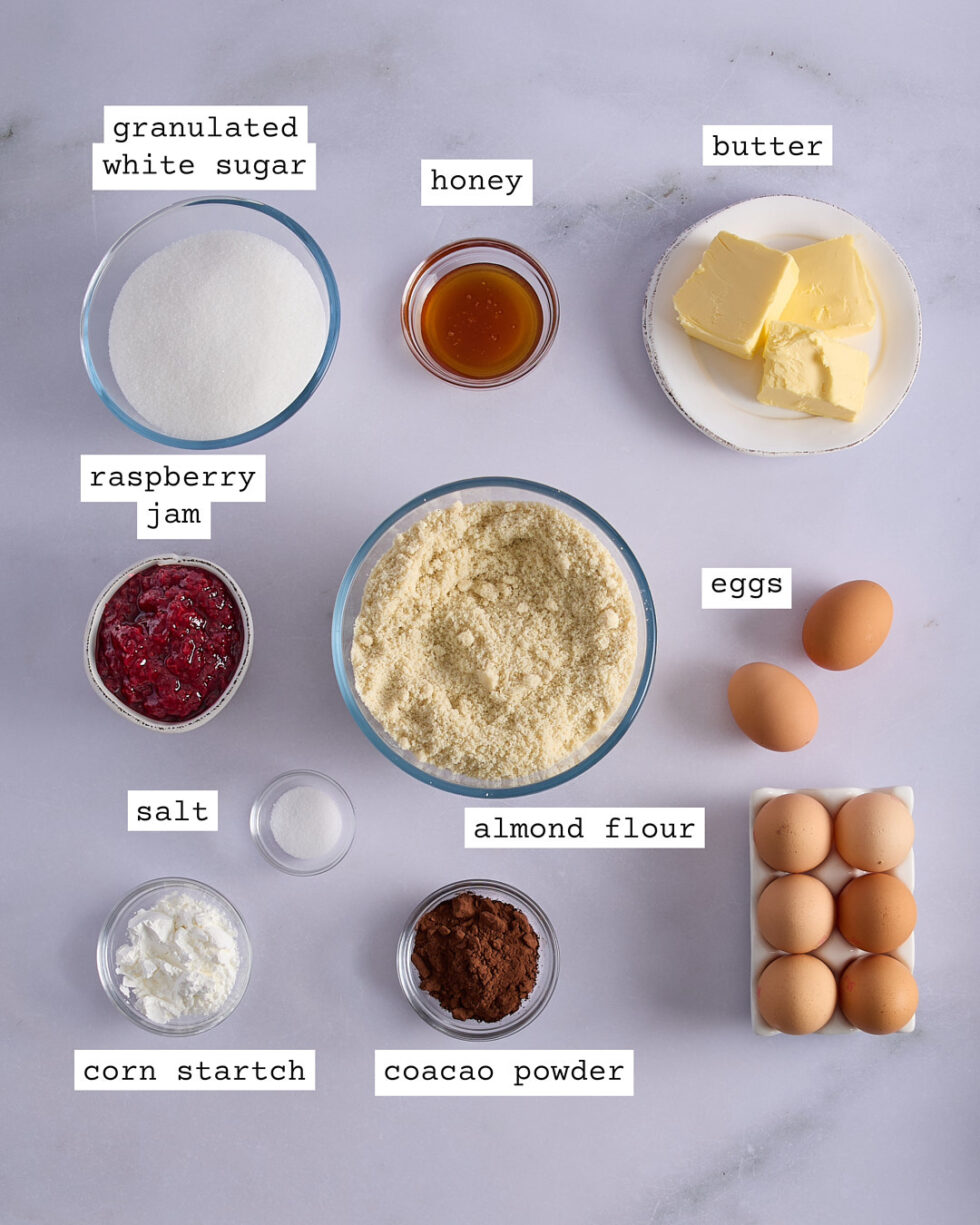
Chocolate and raspberry jam mini cake ingredients

What you’ll need for these gluten free chocolate raspberry mini cakes

Beurre noisette (browned butter or nut butter) 

Beurre noisette is just melted butter taken to the point where the milk solids toast and turn golden brown. It’s the signature flavour base of a financier, and it gives a nutty, deeply aromatic depth that transforms the whole cake. I’ll show you how easy it is to make. 

Egg whites 

Using just the whites keeps the crumb light and slightly chewy—classic financier territory. It also makes this a handy recipe when you’ve got whites leftover from custards or curds. 

Almond meal (or almond flour) 

A staple in gluten free baking, almond meal adds moisture and a subtle nuttiness. In traditional financiers, it’s often the star, but here it plays backup to the chocolate raspberry flavour profile. 

Cornstarch (cornflour) 

Cornstarch helps give structure and softness to the cake without adding gluten. It works alongside the nut meal to keep the texture tender and delicate. 

Cocoa powder 

Quality does count when it comes to cocoa, so use a good quality unsweetened cocoa powder. I go for Dutch processed for its smooth, intense chocolate flavour. 

Granulated white sugar 

I use regular granulated white sugar, but swapping in caster sugar is totally fine if you’re baking by weight—it’ll give you a finer crumb. Since sugar is part of the structure here, I wouldn’t recommend using liquid alternatives. 

Honey 

A little honey adds to the flavour complexity while helping to keep the cakes moist. It’s a small addition that makes a big difference. 

Low sugar raspberry jam (or fresh raspberries) 

Tucked into the centre, this brings a bright, tart contrast to the rich chocolate base. 

And yes, I’m completely biased—but using my low sugar raspberry jam recipe gives you a seriously fresh raspberry pop in these chocolate raspberry mini cakes. 

No time for jam making? All good. Just buy a high-quality store-bought jam—check the label for a lower sugar content—or keep it fresh by pressing a few raspberries into the top of the batter before your gluten free financiers go into the oven. 

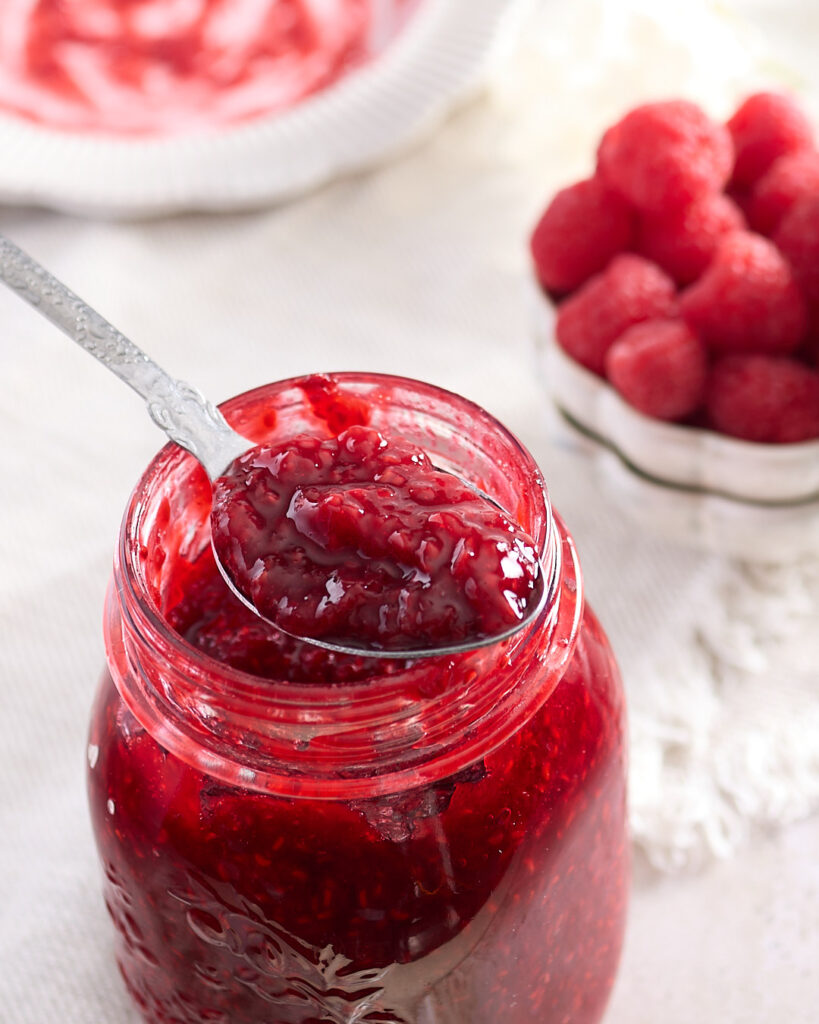
Try making homemade low sugar raspberry jam!

A spoon scooping vibrant raspberry jam from a glass jar, with a small bowl of fresh raspberries and a white dish blurred in the background.

Why I use my raspberry jam

My low sugar raspberry jam recipe captures the sharp, vibrant taste of raspberries without drowning it in sweetness. It’s a small batch recipe—around 1 litre in total—and it’s designed to be flexible: store it in the fridge or freezer, no canning required.  

For these chocolate raspberry mini cakes, I use about ¾ cup of the jam, piped in a ribbon across the top of the batter just before the mini cakes go into the oven. It bakes into the centre, giving each cake a rich chocolate base with a bright raspberry burst. And if I’m feeling generous with the raspberry jam, I’ll pipe another line of jam over the top just before serving. It adds a fresh finish and looks great too.  

Any leftover jam will keep in the fridge for up to 2 weeks or stash it in the freezer for your next baking session or another batch of gluten free mini cakes. 

Shortcut options

No time for homemade? A good quality raspberry jam from the shops works just fine. Just check the label—some brands lean heavily on the sugar, which can throw off the balance.  

Or for a fresher take, press a few whole raspberries into the top of each cake before baking. 

Making beurre noisette (aka browned butter without the drama)

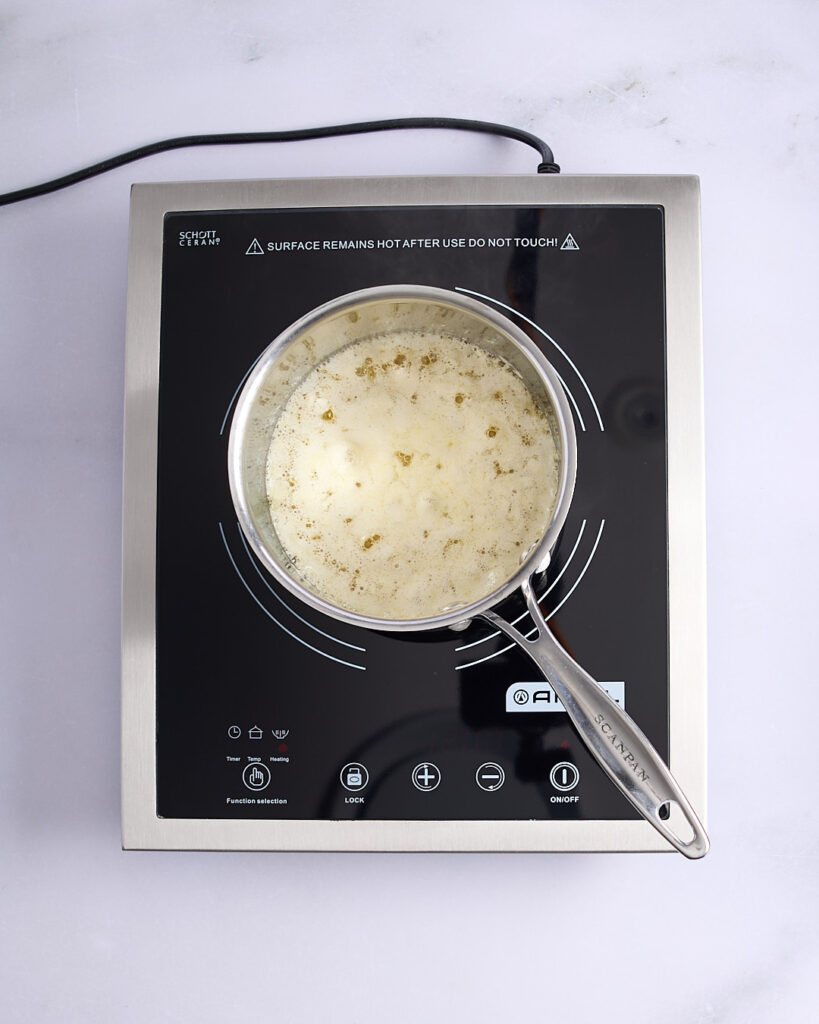
Sandra stirring golden foaming butter with a silicone spatula on a cooktop, nearing the browned butter stage with milk solids visible.
Foaming butter beginning the making of browned butter.
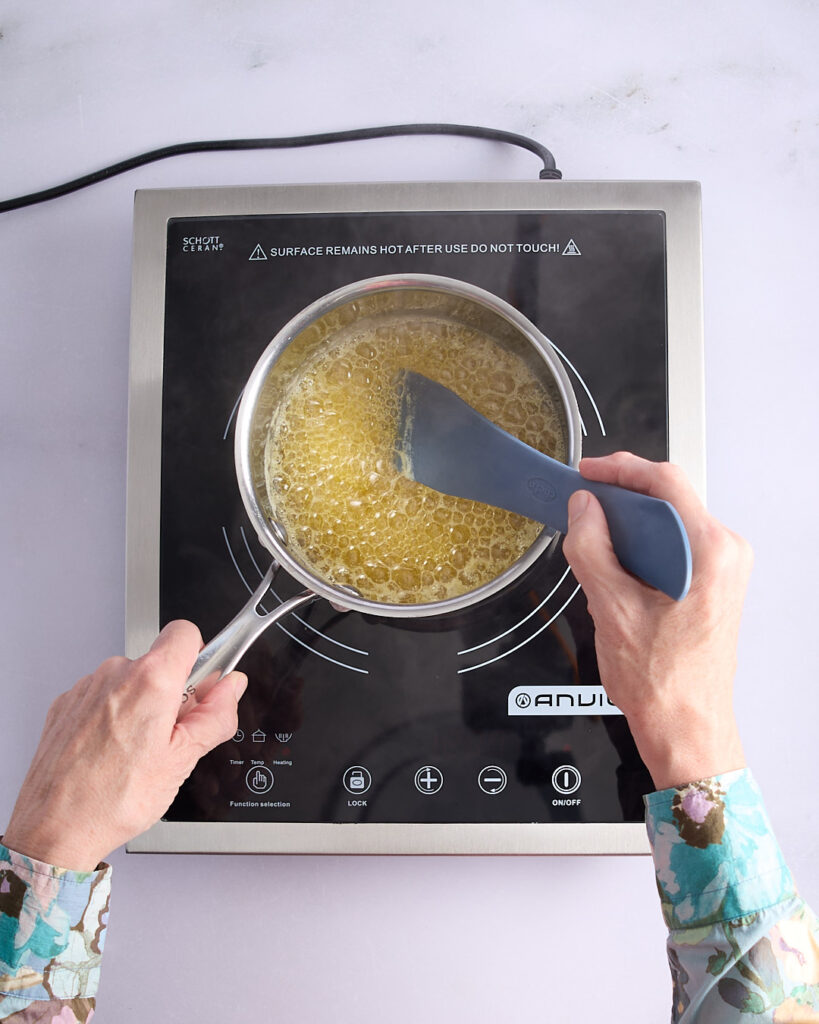
Sandra stirring golden foaming butter with a silicone spatula on a cooktop, nearing the browned butter stage with milk solids visible.
Sandra stirring nearly ready browned butter.

I don’t know about you, but I tend to get a little twitchy when I read a recipe that drops a French term like it’s no big deal. If it’s in French, it must be complicated, right? Is it going to be worth the fuss? 

Well, good news on both fronts: making beurre noisette is absolutely worth it—and there’s actually no fuss at all. 

Beurre noisette, or nut butter, is just butter heated until the milk solids toast and give off a rich, nutty aroma. That’s it. The only real requirement is that you commit to standing beside the pot while it does its thing. Don’t walk away. I mean it. Walk away and you’re guaranteed burnt butter and regrets. 

Butter is roughly 80–82% butterfat, 16–18% water, and 1–2% milk solids. You’ll need to boil off the water first before anything starts browning. Do this over medium-high heat in a wide-bottomed stainless steel pan and have a wooden spoon or spatula in hand. 

At first, the butter will foam and hiss as the water evaporates. Then it’ll quieten down, and the bubbles will turn smaller and clearer. That’s your cue. Keep stirring and scraping the bottom so those precious milk solids don’t catch. 

Once they’re golden brown and smell like toasted hazelnuts and ambition, take the pan off the heat immediately. Pour it into a heatproof jug to stop the cooking—and voilà, beurre noisette. 

Simple, right? Definitely no need to fear the French here. 

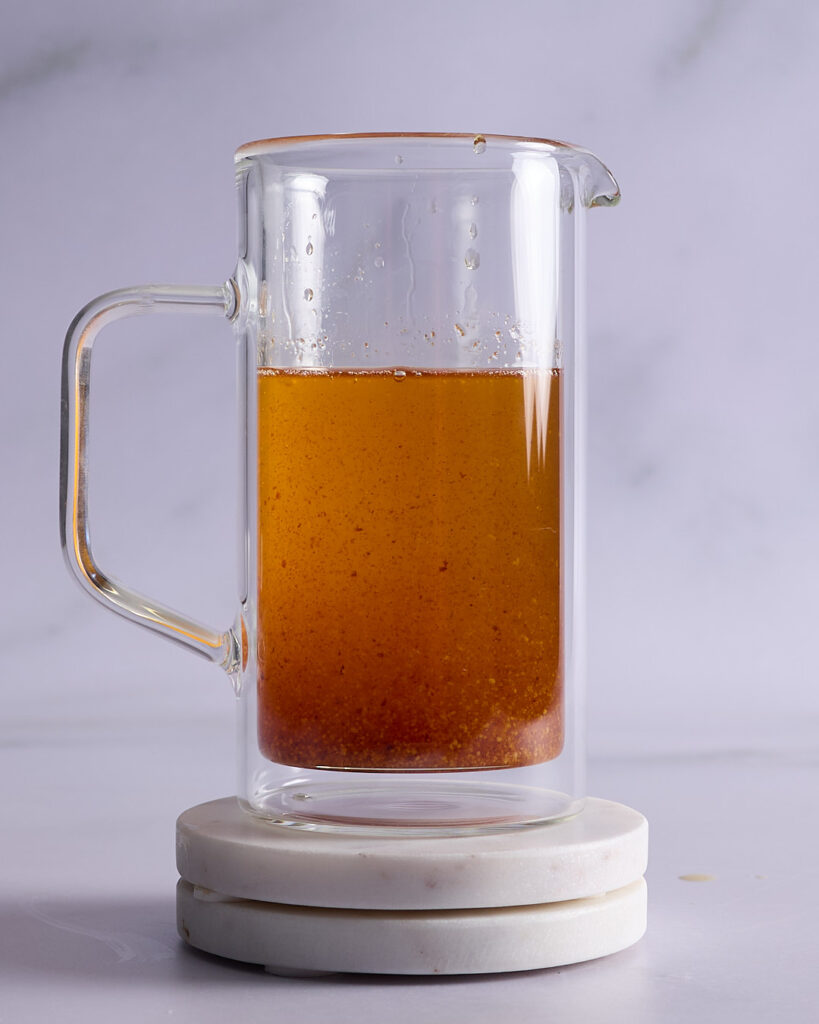
Liquid gold for your gluten free mini cakes!

A glass jug of browned butter showing golden liquid and toasted milk solids.

This golden brown butter—liquid gold—is essential to giving these naturally gluten free financiers their signature depth of flavour. Don’t skip the best part. 

Measure out 150g of the brown butter for the recipe.  Any leftover butter can be used to grease the mini cake pan.   

It can’t be French—this batter is so simple!

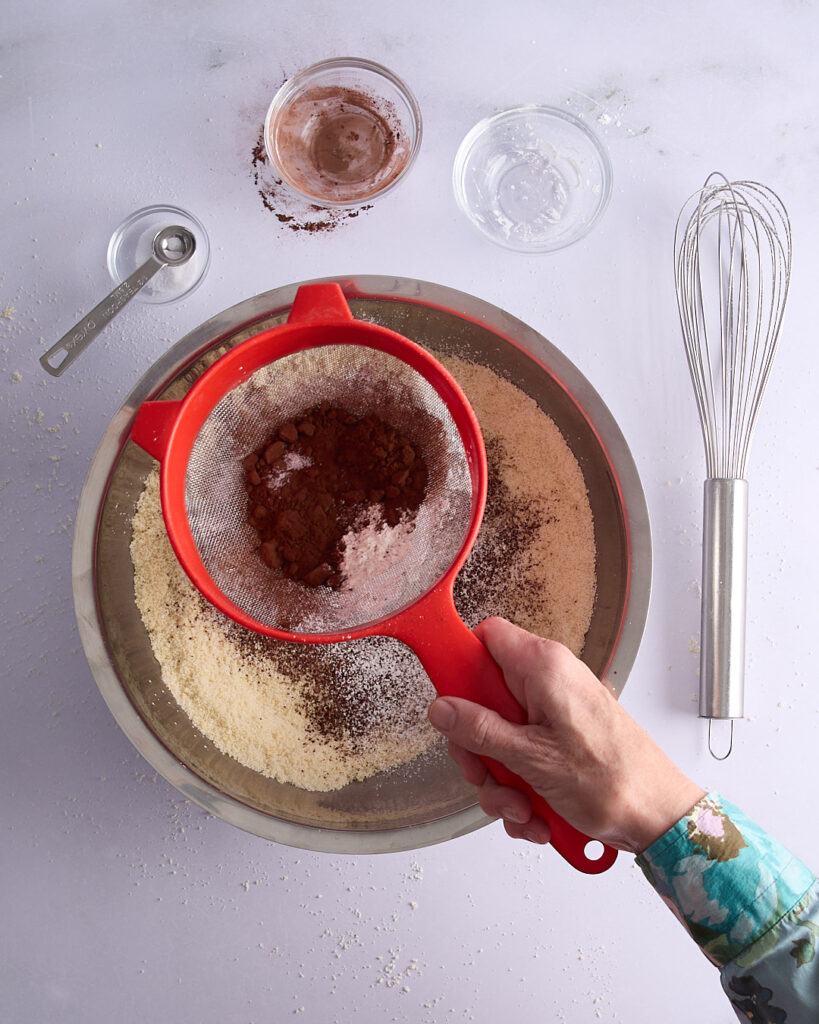
Sandra sifting cacao powder and dry ingredients into a large metal mixing bowl of almond meal and sugar, with a whisk and measuring spoons nearby.
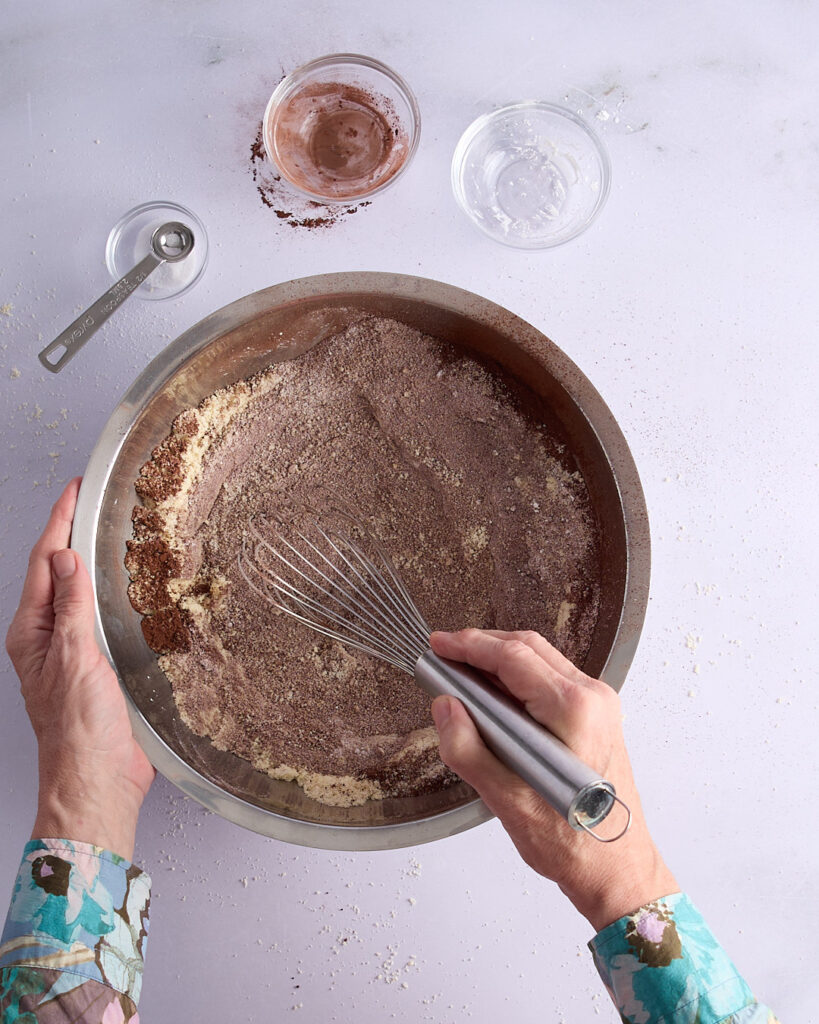
Sandra whisking dry ingredients in a mixing bowl, blending cacao powder with almond meal, sugar, cornflour, and salt.

Give the cacao powder some extra attention

Cacao powder can be a bit of a troublemaker—it’s so fine that it tends to form stubborn little lumps when added straight into your dry ingredients. And once those lumps form, they’re hard to break down. So even though this recipe doesn’t use wheat flour that needs sifting, you’re better off sifting the cacao powder with the cornflour and salt directly over the mixing bowl. 

Start by weighing the almond meal and sugar into a large mixing bowl. Then set a sieve over the bowl on a kitchen scale, zero it out, and weigh in the cacao powder and cornflour. Add the salt, then sift everything through—twice is ideal. I like to throw in a spoonful of almond meal on the second pass to help the finer powders along. 

Once sifted, use a whisk to make sure everything is evenly combined. This extra step means no pockets of cacao powder hiding in the batter and a smoother, more consistent crumb in your chocolate raspberry mini cakes. 

Mixing the batter (and why it needs a rest)

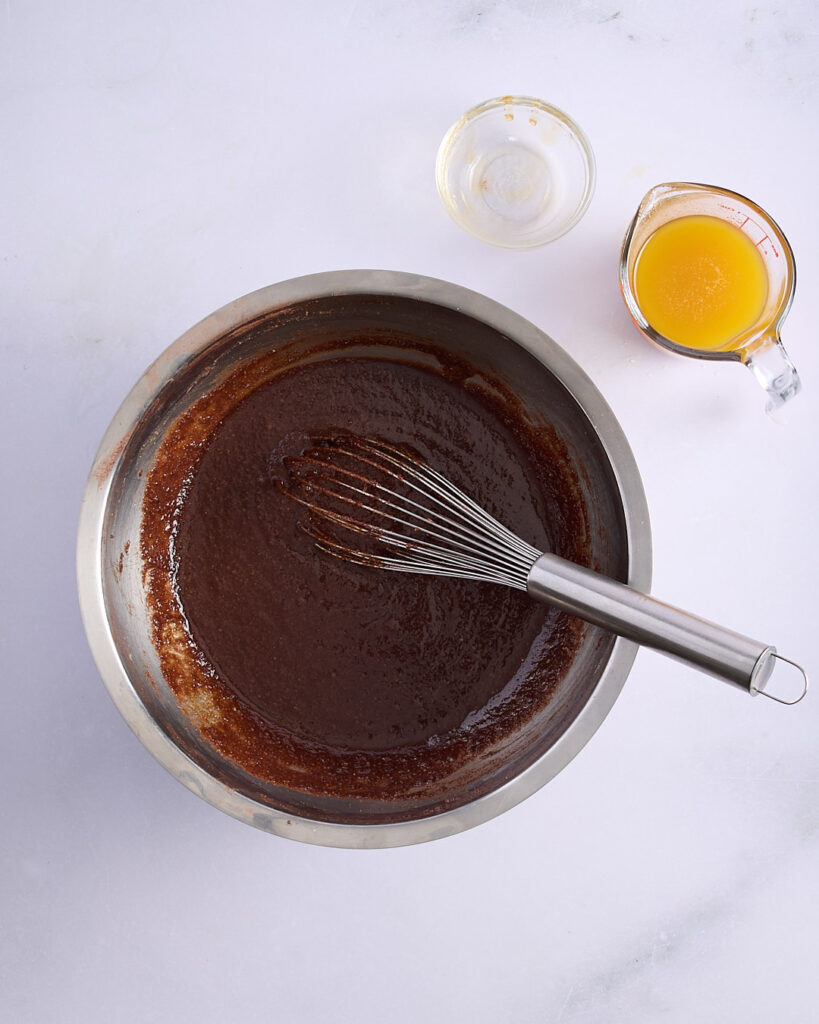
A mixing bowl of chocolate financier batter with a whisk, next to a jug of browned butter and a small bowl of honey on a white marble surface.

Whisk the egg whites into the dry ingredients in three stages—this helps avoid lumps and makes it easier to incorporate everything evenly. Then whisk in the honey. I usually weigh it straight into the bowl to avoid it sticking to the sides of a measuring cup. Alternatively, you can wipe the inside of your measuring cup with a little neutral oil before adding the honey—it’ll slide right out. 

Finally, whisk in the beurre noisette gradually. You want a smooth, glossy batter by the end. 

And while that’s technically the batter done, it’s not quite ready for the oven. This cake batter needs a good long rest in the fridge—preferably overnight, but at the very least three hours. 

This isn’t just a fussy French tradition. Resting the batter is essential for the absolute best chocolate raspberry mini cakes. It allows the moisture to fully hydrate the almond meal, gives the browned butter time to firm up (which helps with structure and rise), and brings the flavours into better balance. The result? A crisp-edged, tender-centred financier with beautifully integrated flavour. 

Time to bake

When you’re ready to bake these chocolate raspberry financiers, preheat your oven to 170°C conventional or 150°C fan-forced.  

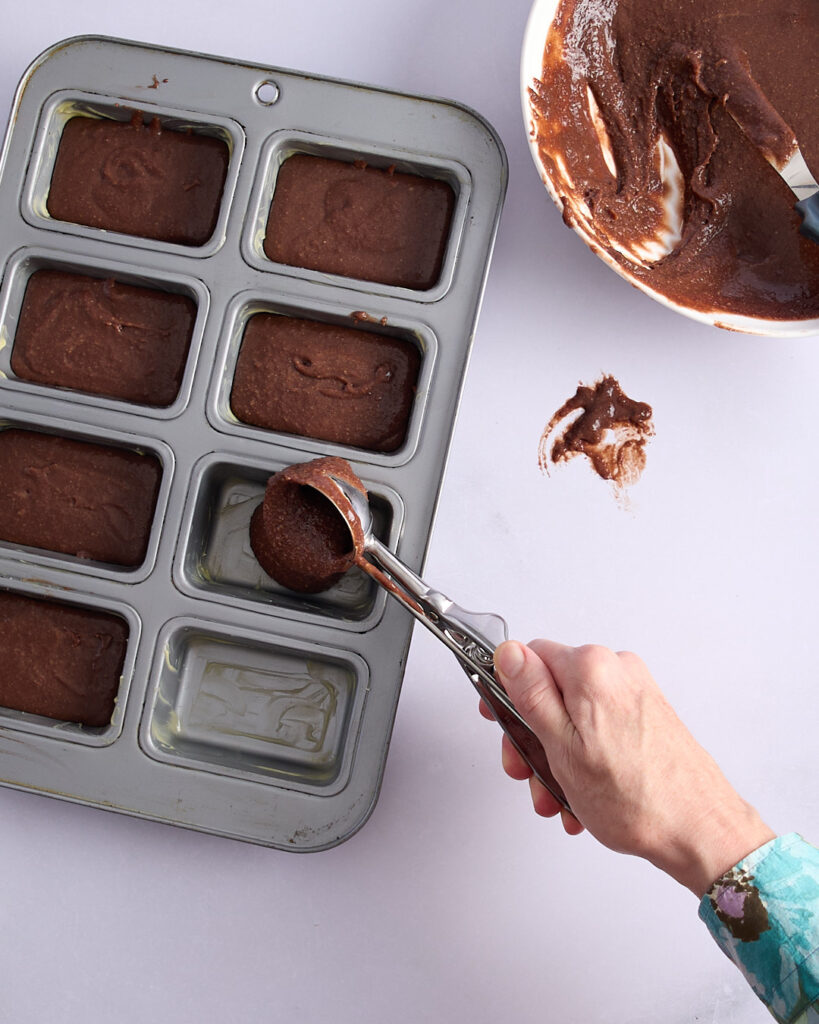
I use an eight-hole mini loaf pan, which fits a full batch of batter perfectly. A #24 ice cream scoop makes light work of portioning—it’s about ¼ cup per mini cake.  

This recipe works just as well in a standard 12-hole muffin tin or an oval friand pan. The cakes will be a bit more petite—closer to the size of a traditional financier.  

Sandra scooping chocolate financier batter into a mini loaf pan, with a mixing bowl and smears of batter on the bench nearby.
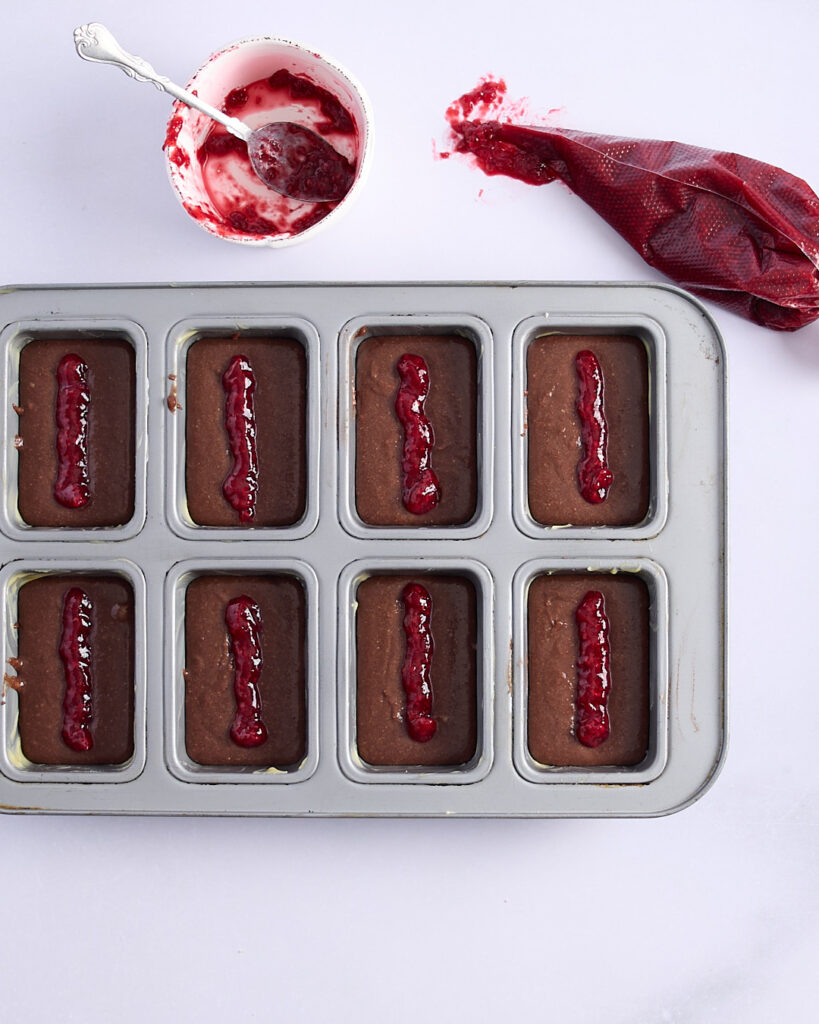
Low sugar raspberry jam piped neatly onto of each portion of chocolate financier batter,with a piping bag of jam and empty dish of jam with a spoon resting in it.

Piping the jam

I never used to think of piping bags as essential kitchen equipment. But now? I can’t imagine not having at least two sizes—medium and large—on hand. They take the mess out of so many recipes. 

For these chocolate raspberry mini cakes, piping the jam neatly down the centre—stopping just short of each edge—gives you that patisserie shop-window finish. You’ll only need about ¾ cup of jam, so a medium-sized piping bag is ideal. A zip lock bag will do the job too, or if you’re in a pinch, just spoon it gently across the top with a small teaspoon. 

If you’re using a round muffin tin or oval friand moulds, pipe a circle of jam right into the centre of each cake before baking. 

Serving and storing

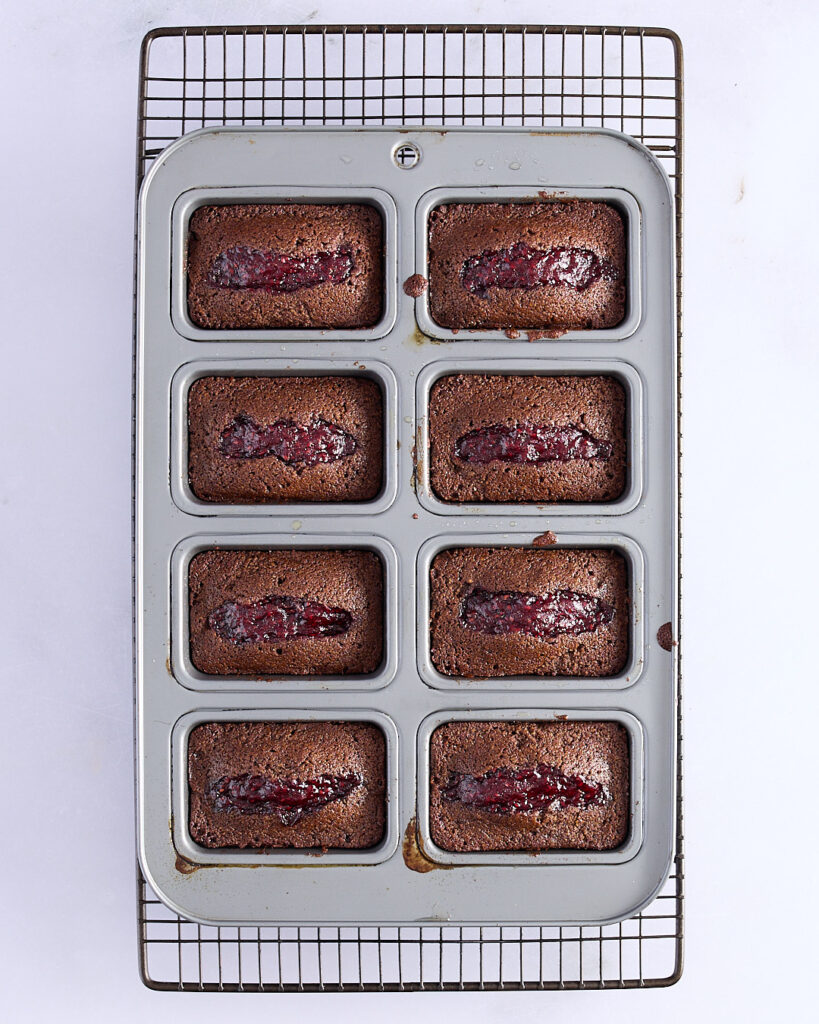
Freshly baked chocolate raspberry financiers in a mini loaf tin, resting on a cooling rack. Each cake has a visible raspberry jam centre.

These gluten free chocolate raspberry cakes are absolutely best fresh out of the oven—ideally as soon as they’re cool enough to lift from the pan without risking a fingertip. 

Financiers are known for that signature crisp-but-slightly-chewy crust, and while it’s glorious fresh, it starts to soften once stored in a sealed container or the fridge. That’s why these cakes are best eaten on the day you bake them. 

The good news? The batter can be made well in advance and happily waits in the fridge. So there’s no reason you can’t bake them just before serving. You can even have the raspberry jam ready in its piping bag—just keep the tip sealed until you’re ready to use it. 

A second swipe of jam piped on top just before serving brightens the flavour and adds a glossy finish to these gluten free mini cakes. 

Perfect with a cup of coffee!

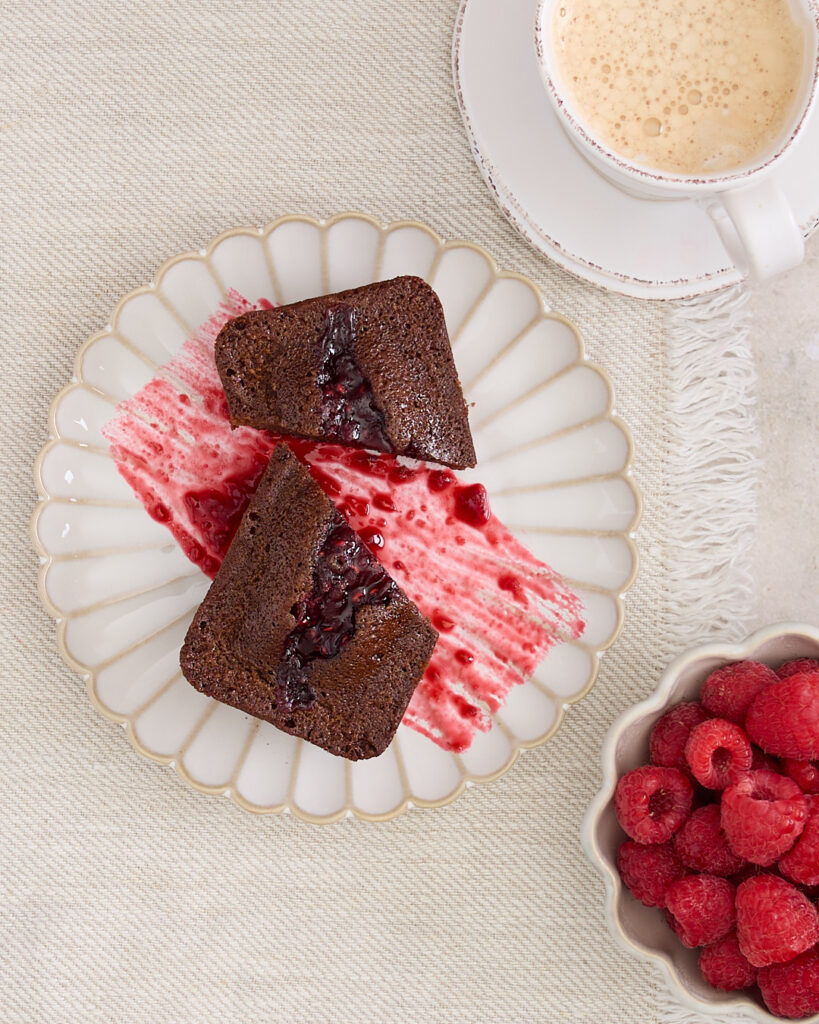
Gluten free chocolate and raspberry financier served with a cup of coffee and fresh raspberries. on a neutral tablecloth.

Once baked and cooled just enough to handle, these chocolate raspberry financiers are ready for their close-up. The jam settles into the centre as the cakes rise, creating that glossy seam of fruit through the middle. 

They need nothing more than a cup of coffee or a pot of tea. But by all means – keeping them in dessert territory, with a chefy swipe of jam on the plate and a few scattered fresh raspberries.  And be prepared for the inevitable request for a scoop of vanilla ice cream from the husband.   

Any why not check out my other raspberry chocolate bakes S’mores Tart – Chocolate Raspberry Marshmallow Tart and Pretty In Pink Devil’s Food Cake

Gluten Free Chocolate Raspberry Cakes

Traditionally, financiers are petite rectangular cakes made with nut meal and browned butter—naturally gluten free (vive la France indeed).
Admittedly, adding chocolate isn’t exactly traditional—but trust me, no one’s complaining once they’ve had a bite of these dessert-sized gluten free mini cakes. A centre of my low sugar raspberry jam adds just enough brightness to cut through the richness, making each mouthful feel balanced and indulgent.
Prep Time 30 minutes
Cook Time 35 minutes
Course Cake, Dessert, muffins, Snack
Cuisine Australian, French
Servings 8 people

Equipment

  • 8-hole mini loaf pan
  • Small saucepan
  • Heatproof jug or bowl
  • Large mixing bowl
  • Medium mixing bowl
  • Fine mesh sieve
  • Large whisk
  • #24 ice cream scoop (optional)
  • Medium piping bag (optional)

Ingredients  

  • 200 g butter (150g beurre noisette)
  • 250 g egg whites (room temperature)
  • 250 g almond flour
  • 45 g gluten free cornstarch
  • 25 g cacao powder
  • ½ teaspoon table salt
  • 250 g granulated white sugar
  • 50 g honey
  • ¾ cup low sugar raspberry jam

Instructions 

  • Assemble ingredients and equipment.
  • Brown the butter: In a small saucepan, cook the butter over medium-high heat until the milk solids turn golden and the butter smells nutty. Once browned (you should be left with just over 150g), immediately pour into a heatproof jug to stop the cooking. Set aside to cool slightly.
  • Mix the dry ingredients: In a large mixing bowl, weigh in the almond flour and sugar. Place a fine mesh sieve over the bowl, then weigh in the cacao powder, cornstarch, and salt. Sift these directly into the almond flour mixture, then whisk everything together until evenly combined.
  • Whisk the egg whites: In a medium mixing bowl, lightly whisk the egg whites just enough to break them up and loosen their texture. You're not building volume—just making them easier to incorporate.
  • Combine: Whisk the egg whites into the dry ingredients in three additions to avoid lumps. Then whisk in the honey. (Weighing it directly into the bowl saves you scraping out a measuring cup.)
  • Add the beurre noisette: Gradually whisk in the browned butter. Take your time here to create a smooth, glossy batter with no oily separation.
  • Rest the batter: Put the batter in a sealed container and refrigerate for at least 3 hours, preferably overnight. This helps hydrate the almond flour, firm up the butter, and improves the rise and texture of the baked cakes.
  • Portion the batter: When ready to bake, preheat the oven to 170°C conventional (150°C fan-forced). Grease an 8-hole mini loaf pan, using any leftover brown butter. Use a #24 scoop or roughly ¼ cup to portion the batter evenly into the pan.
  • Pipe the jam: Transfer ¾ cup of low sugar raspberry jam into a medium piping bag or zip lock bag with the corner snipped off. Pipe a neat line of jam down the centre of each mini cake, stopping just short of the edges.
  • Bake: Bake for 30-35 minutes, or until the cakes are risen, the tops spring back when lightly pressed, and a skewer inserted at the edge (not through the jam) comes out clean.
  • Cool and serve: Let the cakes cool in the pan for 10 minutes before transferring to a wire rack. Serve slightly warm or at room temperature. For extra jammy flair, pipe a second swipe of jam across the top just before serving.

Just before you cook with abandon…

Do I have to use a mini loaf pan? Not at all. While I’ve used an eight-hole mini loaf pan here, this recipe works just as well in a 12-hole standard muffin tin or an oval friand pan. The cakes will be a little smaller—closer to the size of a traditional financier. Remember to adjust the cooking time if the size of the cakes change.
If using a muffin tin or friand pan, how do I add the jam? Instead of piping a line, just pipe or spoon a small circle of jam into the centre of each portion of batter before baking.
Why chill the batter? Chilling the batter gives you a better rise, a crispier edge, and a more cohesive crumb—but it also helps keep that line of jam suspended near the top, rather than sinking into the base of the cake. It’s a small step that makes a big difference.
Can I skip the piping bag? Yes. A medium zip lock bag with the corner snipped off will do the job just fine. And if you don’t want to deal with bags at all, just spoon the jam across the top of the batter with a teaspoon—neatly, if you’re aiming for patisserie vibes.
What if I don’t have homemade jam? Use the best store-bought low sugar raspberry jam you can find—check the label for sugar content. Or press a few fresh raspberries into the batter before baking. It’ll still deliver that sweet-tart balance.
Can I make these in advance? The batter is very happy to rest in the fridge overnight, so you can make it the day before and bake them fresh when you’re ready to serve. You can even have the jam preloaded in the piping bag—just leave the tip sealed until it’s go time.
What can I do with the leftover egg yolks? Crème anglaise, curd, custard, or the richest quiche of your life. Personally, I vote for custard—no sharing required.
Made too much brown butter? First of all, good instincts. Extra beurre noisette is never a problem. Pour it into a jar, store it in the fridge, and use it anywhere you’d use melted butter—pasta, roasted veg, scrambled eggs, or drizzled over ice cream. Liquid gold never goes to waste.
Room temperature eggs: When baking cakes, it’s important that your eggs are at room temperature—this helps prevent the batter from splitting and gives you a smoother, more cohesive mix. I usually take them out the night before. If I forget (which happens), I put the eggs—shell on—in a bowl and cover them with hot water. They’ll come to room temperature in a few minutes.
Oven temperatures: Cakes are supposed to be baked in a conventional oven (top and bottom heat), as a fan forced oven (convection) dries the cake out. All well and good if your oven maintains an even temperature on that setting, mine does not. I use the fan forced setting on a lower temperature, as this gives me a more even heat distribution in my oven. I don’t believe in oven thermometers as they are notoriously inaccurate. But you will know there’s a problem when two cakes on the same rack (on the conventional setting) bake at very different rates. The only way you can accurately test your oven temperature is with a laser temperature gun (and, yes, I have one!).
Testing for doneness: With a dense batter like this, it’s important not to open the oven too early. Start checking at around 30 minutes—no sooner. The cakes are done when they’ve risen and a skewer inserted at the edge (not through the jam) comes out clean. If you have a Thermapen, the cakes will be ready when they reach an internal temperature of 93–94°C.
Keyword chocolate and raspberry jam muffins, chocolate raspberry financier, gluten free financier, gluten free mini cakes

2 Responses

  1. 5 stars
    Thank you for showing me how to make brown butter Sandra, I have never learnt properly before and it was a great success! Just have to make myself not walk away…

  2. 5 stars
    Thank you to sharing the recipe. I made chocolate financier for the kids event and everyone love it. ❤️

Leave a Reply

Your email address will not be published. Required fields are marked *

Recipe Rating


Hi, I'm Sandra!

I live by the words of Harriet Van Horne and I will be exploring every possible way to bring Harriet’s words to life in my kitchen.

Recipes

Discover delicious featured food recipes! From quick meals to gourmet delights, Sandra offer inspiring dishes for every occasion. Explore, cook, and enjoy flavorful creations today.

You might also like..

Peppermint Bark Shortbread Biscuits

Pretty In Pink Devil’s Food Cake

Blueberry Rosemary Jam

Whole Lemon Poppy Seed Cake

Subscribe

Subscribe to my newsletter for a chance to win a FREE APRON (drawn monthly) as well as cooking tips, recipes, offers and exclusive content.

"*" indicates required fields