Recipes

Pretty In Pink Devil’s Food Cake
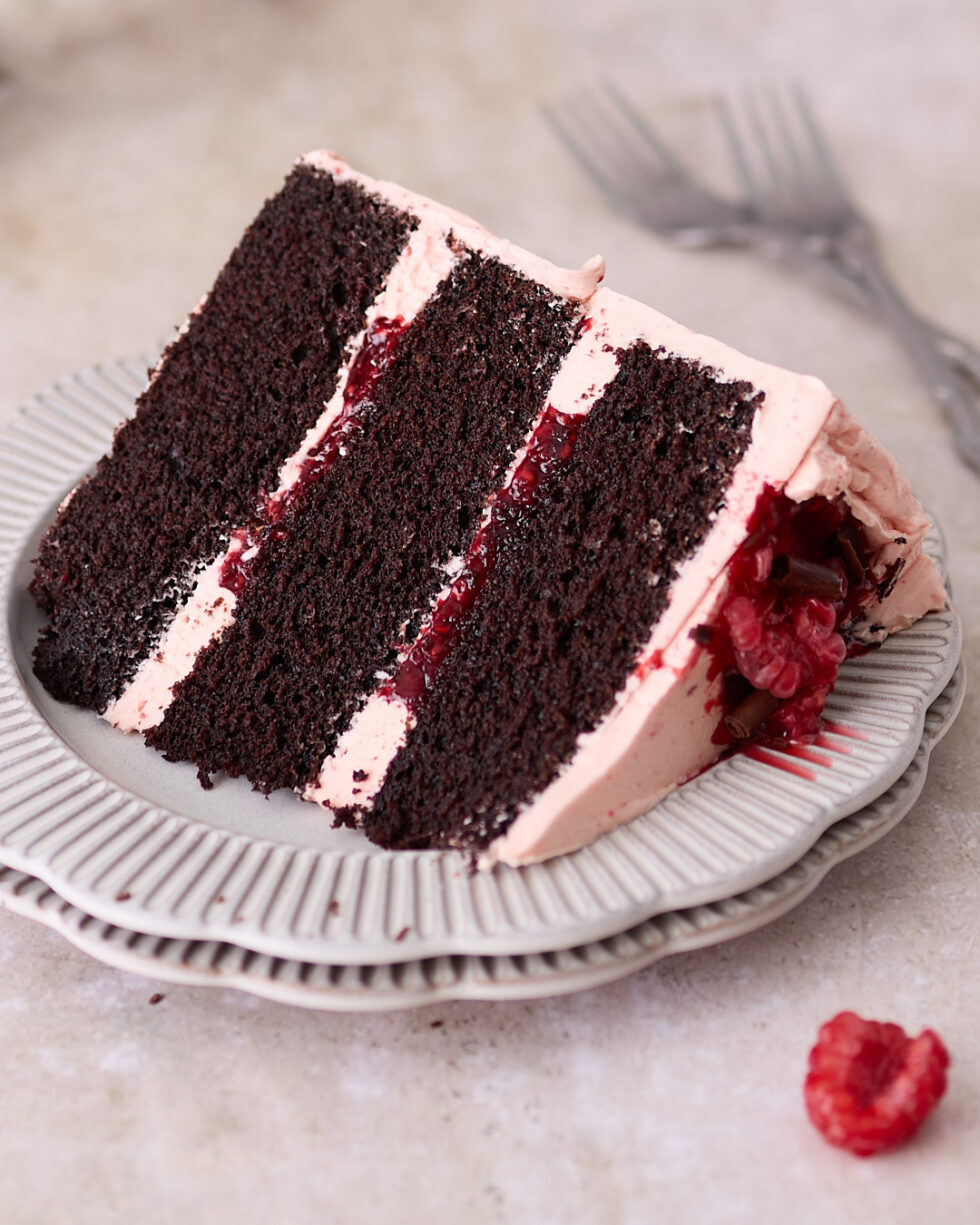
Slice of three-layer chocolate cake with raspberry filling and pink buttercream on a plate, showing moist devil’s food cake layers and fresh raspberries on the side.

The 1970s was the decade when food met marketing—and marketing won. My mum was a single parent who fully embraced the why bake from scratch when you can reach for a box? approach. 

Duncan Hines or Betty Crocker—which packet mix made the best birthday cake? It was a hotly contested topic on the schoolground any time a party was looming. We were a Duncan Hines household. And every year, when it came time to choose our birthday cake flavour, there was never any question. For me, it was Devil’s Food Cake. Every time. No hesitation. 

And full fall-on-your-sword disclosure—I’ll admit it. My own kids had more than their fair share of Duncan Hines birthday cakes too. When you’ve got three kids under three, convenience isn’t just appealing—it’s survival. 

It wasn’t until my obsession with the Great British Bake Off took hold that I finally ditched the packet mix and embraced the glory of baking from scratch. And, well, those who know me know how that turned out—me (and my cakes) showing up on Season 6 of The Great Australian Bake Off. The rest, as they say, is history. 

My post-Duncan Hines world of chocolate cake

When I look back on my Duncan Hines Devil’s Food Cake days, all I can see is me sprinting to the fridge for a huge glass of milk—trying to wash down a hefty slice of rich chocolate cake smothered in ultra-sweet chocolate American buttercream. 

So I’ve reimagined what a special occasion chocolate cake looks like to me now, armed with my hard-earned lifestyle TV cake credentials (you know, the kind that don’t come with a diploma—and come with a touch of unjustifiable confidence). The devil’s food cake recipe still sits at the heart of my dream birthday cake, but I’ve elevated it—added some pretty-in-pink energy, softened the sweetness, and given it a 2025 glow-up. A cake that still celebrates chocolate, but with a lighter hand and a fresher, more elegant finish. 

Gone is the cloying chocolate-on-chocolate overload. These days, I want contrast. I want balance. I want something that says yes, it’s still a chocolate cake—but it’s grown up a bit

So instead of more chocolate frosting, I’ve gone for layers of sharp raspberry jam and a silky raspberry Swiss meringue buttercream. And not just any jam—I use my low sugar raspberry jam recipe which keeps things bright and punchy without tipping the whole cake into sweetness overload. The tartness cuts through the richness of the cake, while the buttercream—pale pink, glossy, and ridiculously smooth—gives it that perfect finish. 

Think of it as the 2025 version of a birthday cake flex. All the nostalgia, just with better taste (literally and otherwise). 

Ingredients

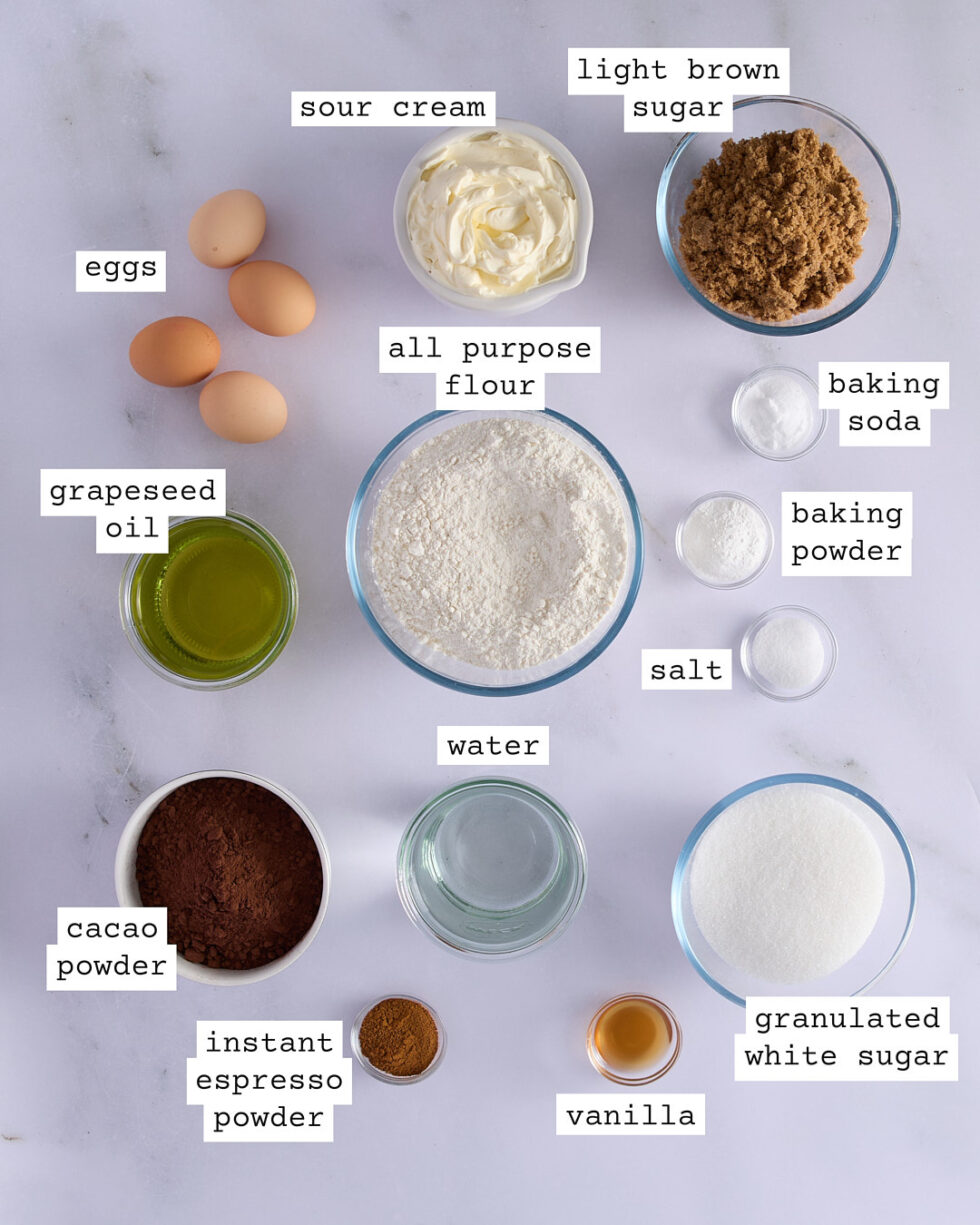
Devil’s food cake ingredients​

Ingredients for a three-layer devil’s food cake recipe laid out on a marble surface, including flour, cocoa powder, espresso powder, sugars, eggs, sour cream, grapeseed oil, vanilla, and leavening agents.

Espresso powder vs instant coffee

This devil’s food cake recipe includes espresso powder for a reason. It boosts the chocolate flavour without making the cake taste like coffee. If all you’ve got is instant granules, they’ll still do the job—just know the flavour won’t be quite as smooth or deep. Either way, they steep with the Dutch-processed cocoa to bring out that rich, bittersweet intensity this moist devil’s food cake is all about. 

Why Dutch-processed cocoa is worth it

This isn’t the place for skimping on the cocoa powder with no name brands. Dutch-processed cocoa powder gives this three-layer chocolate cake its signature dark crumb and rounded, complex flavour. It also bakes up beautifully with the baking powder in this recipe, helping keep the texture soft and luxurious. Natural cocoa will work but expect a sharper taste and lighter colour—not quite the vibe of a chocolate raspberry celebration cake. 

What if I don’t have grapeseed oil?

I use grapeseed oil here for its lightness and neutral flavour—it doesn’t compete with the chocolate or the raspberry filling. But if you don’t have it, don’t panic. Canola, rice bran or sunflower oil will all work well in this devil’s food cake with raspberry buttercream. Just steer clear of olive oil unless it’s very mild—you want the raspberry Swiss meringue buttercream to shine, not fight with the grassy notes of EVOO.

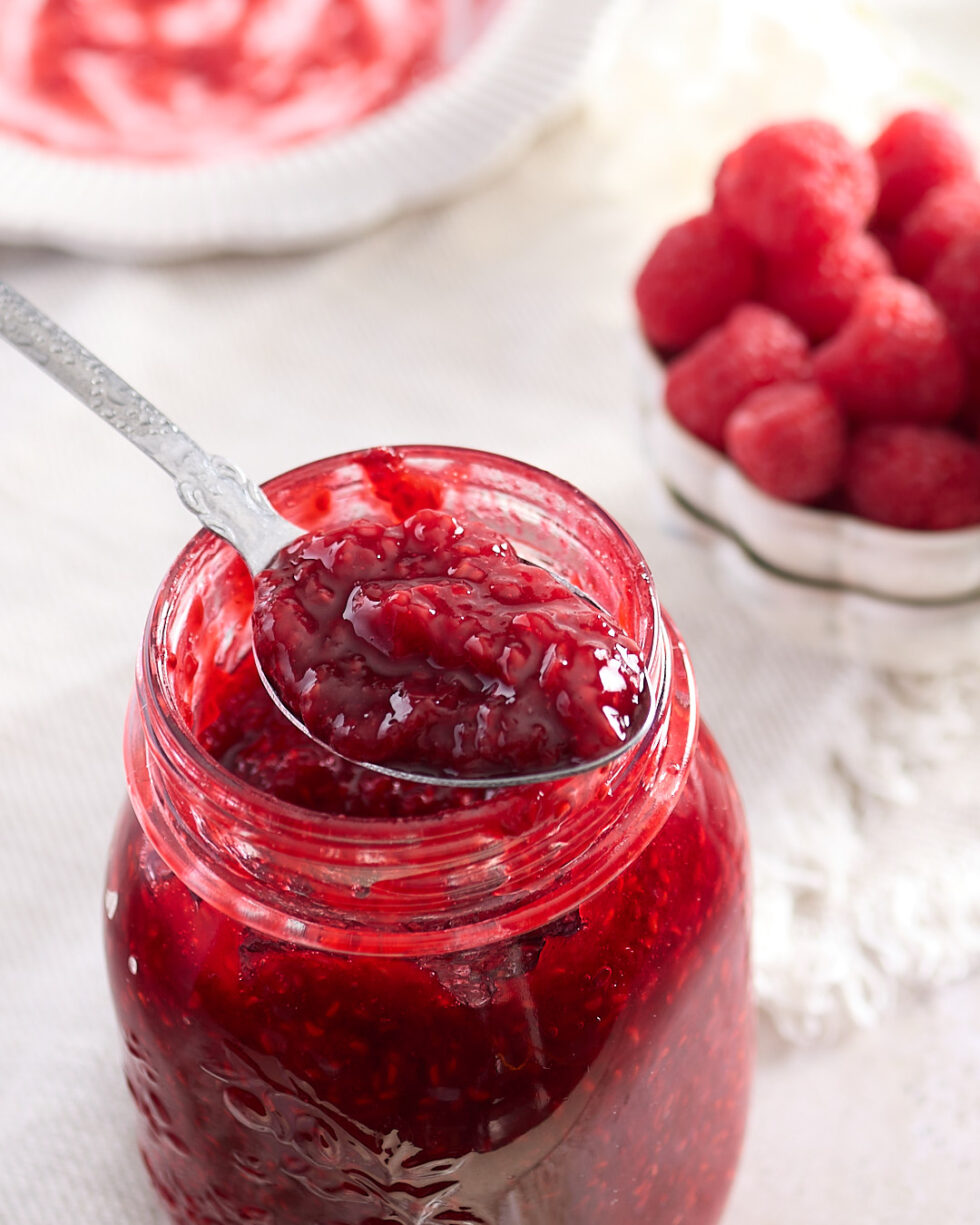
Raspberry jam

A spoon scooping vibrant raspberry jam from a glass jar, with a small bowl of fresh raspberries and a white dish blurred in the background.

Why I use my raspberry jam (you’ve got to hear me out on this one)

The raspberry jam layer in this devil’s food cake recipe isn’t just there to look pretty—it’s doing serious work. It cuts through the richness of the chocolate cake and buttercream, bringing sharpness and contrast to what is otherwise a very decadent dessert. It’s the secret to turning a rich chocolate layer cake into a well-balanced chocolate raspberry celebration cake. 

I use my own low sugar raspberry jam, which captures the bright, tart flavour of fresh raspberries without tipping the cake into sugar overload. It’s a small batch recipe—around one litre total—and doesn’t need any special equipment: just store it in the fridge or freezer. No preserving jars or canning needed. 

For this three-layer chocolate cake, you’ll need just under a cup—about 200ml. Any leftover jam will keep in the fridge for a couple of weeks or freeze it for your next round of baking. It’s also brilliant in my gluten free chocolate raspberry mini cakes

Shortcut options

Short on time? You can absolutely use a good-quality raspberry jam from the supermarket. Just check the label—some are packed with sugar or thickeners that can overpower the flavour of the cake and buttercream. Look for one with raspberries at the top of the ingredients list and a sharp, natural taste that won’t fight the chocolate. 

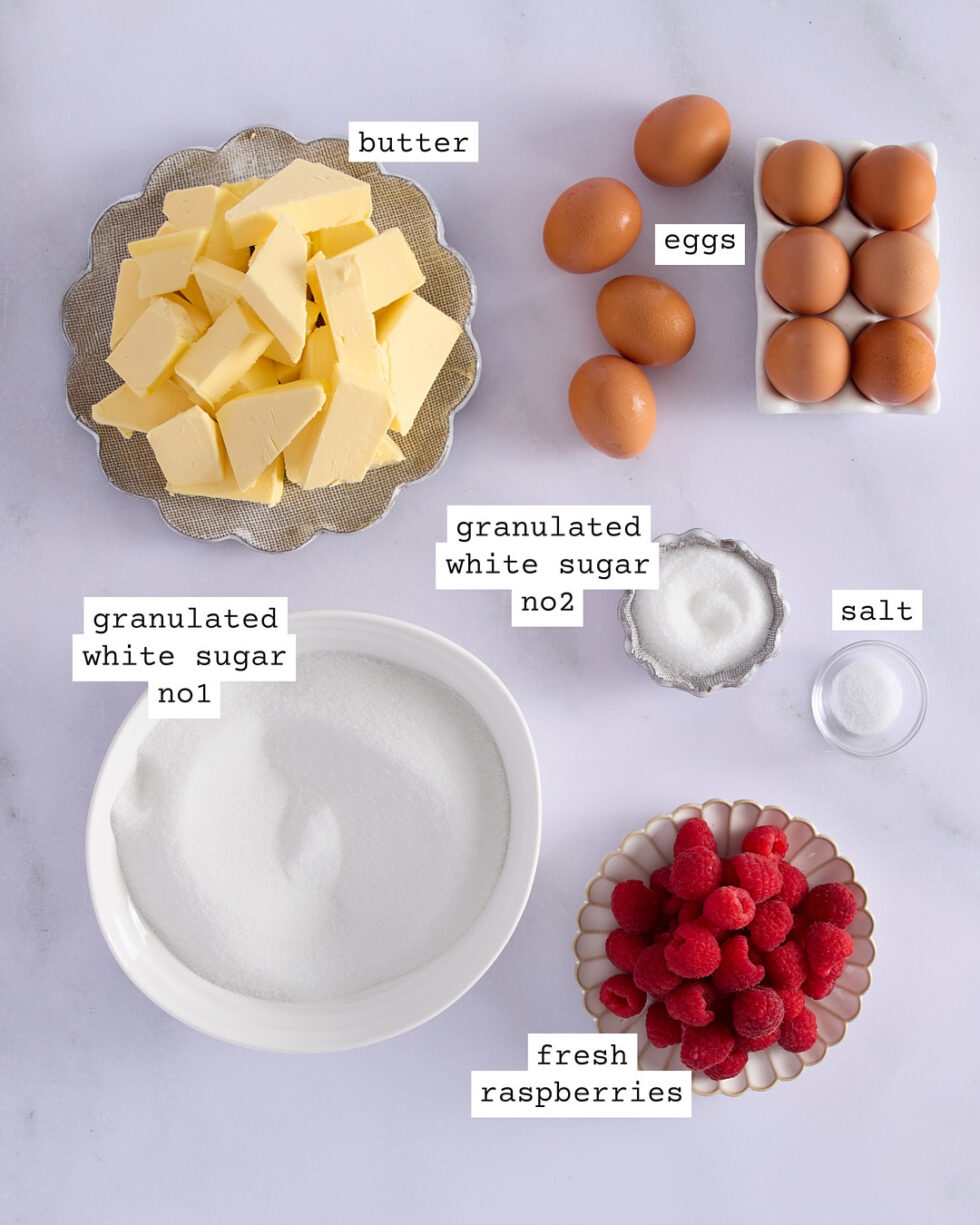
Raspberry Swiss meringue buttercream ingredients

Ingredients for raspberry Swiss meringue buttercream laid out on a marble surface, including eggs, unsalted butter, fresh raspberries, granulated white sugar, and salt.
  • 250ml egg whites (9-10 large eggs) 
  • 400g granulated white sugar 
  • 675g unsalted butter 
  • 200g fresh raspberries 
  • 3 teaspoons granulated white sugar 
  • Pinch salt 

This raspberry Swiss meringue buttercream is what takes this chocolate raspberry birthday cake from nostalgic to next-level. It’s silky, not too sweet, and stable enough to hold up on a celebration cake. The fresh raspberries bring brightness and natural flavour (no need for artificial colouring or flavouring), while the whipped meringue base keeps everything light and luscious. 

You’ll need egg whites, sugar, butter, and fresh raspberries—plus a pinch of salt to balance the sweetness. It’s worth the extra step for the texture alone, especially when paired with the rich layers of moist devil’s food cake and the punch of raspberry jam. 

Swiss meringue buttercream is famously forgiving once you get the hang of it, and unlike traditional buttercream, it won’t coat your mouth with sugar. For this pink and chocolate layer cake, it’s the dream finish—both pretty and party-worthy. 

And before you ask—no, this isn’t the time to swap in frozen raspberries. They’ll water down the buttercream and dull the colour. You want fresh raspberries here for their brightness, their texture, and that clean, sharp flavour that balances all the richness in this special occasion chocolate cake. 

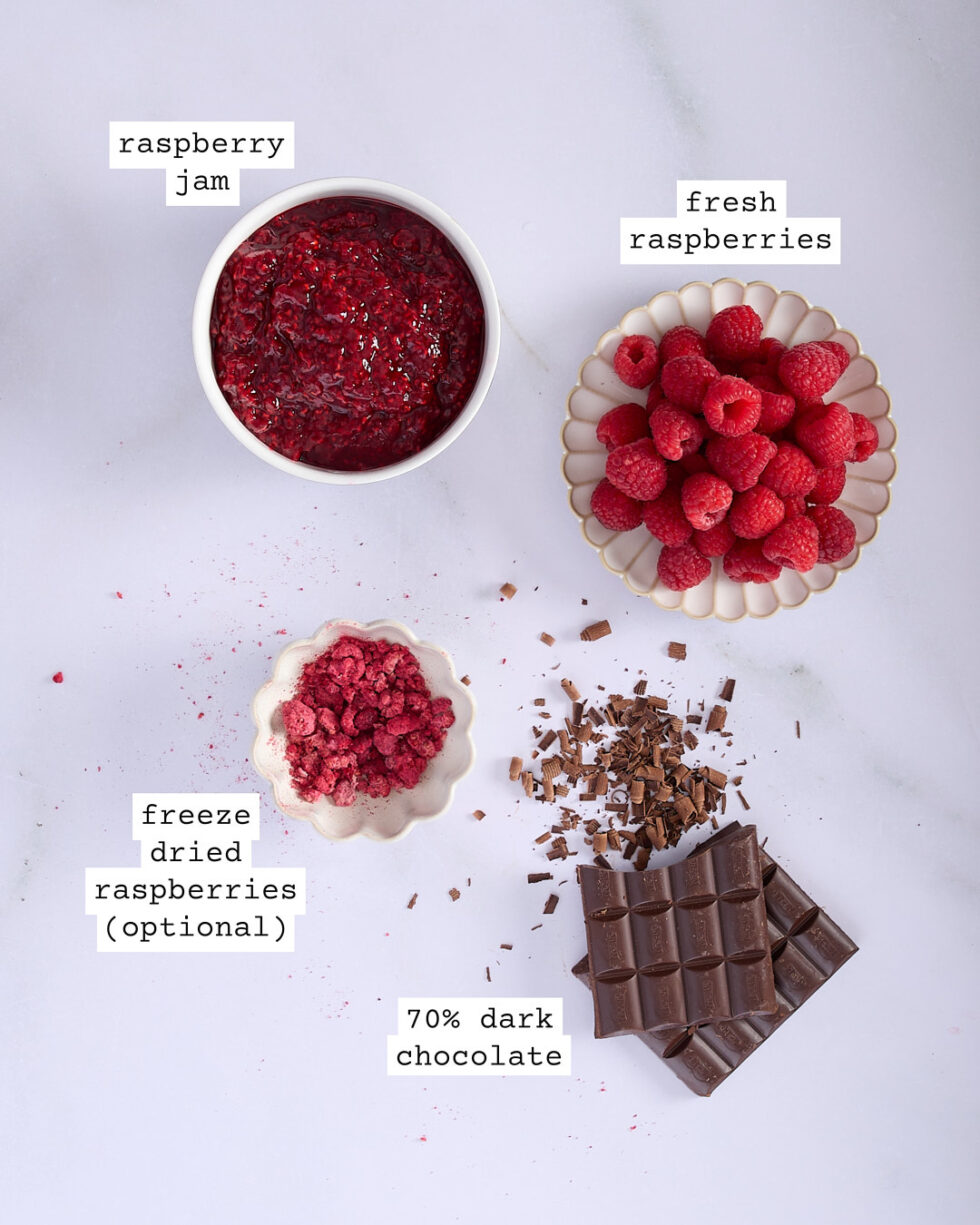
Decorating this party-worthy chocolate cake ingredients

You can decorate this chocolate raspberry celebration cake as much—or as little—as you like. The raspberry Swiss meringue buttercream doesn’t need to be perfectly piped or smoothed; a few confident swirls with a spatula and it’ll still look stunning. But if you’re in the mood for a full show-stopper, go ahead and get those buttercream edges sharp, stack your layers with precision, and decorate to match the tone of your celebration. 

I’ve suggested fresh raspberries, dark chocolate shards, raspberry jam, and freeze-dried raspberries for texture and colour—but between us, I left out the freeze-dried ones in the version I shot for the website. And honestly? No one missed them. The beauty of this pink and chocolate layer cake is how flexible the finish can be.  

The how to of devil’s food cake without the backing of Duncan Hines

This moist devil’s food cake might not come with a Betty Crocker guarantee, but it bakes up like a dream—rich cocoa crumb, balanced sweetness, and absolutely no packet mix aftertaste. The secret? A solid recipe, proper prep, and a few baker’s tricks that turn this chocolate layer cake recipe into something truly celebration-worthy.

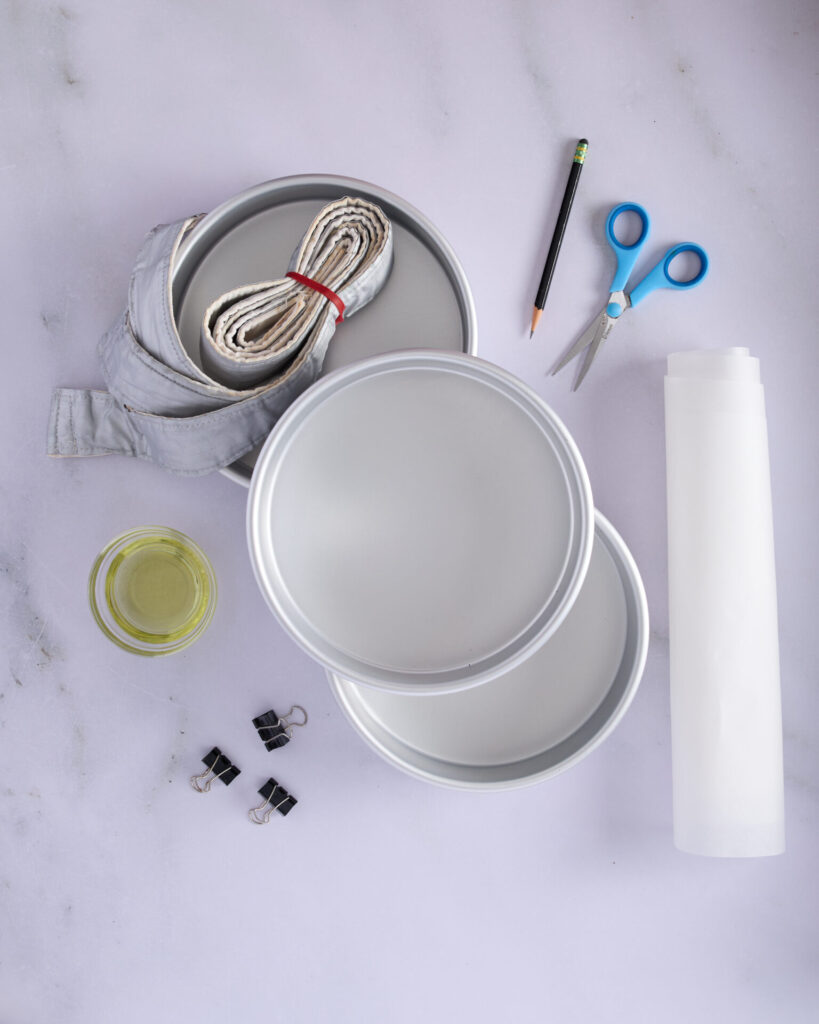
The showstopper finish starts with your cake pans

Cake prep tools for baking a three-layer chocolate cake, including cake pans, scissors, baking strips, baking paper, grapeseed oil, and bulldog clips.
Cake prep equipment.
Three prepared cake pans wrapped with soaked baking strips and clipped with bulldog clips, ready for baking a devil’s food cake.
Three prepared cake pans.

The road to a party-worthy chocolate cake starts before the batter even hits the tin. Sharp edges, even layers, and level tops don’t come from wishful thinking—they come from well-prepped pans. 

In this devil’s food cake recipe I use three 8-inch (20 cm) cake tins, greased and lined with baking paper. Then I wrap each one in a water-soaked baking strip (secured with a bulldog clip) to keep the layers flat and prevent doming. If you don’t have baking strips, cake collars—or even folded damp paper towel inside an aluminium foil collar—can work in a pinch. They’re totally optional, but they do help you get that smooth, soft finish without the need for trimming.

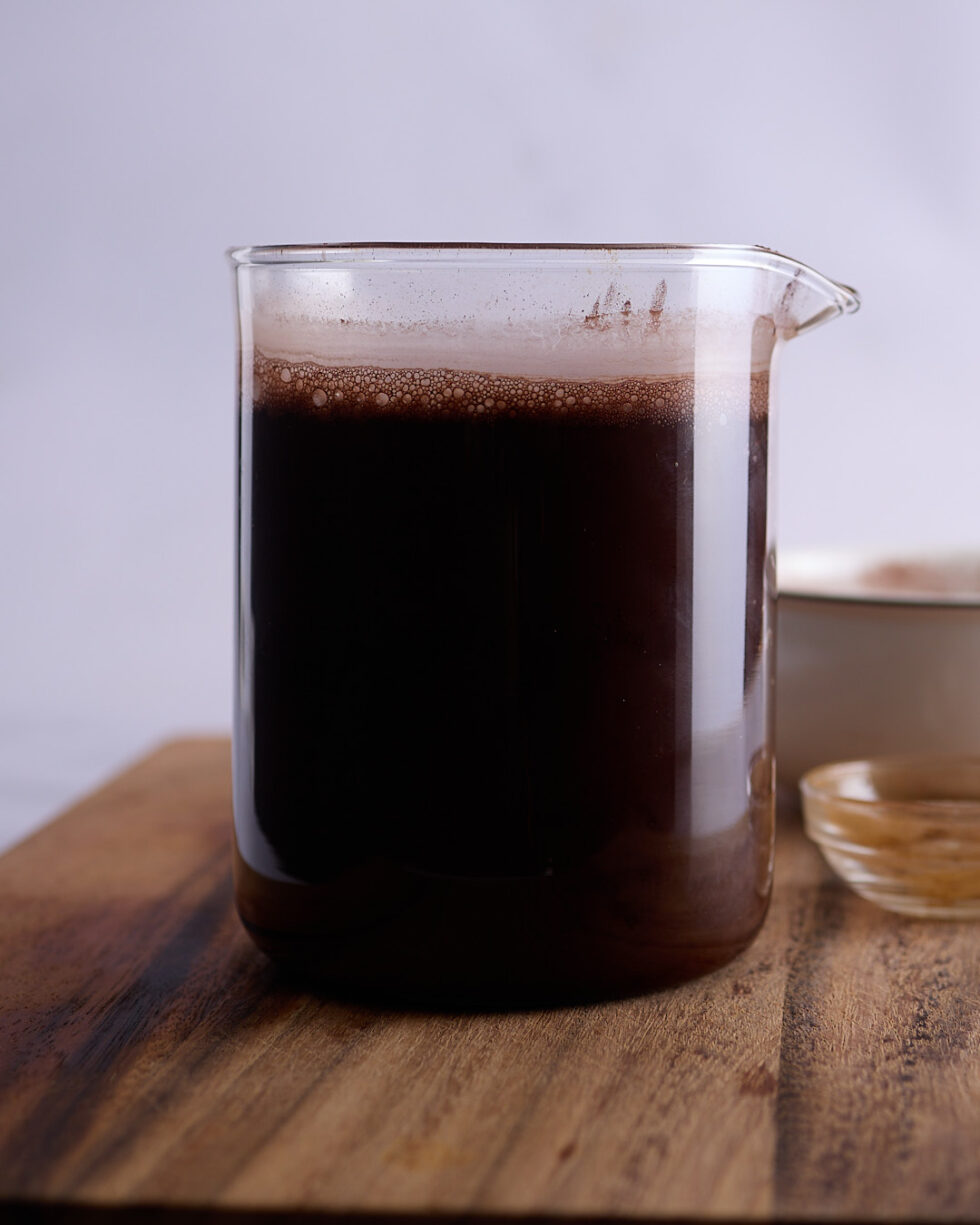
Why bloom cacao powder and espresso powder in boiling water?

Glass jug filled with bloomed cocoa powder and espresso powder in boiling water, resting on a wooden board as part of a devil’s food cake preparation.

Assemble the devil’s food cake ingredients.   

Blooming cocoa powder and espresso powder in boiling water helps unlock a deeper, more complex flavour and contributes to the moist texture that makes a devil’s food cake recipe so special. 

Cocoa powder contains compounds that give chocolate its bitter, aromatic edge. When mixed with boiling water, those compounds dissolve and intensify, giving you a richer, more full-bodied result. The espresso powder works the same way—it adds roastiness and depth without making the cake taste like coffee. 

It also improves texture and consistency. In this three-layer chocolate cake, the cocoa and espresso powder are fully hydrated during the bloom. That means no dry pockets or streaks, and a smoother, more even crumb. 

And it enhances moisture. Blooming the cocoa helps it fully incorporate into the liquid, locking in moisture and giving you that tender, party-worthy chocolate cake finish. 

While the chocolate is blooming preheat oven to 175°C conventional and 155°C fan forced.

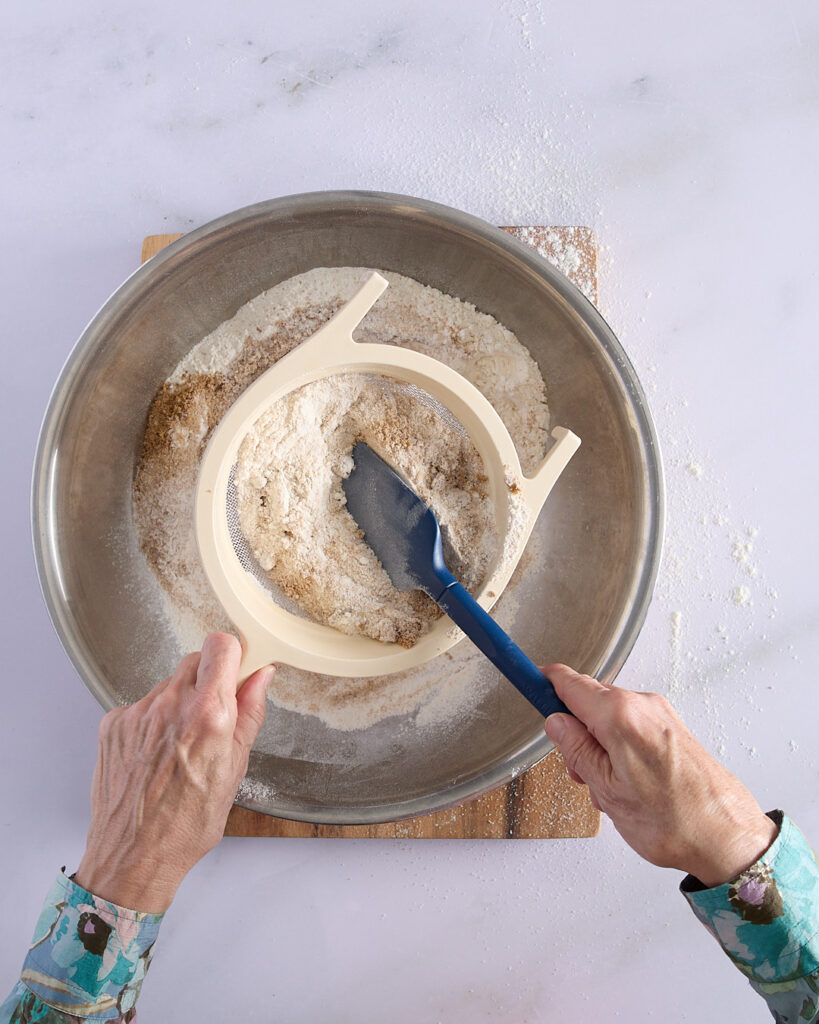
Take the time to sift the dry ingredients – you’ll be glad you did

While the chocolate and espresso mixture cools to room temperature, sift the flour, baking powder, baking soda, salt, white sugar, and brown sugar into a large mixing bowl. I use a coarse sieve here—pushing brown sugar through a fine one is an exercise in frustration. 

Keep scooping up the sifted mixture and passing it through the sieve until everything is well combined and the texture is even and fine—think soft sand with no lumps. It takes an extra minute, but it’s worth it. 

This step makes a big difference. When your dry ingredients are evenly mixed and lump-free, it’s much easier to incorporate the wet ingredients without overmixing the batter—key to getting that tender, moist devil’s food cake crumb.

Sandra sifting flour, brown sugar, white sugar, and leavening agents through a coarse sieve into a large metal mixing bowl while preparing a devil’s food cake.

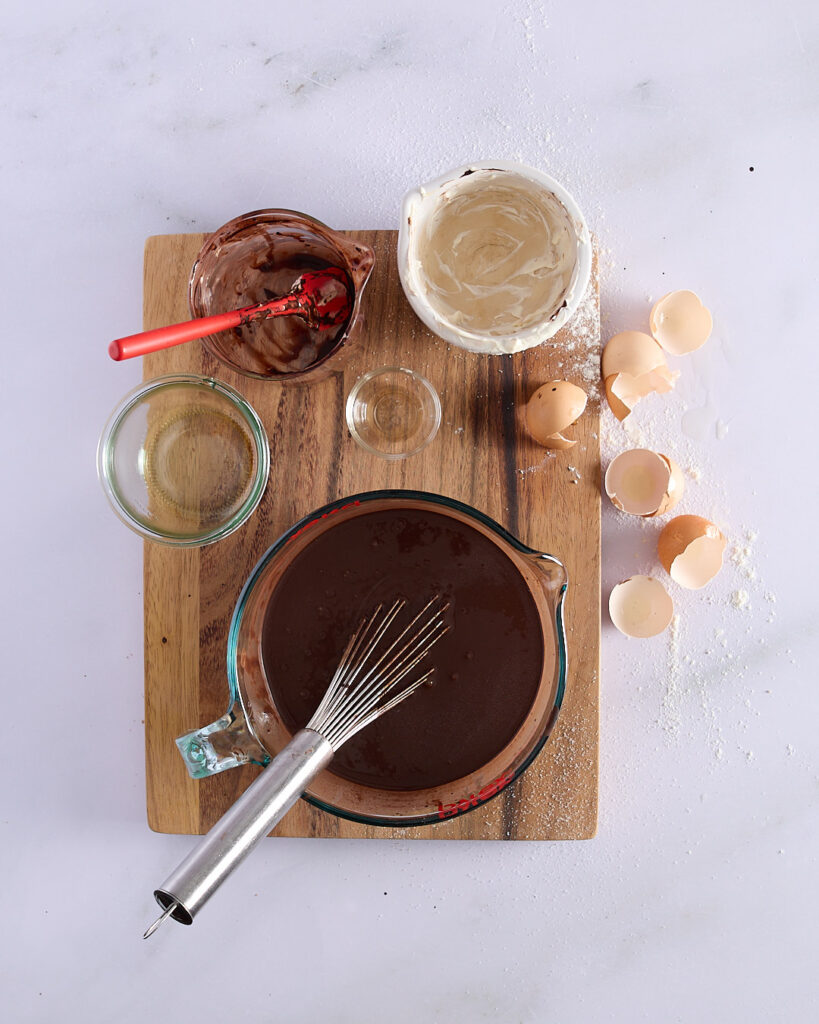
Combine all the wet ingredients

Overhead view of whisked wet ingredients in a glass jug for devil’s food cake, surrounded by empty bowls, eggshells, and measuring cups on a wooden board.

In a large 2–3 litre jug, start preparing the wet ingredients. Add the sour cream, then whisk in 1 egg at a time, beating well after each addition. Next, add the oil and vanilla extract and whisk until smooth. 

Finally, pour in the bloomed cocoa and espresso mixture and whisk until thoroughly combined. You’re now ready for the final step in this chocolate layer cake recipe—bringing the batter together. 

Don’t ruin all your hard work

If you’ve read this far, you’re clearly aiming high. You’re chasing that perfectly moist devil’s food cake with a soft, light crumb and an impressive rise. And you’re almost there—because the effort you’ve already put into building the right base matters. You’ve nailed the blooming, the sifting, the mixing.  

Now it all comes down to one thing: do not overmix when you bring the dry and wet ingredients together. 

This chocolate layer cake recipe uses water as its main fluid—and that makes not overmixing even more important. Water is uniquely effective at hydrating gluten-forming proteins without interference. That’s brilliant when you want structure, like in a loaf of bread. But for a special occasion chocolate cake? Not so much. 

Gently controlling gluten development is exactly why this devil’s food cake recipe is made by hand—not in a stand mixer.

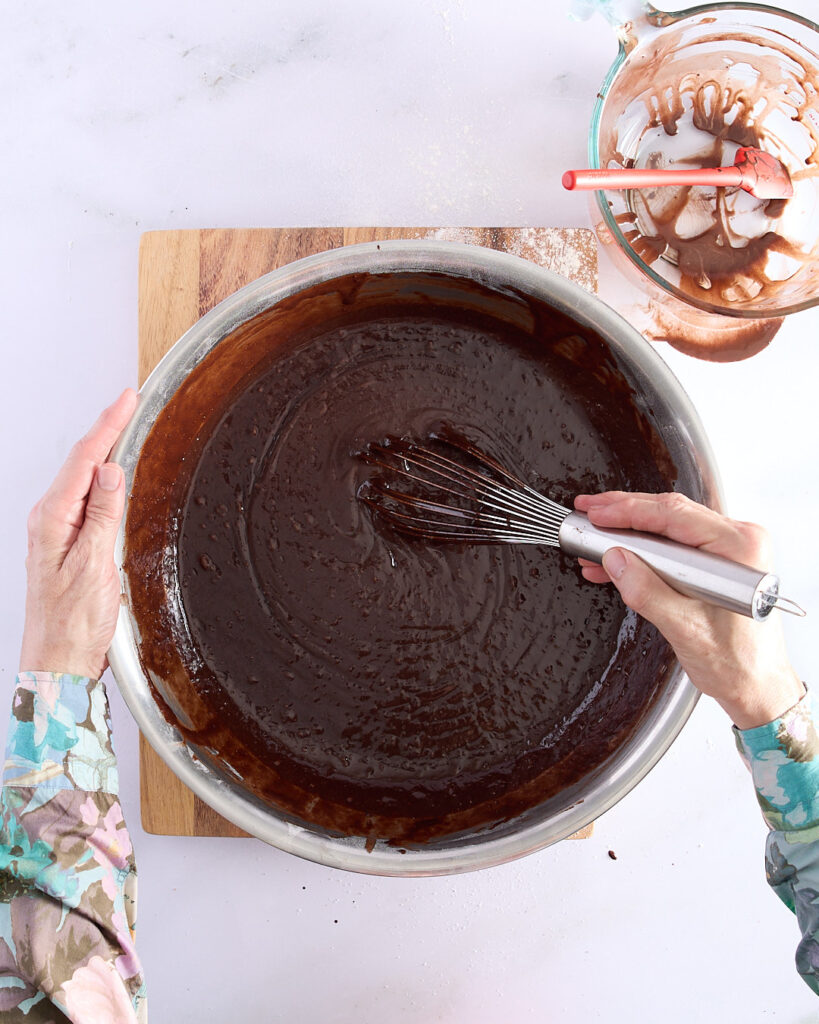
Sandra gently whisking chocolate cake batter in a large mixing bowl, showing the smooth, glossy texture of a fully combined devil’s food cake batter. A jug with leftover mixture sits nearby on a wooden board.

Add the wet ingredients to the dry in three batches. Use a large balloon whisk to incorporate each one and add the next as soon as the liquid is mostly absorbed. After the final addition, give it one last gentle whisk and stop. 

The finished batter should be smooth, glossy, and dark brown—ready to deliver that soft crumb and tender bite you’re aiming for. 

Divide the batter evenly between the three prepared cake pans. I prefer to weigh it out—aim for around 790 to 800 grams per pan for even layers. Gently tap the pans on the bench a few times to release any trapped air bubbles. 

A few cracks? Totally fine

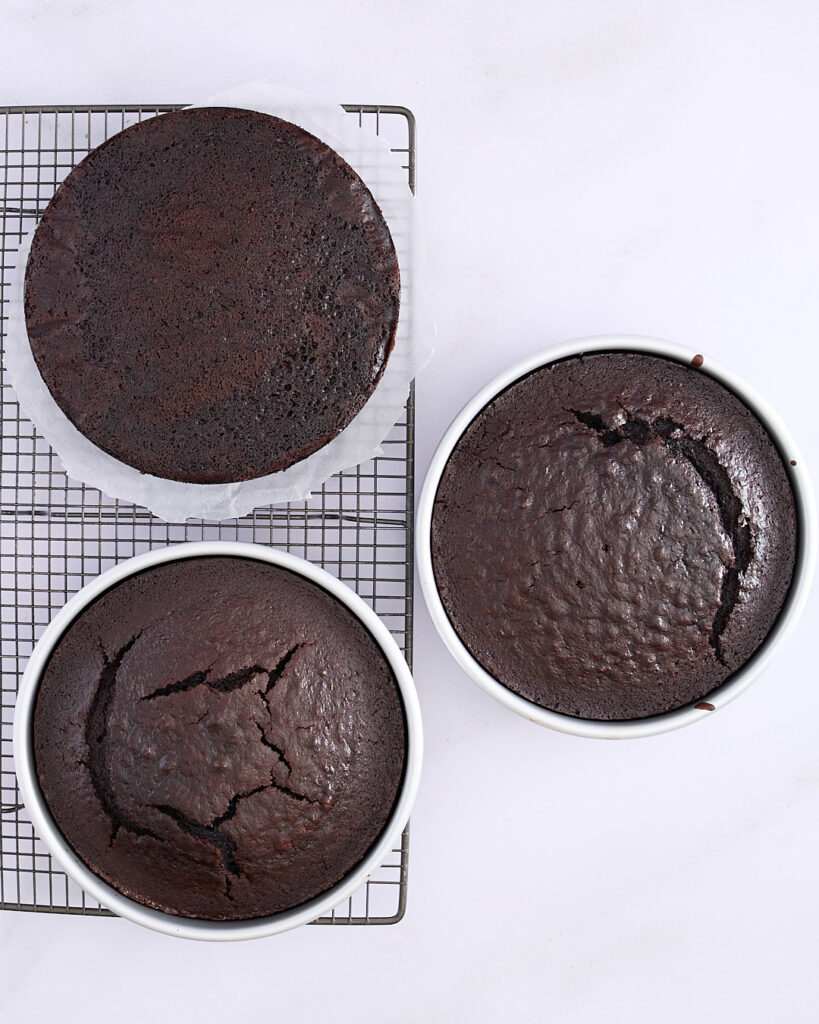
Overhead view of three baked devil’s food cake layers, two still in tins with surface cracks and one inverted on a cooling rack, showing the texture and colour of a rich chocolate layer cake.

Bake at 175°C conventional or 155°C fan-forced. Your bake time will depend on whether you’re using baking strips or cake collars. With collars, bake for 40 to 44 minutes, but start checking at 35. Without collars, expect 25 to 28 minutes. 

Dark chocolate cakes—especially devil’s food cake—are notoriously tricky to check for doneness. There’s no visual colour cue, and water-based batters seem to go from undercooked to overbaked in a matter of seconds. Keep a close eye on things toward the end and have a cake tester or toothpick ready. It should come out clean, with just a few moist crumbs clinging to it. 

My layers usually come out with a few cracks—and as long as they keep to themselves near the top, I’m still calling it a complete success. Cracks are virtually inevitable with water-based batters that rise quickly in the oven. Cake collars help slow that rise and can reduce cracking, but they don’t eliminate it entirely. 

What matters is that the crumb stays tender, the texture moist, and any surface issues can be trimmed before stacking. I’ll show you exactly how. 

Raspberry Swiss meringue buttercream

For me, nostalgia bakes taste best when they’ve been tempered by modern technique. In this chocolate raspberry celebration cake, I’ve evoked my favourite childhood birthday flavour—devil’s food cake—and taken it in a new direction.  

Gone is the traditional chocolate-on-chocolate finish. In its place: a fresh raspberry Swiss meringue buttercream. It’s a low sugar, meringue-based buttercream that cuts beautifully through the richness of the chocolate layers, bringing a clean pop of fresh raspberry purée.  

And really, what better way to make a party-worthy chocolate cake than by delivering it as a pretty-in-pink cake?!

Raspberry purée

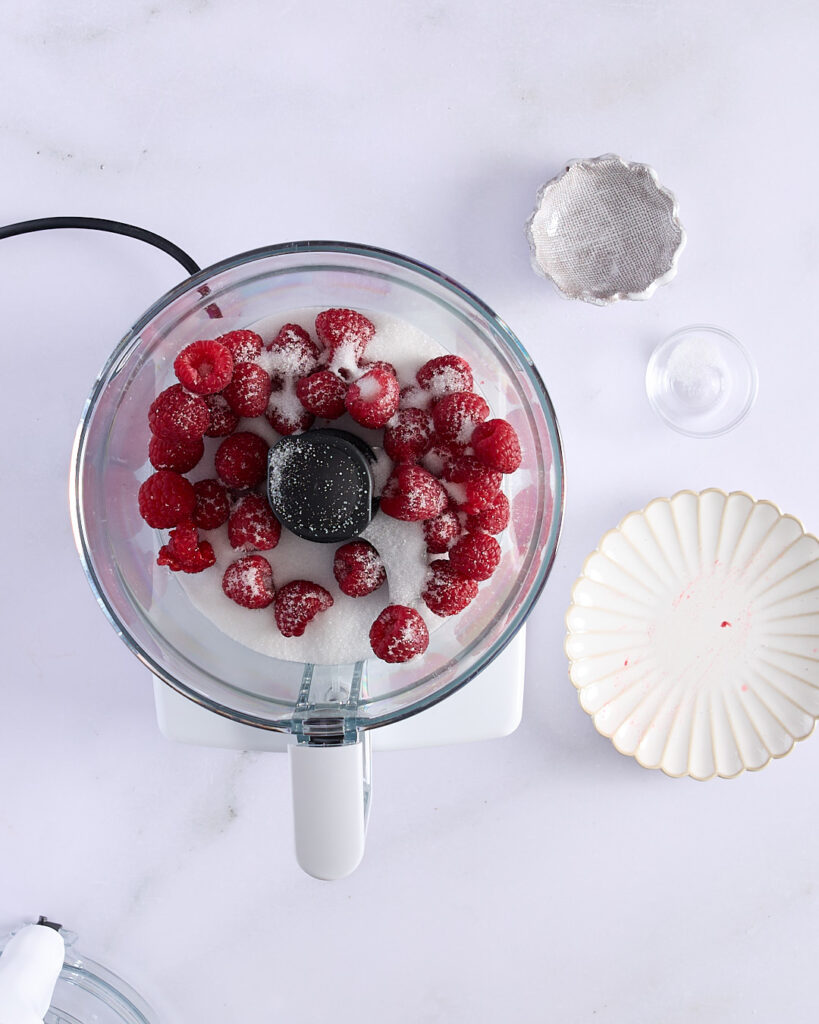
Fresh raspberries, granulated white sugar, and a pinch of salt in a food processor bowl, ready to be blended into raspberry purée for Swiss meringue buttercream.

I use a small food processor to make the raspberry purée in batches, but an immersion blender or smoothie blender works just as well.  

Add 200g of fresh raspberries, 3 tablespoons of granulated white sugar, and a pinch of salt to the blender. Process until smooth, then set aside to add at the final stage of your Swiss meringue buttercream.  

You can pass the purée through a sieve if you’re not a fan of seeds or want a smoother finish to the buttercream. Personally, I like the texture the seeds bring. There’s something about that slightly rustic edge—it leans into relaxed sophistication, especially when there are a few imperfections to hide in the finished result. 

Swiss meringue technique

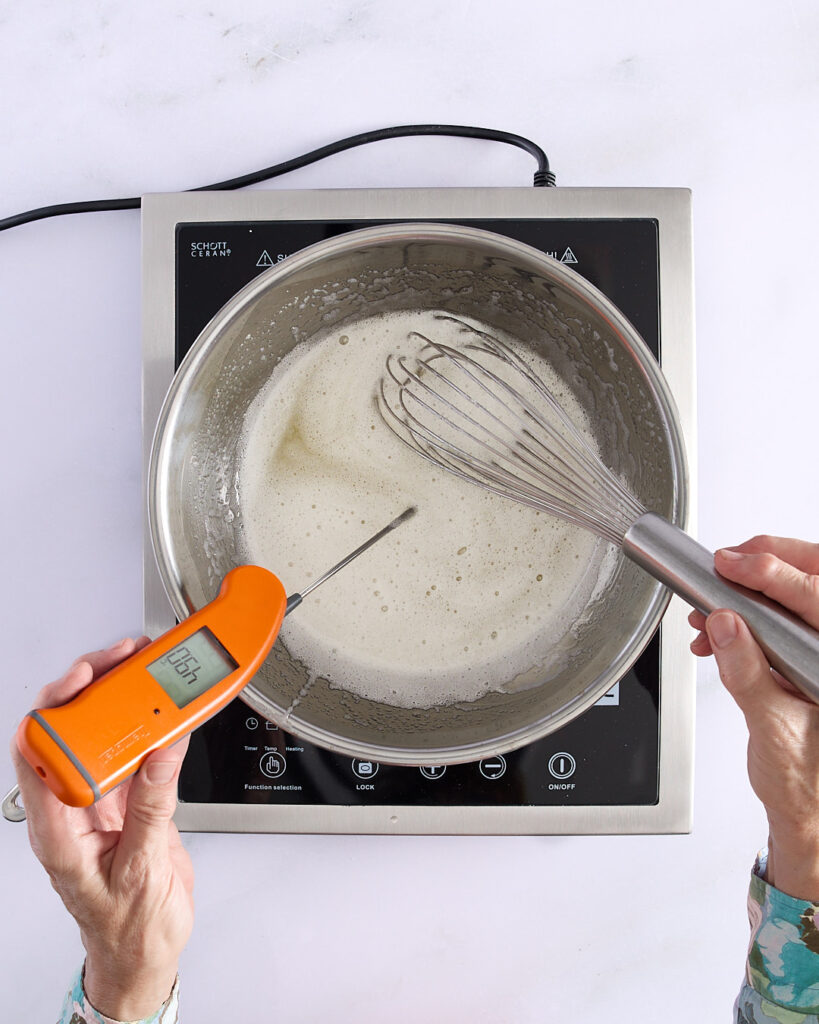
Sandra whisking egg whites and sugar in a metal bowl over a double boiler with a thermometer reading 70°C, step one in making Swiss meringue buttercream.
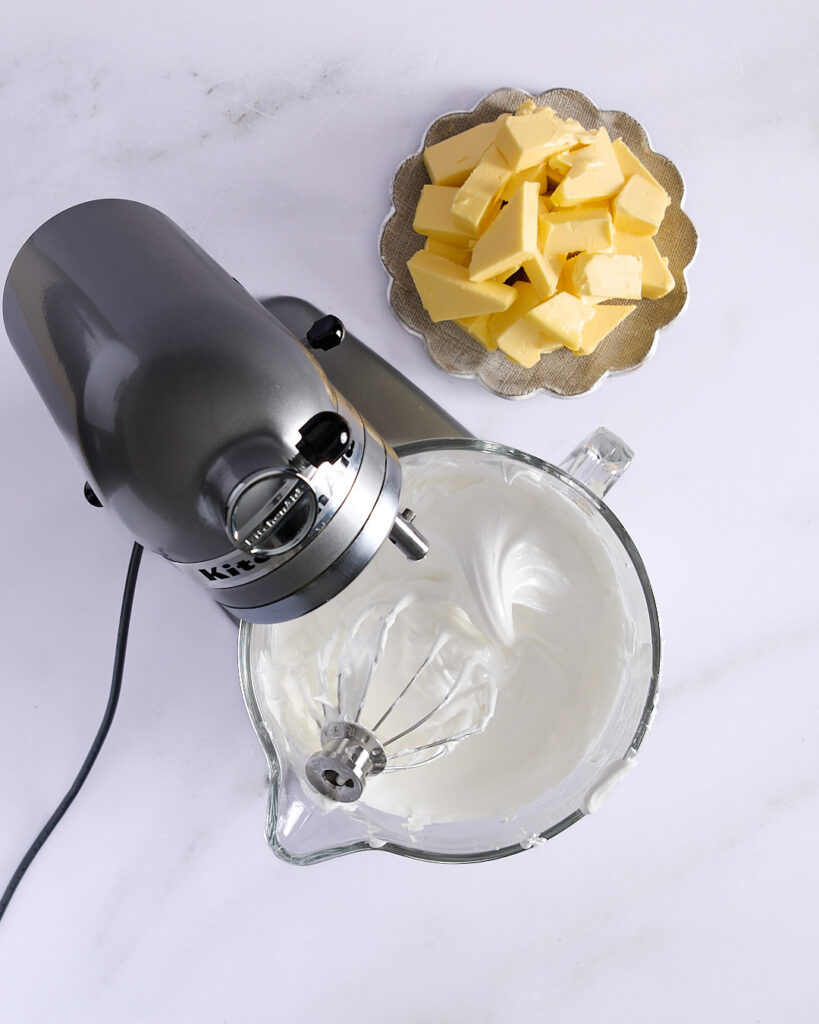
Stand mixer with glossy, stiff-peaked meringue and a plate of cubed unsalted butter beside it, ready for the next step in buttercream preparation.

Don’t worry—getting your party-worthy chocolate cake across the line makes mastering the Swiss meringue buttercream technique worth it. This is a technical recipe, but with the right approach (and a little patience), you’ll get there. 

It helps to have an instant-read thermometer and a stand mixer. Don’t have either? No worries—I’ve included a workaround using a hand mixer and your fingertips. 

Before you get started, bring 675 g of unsalted butter almost to room temperature. I prefer it to still have a bit of firmness when it hits the meringue—especially if you’re making Swiss meringue buttercream on a warm day. Cut the butter into 2–3 cm cubes. 

Step 1: Heat the egg whites and sugar

In a large metal bowl (or the bowl of your stand mixer), combine 250 ml of egg whites (about 8–9 large eggs) and 400 g of granulated white sugar. Set the bowl over a saucepan of simmering water and whisk constantly until the mixture reaches 70°C. If you don’t have a thermometer, keep whisking until the sugar has completely dissolved and the mixture feels hot, and all the sugar has dissolved. 

Step 2: Whip the meringue

Transfer the bowl to a stand mixer fitted with the whisk attachment. Whip on high speed until the meringue is thick, glossy, and has reached stiff peaks (8–10 minutes). The bowl should feel cool to the touch before you move on.  You can also use a handheld electric beater on high speed, noting that it will take longer to get to the stiff peaks stage.

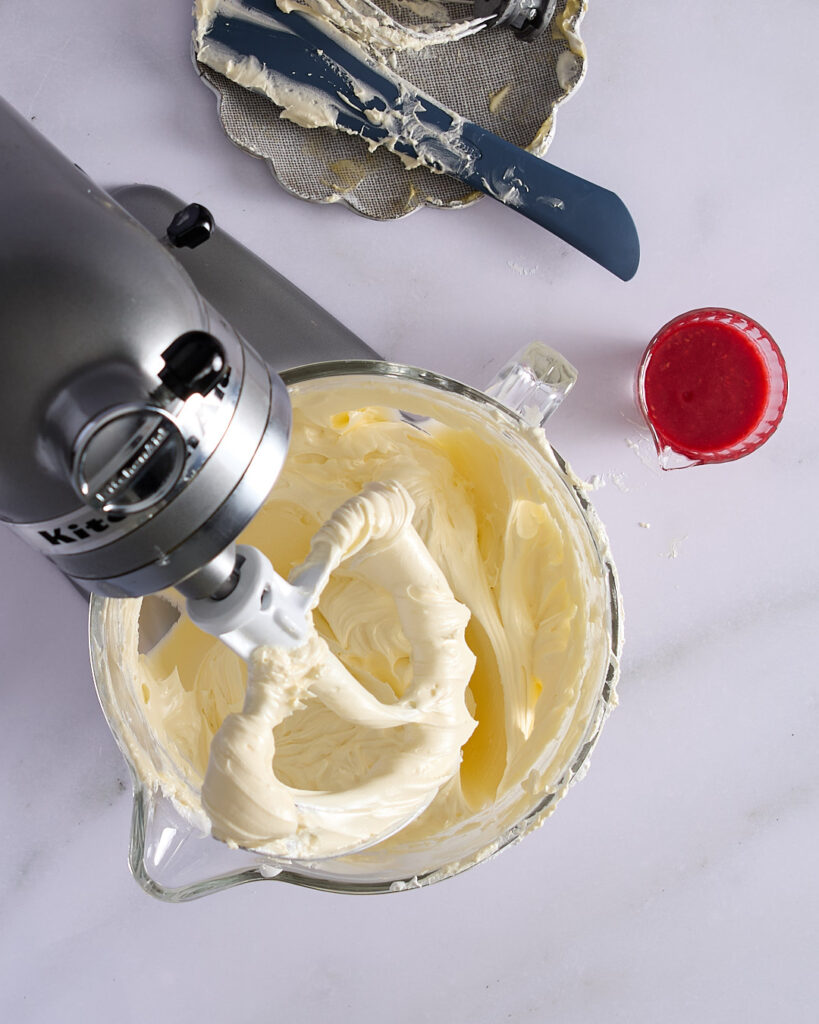
Butter fully incorporated into Swiss meringue, with raspberry purée in a jug ready to be mixed in to finish the raspberry Swiss meringue buttercream.
Butter fully incorporated into Swiss meringue.
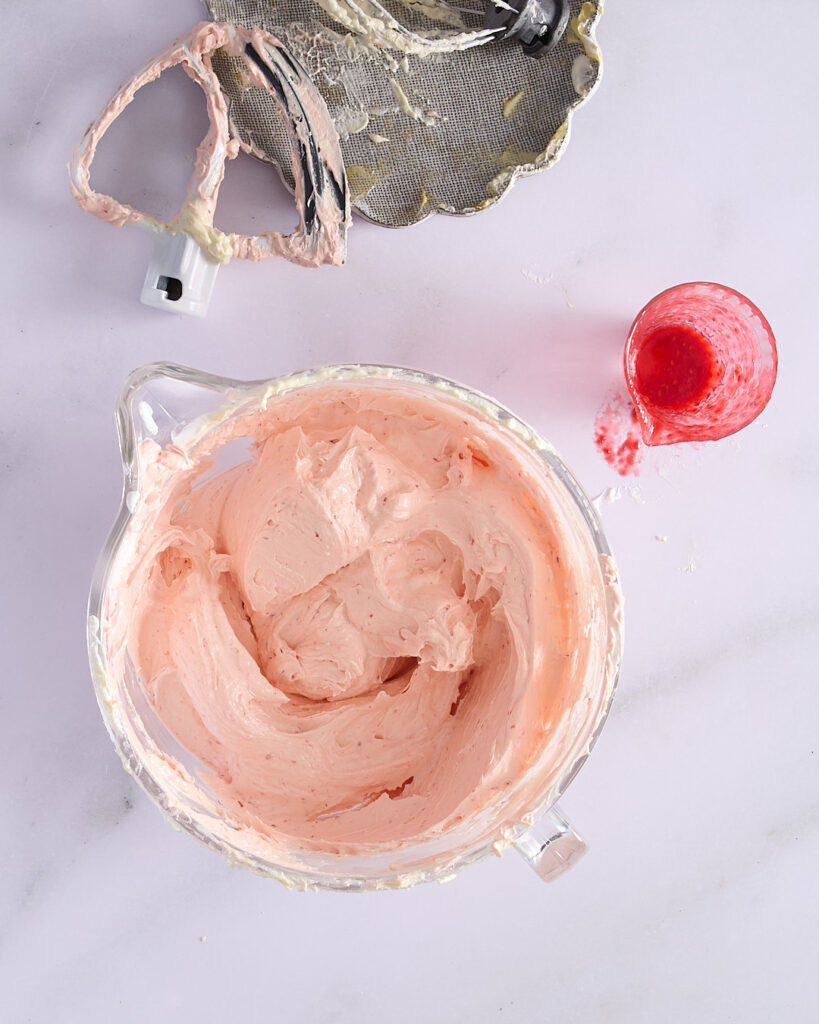
Bowl of finished raspberry Swiss meringue buttercream with a soft pink hue, next to a used paddle attachment and a nearly empty jug of raspberry purée.
Finished raspberry Swiss meringue buttercream.

Step 3: Add the butter

Add half of the butter cubes to the meringue and beat with the whisk attachment on medium speed until mostly incorporated. Then add the remaining butter and whisk again until the mixture is smooth and cohesive. 

Switch to the paddle attachment and continue to beat on low. This step helps remove excess air and gives the buttercream a smooth, silky finish. 

If the mixture looks curdled at any point—don’t panic. Just keep mixing. It will come together once the emulsion is complete. 

Step 4: Add the raspberry purée

With the mixer on low, slowly pour in 150 ml of your raspberry purée and mix until just incorporated. Scrape down the bowl and give it a final brief beat to bring everything together. 

You’ll end up with a pale pink, silky buttercream that’s stable, pipeable, and sharp enough to finish your chocolate raspberry celebration cake in style. 

You may have some purée leftover—resist the urge to add it. Too much liquid can cause the buttercream to split.

Let’s assemble that pretty celebration cake

Because you’re aiming for a party-worthy chocolate cake, it’s worth paying close attention to the assembly of this three-layer chocolate cake. The key to a perfectly stacked layer cake? Level layers, even filling, and remembering that the fridge is always your friend. 

Once your cake is stacked and chilled, the final frosting and decoration can actually be fun—no fear of sliding tiers or structural drama. A solid base sets you up for a confident finish. 

Level up the cakes

To get a properly stacked three-layer chocolate cake, you need flat, even layers. If your cakes have domed or cracked on top (as devil’s food cake often does), take a moment to level them. It makes a big difference to the cake’s stability and final presentation. 

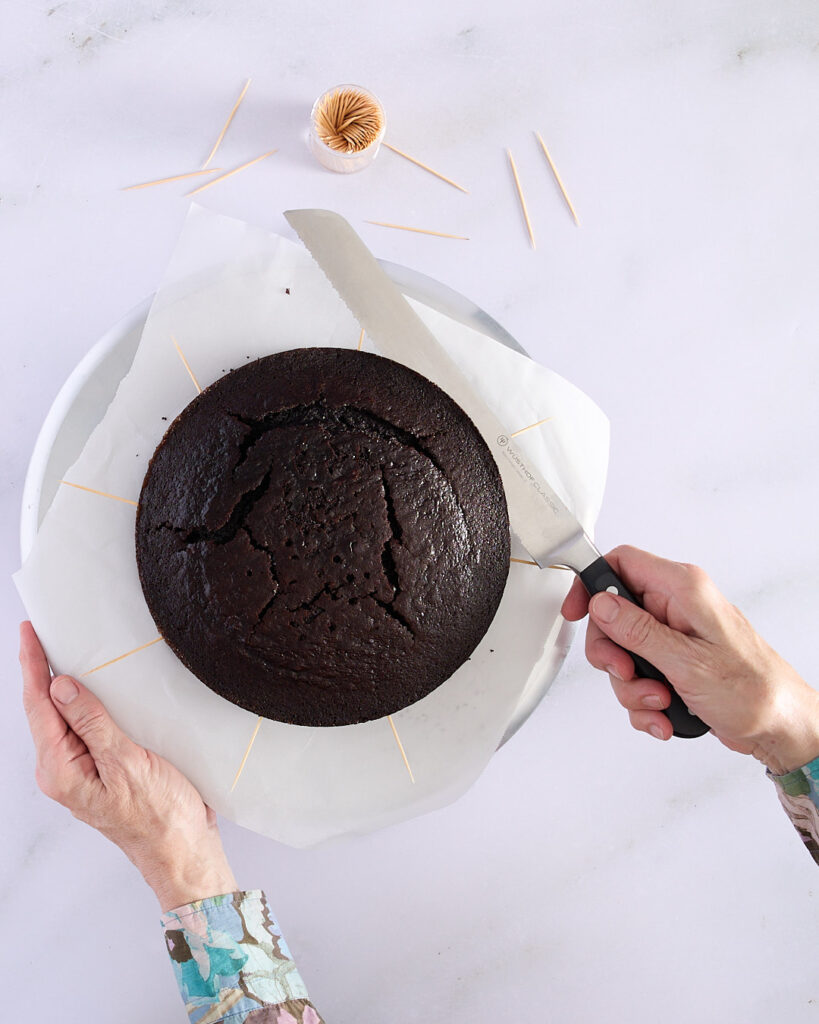
In the shot above, I’ve used the toothpick method: insert toothpicks around the edge of the cake to mark a cutting line. Start where the dome is at its lowest and measure the height at that point—my layers ended up being 4 cm high. Keep measuring and inserting toothpicks at the same height all the way around. Then use a long serrated knife to trim off the top, rotating the cake as you go. I’ve used a cake turntable here, but turning the cake by hand works just as well at this stage. 

That said—I usually reach for my cake leveller. Of course I own one. And if you’re baking celebration cakes even semi-regularly, it’s worth it. You’ll get an even finish in seconds, no guesswork required. 

Filling and stacking the layers

Don’t you think this chocolate raspberry celebration cake looks as gorgeous on the inside as it does on the outside? 

If you’re using a turntable and cake boards, start by placing a circle of non-slip matting on the turntable, then glue an 8″ cake board on top with a dab of buttercream. You can use a larger cake board depending on how you plan to serve it. If you want to move the cake without damaging the bottom edge of the buttercream, double up: stick an 8″ board onto a 10–12″ board with more buttercream and go from there.

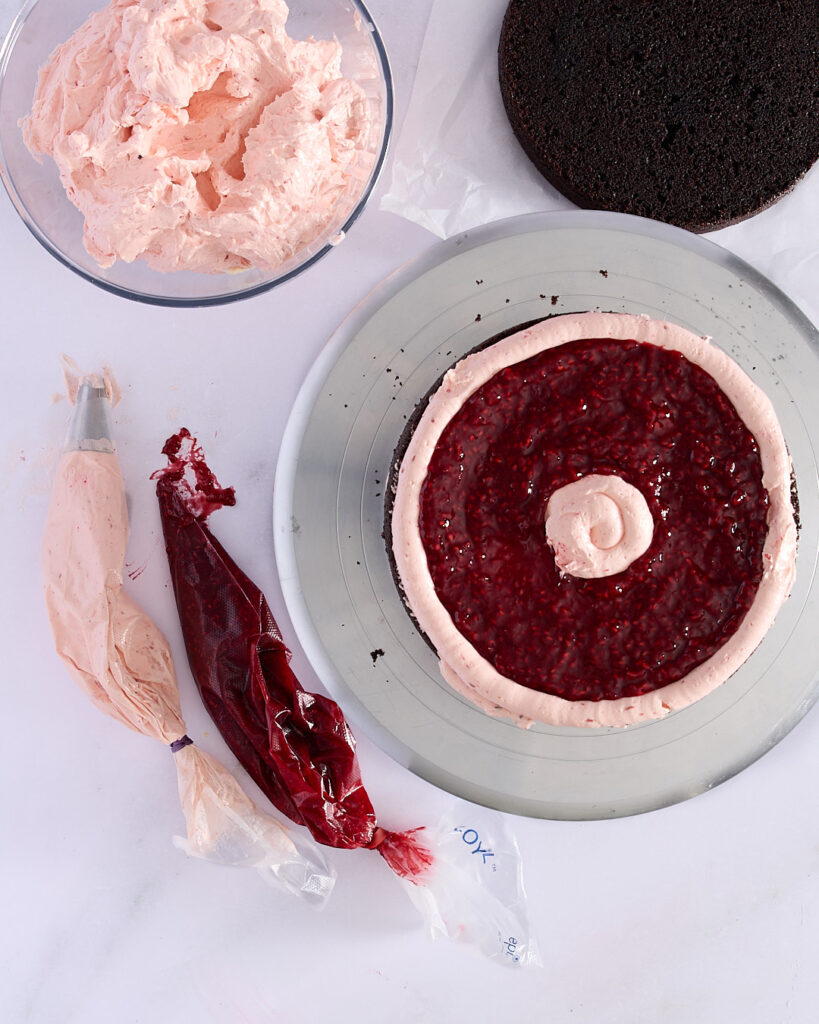
Partially assembled three-layer chocolate cake with raspberry jam and raspberry Swiss meringue buttercream filling piped between layers, shown on a cake turntable with piping bags and a bowl of buttercream.

Prepping your piping bags

Fill a medium tipless piping bag with about 1 cup of raspberry jam. Cut the tip off, but not too far—just enough to pipe cleanly without jam oozing onto the bench. Fit a 1 cm round tip into another piping bag and fill it with your raspberry Swiss meringue buttercream. I seal both bags with small rubber bands to keep things tidy and under control. 

Assembling the cake

Spread a thin layer of buttercream over the centre of your cake board using a small offset spatula. Gently place the first cake layer on top, trimmed side up—this gives you a firm, flat foundation. 

Pipe a 4 cm circle of buttercream in the centre of the cake, then pipe a dam of buttercream around the outer edge. Be generous and consistent with the height and pressure, sealing the ends together to prevent any jam from leaking out. Pipe the raspberry jam into the gap between the buttercream rings, then gently smooth it out with an offset spatula. The jam should sit just below the height of the buttercream. 

Repeat the process with the second layer. Place the final layer on top, this time with the trimmed side down to give you a smooth surface for frosting. 

Once assembled, place the cake still on the turntable in the fridge for 15–30 minutes. You want the buttercream to firm up enough to hold but not go rock solid—it makes the final frosting step so much easier. 

Frosting the cake

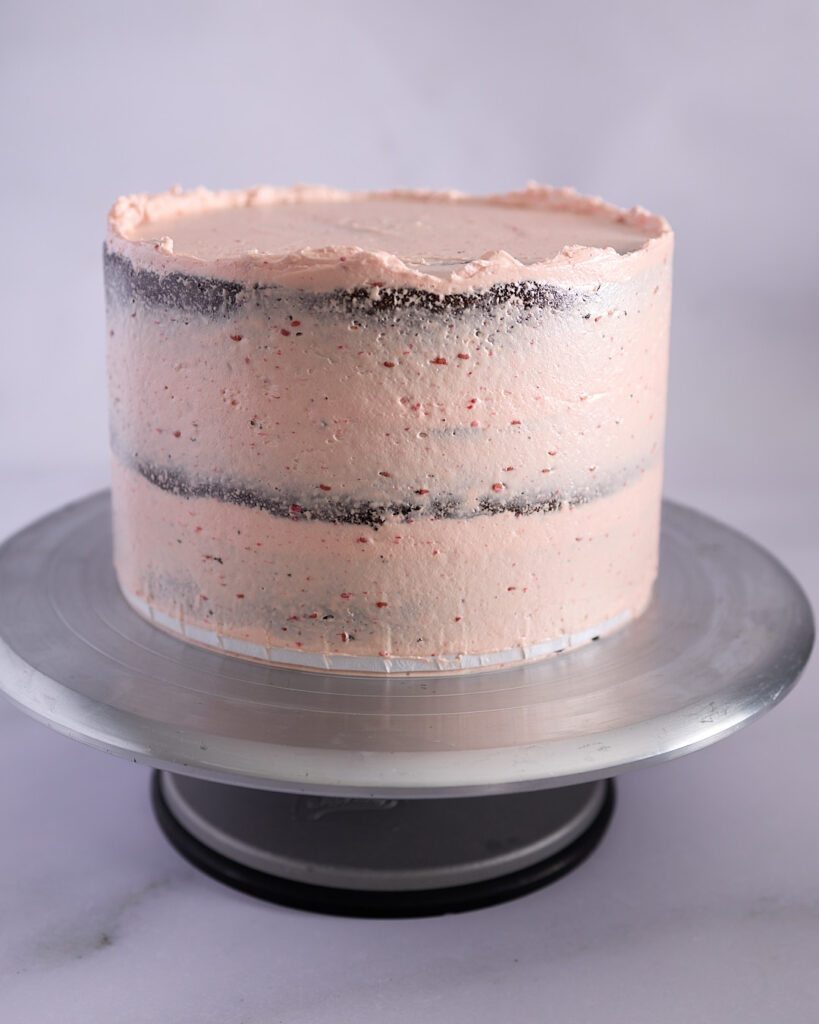
Chocolate layer cake on a turntable with a thin crumb coat of pale pink raspberry buttercream applied, showing visible layers through the frosting.
Chocolate layer cake with a thin crumb coat of buttercream.
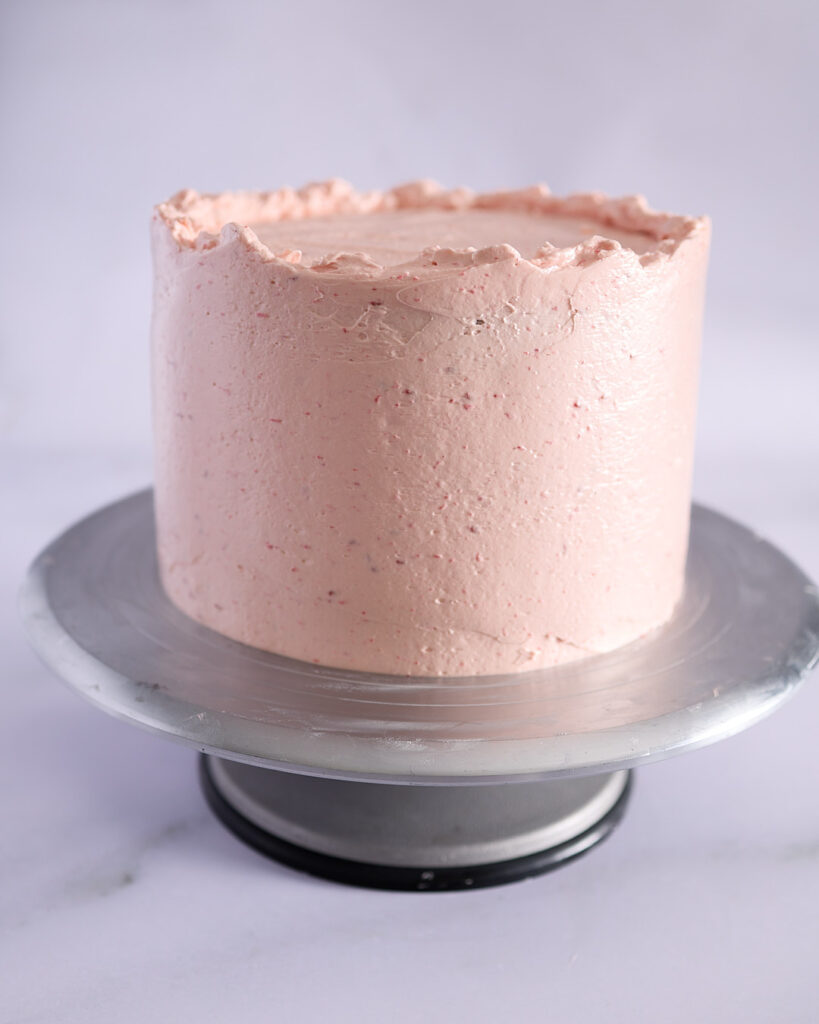
Fully frosted three-layer chocolate cake with a smooth raspberry buttercream finish and a rustic top edge created by gently swirling frosting inward.
Fully frosted three-layer chocolate cake.

Crumb coat

Once your cake layers have chilled, it’s time for a crumb coat. Using a small offset spatula, apply a thin layer of raspberry Swiss meringue buttercream over the top and sides of the stacked cake. Don’t worry about perfection—this coat is just here to trap stray crumbs. Scrape it back with a cake scraper or straight spatula until you’ve got a thin, even layer. It’s completely fine if you can still see the sides of the cake through the frosting. 

Chill the cake again for 15–20 minutes, just until the buttercream is firm to the touch. This gives you a stable base to apply the final coat without dragging crumbs through your finish. 

Final coat and rustic finish

Apply a second, thicker coat of raspberry buttercream, starting at the top and working your way down the sides. Use a cake scraper to smooth it out as much—or as little—as you like. 

If you’re after a soft, rustic ripple around the top edge, be a bit more generous with buttercream at the top. As you scrape the sides clean, it will naturally build up and overhang the top of the cake—creating that casual, textured finish. I love this look. 

If you’re after something sharper, chill the cake again and use a small, sharp paring knife to gently trim the overhang, holding the blade flat against the top for a crisp edge. 

Now, full transparency: I’m not 100% happy with the smooth sides of my chocolate raspberry celebration cake in the photo above. Yes, I am my own worst critic. In hindsight, I wish I’d left the sides a bit rougher—maybe added some texture with a cake comb, a few deliberate strokes with a pastry brush, or gone all in with soft buttercream swoops. Always a next time—for sure. 

Make it a pretty celebration cake!

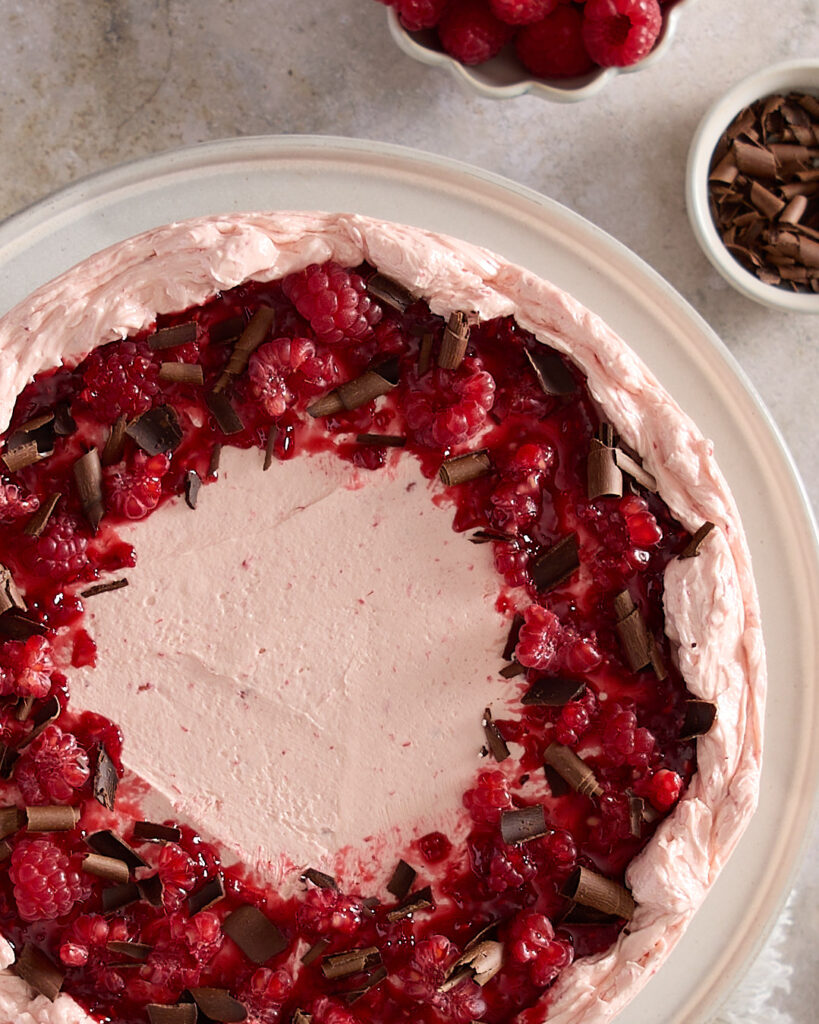
Overhead close-up of the top of a chocolate raspberry celebration cake, decorated with raspberry Swiss meringue buttercream, spooned raspberry jam, fresh raspberries, and dark chocolate curls, arranged in a loose, rustic ring around the edge.

It’s been a long road for me—from “more is more” to “less is actually quite lovely”—when it comes to decorating showstopper cakes. And that journey includes a few (very public) reality checks from Great Australian Bake Off judges. Delivered kindly, of course. But still…noted. 

So yes, I’ve specified raspberry jam, fresh raspberries, chocolate curls, and freeze-dried raspberries for the décor. But as you’ll see in the final shot of this chocolate raspberry celebration cake, I left the freeze-dried raspberries out. And honestly? I think it was the right call. Possibly the most restrained—and dare I say, gorgeous—cake top I’ve ever managed in my admittedly brief cake decorating career. 

Now, to the specifics. The cake was well chilled. I warmed the raspberry jam to make it easily spreadable, then spooned it around the inner edge of the buttercream ring. Using a dry 1-inch paintbrush (yes, an actual paintbrush), I gently brushed the jam toward the centre to create a soft, natural fade. 

Next came the torn raspberries—placed with my best attempt at randomness, though I still questioned every move—and a scattering of dark chocolate curls. Those were made with a vegetable peeler, run along the side of a chocolate bar. Simple, effective, and a little bit luxe. 

And then? I stopped. 

A far cry from my childhood birthday cakes, slathered edge to edge with chocolate-on-chocolate and drowning in sprinkles—but I think younger me would’ve been impressed. Or at least distracted by the chocolate curls. 

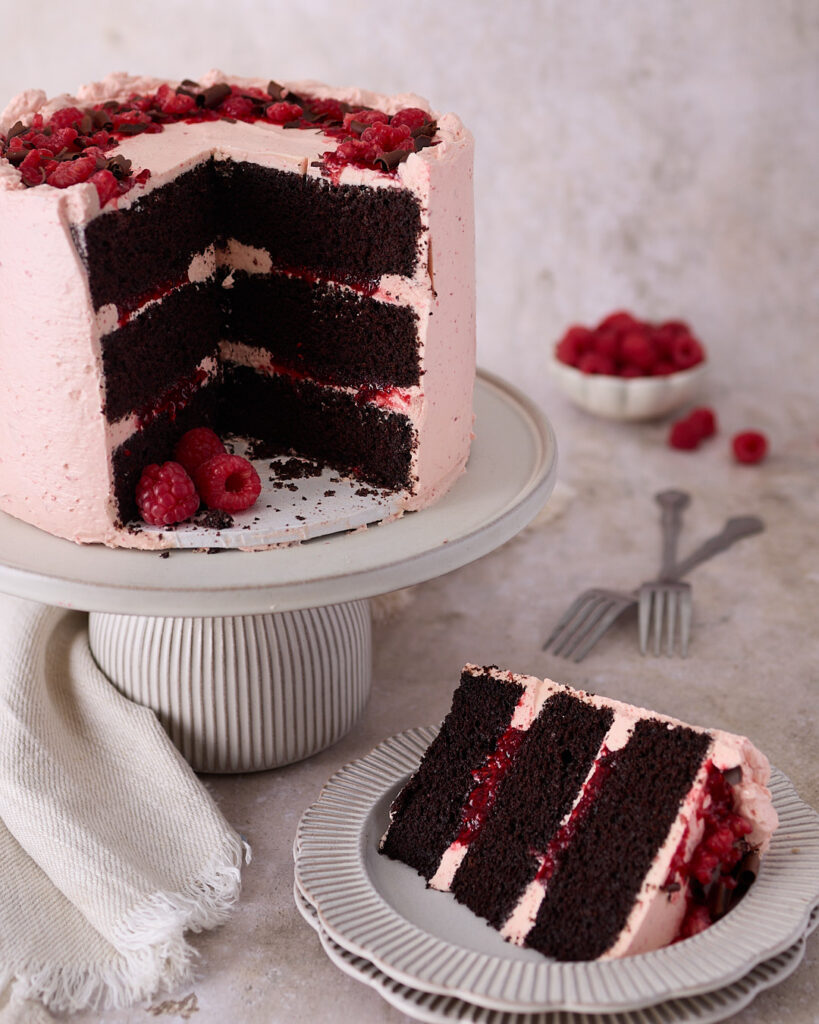
Three-layer chocolate raspberry celebration cake on a pedestal cake stand, with a slice removed and placed on a plate in the foreground. The cake is frosted with pale pink raspberry Swiss meringue buttercream, filled with raspberry jam, and topped with fresh raspberries and chocolate curls.

This is the kind of cake that makes people pause mid-sentence when you slice it. Moist devil’s food layers, tart raspberry jam, and that soft pink buttercream—it’s equal parts nostalgic and grown-up. A proper chocolate raspberry celebration cake, inside and out. 

Pretty In Pink Devil’s Food Cake

The 1970s was the decade when food met marketing—and marketing won. My mum was a single parent who fully embraced the why bake from scratch when you can reach for a box? approach. 
Duncan Hines or Betty Crocker—which packet mix made the best birthday cake? It was a hotly contested topic on the schoolground any time a party was looming. We were a Duncan Hines household. And every year, when it came time to choose our birthday cake flavour, there was never any question. For me, it was Devil’s Food Cake. Every time. No hesitation. 
Prep Time 4 hours
Cook Time 15 minutes
Course Cake, Dessert
Cuisine American, Australian
Servings 8 to 10 people

Equipment

  • Cakes:
  • Sieve (coarse mesh)
  • Balloon whisk
  • kitchen scale
  • 3 x 20 cm (8-inch) round cake tins
  • Baking strips or cake collars (optional)
  • Bulldog clips (to secure baking strips)
  • Cooling racks
  • Swiss meringue buttercream:
  • Small food processor, immersion blender or smoothie blender
  • Stand mixer with whisk and paddle attachments (or electric hand mixer)
  • Thermometer (instant-read or sugar thermometer)
  • Assembly and decorating:
  • Cake turntable (optional but helpful)
  • Offset spatula
  • Cake scraper or straight spatula
  • Large, serrated knife
  • 2 Extra-large piping bags
  • 1 cm round piping tip
  • Rubber bands (to seal piping bags)
  • 8-inch cake boards (plus an optional larger board)
  • Non-slip matting (for turntable)
  • Small paintbrush (clean, dry, food-safe)
  • Vegetable peeler (for chocolate curls)

Ingredients  

Cakes:

  • 475 g all-purpose flour
  • 145 g Dutch processed cacao powder
  • 1 tablespoon espresso powder
  • 550 ml boiling water
  • 300 g granulated white sugar
  • 250 g light brown sugar
  • 3 ¾ teaspoons baking powder
  • 1 ½ teaspoon baking soda
  • 1 ½ teaspoon table salt
  • 270 ml grapeseed oil
  • 2 teaspoons vanilla extract
  • 4 large eggs
  • 350 g full fat sour cream

Swiss meringue buttercream:

  • 250 ml egg whites (9-10 large eggs)
  • 400 g granulated white sugar
  • 675 g unsalted butter
  • 200 g fresh raspberries
  • 3 teaspoons granulated white sugar
  • Pinch salt

Decorate as much or as little as you like:

  • Raspberry jam
  • Fresh raspberries
  • Freeze dried raspberries (optional)
  • 70% dark chocolate shards

Instructions 

Assemble ingredients and equipment

  • This recipe has several stages—cake, buttercream, assembly, and decoration—so it’s worth measuring everything out and having your equipment ready before you begin. It’ll make the process much smoother, especially once things start moving.

Devil’s food cakes

  • Preheat the oven to 175°C conventional (or 155°C fan-forced).
  • Grease and line three 20 cm (8-inch) round cake tins. If using baking strips or cake collars, soak them in water and secure around the tins with bulldog clips.
  • In a medium heatproof bowl, combine the cocoa powder and espresso powder. Pour over the boiling water and whisk to combine. Set aside to cool to room temperature.
  • In a large mixing bowl, sift together the flour, baking powder, baking soda, salt, white sugar, and brown sugar. I use a coarse sieve—it’s easier with the brown sugar. Pass the mix through the sieve at least twice until the texture is even and fine, like soft sand.
  • In a separate jug, whisk the sour cream, then add the eggs one at a time, beating well after each addition. Whisk in the grapeseed oil and vanilla extract. Then add the cooled cocoa and espresso mixture and whisk until fully combined.
  • Add the wet ingredients to the dry in three batches. Use a balloon to whisk in each addition, adding the next batch as soon as the previous is mostly incorporated. After the final addition, give it one last gentle whisk—don’t overmix.
  • Divide the batter evenly between the three pans—around 790g to 800g per tin. Tap the pans gently on the bench to release any air bubbles.
  • Bake for 40–44 minutes with collars (start checking at 35), or 25–28 minutes without. The cakes are done when a skewer or cake tester comes out clean with a few moist crumbs.
  • Cool the cakes in their tins for 10 minutes before turning out onto racks to cool completely.

Raspberry Swiss meringue buttercream

  • To make the raspberry purée, blend the fresh raspberries with the sugar and salt until smooth. Set aside. You can strain the purée if you prefer a seedless buttercream, but I like the texture the seeds give.
  • In a heatproof bowl set over a saucepan of simmering water, whisk the egg whites and sugar together until the mixture reaches 70°C. If you don’t have a thermometer, heat until the sugar is fully dissolved and the mixture feels hot and all the sugar has dissolved.
  • Transfer to a stand mixer with the whisk attachment and beat on high speed until stiff peaks form and the bowl is cool to the touch—this may take 8–10 minutes.
  • Start adding the butter—make sure it’s just shy of room temperature and cut into 2–3 cm cubes. Add half the cubes and beat on medium speed until mostly incorporated, then add the rest and beat again until smooth.
  • Switch to the paddle attachment and mix on low speed to remove air bubbles and smooth the buttercream.
  • With the mixer on low, slowly pour in 150 ml of raspberry purée and beat until incorporated. Scrape down the bowl and mix again briefly. Do not add more purée—even if you have extra—as it may cause the buttercream to split.

Assembly

  • Level your cake layers using a serrated knife and the toothpick method—or use a cake leveller if you have one. Aim for even, flat layers.
  • Place a non-slip mat on a cake turntable and secure your 8-inch cake board with a dab of buttercream. Spread a small amount of buttercream across the board and place the first cake layer trimmed-side up on the board.
  • Fill a piping bag fitted with a 1 cm round tip with buttercream. Fill a separate tipless piping bag with 1 1 cup raspberry jam.
  • Pipe a 4 cm circle of buttercream in the centre of the cake, followed by a buttercream dam around the edge. Make sure the dam is even and fully sealed. Fill the space between with raspberry jam, smoothing it just below the height of the buttercream.
  • Place the second cake layer on top and repeat the filling process. Top with the final cake layer, trimmed-side down.
  • Refrigerate the stacked cake for 15–30 minutes until the buttercream is firm but not hard.

Frosting and decorating

  • Apply a thin crumb coat of raspberry buttercream to the top and sides of the cake using an offset spatula. Scrape it back with a cake scraper or straight spatula. It’s fine if the cake shows through.
  • Chill cake for another 15–20 minutes. I put it in the fridge still on the turntable.
  • Apply a second, thicker coat of buttercream, starting at the top and working down the sides. Smooth with a cake scraper. For a soft rustic ripple at the top edge, apply extra buttercream towards the top of the side of the cake, let the buttercream build up slightly as you scrape. For a sharper edge, chill the cake and gently trim the edge with the flat side of small paring knife.
  • Chill the cake well before decorating.
  • To decorate, warm the raspberry jam until spreadable. Spoon it around the top edge of the cake and use a dry 1-inch paintbrush to brush it gently toward the centre.
  • Add torn fresh raspberries, then finish with dark chocolate curls made by running a vegetable peeler along the side of a chocolate bar.

Just before you cook with abandon…

Jam substitution: You can substitute the homemade low sugar raspberry jam with a good-quality shop-bought raspberry jam. Just check the label—some brands lean heavily on the sugar or use thickeners that can throw off the flavour balance. Look for one with raspberries listed first and a bright, tart flavour.
Why use cake collars or baking strips: Cake collars (also called baking strips) help your cakes bake more evenly by slowing down the rise at the edges. This reduces doming, cracking, and overbaked edges—especially useful for devil’s food cake, which tends to rise quickly in the oven and crack. They give you flatter layers, less trimming, and a more even crumb from centre to edge.
Blooming matters: Blooming the cocoa powder and espresso powder in boiling water intensifies flavour, improves texture, and ensures a moist devil’s food cake crumb. It’s worth the extra step.
Don't overmix: Because this chocolate layer cake recipe uses water as its main fluid, it develops gluten more quickly than batters made with milk or sour cream alone. Be gentle when combining the wet and dry ingredients—overmixing will lead to a tougher crumb. Use a balloon whisk and stop mixing as soon as the batter comes together.
Baking times: With baking strips or cake collars, bake the layers for 40–44 minutes (start checking at 35). Without collars, bake for 25–28 minutes. The cakes are done when a skewer comes out with just a few moist crumbs.
Making ahead and freezing: You can bake the devil’s food cake layers in advance and freeze them. Once completely cool, wrap each layer tightly in plastic wrap, then place in a Ziplock bag or wrap again in foil. Freeze for up to one month. Defrost overnight in the fridge—still wrapped. You’ll get the best results assembling this cake while the layers are cold, as it makes trimming and stacking cleaner and reduces the risk of sliding.
Levelling the cake layers: To get a properly stacked three layer chocolate cake, you need flat, even layers. If your cakes have domed or cracked on top (as devil’s food cake often does), take a moment to level them. Use the toothpick method: start where the dome is lowest, insert a toothpick, measure the height, and repeat around the edge of the cake. Then trim with a long serrated knife, keeping it steady as you rotate the cake. A cake turntable helps, but it’s fine to turn the cake by hand. Or, if you’ve got a cake leveller—use it. It’s quick, accurate, and well worth having if you bake layer cakes regularly.
Butter temperature for Swiss meringue: Bring the butter just shy of room temperature—still slightly cool and firm to the touch. This helps the buttercream emulsify properly, especially on warmer days.
Using fresh raspberries in the buttercream: This is not the time to swap in frozen raspberries. They’ll water down the purée and risk splitting the buttercream. Stick with fresh berries for the best texture and colour.
Don’t add extra raspberry purée: You may have some raspberry purée left over—resist the urge to add it all. Too much liquid will cause the Swiss meringue buttercream to split.
What's a crumb coat: A crumb coat is a thin layer of buttercream applied to the cake before the final coat. It helps trap loose crumbs and gives you a smoother, cleaner surface to frost. Chill the cake after crumb coating to set the buttercream before finishing the final layer.
Cake scraper finish (or not): You don’t need a cake scraper to finish this cake—just a steady hand and an offset spatula will do. I used a scraper here for a smooth finish, but truthfully? I ended up wishing I’d gone for something a bit looser. Some relaxed swirls or a bit of texture from a pastry brush or cake comb might’ve suited the buttercream—and the moment—better. If you’re more of a “swoop and see what happens” type, lean into it. Not everything needs to be polished to perfection.
Decorating note: If you want that rustic jam-brushed top, warm the jam slightly and use a dry paintbrush to feather it inward from the edge. Scatter torn raspberries and chocolate curls just before serving.
Storage: Once fully frosted, the cake can be stored in the fridge for up to 3 days. Bring to room temperature for at least one to two hours before serving to soften the buttercream and bring out the full flavour.
Slicing tip: For the cleanest slices, use a large sharp knife dipped in hot water and wiped dry between cuts.
Keyword chocolate and raspberry cake, Devil's food cake

Leave a Reply

Your email address will not be published. Required fields are marked *

Recipe Rating


Hi, I'm Sandra!

I live by the words of Harriet Van Horne and I will be exploring every possible way to bring Harriet’s words to life in my kitchen.

Recipes

Discover delicious featured food recipes! From quick meals to gourmet delights, Sandra offer inspiring dishes for every occasion. Explore, cook, and enjoy flavorful creations today.

You might also like..

Low Sugar Raspberry Jam

French-style Potato Salad (no mayo) with Lemon and Garlic

S’mores Tart – Chocolate Raspberry Marshmallow Tart

Peppermint Bark Shortbread Biscuits

Subscribe

Subscribe to my newsletter for a chance to win a FREE APRON (drawn monthly) as well as cooking tips, recipes, offers and exclusive content.

"*" indicates required fields