
Recipes

Candy Cane Peppermint Chocolate Bark

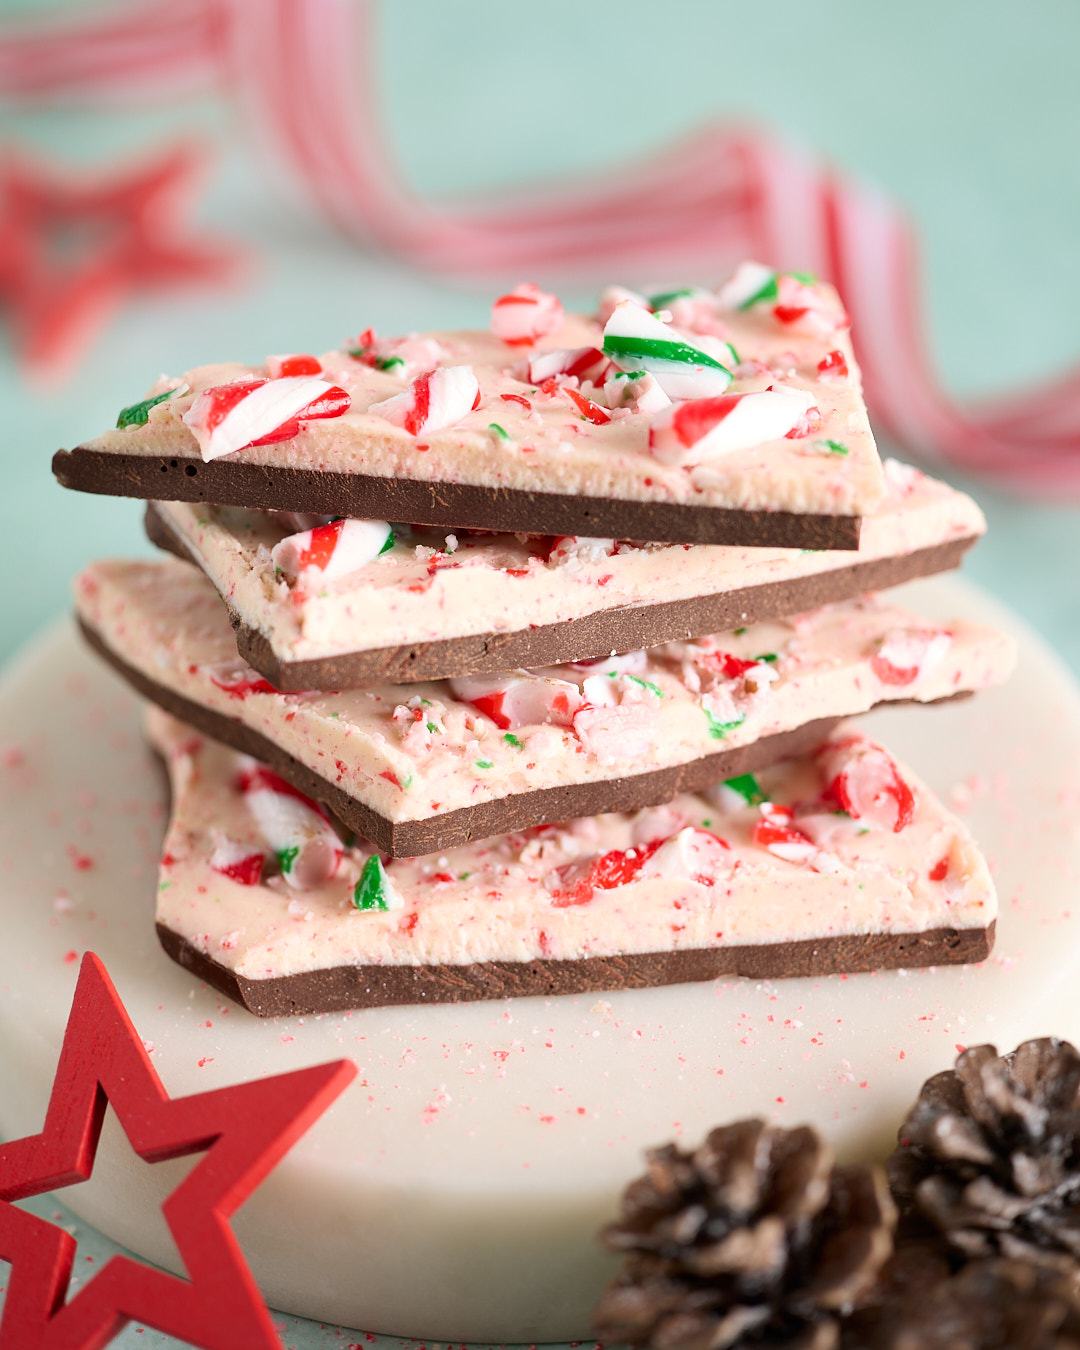
Stack of Candy Cane Peppermint Chocolate Bark on a white plate, layered dark and white chocolate studded with crushed red, white and green candy canes, with Christmas decorations and pinecones in the background.

I’m not pretending I invented this. Candy cane chocolate bark is an American Christmas classic at this point – the kind of thing that shows up in tins, office kitchens and school hampers all December. My Candy Cane Peppermint Chocolate Bark is simply my version of it. The only “discovery” here is what you do with the candy canes themselves – my own personal discovery, but I’m certainly not the first to that party either. 

I happened to be staying beside the original Ghirardelli chocolate factory on the waterfront in San Francisco and was curious enough to try their dark chocolate peppermint bark squares. Thin dark chocolate squares topped with a layer of white chocolate, with finely crushed candy cane flecked through the top layer. On paper, it shouldn’t have worked for me at all. Candy canes and white chocolate are, on their own, just about the last sweets I’d reach for; I’m usually the person politely saying “no thanks” when someone offers them around. 

But together? Completely different story. Who would have imagined such an upgrade to plain white chocolate and such a clever way to tone down those sugary peppermint stick candy canes that are really just for show – right? Suddenly they made sense. 

I did try the milk chocolate version of the Ghirardelli peppermint bark, purely in the interests of research. But it dialled the sweetness up far too high and the squares instantly lost their magic, at least in my opinion. Dark chocolate is what keeps this peppermint bark recipe on the right side of decadent rather than sickly. 

For my Christmas peppermint chocolate bark, I wanted an extra festive note so I channelled the Ghirardelli squares and folded crushed candy canes into the white chocolate layer, with broken pieces of candy cane decorating the surface. The result has all the Christmas pizazz with a subtle peppermint crunch running through the bark. And, funnily enough, the humidity of a Queensland summer actually helps here – it softens the exposed pieces just enough to give them a subtle glossy sheen and takes the sharp edge off the crunch. 

This is very much an easy peppermint bark recipe – two kinds of chocolate, some crushed candy canes and a bit of chocolate technique. Let me break it down for you. 

Candy cane chocolate bark ingredients

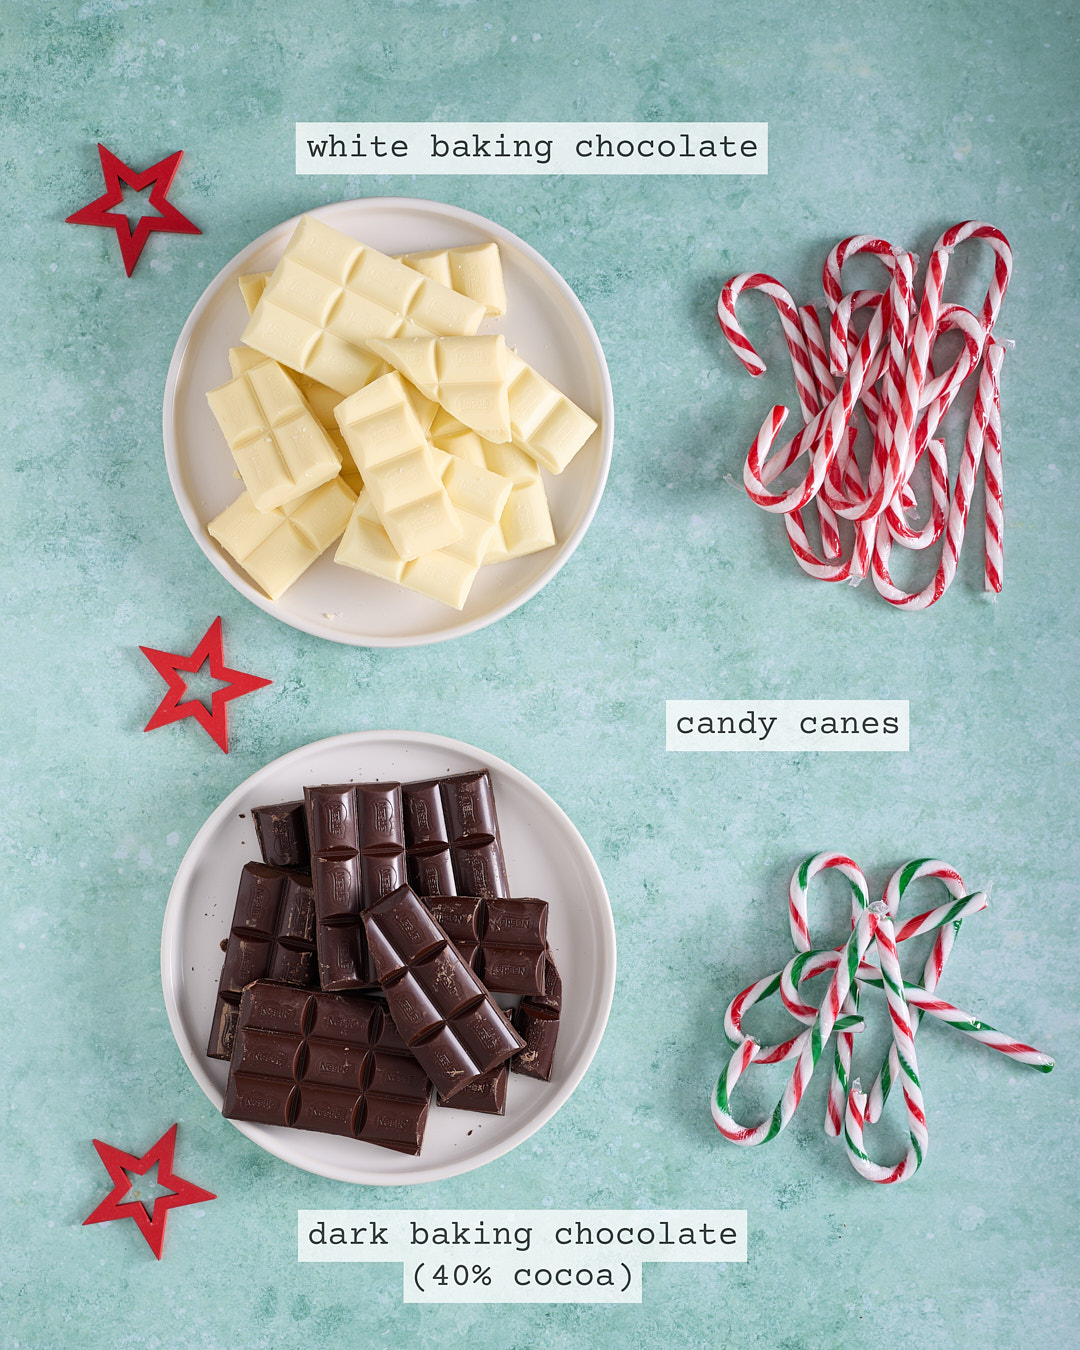
Overhead image of ingredients for Candy Cane Peppermint Chocolate Bark: plates of chopped white baking chocolate and dark baking chocolate (40% cocoa) with labelled text, alongside red-and-white and green-striped candy canes on a pale green background with red star decorations.
  • 180g dark chocolate  
  • 180g white chocolate 
  • 30g crushed candy canes 
  • 100-150g broken candy canes 

For this easy peppermint bark recipe I’ve used 180g dark chocolate, 180g white chocolate, 30g finely crushed candy canes and 100–150g broken candy canes for the topping. I’ve portioned it to match the size of my favourite good-quality baking chocolate – Nestlé Plaistowe premium baking chocolate.

This is not a recipe where I’d recommend swapping in compound chocolate or chocolate melts, buttons or chips. There is nowhere for average chocolate to hide and this is meant to be celebratory – proper Christmas peppermint chocolate bark, not an everyday tray of slice. 

How you decide to batch this peppermint bark recipe depends on how much you want to make and how thick you like each chocolate layer. The image at the start of the recipe shows a double batch with red and green candy cane décor. It’s made on a 23cm x 30cm (9” x 12”) baking pan and each layer of dark and white chocolate bark is about 5mm thick. A single batch can be made on the same size baking sheet and the chocolate layers will be a little thinner, around 2–3mm each. See the image at the bottom of this article (red candy can décor). 

Get organised

Overhead image of hands chopping white baking chocolate into small pieces on a wooden board, with a large white bowl of chopped chocolate and a red star decoration on a pale green background.

I’m an adherent to the French cooking principle of mise en place—everything in its place. Having your ingredients and equipment ready before you start isn’t just for professional kitchens; it’s how you keep home baking calm and consistent. Measuring, prepping and setting everything out before the first step really does put the “easy” into any recipe—especially when you’re melting chocolate for this easy peppermint bark recipe. There are a couple of pressure points where you’ll need to move quickly, so you want to be organised. 

The chocolate I use in my candy cane peppermint chocolate bark comes in bars. To achieve a consistent result, it’s important to chop the bars into small, fairly evenly sized pieces—no need for perfection, but you do want everything roughly the same size so it melts at the same rate.

Prepare your pans

You want to have your pan ready before you start melting the chocolate for this easy peppermint bark recipe. 

If I’m making a single batch of candy cane peppermint chocolate bark, I use a 23cm x 30cm (9” x 12”) baking sheet. If it has sides, I flip the pan over and use the back of the sheet. I like to use baking acetate, which helps the tempered dark chocolate set with a lovely shine, but baking paper is absolutely fine. I tape the acetate or baking paper securely to the tray so it doesn’t slip around while I’m spreading the melted chocolate. 

When making a double batch of this peppermint bark recipe, I switch to a 23cm x 30cm (9” x 12”) baking pan with sides at least 3cm deep. In the double batch shown in the images, I’ve used a cake pan with 7cm (3”) sides. I line the pan with a sling of baking paper, pressing it firmly into the corners and over the top edge of the pan, then secure the paper in place with small bulldog clips so it stays put while I pour and spread the chocolate. 

Wrangling candy canes

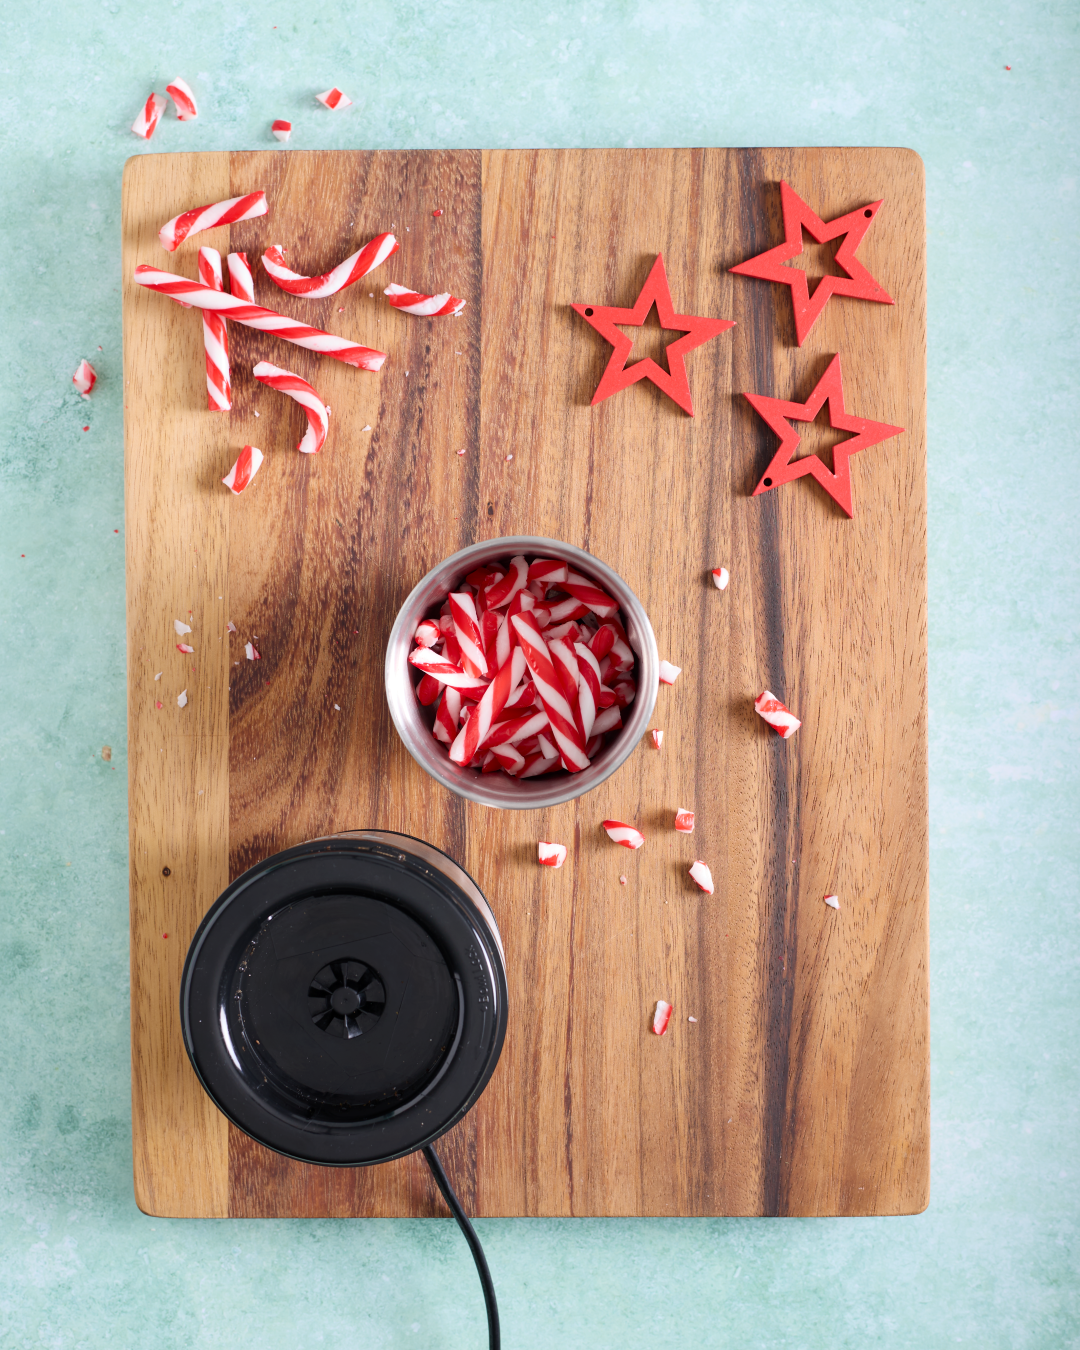
Overhead image of whole and broken red-and-white candy canes on a wooden board, with pieces collected in a small metal cup next to a black electric spice grinder and red star decorations.
Overhead image of finely ground pink candy cane powder in a small cup on a wooden board, with a black electric spice grinder nearby, stray candy crumbs on the board and red star decorations to the side.

If you’re making Christmas peppermint chocolate bark in Australia in December – in our full-throttle summer humidity – there’s a bit of strategy involved in wrangling the candy canes. As soon as you peel off the plastic, they start absorbing moisture. The upside is a lovely extra shine; the downside is a level of stickiness that’s not quite so charming. So don’t be tempted to pre-prepare the crushed and chopped candy canes. Get this step done just before you’re ready to start melting the chocolate for your candy cane chocolate bark. 

Weigh the candy canes while they’re still in their wrappers, making sure you have at least 10g more than the recipe calls for to cover the weight of the plastic. Then remove the wrapping. I use a small electric spice grinder to blitz candy canes into a fine dust that’s folded into the white chocolate. You can also use a mini food processor, a high-speed blender, or go low-tech with a doubled up Ziplock bag and a rolling pin or meat mallet. Whatever you use, aim for a fine, even sand like result.  

Measure out 30g (single batch) or 60g (double batch) of the processed candy canes into a sealed container and set aside until needed for this peppermint bark recipe. 

For the roughly chopped décor pieces of candy cane, you can decide how generous you want to be on the topping. You can stop at classic red-and-white or add some Christmas-themed sprinkles, or even a salty element like pretzels, to create your own take on a festive candy cane chocolate bark.  

My big tip is not to unwrap the décor candy canes before you break them up. Keep them contained in their wrappers and use something with a bit of weight. I use the granite pestle from my mortar and pestle – to gently pound them on a wooden chopping board. You’re aiming for irregular pieces, not dust, so go easy. 

Once you’re happy with the size of the pieces, use a pair of kitchen scissors to snip through the plastic wrapping, tearing it open as you go. I do this over the large plastic container I plan to store them in. Tip the candy cane pieces into the container, breaking up any larger chunks with your fingers, then seal the lid. They can sit there, safely contained and only mildly sticky, until it’s time to decorate your candy cane peppermint chocolate bark. 

Onto the chocolate

You don’t have to temper the chocolate for this candy cane peppermint chocolate bark. It will look a little less glossy and won’t have quite the same “snap”, but it will still eat beautifully. The only real trade-off is that it will melt on your fingers a bit faster and is best stored in the fridge in an airtight container. For an easy peppermint bark recipe, that’s a compromise I’m very happy to live with. 

For storage, treat this Christmas peppermint chocolate bark with the same respect you’d give any good chocolate. In a cooler climate you could leave it in an airtight container at room temperature for 1–2 weeks, somewhere dark and away from direct heat. In an Australian summer though, especially if you’re dealing with humidity, I’d move it straight to the fridge. Stored in an airtight container in the refrigerator, this candy cane chocolate bark will happily keep for 2–3 weeks. If you’re serving it on a platter, take out only what you need and keep the rest chilled; the pieces will soften a little as they sit out unless you’ve tempered the chocolate. If you’re really planning ahead, you can also freeze the bark for up to a month, layered between baking paper in a sealed container, then thaw it in the fridge before serving.


Planning your stage chocolate layers

Whether you’re tempering or just melting the chocolate, you’ll need two medium-sized microwave-safe bowls (I prefer plastic over glass) and two separate flexible silicone spatulas. The chocolate is prepared in stages because the dark chocolate layer for the candy cane chocolate bark needs to partially set before you add the white chocolate layer. If you pour the white chocolate on too soon, the layers will blur together instead of staying distinct – which is fine if you’re happy with a marbled look, but not ideal if you want clean layers.  

On the other hand, you don’t want to wait so long that the white chocolate starts to set in the bowl and won’t spread easily over the dark chocolate. What you’re aiming for is a bottom layer of dark chocolate that is mostly set but still slightly soft. When you spread the warm white chocolate over the top, the two layers of this peppermint bark recipe should fuse together. If the dark chocolate is too firm, the layers are more likely to separate and pull apart when you break up the finished candy cane chocolate bark. 

Keep your blow dryer handy!

Don’t stress if this all sounds a bit precise – there’s a simple trick to keeping your chocolate cooperative while you assemble the layers of your Christmas peppermint chocolate bark.  

A basic blow dryer is all you need to rescue chocolate that’s setting a little too quickly. I use a Makita heat gun from Bunnings and, if you go that route, be very mindful of how hot they can get; I never go past the second heat setting.  

You can apply gentle heat to the surface of the dark chocolate layer to soften it slightly before adding the white chocolate. You can also briefly warm the chocolate in the microwave-safe bowl if it thickens before you’ve had a chance to spread it into the pan. The goal is just enough warmth to make the chocolate soft and spreadable again, not so much that it overheats or loses its structure.

Melting without tempering the chocolate

If you’re not tempering, just melt the chocolate gently. Start with the chopped dark chocolate in a microwave-safe bowl and heat on medium power in 20–30 second bursts, stirring well between each burst. Stop when there are still a few small lumps left – the residual heat will finish melting them as you stir.  

Alternatively, you can set a heatproof bowl over a saucepan of barely simmering water, making sure the base of the bowl doesn’t touch the water and no steam or splashes get into the chocolate. In both cases, low and slow is the rule; you want smooth, pourable chocolate for your candy cane peppermint chocolate bark, not overheated chocolate that seizes or burns.

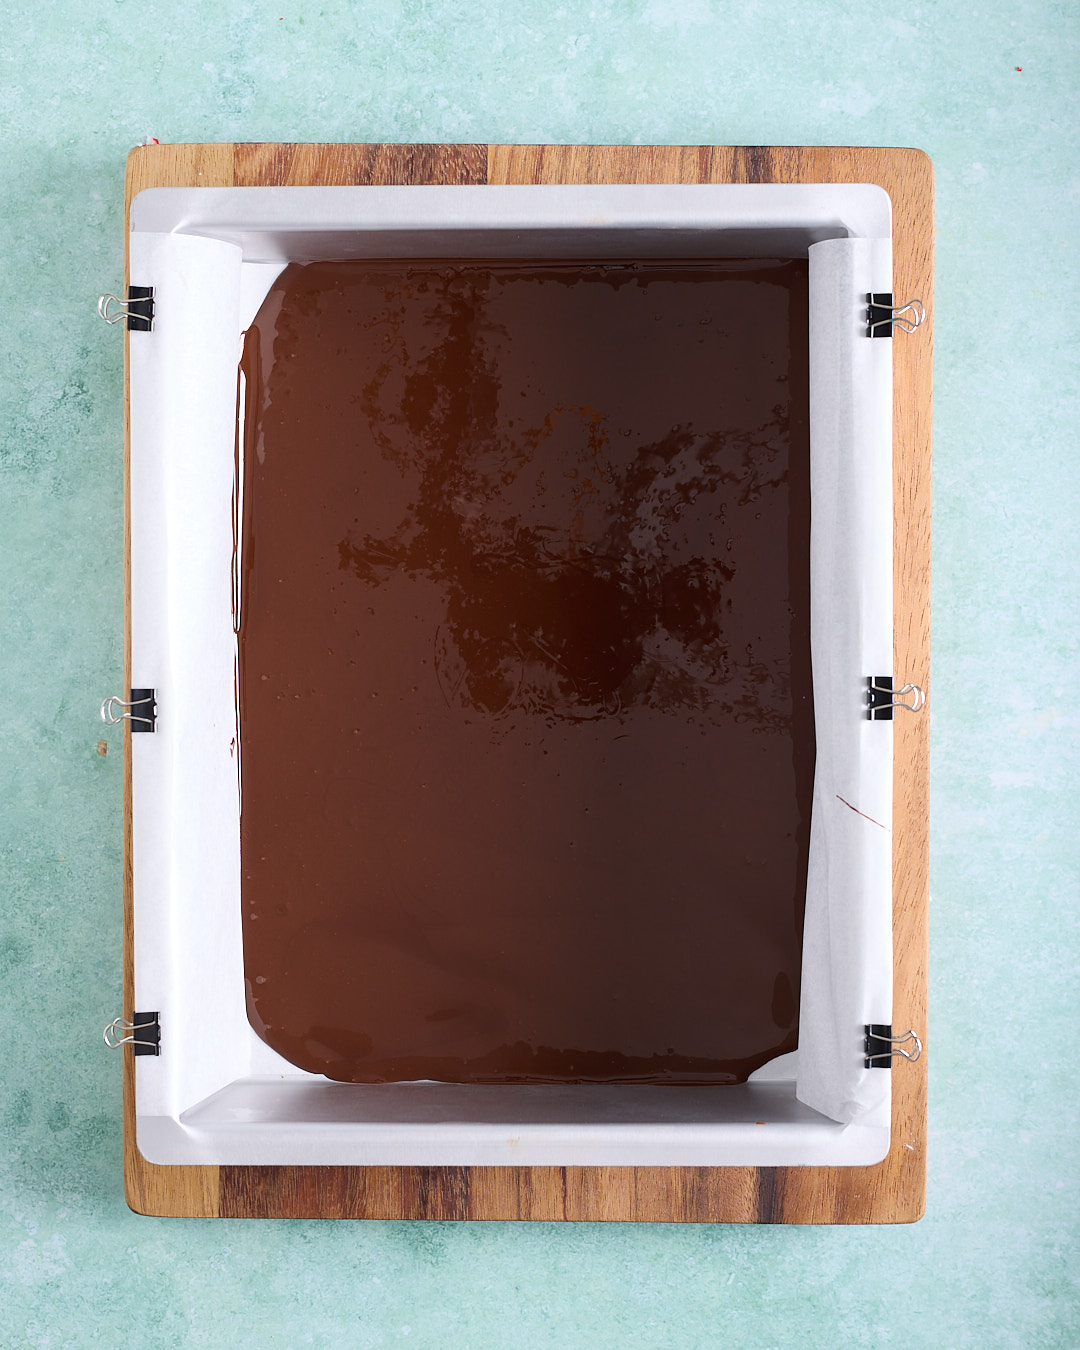
Overhead view of a rectangular baking pan lined with baking paper and clipped to the sides, filled edge to edge with a smooth, glossy layer of melted dark chocolate for the base of the peppermint bark.

Once the dark chocolate is melted, pour it into the prepared pan and spread it into an even layer. I use a combination of tipping and gently shaking the pan to encourage the chocolate to move, then finish by smoothing it with an offset spatula. Tap the pan on the bench a couple of times to get rid of any air bubblesSet the pan aside while you melt the white chocolate; the dark layer should be mostly set but still faintly soft by the time you’re ready to add the second layer of this peppermint bark recipe. 

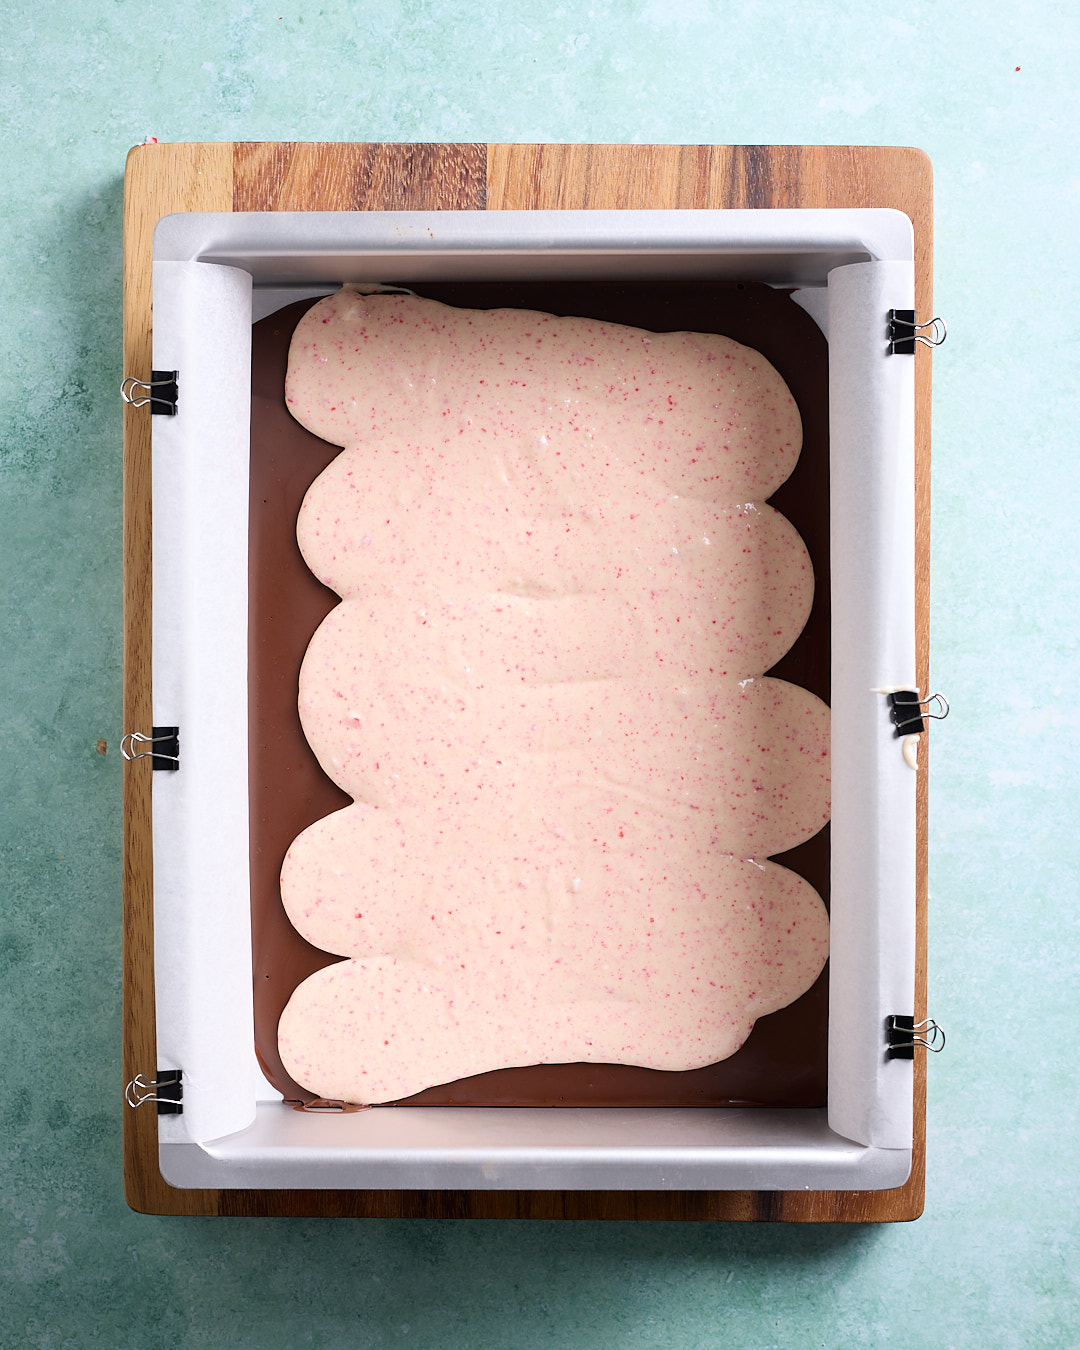
Overhead view of a rectangular baking pan lined with baking paper and clipped to the sides, filled with a smooth layer of dark melted chocolate topped in the centre with an irregular oval of pale pink peppermint white chocolate, ready to be spread into an even layer.

Have your crushed and broken candy canes ready to go. Melt the chopped white chocolate using the same gentle method as the dark, again using a silicone spatula to stir. Once melted, mix in the finely crushed candy cane until it is evenly distributed through the chocolate. The candy cane will encourage the white chocolate to thicken more quickly, so if it starts to firm up before you’re ready to spread it, use your blow dryer or heat gun on a low setting to gently warm the bowl until the chocolate loosens back to a smooth, pourable consistency. 

For a bit more control, I like to transfer the white chocolate to a large disposable piping bag and pipe it in wide ribbons over the dark chocolate layer of this candy cane chocolate bark. Then I use a clean offset spatula to spread it into an even layer, working quickly so the surface stays smooth. This gives you neat, distinct layers and a professional finish, even without tempering – very much in the spirit of an easy peppermint bark recipe that still looks like it belongs on a Christmas dessert table.

Optional microwave tempering method

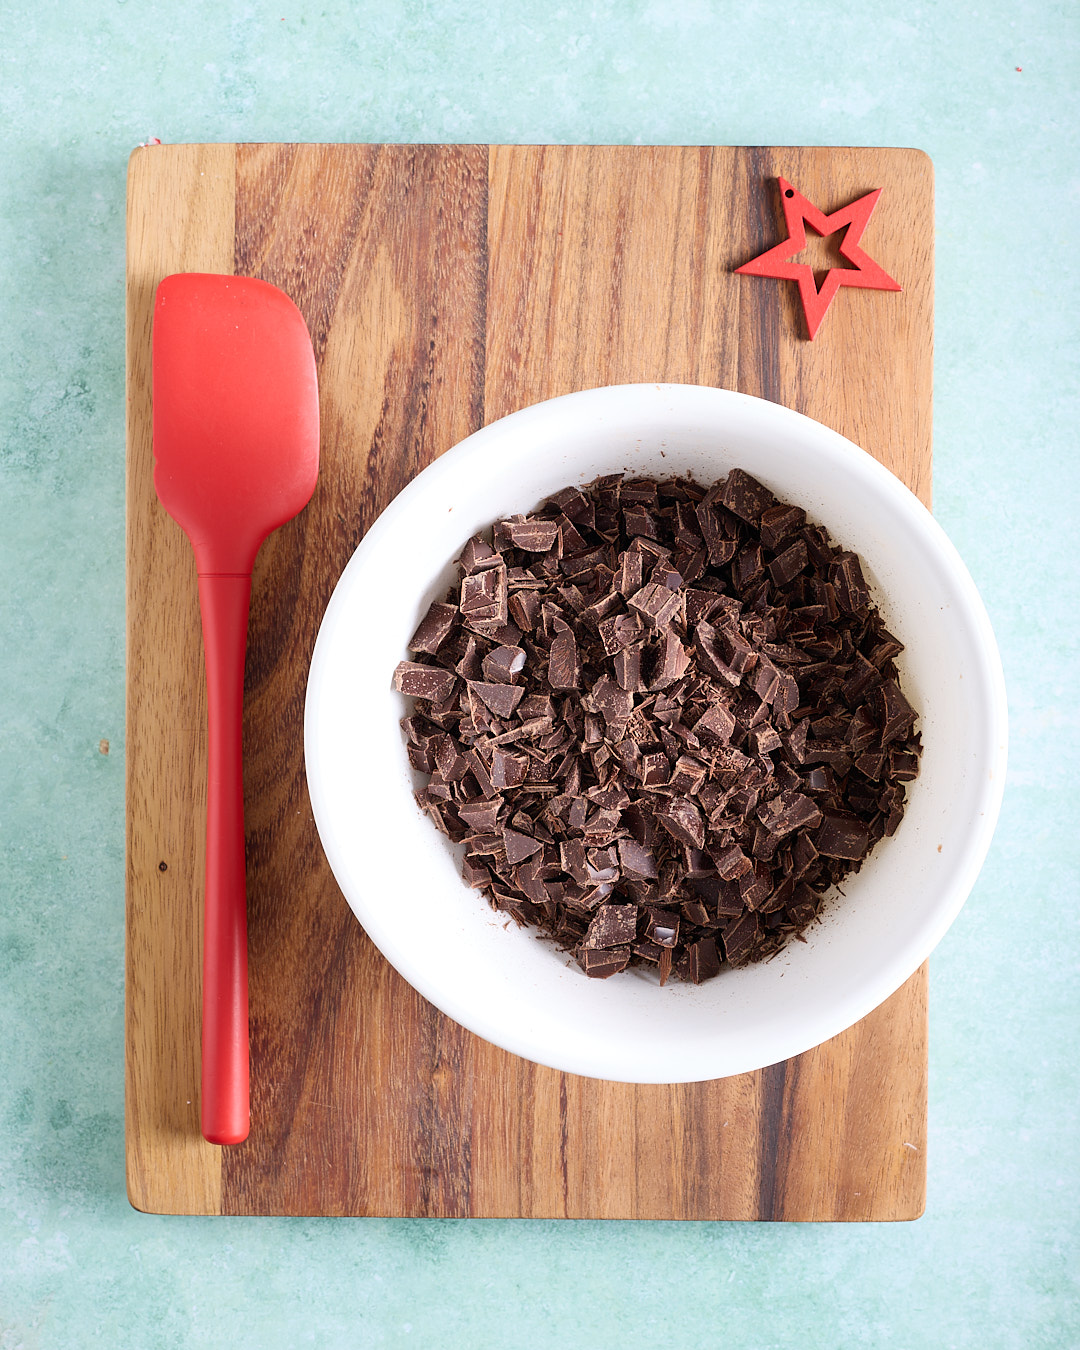
Overhead view of a white bowl filled with finely chopped dark chocolate on a wooden board, with a red silicone spatula and a small red star decoration beside it, ready for melting.
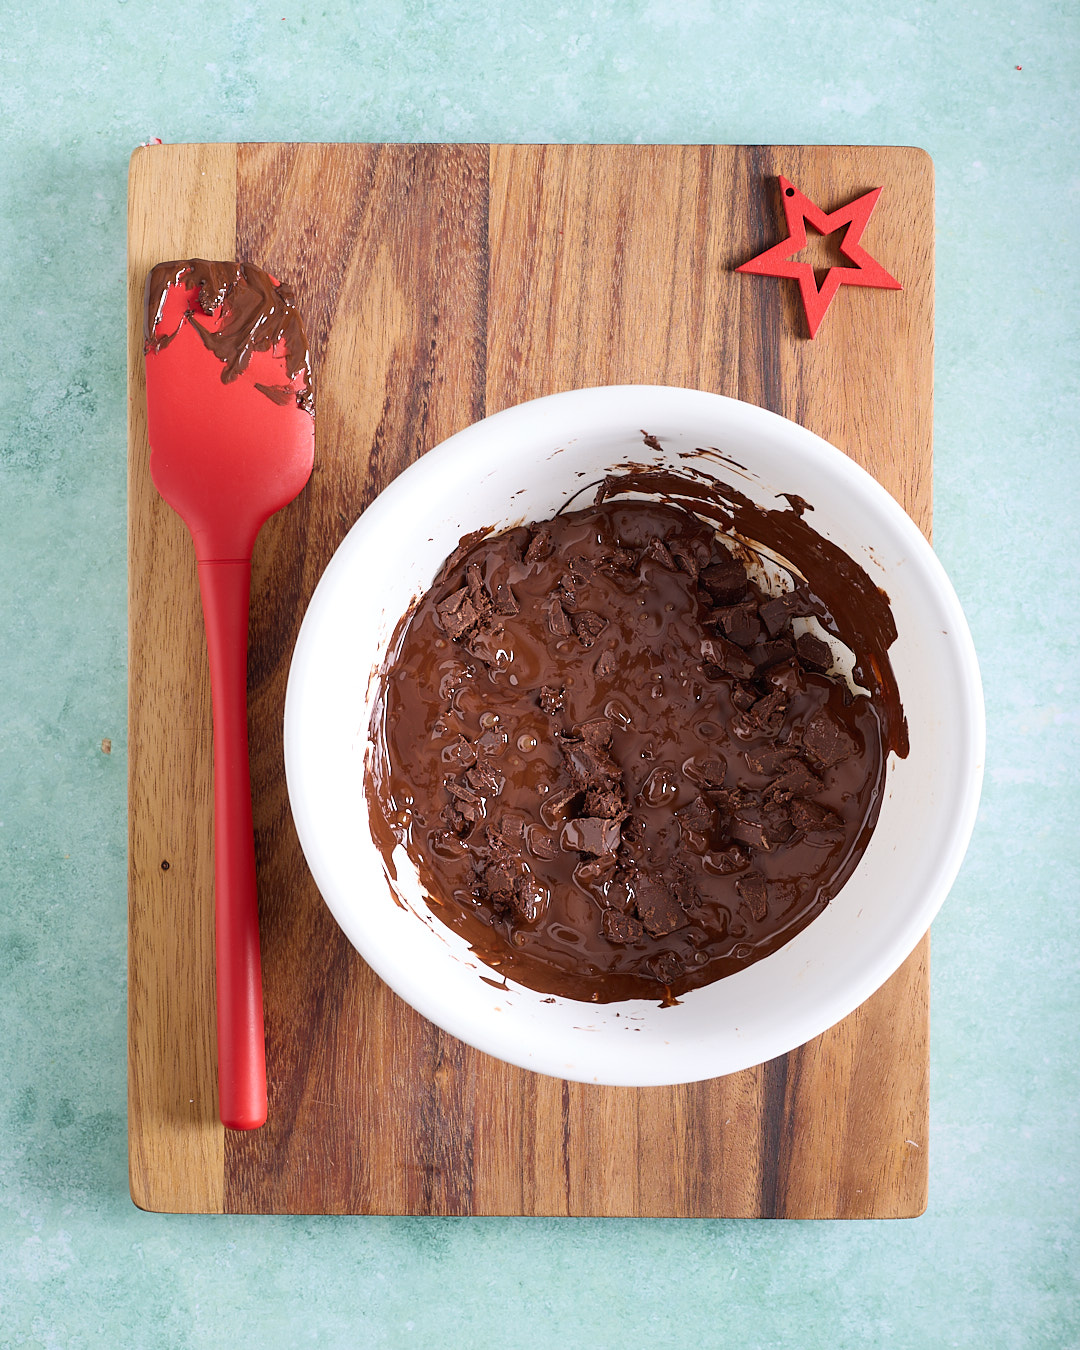
Overhead view of a white bowl of dark chocolate on a wooden board, the chocolate is 50% melted with visible soft chunks, and a red silicone spatula resting alongside.

If you want a glossy finish and a clean snap for this candy cane peppermint chocolate bark, microwave tempering is the simplest way to get there. As noted above, start by chopping the dark chocolate into fairly even small pieces, weighing the chocolate into a completely dry microwave-safe plastic bowl as you go. 

Heat the bowl on medium power in 20–30 second bursts, stirring thoroughly with a silicone spatula after each burst. The stirring matters just as much as the heating; it moves the warmer chocolate around so everything melts evenly. Keep going until you have roughly 50% solid chocolate and 50% liquid chocolate. 

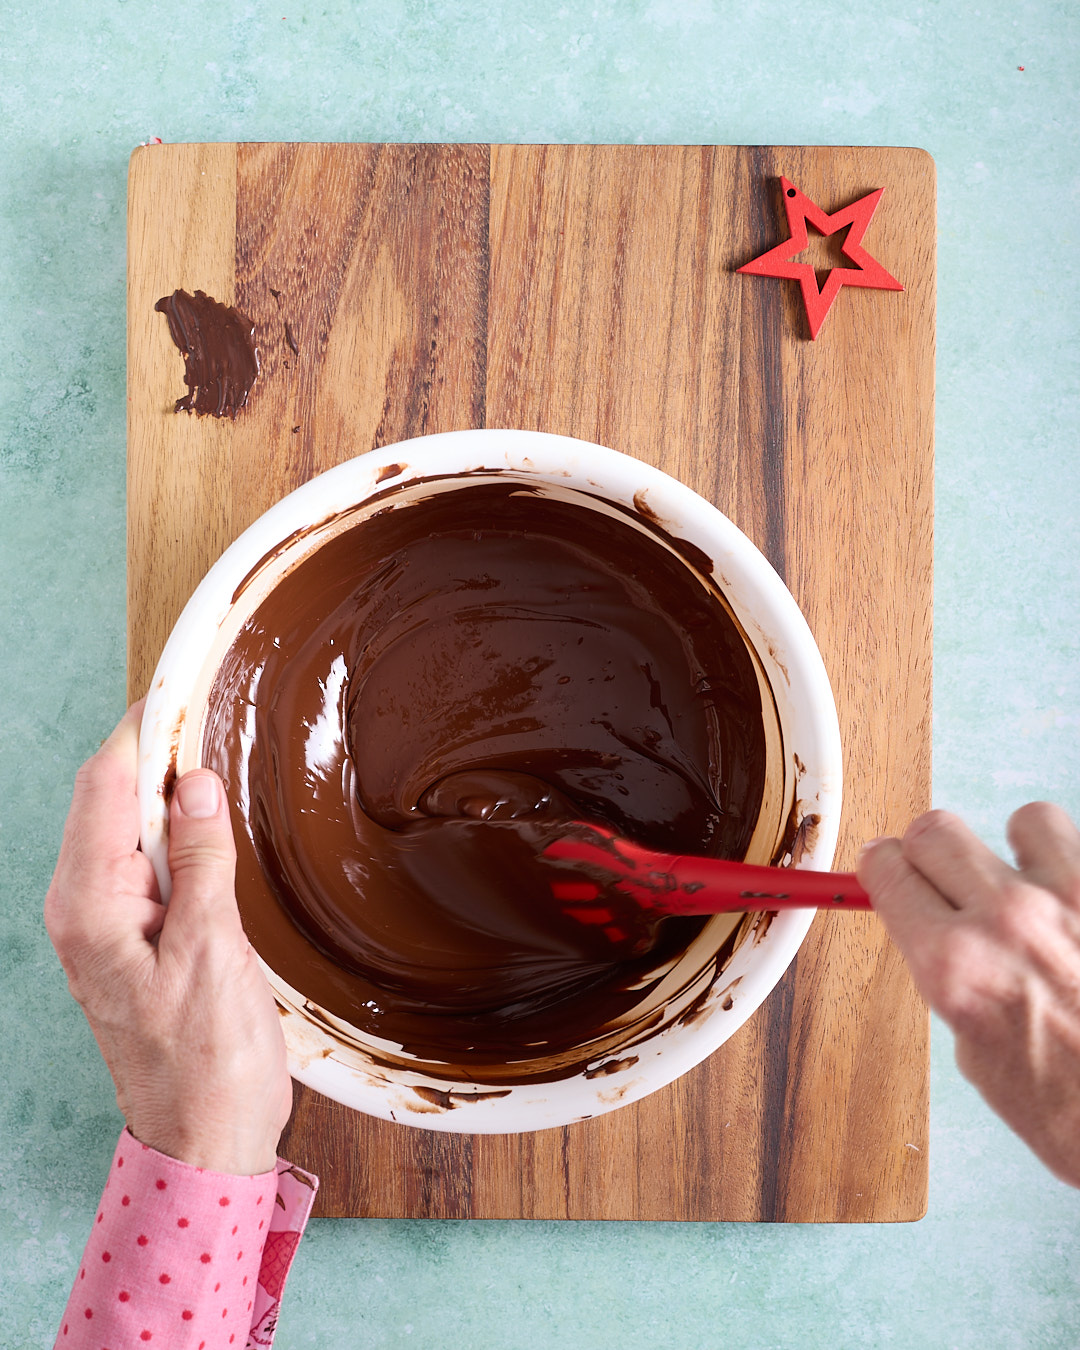
Overhead view of hands stirring a bowl of smooth, glossy melted dark chocolate with a red silicone spatula on a wooden board, a small smear of chocolate and a red star decoration nearby.

Remove the bowl of chocolate from the microwave and stir vigorously without applying any more heat until all the remaining solid chocolate has melted. This may take a few minutes. As you stir, the chocolate will start to thicken slightly and become glossy. If a few stubborn pieces refuse to melt, gently apply a little heat with the blow dryer while you keep stirring, just until they disappear. 

In the end don’t fret if your first attempt at tempering chocolate doesn’t work. You won’t be able to check until your peppermint bark recipe I ready to cut. But success looks like the dark chocolate layer contracts away from the sides of the pan (or the acetate/baking paper base) and when you lift it off the paper it comes away clean with a smooth glossy finish. And the ultimate test is whether you get a clean snap and break when you start to cut it up.   

If it sets slowly, looks a bit dull or streaky, or stays soft—don’t panic. Your easy peppermint bark recipe will still taste just as good. It simply means the chocolate is behaving like gently melted, untempered chocolate: a little softer, more prone to melting on your fingers and happiest stored in the fridge.

Get the holiday vibe with candy cane decor

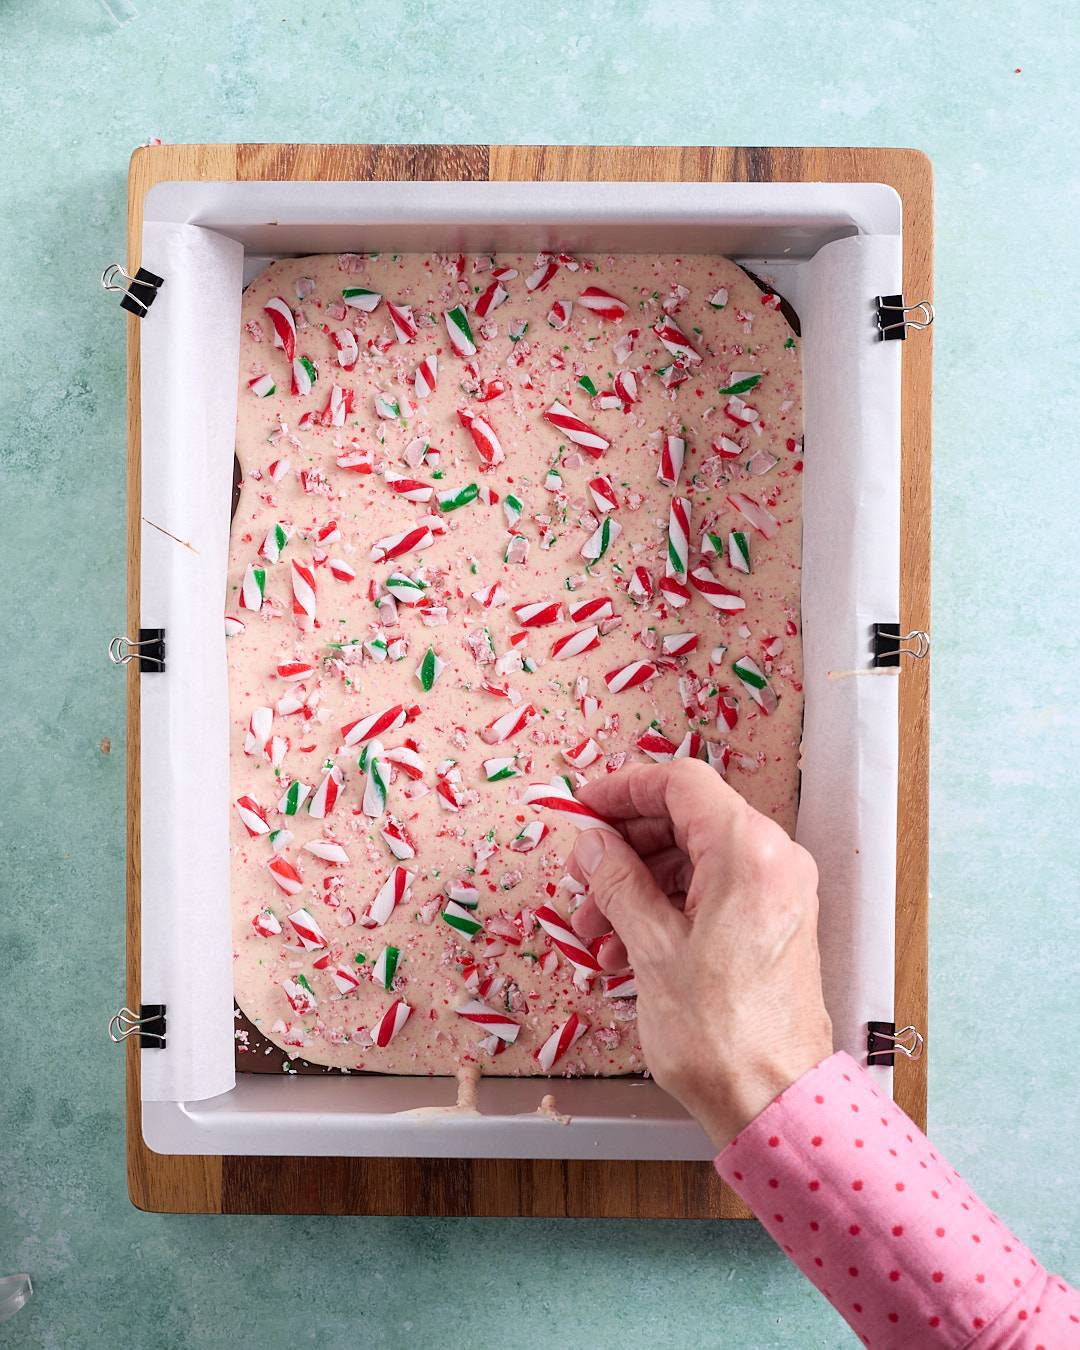
Overhead image of a rectangular pan lined with baking paper and filled with peppermint white chocolate over a dark chocolate base, as a hand scatters red and green candy cane pieces over the top to decorate the candy cane peppermint chocolate bark.

Once you’ve smoothed out the white chocolate layer on your Christmas peppermint chocolate bark, you’re ready to decorate with the broken candy cane pieces. There are no rules here; my biggest challenge is purposeful randomness – that is truly an art I have yet to master. Scatter the candy cane pieces over the surface so every bite of this candy cane chocolate bark has a mix of colour and crunch. 

You want the white chocolate layer to still be slightly soft so the candy canes will stick properly. If it has started to set, a brief waft of warm air from the blow dryer will soften the surface just enough for the décor to bed in without disturbing the layers underneath.

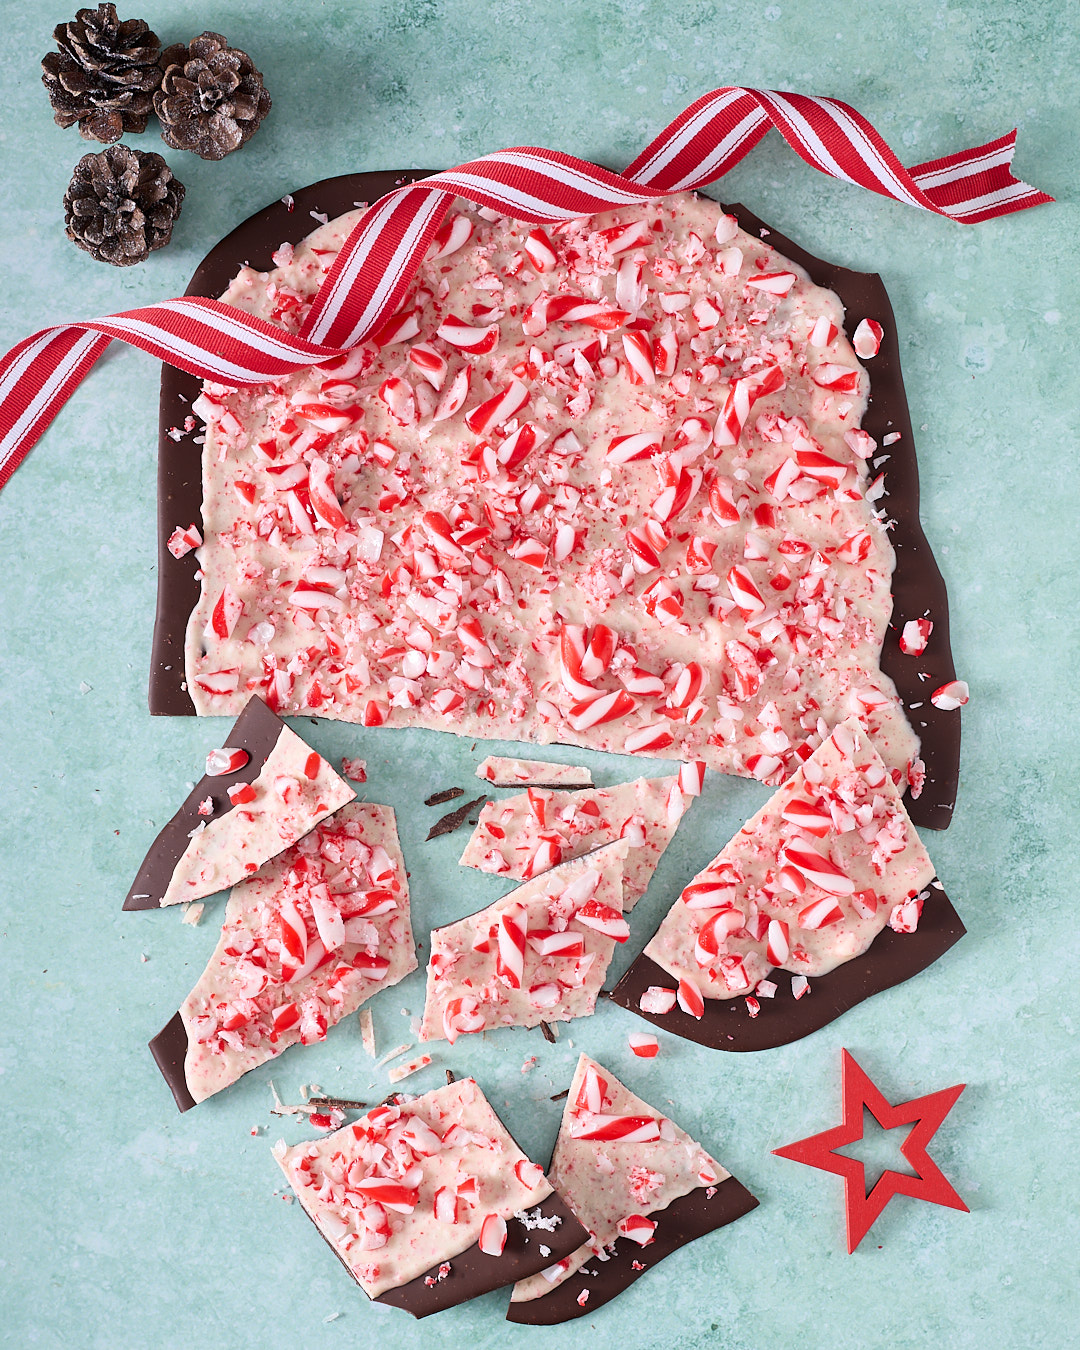
Overhead image of a large slab of candy cane peppermint chocolate bark on a mint-green background, dark chocolate base topped with a thick layer of peppermint-speckled white chocolate and crushed red-and-white candy canes, with broken shards scattered below, frosted pinecones, a red-and-white striped ribbon and a red star decoration completing the Christmas scene.

In the hero image above you can see the single-batch version of my Candy Cane Peppermint Chocolate Bark. This one is made on the same 23cm x 30cm baking sheet but spread a little thinner, so each chocolate layer is closer to 2–3mm. The result is a crisper snap when tempered and slightly more elegant shards, which I love for gifting. I’ve kept the décor simple here with just red-and-white candy canes, which gives a really clean, classic Christmas look compared to the chunkier double-batch bark with red and green candy canes. 

Candy Cane Peppermint Chocolate Bark

Stack of Candy Cane Peppermint Chocolate Bark on a white plate, layered dark and white chocolate studded with crushed red, white and green candy canes, with Christmas decorations and pinecones in the background.
I’m not pretending I invented this. Candy cane chocolate bark is an American Christmas classic at this point – the kind of thing that shows up in tins, office kitchens and school hampers all December. My Candy Cane Peppermint Chocolate Bark is simply my version of it. The only “discovery” here is what you do with the candy canes themselves – my own personal discovery, but I’m certainly not the first to that party either.
On paper, it shouldn’t have worked for me at all. Candy canes and white chocolate are, on their own, just about the last sweets I’d reach for; I’m usually the person politely saying “no thanks” when someone offers them around. 
Prep Time 30 minutes
Cook Time 1 hour 30 minutes
Total Time 2 hours
Course Candy, Confectionery, Treat
Cuisine American, Mexican
Servings 12

Equipment

  • 3cm x 30cm (9” x 12”) baking sheet or baking pan
  • Digital scales
  • Wooden chopping board
  • Sharp knife
  • 2 Medium microwave-safe mixing bowls (plastic)
  • 2 Silicone spatulas
  • Offset spatula
  • Baking paper or baking acetate
  • Small bulldog clips (optional, for securing baking paper)
  • Electric spice grinder (optional, for crushing candy canes)
  • Mortar and pestle (optional, for breaking candy canes in wrappers)
  • Large plastic container with lid
  • Large disposable piping bag (optional, for piping white chocolate layer)
  • Blow dryer or heat gun

Ingredients  

  • 180 g dark chocolate
  • 180 g white chocolate
  • 30 g crushed candy canes
  • 100-150 g broken candy canes

Instructions 

Prepare the pan:

  • Line a 23cm x 30cm (9” x 12”) baking sheet with baking paper or baking acetate and secure it with a tape.

Crush and chop the candy canes:

  • Using digital scales, weigh out 40g of candy canes while they are still in their wrappers.
  • Unwrap the candy canes and use an electric spice grinder, mini food processor or a Ziplock bag and rolling pin to grind enough to give you 30g finely crushed candy cane.
  • Tip this into a small plastic container with a lid and set aside.
  • For the décor, keep 100-150g of candy canes in their wrappers, use a mortar and pestle (or something with a bit of weight) over a wooden chopping board to break them into irregular pieces. Snip open the wrappers with kitchen scissors, tip the broken pieces into a lidded container, breaking up any bigger chunks with your fingers, then seal until you’re ready to decorate the chocolate bark.

Melt the dark chocolate:

  • Chop 180g dark chocolate into small, fairly even pieces, then transfer it to a medium microwave-safe plastic mixing bowl.
  • Heat on medium power in 20–30 second bursts, stirring thoroughly with a silicone spatula between each burst.
  • Stop when most of the chocolate is melted and only a few small lumps remain; the residual heat will finish melting them as you stir.
  • You want smooth, pourable chocolate for this easy peppermint bark recipe, not overheated chocolate that’s starting to thicken or seize.

Spread the dark chocolate layer:

  • Pour the melted dark chocolate onto the prepared pan and tilt, tip and gently shake the pan to help it spread into an even layer.
  • Use an offset spatula to nudge the chocolate into the corners and smooth the surface, the layer will be about 2–3mm thick.
  • Tap the pan on the bench a couple of times to get rid of any air bubbles, then set it aside at cool room temperature while you prepare the white chocolate.
  • You want the dark chocolate to be mostly set but still faintly soft when you add the next layer, so don’t refrigerate it at this point.
  • If you prefer to temper the chocolate for an extra glossy finish and crisper snap, there is a full microwave tempering method in the notes at the end of the recipe.

Melt the white chocolate and add the crushed candy cane:

  • Chop 180g white chocolate into small, even pieces and place in a second medium microwave-safe mixing bowl.
  • Melt it using the same gentle method as the dark chocolate, again stirring between short bursts in the microwave with a clean silicone spatula.
  • Once the white chocolate is smooth and fully melted, add the 30g finely crushed candy cane and stir until it is evenly distributed.
  • The candy cane will thicken the white chocolate more quickly than plain chocolate, so if it starts to firm up before you’re ready to pour, use a blow dryer or heat gun on a low setting to warm the chocolate, stirring until the chocolate loosens back to a smooth, pourable consistency.

Add the white chocolate layer:

  • For more control, transfer the peppermint white chocolate to a large disposable piping bag and snip off the tip, then pipe it in wide ribbons over the dark chocolate layer.
  • Alternatively, pour it directly from the bowl. Use a clean offset spatula to spread the white chocolate into an even layer, working quickly so the surface stays smooth.
  • Again, tap the pan firmly on the bench a couple of times to remove any air bubbles and help the layers settle together.

Decorate with candy cane pieces:

  • While the white chocolate layer is still slightly soft, scatter 100–150g of the broken candy cane pieces over the surface of the chocolate bark, aiming for reasonably even coverage.
  • If the surface has started to set, a brief waft of warm air from the blow dryer will soften it just enough to help the candy cane pieces stick without disturbing the layers underneath.

Set, slice and serve:

  • Leave the bark to set until the chocolate is completely firm.
  • In a cool kitchen you can let it set at room temperature, but in a warm or humid Australian summer it’s safer to cover the pan with several layers of plastic wrap and transfer the pan to the fridge and chill for about 1–1½ hours, until the bark is fully set.
  • Once firm, use a sharp knife to cut it into irregular pieces or simply snap it into shards.

Just before you cook with abandon…

Tempering or not: You don’t have to temper the chocolate for this candy cane peppermint chocolate bark. Tempering gives you a glossier finish and a crisper snap, and the bark will hold up a little better on a Christmas platter. But if your chocolate ends up behaving like untempered chocolate, it will still eat beautifully. The only real trade-off is that it will melt on your fingers a bit faster and is happiest stored in the fridge.
Using good chocolate: This is not the place for compound chocolate, melts, buttons or chips. There is nowhere for average chocolate to hide in candy cane chocolate bark like this, and you only have a handful of ingredients to work with. Use a decent eating or baking chocolate (like the Nestlé Plaistowe bars I’ve used) and you’ll get a smoother melt, better flavour and a more satisfying snap when you break up the bark.
Single batch versus double batch: The ingredients scale batch well depending on how thick you want each layer of your peppermint bark recipe to be. A single batch made on a 23cm x 30cm baking sheet gives you thinner layers, around 2–3mm, which means a crisper snap and slightly more elegant shards for gifting. A double batch in a pan of the same footprint but higher sides will give you layers closer to 5mm thick and a chunkier, more indulgent result. Both versions work – it just depends on whether you want dainty shards or more of a “slab of Christmas” energy.
Wrangling candy canes in summer: If you’re making Christmas peppermint chocolate bark in an Australian December, the humidity will start working on those candy canes the moment you peel off the plastic. They’ll pick up a lovely shine but also a fair bit of stickiness. The trick is timing: don’t crush or chop the candy canes ahead of time. Grind the fine candy cane “dust” and break the décor pieces just before you start melting the chocolate, then keep them in sealed containers until you’re ready to mix and decorate.
Keep white and dark chocolate separate: To keep the layers of your candy cane chocolate bark looking sharp, treat the dark and white chocolate like separate projects. Use different bowls and different silicone spatulas for each, and make sure there are no streaks of dark chocolate hiding in the white chocolate bowl (or vice versa) before you melt or spread. Any stray smears will show up as muddy streaks in the finished bark, especially in the white layer.
Microwave tempering (at a glance): The full microwave tempering method for this candy cane peppermint chocolate bark is set out in the blog, but here’s a short version. Gently melt the chopped chocolate in the microwave until it’s 50% melted and 50% solid, then stop applying heat and stir vigorously until the remaining pieces melt and the chocolate thickens slightly and turns glossy.
Storage and make ahead: For storage, treat this Christmas peppermint chocolate bark with the same respect you’d give any good chocolate. In a cooler climate you could leave it in an airtight container at room temperature for 1–2 weeks, somewhere dark and away from direct heat. In an Australian summer though, especially if you’re dealing with humidity, I’d move it straight to the fridge. Stored in an airtight container in the refrigerator, this candy cane chocolate bark will happily keep for 2–3 weeks. If you’re serving it on a platter, take out only what you need and keep the rest chilled; the pieces will soften a little as they sit out unless you’ve tempered the chocolate. If you’re really planning ahead, you can also freeze the bark for up to a month, layered between baking paper in a sealed container, then thaw it in the fridge before serving.
Keyword candy cane chocolate bark, candy cane peppermint chocolate bark, easy peppermint bark, peppermint bark recipe

Leave a Reply

Your email address will not be published. Required fields are marked *

Recipe Rating


Hi, I'm Sandra!

I live by the words of Harriet Van Horne and I will be exploring every possible way to bring Harriet’s words to life in my kitchen.

Recipes

Discover delicious featured food recipes! From quick meals to gourmet delights, Sandra offer inspiring dishes for every occasion. Explore, cook, and enjoy flavorful creations today.

You might also like..

Pumpkin ‘Kitchen Sink’ Salad

Thai Green Pawpaw Salad

Blueberry Rosemary Jam

Easy Stovetop Grilled Lamb Chops (no BBQ)

Subscribe

Subscribe to my newsletter for a chance to win a FREE APRON (drawn monthly) as well as cooking tips, recipes, offers and exclusive content.

"*" indicates required fields