

Recipes

Devil’s Food Mini Cakes with Whipped Peppermint Bark Ganache
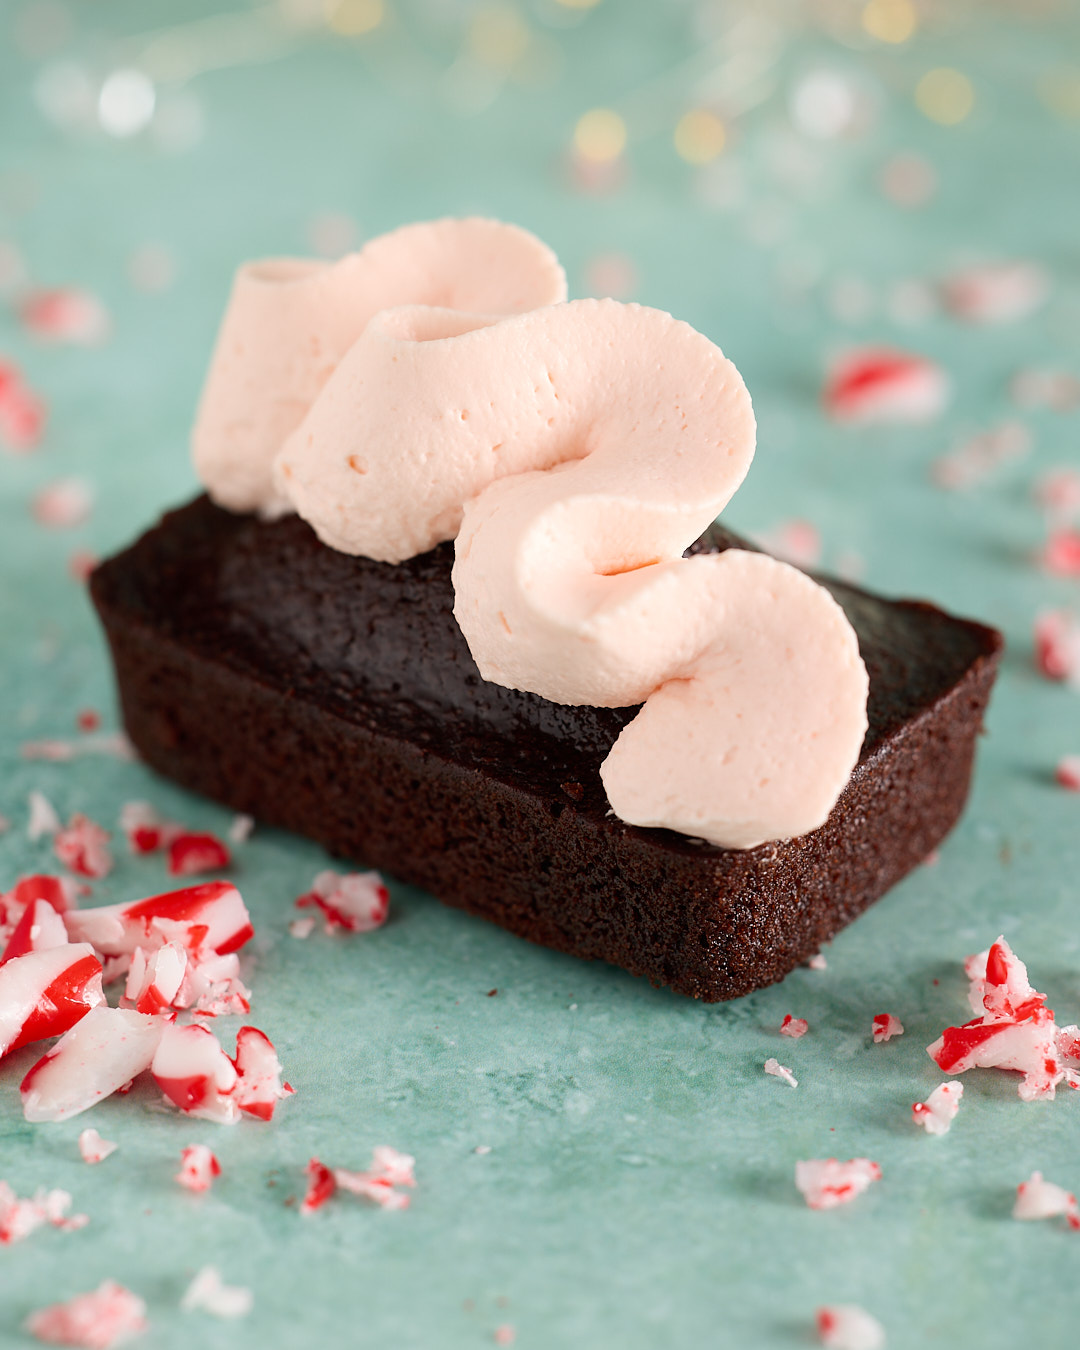
Close-up of a devil’s food mini cake topped with a swirl of whipped peppermint bark ganache, with crushed candy cane pieces scattered on a teal background.

I knowdevil’s food mini cakes with whipped peppermint bark ganache is a whopping great big verbose recipe title for what is actually a petite and straightforward make-ahead Christmas dessert. 

These mini devil’s food cakes are my Christmas answer to the “what are we going to do with all those candy canes?” situation: rich, deeply chocolatey little devil’s food mini cakes topped with whipped candy cane white chocolate ganache. It tastes like peppermint bark grew up and got its act together. 

Once you’ve experienced whipped peppermint bark ganache, you’re going to be looking for any excuse to use it in a dessert. My family is currently debating whether a bowl of whipped ganache each in front of our favourite Christmas movie—Love Actually—is an indulgent bridge too far… 

If you’re following along with my candy cane trilogy, you can also see the original Candy Cane Peppermint Chocolate Bark, and the Peppermint Bark Shortbread Biscuitsbecause apparently this is the year I finally stopped rolling my eyes at candy canes and started using them on purpose. 

Let me break it down for you. 

Ingredients

Devil’s food mini cake ingredients

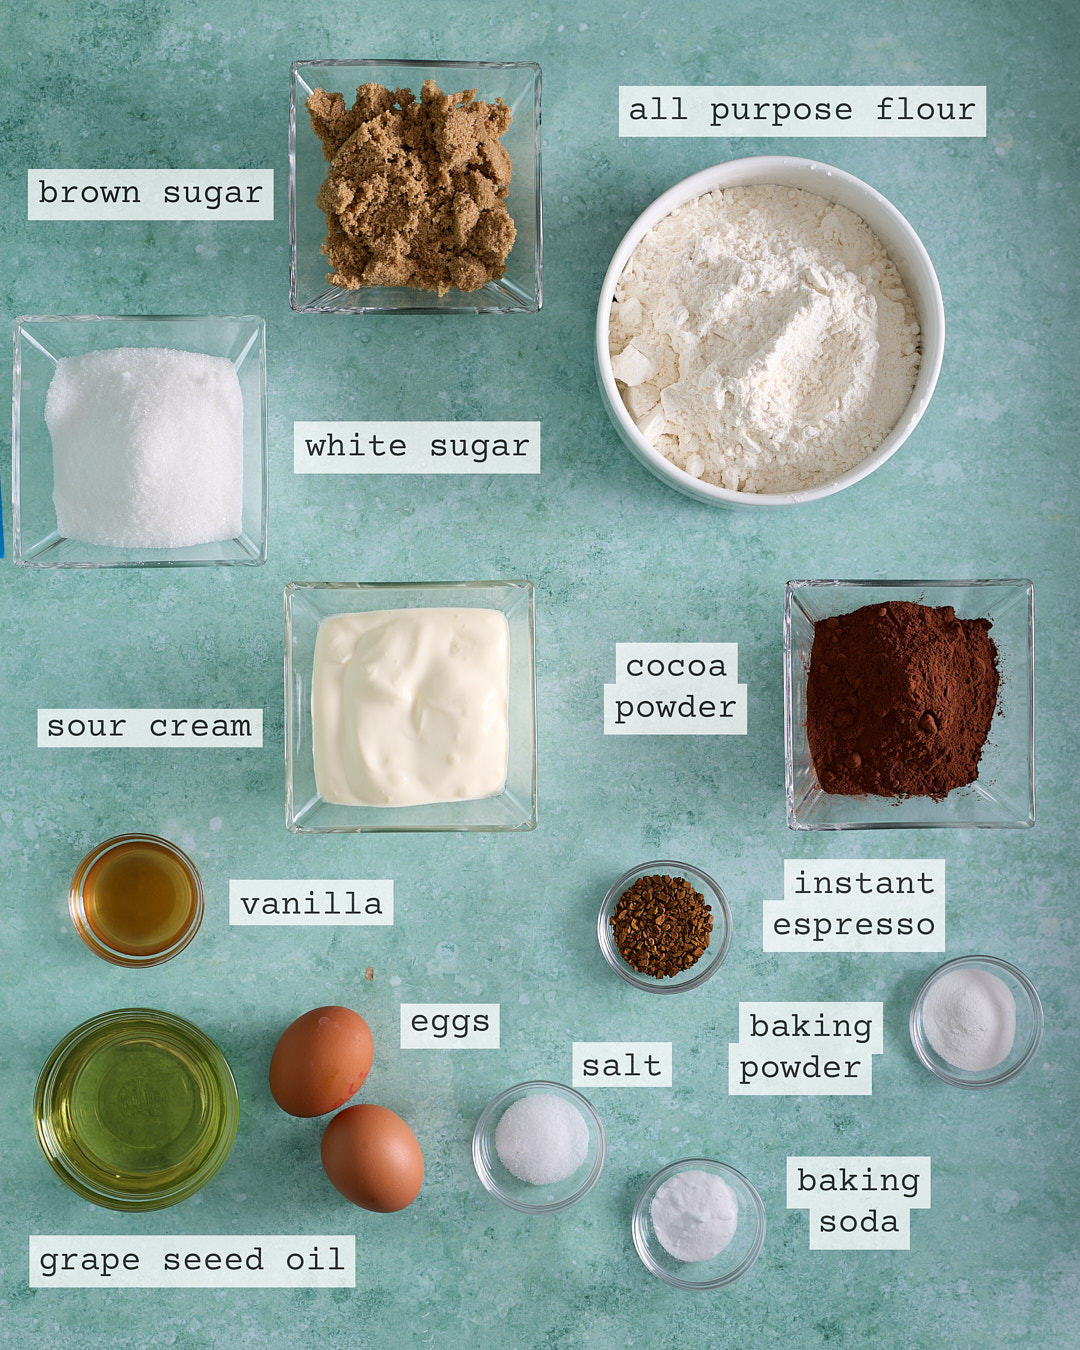
Overhead flat lay of the labelled ingredients for devil’s food mini cakes on a teal background: all-purpose flour, Dutch processed cacao powder, brown sugar, white sugar, sour cream, vanilla, grapeseed oil, eggs, instant espresso, salt, baking powder, and baking soda in small bowls.
  • 240g all-purpose flour 
  • 75g Dutch processed cacao powder 
  • 2 teaspoons espresso powder 
  • 275ml boiling water 
  • 150g granulated white sugar 
  • 125g light brown sugar 
  • 1 teaspoons baking powder 
  • 1/4 teaspoon baking soda 
  • 3/4 teaspoon table salt 
  • 135ml grapeseed oil 
  • 1 teaspoon vanilla extract 
  • 2 large eggs 
  • 175gm full fat sour cream 

Espresso powder vs instant coffee

This mini devil’s food cakes recipe includes espresso powder for a reason. It boosts the chocolate flavour without making the cake taste like coffee. If all you’ve got is instant granules, they’ll still do the job—just know the flavour won’t be quite as smooth or deep. Either way, they steep with the Dutch-processed cocoa to bring out that rich, bittersweet intensity these moist devil’s food mini cakes are all about

Why Dutch-processed cocoa is worth it

This isn’t the place for skimping on the cocoa powder with no name brands. Dutch-processed cocoa powder gives these mini devil’s food cakes their signature dark crumb and rounded, complex flavour. It also bakes up beautifully with the baking powder in this recipe, helping keep the texture soft and luxurious. Natural cocoa will work but expect a sharper taste and lighter colour. 

What if I don’t have grapeseed oil?

I use grapeseed oil here for its lightness and neutral flavour. But if you don’t have it, don’t panic. Canola, rice bran or sunflower oil will all work well in this devil’s food mini cakes recipe. Just steer clear of olive oil unless it’s very mild—you want the whipped peppermint bark ganache to shine, not fight with the grassy notes of EVOO.

Candy cane white chocolate ganache ingredients

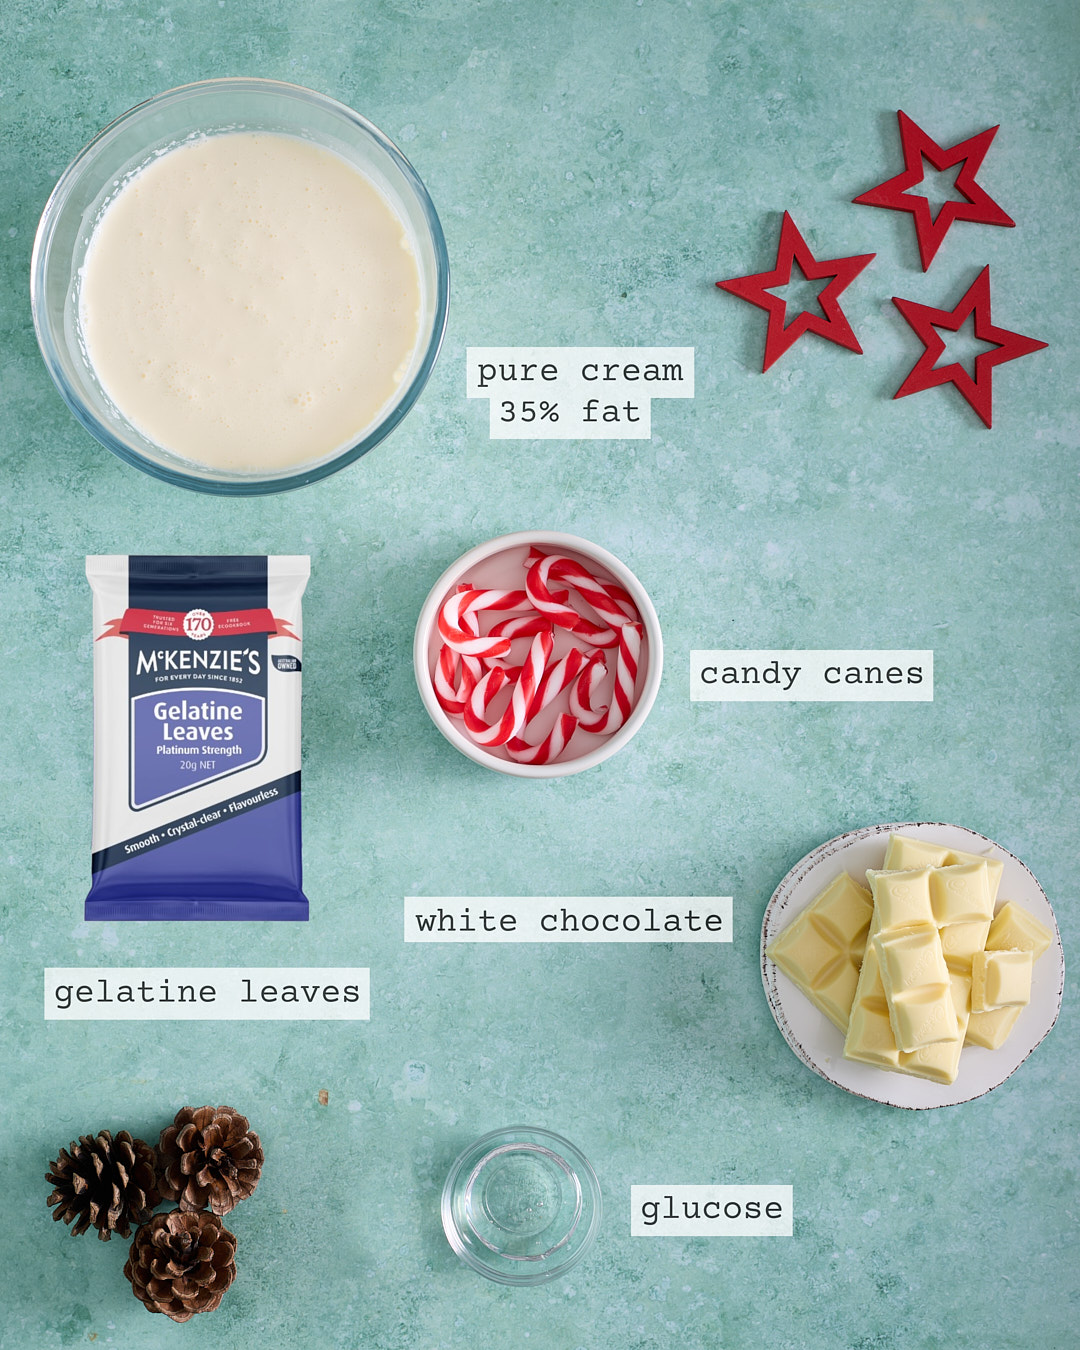
Overhead photo of the labelled ingredients for candy cane white chocolate ganache on a teal background: a bowl of pure cream (35% fat), candy canes, a packet of gelatine leaves, white chocolate pieces on a plate, and a small bowl of glucose.
  • 120g white chocolate 
  • 2g gelatine sheet (gold) 
  • 30g crushed candy canes 
  • 85g pure cream 35% (Cream A) 
  • 10g glucose 
  • 260g pure cream 35% (Cream B) 

To get 30g net crushed candy canes, I start with around 50g of whole candy canes to account for wastage. And I weigh them in their plastic wrapping because they start getting sticky in Queensland on a hot, humid summer day in the lead up to Christmas. 

All white chocolate is not created equal

A successful whipped peppermint bark ganache is honestly most dependent on the quality of the white chocolate you use. This isn’t the recipe for compound chocolate, melts, buttons, or chips. 

And all baking white chocolate is not created equal. It’s the cocoa butter content that helps—along with the gelatine—stabilise the ganache so it can be piped and hold its shape. 

I find that, as a home baker, sourcing white chocolate that actually  contains cocoa butter can be challenging. Before buying a block, check the ingredients. You’re looking for a minimum declaration of 23% cocoa solids. If it only lists vegetable oils, that’s not actually a bar of ‘chocolate’—move on. 

For this candy cane white chocolate ganache recipe, I’ve used the 23% cocoa solids Cadbury Baking Chocolate that’s generally available in Australian supermarkets. 

Speciality stores may also carry Lindt couverture, which is 36% cocoa solids. 

And if it’s in your budget and you want the best, you can’t go past Callebaut’s white chocolate, which ranges from 32%–40.7% cocoa solids, depending on which of their recipes you can source. 

Gelatine will save the day in the summer

Gelatine plays an important role in stabilising the whipped peppermint bark ganache, and I promise it doesn’t end up with a mouthfeel like jelly—it plays a subtle supporting role only. 

I use McKenzie’s gelatine leaves because they’re readily available in Australian supermarkets. For this candy cane white chocolate ganache, you need one McKenzie gelatine leaf. 

If you only have McKenzie’s powdered gelatine, you can substitute ½ teaspoon gelatine powder bloomed in 1 tablespoon of cold water.

Get organised

I’m an adherent to the French cooking principle of mise en place—everything in its place. Having your ingredients and equipment ready before you start isn’t just for professional kitchens; it’s how you keep home baking calm and consistent.  

Measuring, prepping and setting everything out before the first step really does put the “easy” into any recipe. 

For this recipe the 2 large eggs and 175gm full fat sour cream to be at room temperature. Cream B is used cold straight from the fridge. 

Making the mini devil’s food cakes

This recipe has been developed for an eighthole mini loaf pan, preferably a non-stick pan, and it makes 14–15 mini cakes depending on the size of your pan. I use two eighthole mini loaf pans, but you won’t necessarily fill every cavity. Prepare the pans with spray oil or grease with butter. I also cut out baking paper to snuggly fit into the base of each hole, to ensure the delicate devil’s food mini cakes come out without sticking to the bottom of the pan.

Why bloom cacao powder and espresso powder in boiling water?

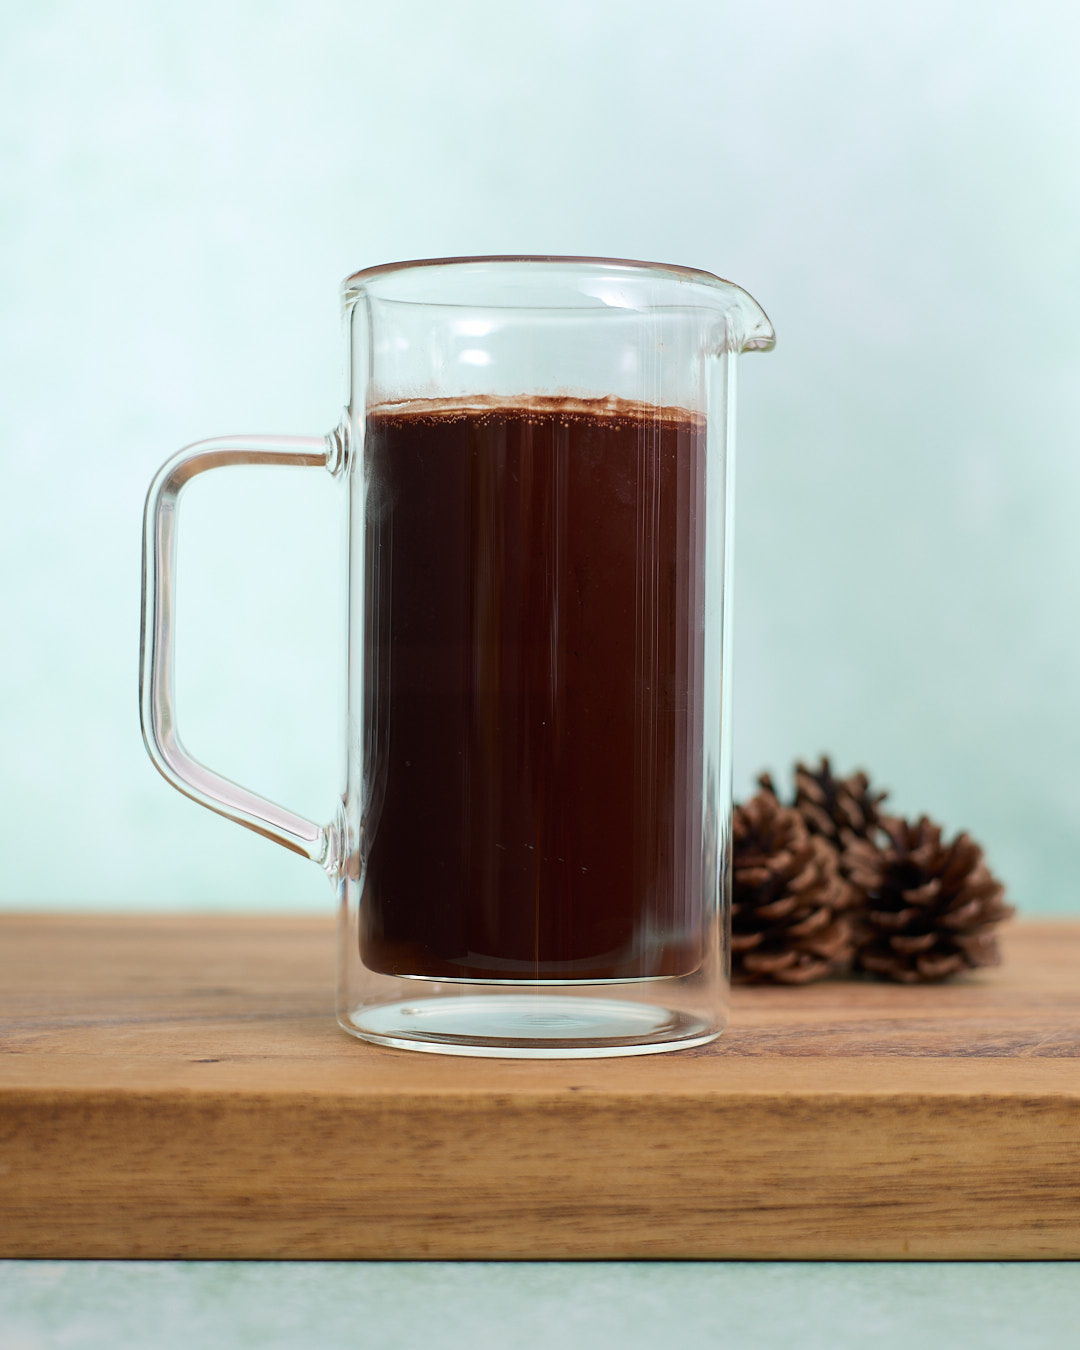
Glass jug filled with a dark chocolate cocoa-and-espresso bloom mixture sitting on a wooden board, with pinecones in the background.

Blooming cocoa powder and espresso powder in boiling water helps unlock a deeper, more complex flavour and contributes to the moist texture that makes a devil’s food mini cakes recipe so special. 

Cocoa powder contains compounds that give chocolate its bitter, aromatic edge. When mixed with boiling water, those compounds dissolve and intensify, giving you a richer, more full-bodied result. The espresso powder works the same way—it adds roastiness and depth without making the cake taste like coffee. 

It also improves texture and consistency. In this these mini devil’s food cakes, the cocoa and espresso powder are fully hydrated during the bloom. That means no dry pockets or streaks, and a smoother, more even crumb. 

And it enhances moisture. Blooming the cocoa helps it fully incorporate into the liquid, locking in moisture and giving you that tender, party-worthy chocolate cake finish. 

While the chocolate is blooming preheat oven to 175°C conventional and 155°C fan forced.

Take the time to sift the dry ingredients – you’ll be glad you did

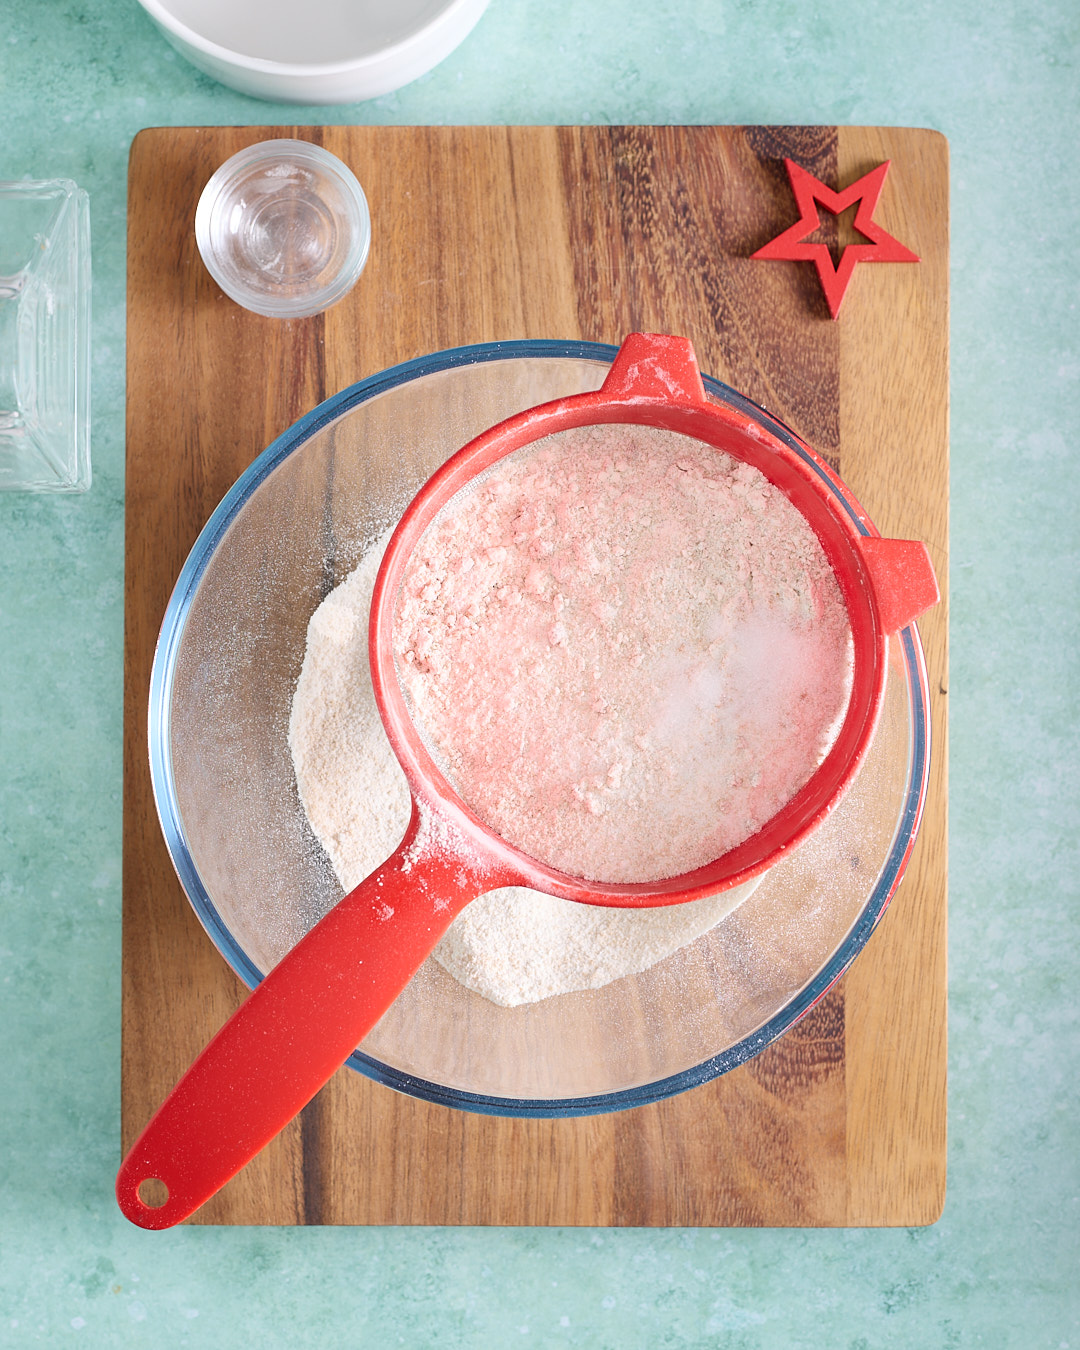
While the chocolate and espresso mixture cools to room temperature, sift the flour, baking powder, baking soda, salt, white sugar, and brown sugar into a large mixing bowl. I use a coarse sieve here—pushing brown sugar through a fine one is an exercise in frustration. 

Keep scooping up the sifted mixture and passing it through the sieve until everything is well combined and the texture is even and fine—think soft sand with no lumps. It takes an extra minute, but it’s worth it. 

This step makes a big difference to the mini devil’s food cakes’ final result. When your dry ingredients are evenly mixed and lump-free, it’s much easier to incorporate the wet ingredients without overmixing the batter—key to getting that tender, moist devil’s food cake crumb.

Sifting the flour, baking powder, baking soda, salt, white sugar, and brown sugar into a large mixing bowl with a coarse sieve while the cocoa and espresso mixture cools to room temperature, creating a fine, evenly combined dry mix with no lumps.

Combine all the wet ingredients

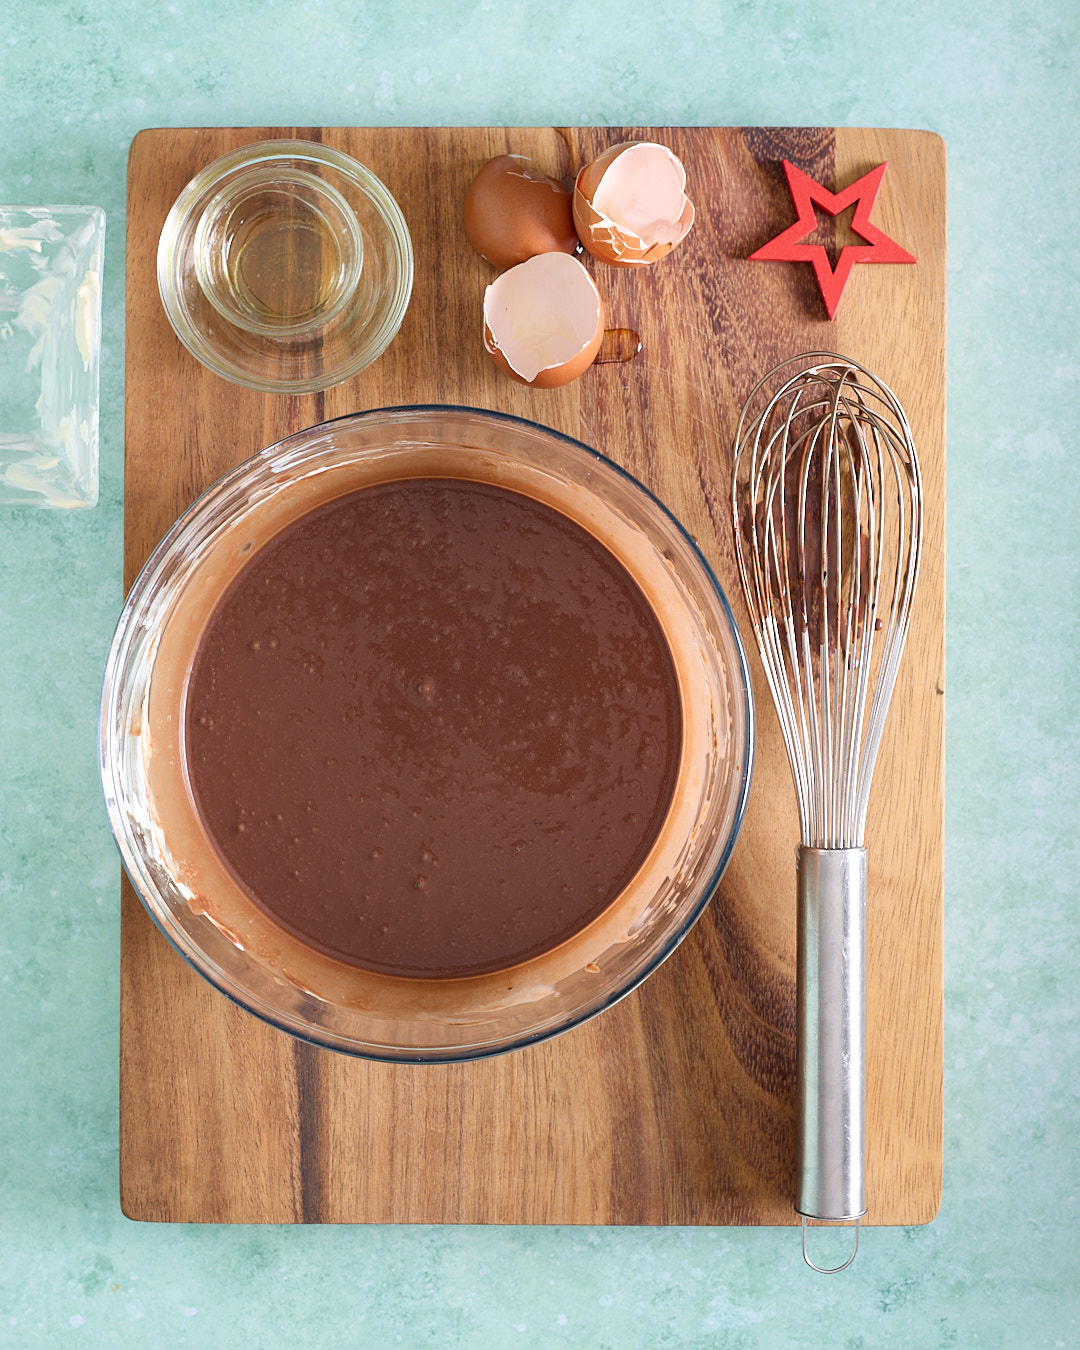
Overhead photo of the wet ingredients for devil’s food mini cakes mixed in a large glass bowl on a wooden board, with a whisk, eggshells, and a small bowl of grapeseed oil nearby on a teal background.

In a large 2–3 litre jug, start preparing the wet ingredients. Add the sour cream, then whisk in 1 egg at a time, beating well after each addition. Next, add the oil and vanilla extract and whisk until smooth. 

Finally, pour in the bloomed cocoa and espresso mixture and whisk until thoroughly combined. You’re now ready for the final step in this devil’s food mini cakes recipe—bringing the batter together. 

Don’t ruin all your hard work

If you’ve read this far, you’re clearly aiming high. You’re chasing that perfectly moist devil’s food cake with a soft, light crumb and an impressive rise. And you’re almost there—because the effort you’ve already put into building the right base matters. You’ve nailed the blooming, the sifting, the mixing.  

Now it all comes down to one thing: do not overmix when you bring the dry and wet ingredients together. 

This devil’s food mini cakes recipe uses water as its main fluid—and that makes not overmixing even more important. Water is uniquely effective at hydrating gluten-forming proteins without interference. That’s brilliant when you want structure, like in a loaf of bread. But for a special Christmas chocolate cake? Not so much.

Gently controlling gluten development is exactly why this mini devil’s food cakes recipe is made by hand—not in a stand mixer.

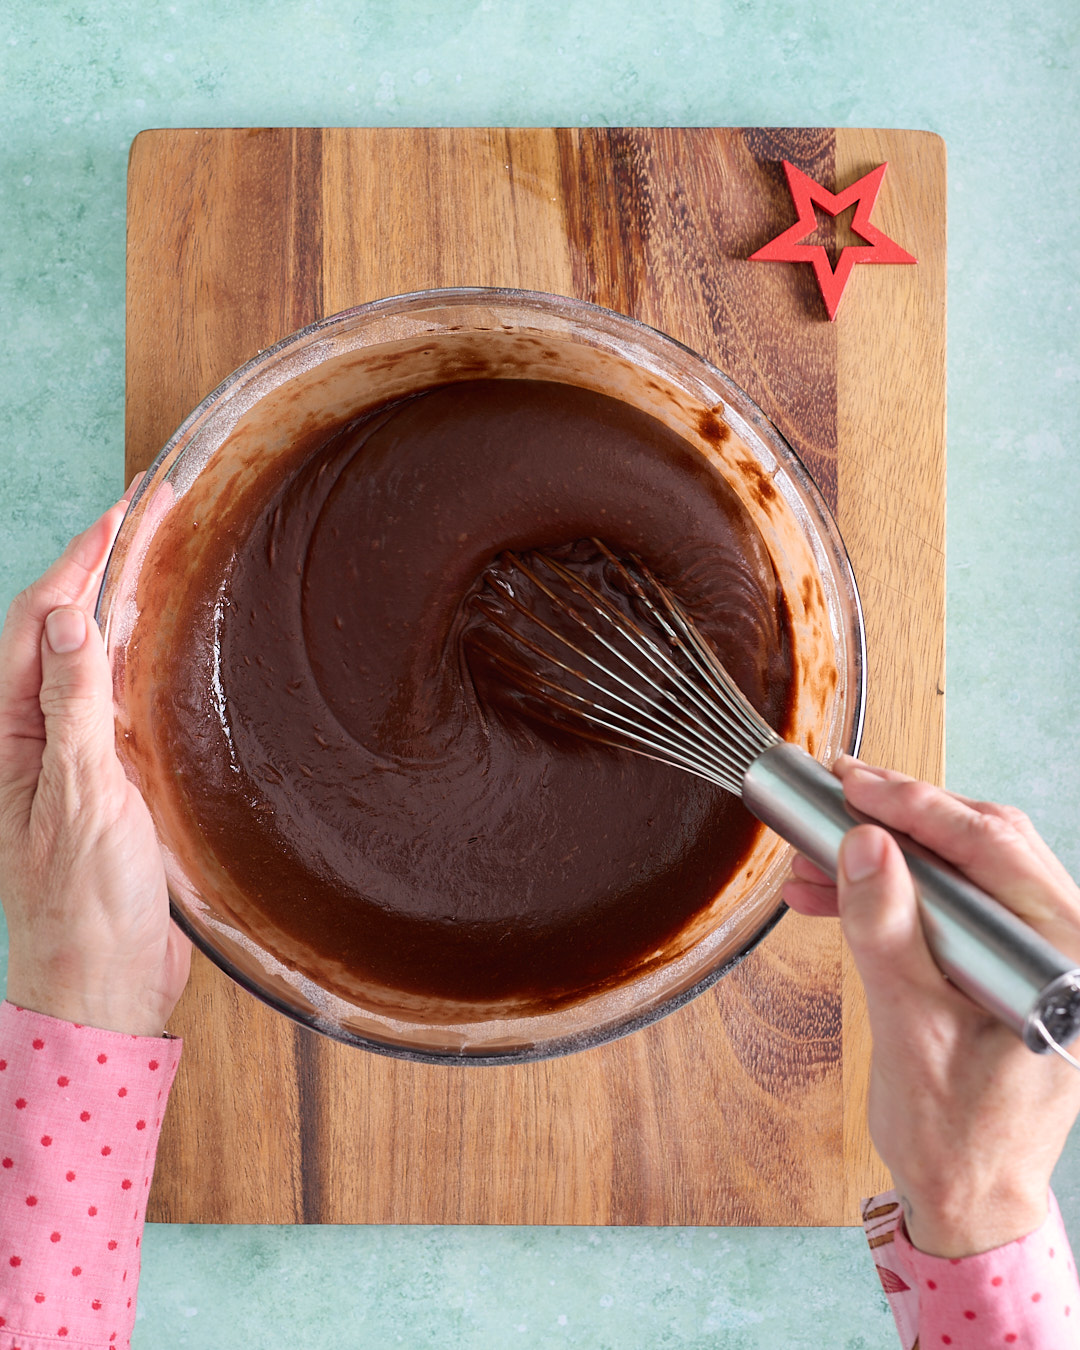
Hands whisking glossy dark chocolate devil’s food cake batter in a large glass bowl on a wooden board, showing the smooth, thick batter as the dry and wet ingredients are gently combined.

Add the wet ingredients to the dry in three batches. Use a large balloon whisk to incorporate each one and add the next as soon as the liquid is mostly absorbed. After the final addition, give it one last gentle whisk and stop. 

The finished batter should be smooth, glossy, and dark brown—ready to deliver that soft crumb and tender bite you’re aiming for. 

Baking the devil’s food mini cakes

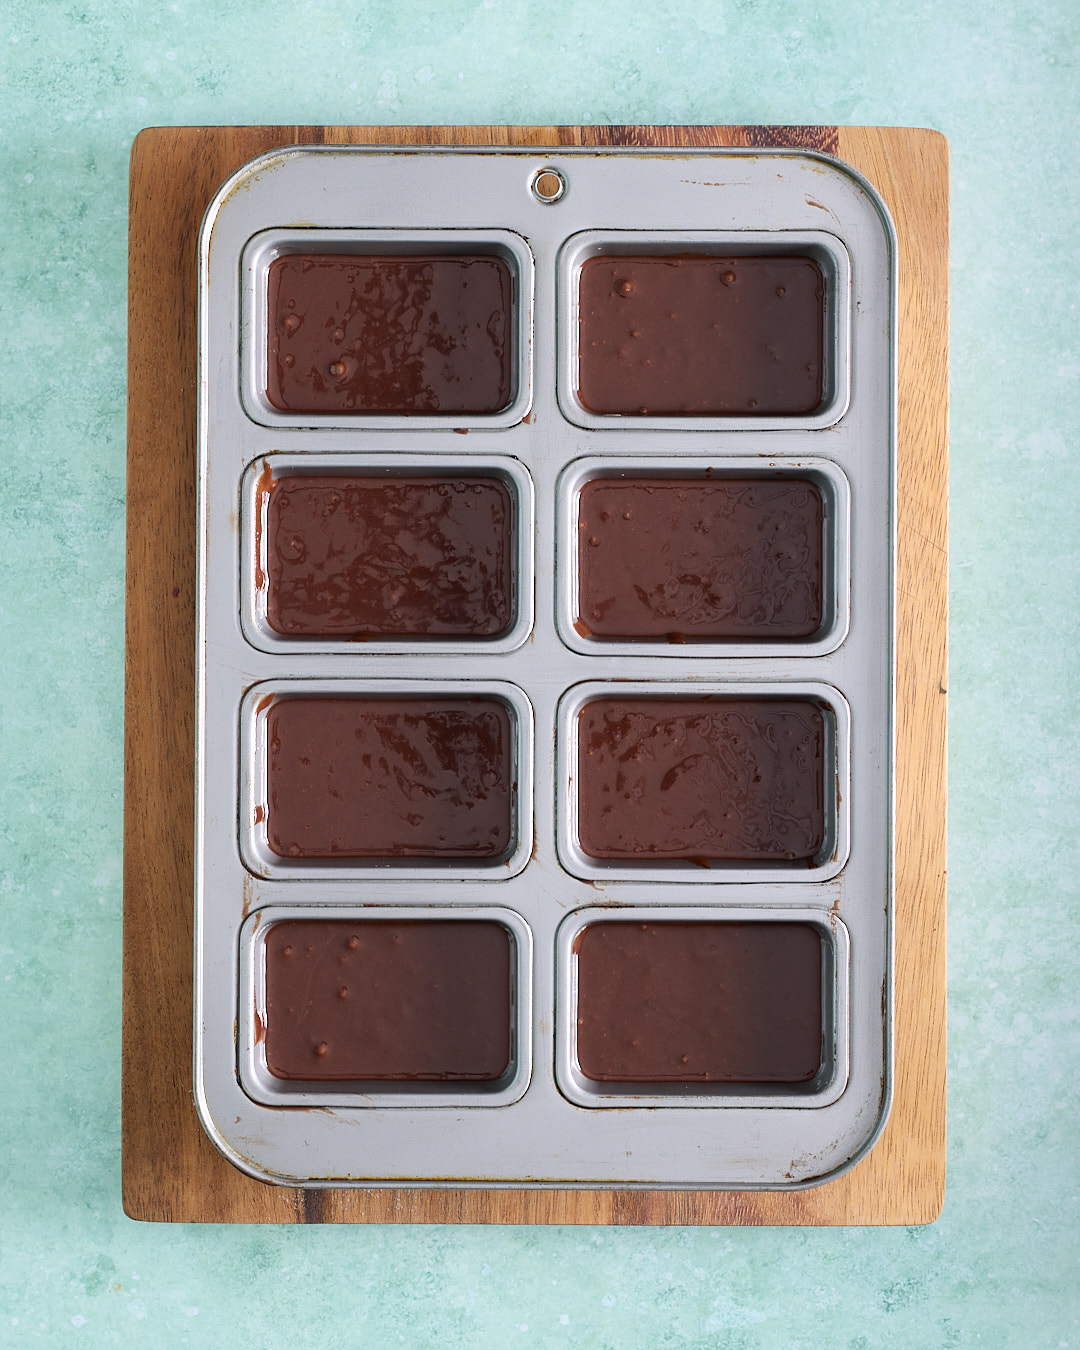
Chocolate cake batter portioned into an eight-hole mini loaf pan, with each cavity filled to about one centimetre below the rim, ready to bake.

Portion the batter into your prepared mini loaf pans. I actually weigh the batter into each cavity  using digital scales so the cakes bake evenly, but the simple visual guide is this: fill each cavity to about 1cm below the rim. That gives the devil’s food mini cakes enough headroom to rise just above the rim without spilling over the sides. 

Bake at 175°C conventional or 155°C fan-forced. Your bake time will depend on the size of your mini loaf pans. My devil’s food mini cakes use around 80g of batter per cake and take 12–14 minutes, but start checking at 12 minutes. 

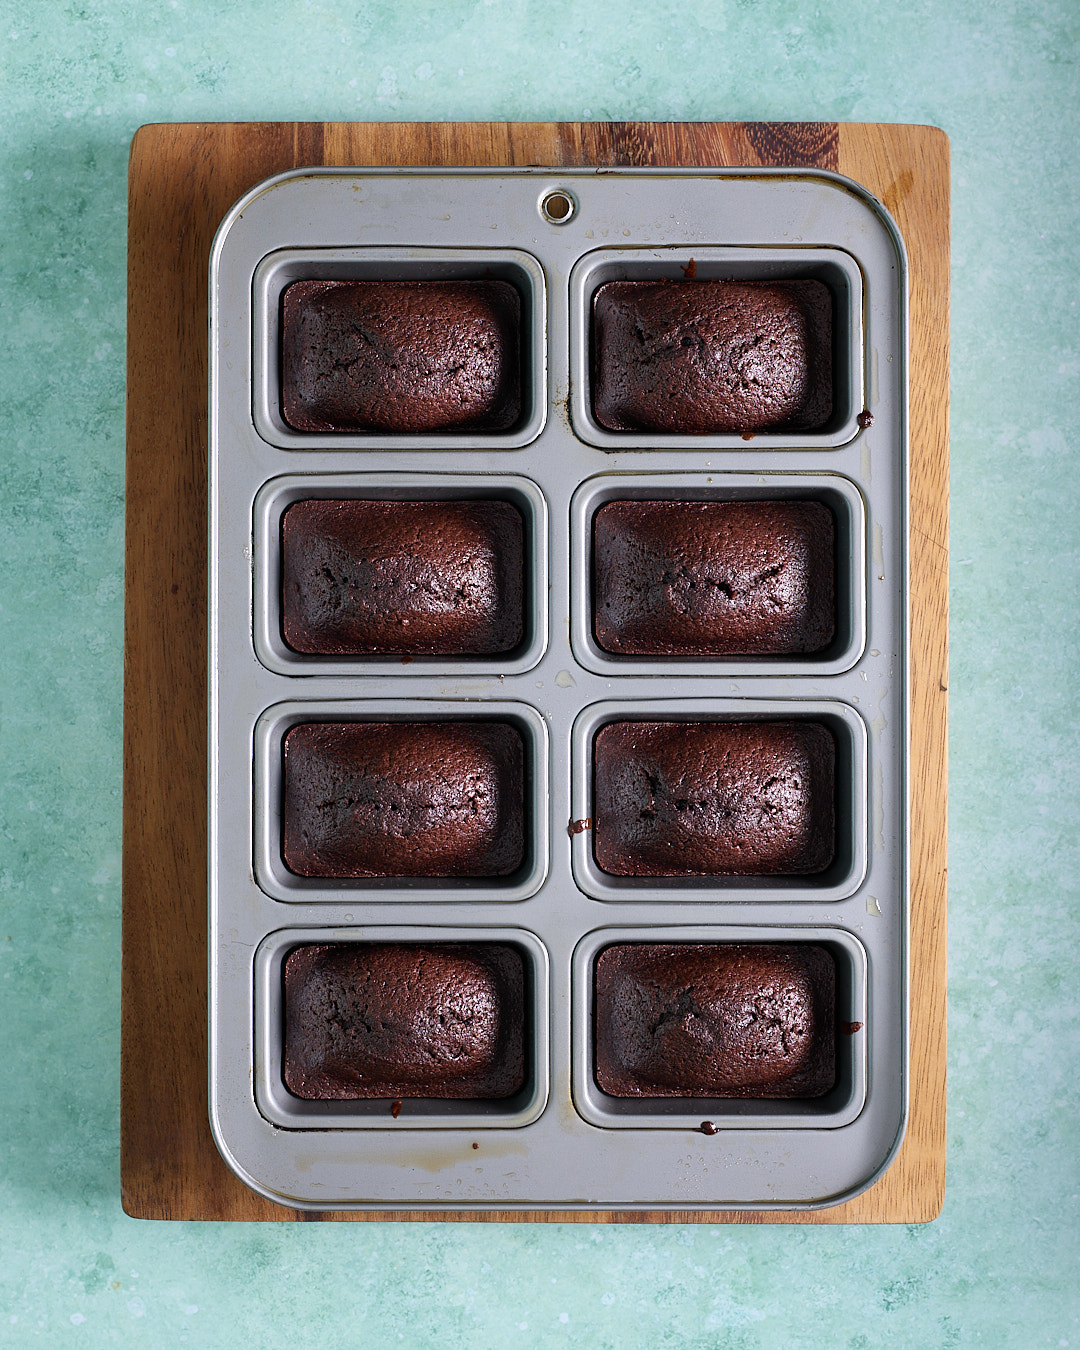
Using a cake tester or wooden skewer, the cakes are ready when it comes out with a few moist crumbs attached. Don’t wait for it to come out clean — chocolate cakes go from “still a bit wet” to “a bit scorched” with very little warning. Cool the cakes in the pans on a cooling rack before attempting to remove them. If they feel delicate, chill them in the fridge first, then unmould. I also prefer piping the ganache onto cold cakes, because it encourages the ganache to stay put as you pipe. 

Freshly baked devil’s food mini cakes in an eight-hole mini loaf pan, risen just above the rim with a dark, glossy chocolate crumb, cooling on a wooden board.

Whipped candy cane white chocolate ganache

Wrangling candy canes

If you’re baking these devil’s food mini cakes with whipped peppermint bark ganache in Australia in December – in our full-throttle summer humidity – there’s a bit of strategy involved in wrangling the candy canes. As soon as you peel off the plastic, they start absorbing moisture and turning tacky. So don’t be tempted to pre-prepare the crushed and chopped candy canes. Do this step just before you’re ready to start melting the chocolate for your candy cane white chocolate topping. 

Before preparing the crushed candy canes, bloom one gelatine sheet in a bowl of ice water.  Alternatively, bloom one teaspoon of powdered gelatine in a tablespoon of cold water.

How to crush candy canes for whipped peppermint bark ganache

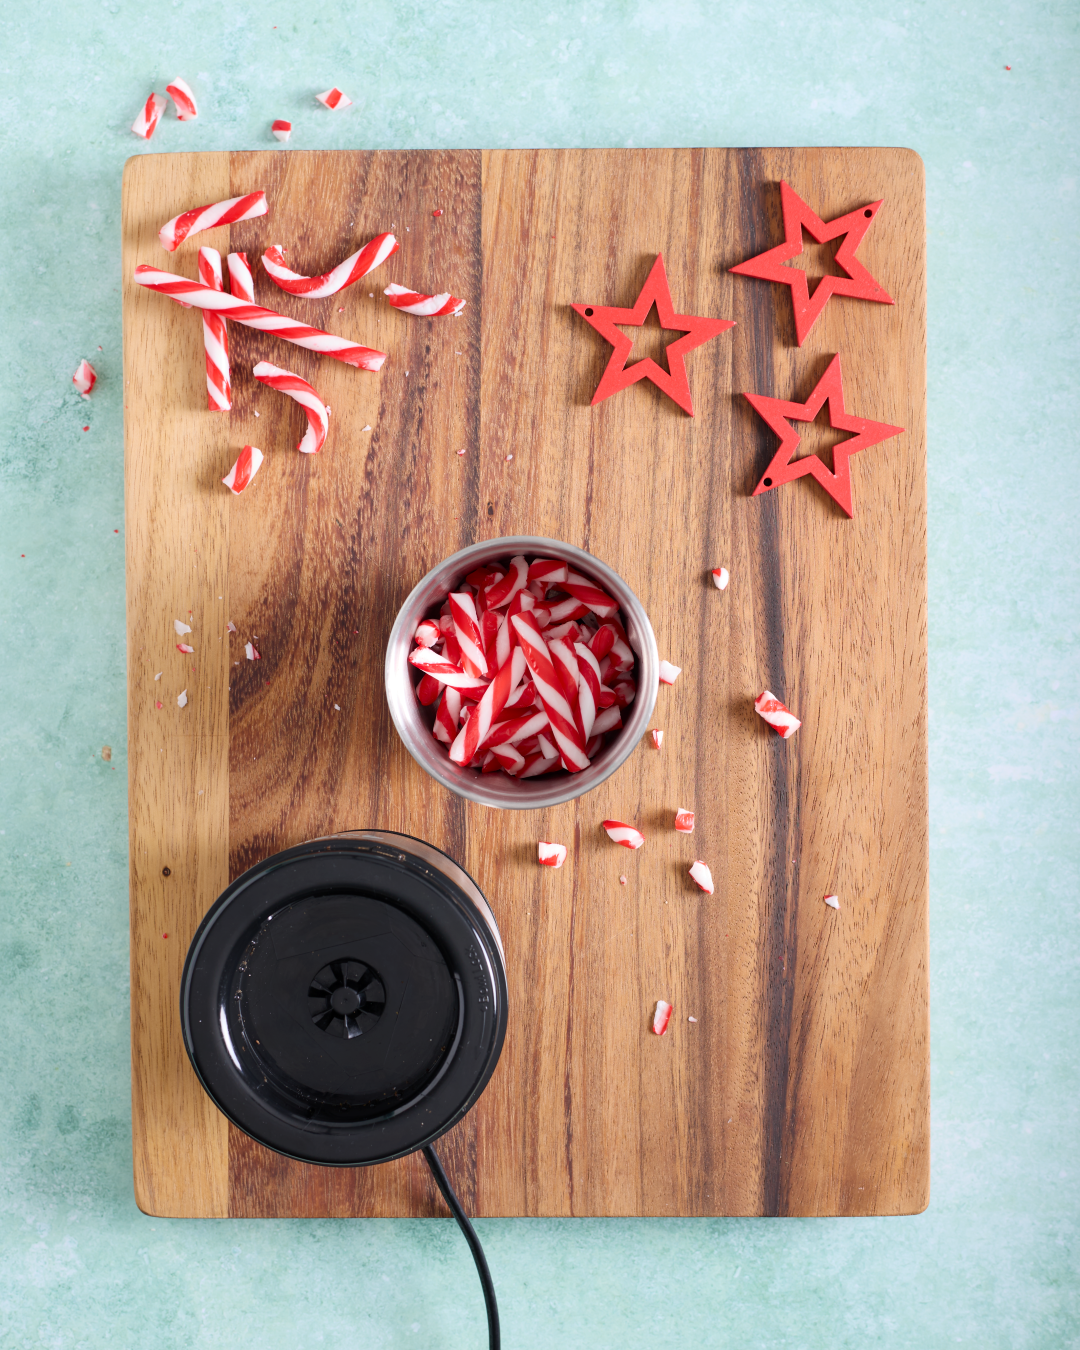
Overhead image of whole and broken red-and-white candy canes on a wooden board, with pieces collected in a small metal cup next to a black electric spice grinder and red star decorations.
Overhead image of finely ground pink candy cane powder in a small cup on a wooden board, with a black electric spice grinder nearby, stray candy crumbs on the board and red star decorations to the side.

I use about 30g of crushed candy canes in this whipped peppermint bark ganache recipe. To allow for wastage, I start with 50g of candy canes while they’re still in their wrappers. Then unwrap and blitz them in a small electric spice grinder until you’ve got a fine, even, sand-like dust that will fold neatly into the chocolate. You can also use a mini food processor, a high-speed blender, or go low-tech with a doubled up Ziplock bag and a rolling pin or meat mallet. Whatever you use, aim for fine and consistent rather than chunky. 

Measure out 30g of the candy cane dust into a sealed container and set aside until you’re ready to use it. 

Prepping the candy cane white chocolate ganache

Overhead image of a glass bowl holding chopped white chocolate and crushed candy cane dust on a wooden board, with a small jug of cream nearby and a stick blender to the side.

Weigh 120g white chocolate into a microwave-safe containera tall jug works best if you’re using a stick blender. Gently melt the chocolate in the microwave on medium power in 15-second bursts, stirring between each burst. It doesn’t need to be fully melted at this stagejust softened and starting to loosen. Squeeze out your bloomed gelatine leaf and add it to the warm chocolate, then add 30g crushed candy canes. 

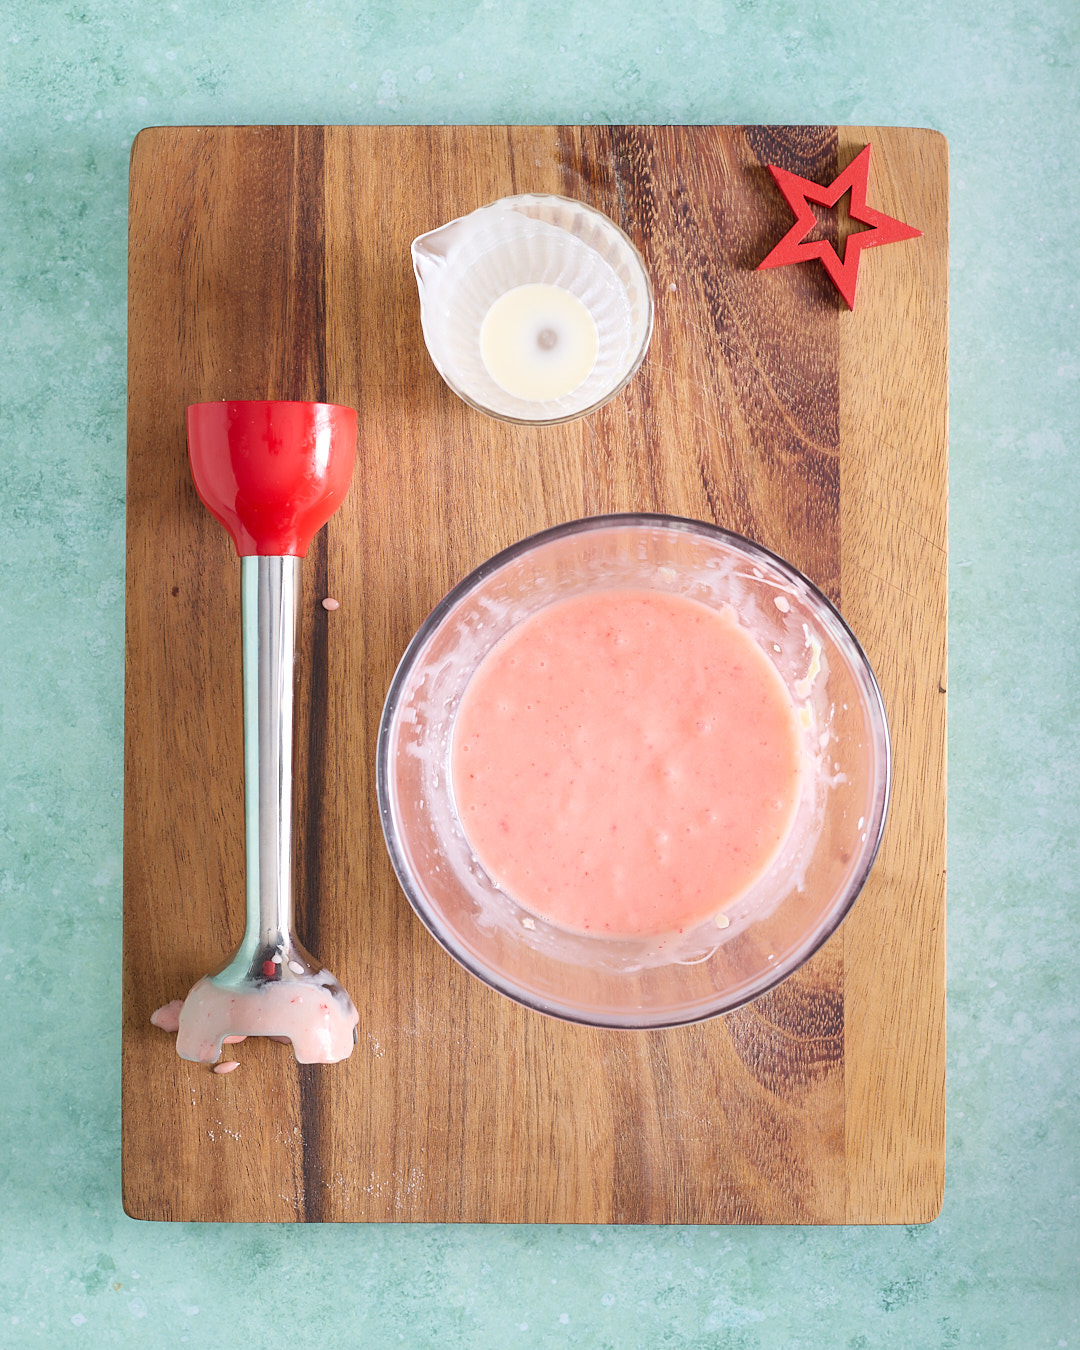
Overhead image of pale pink candy cane white chocolate ganache mixture in a glass bowl on a wooden board, with a stick blender and a small jug nearby.
Overhead image of smooth, pale pink candy cane white chocolate ganache mixture in a glass bowl on a wooden board, with a stick blender beside it.

Heat 85g cream (Cream A) and 10g glucose in the microwave, using short bursts on high, until the cream is very hot but not boiling. 

Pour the hot Cream A mixture over the chocolate mixture and leave it to sit for a few minutes so the heat can finish melting the chocolate and dissolve the gelatine. Then emulsify thoroughly using a stick blender (or a hand whisk) until smooth and glossy. I wouldn’t recommend electric beaters here—you don’t want to incorporate air at this stage of your whipped peppermint bark ganache. The whipping comes later. 

Add 260g cold cream (Cream B) straight from the fridge and emulsify again with the stick blender until fully incorporated. Cover the ganache with plastic wrap, pressing the wrap directly onto the surface. Refrigerate for at least 6 hours, but preferably overnight. 

The final whipped peppermint bark ganache

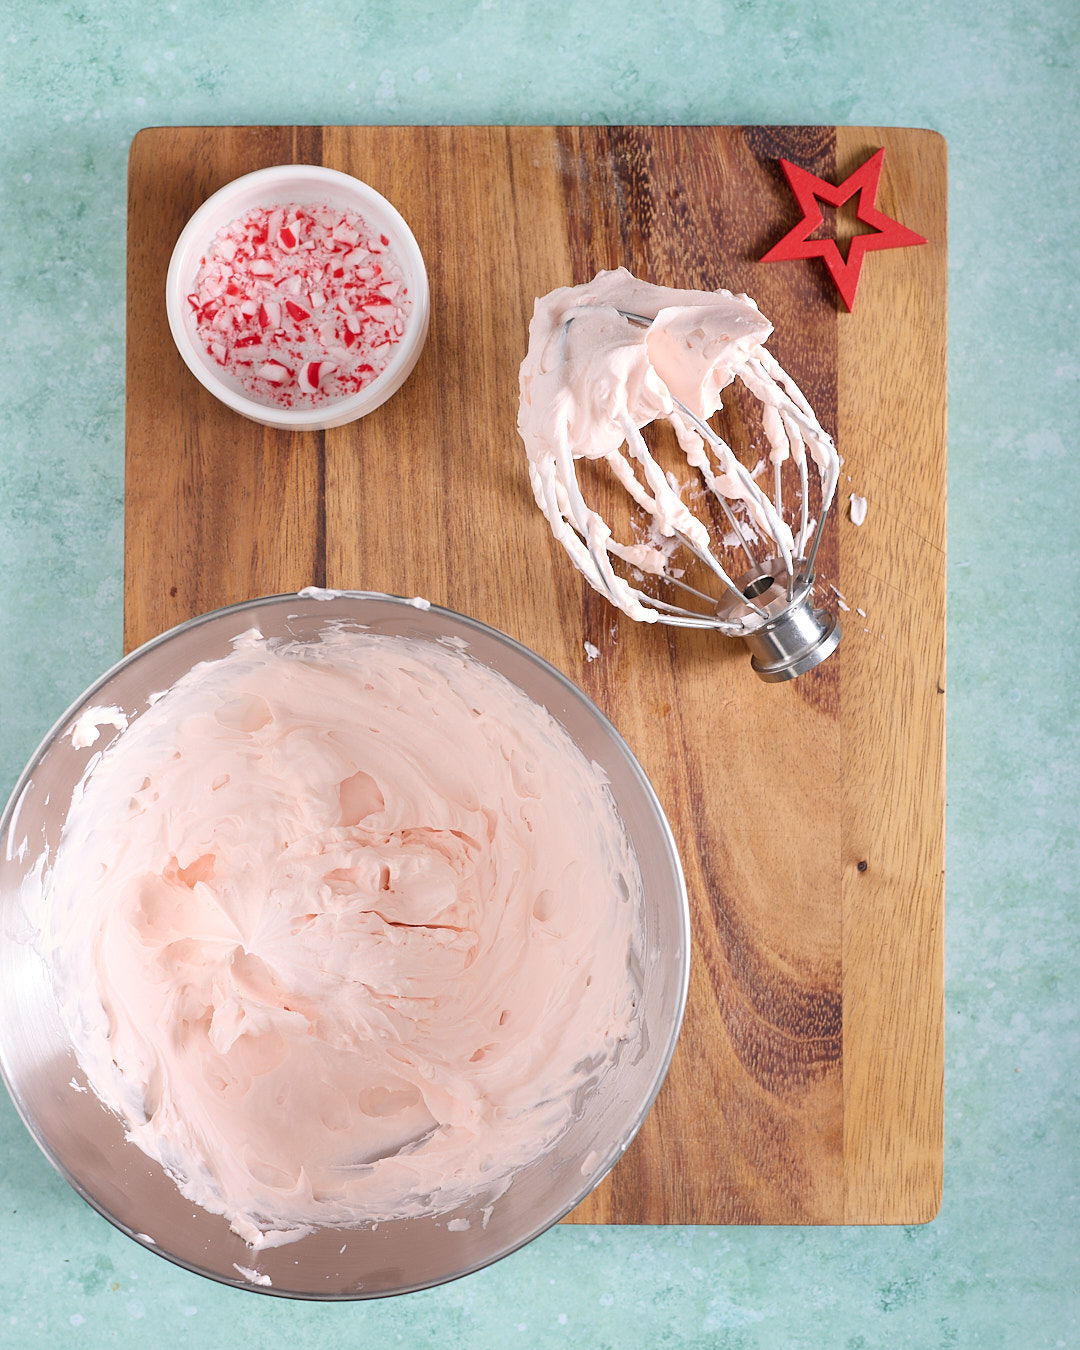
Overhead image of pale pink whipped peppermint bark ganache in a mixing bowl with a whisk attachment, with a small bowl of crushed candy canes nearby on a wooden board.

Just before you are ready to serve your devil’s food mini cakes with whipped peppermint bark ganache, get organised to whip the ganache. If you are planning to pipe the ganache onto the cakes, set up your piping bag. For the photos I took for this recipe, I used Loyal tip St Honore tip no. 880.

You can use a stand mixer with the whisk attachment or electric beaters for this step. To help the ganache whip up efficiently, chill your mixing bowl and beaters in the fridge or freezer before you start. 

What you’re using this whipped peppermint bark ganache for will dictate how far you whip it. This ganache is delicious, versatile, and stable. Whipped just past soft peaks, it’s perfect as a Chantilly cream substitute on any chocolate-based dessert. But for these festive mini devil’s food cakes, we want a denser ganache whipped just past firm peaks. 

Won’t the ganache split? you may ask. This is where both the glucose and the gelatine back you up. The glucose adds extra shine while helping to prevent splitting, and the gelatine also helps with stability while providing additional structure so the piped ganache won’t slump. 

So be confident as you whip up the candy cane white chocolate ganache to the firm peaks stage. You’ll see it change from soft and pillowy to a creamy, dense consistency. You’ll know you’re there when the ganache clings to the beater and holds its shape when lifted from the bowl. 

Final touches

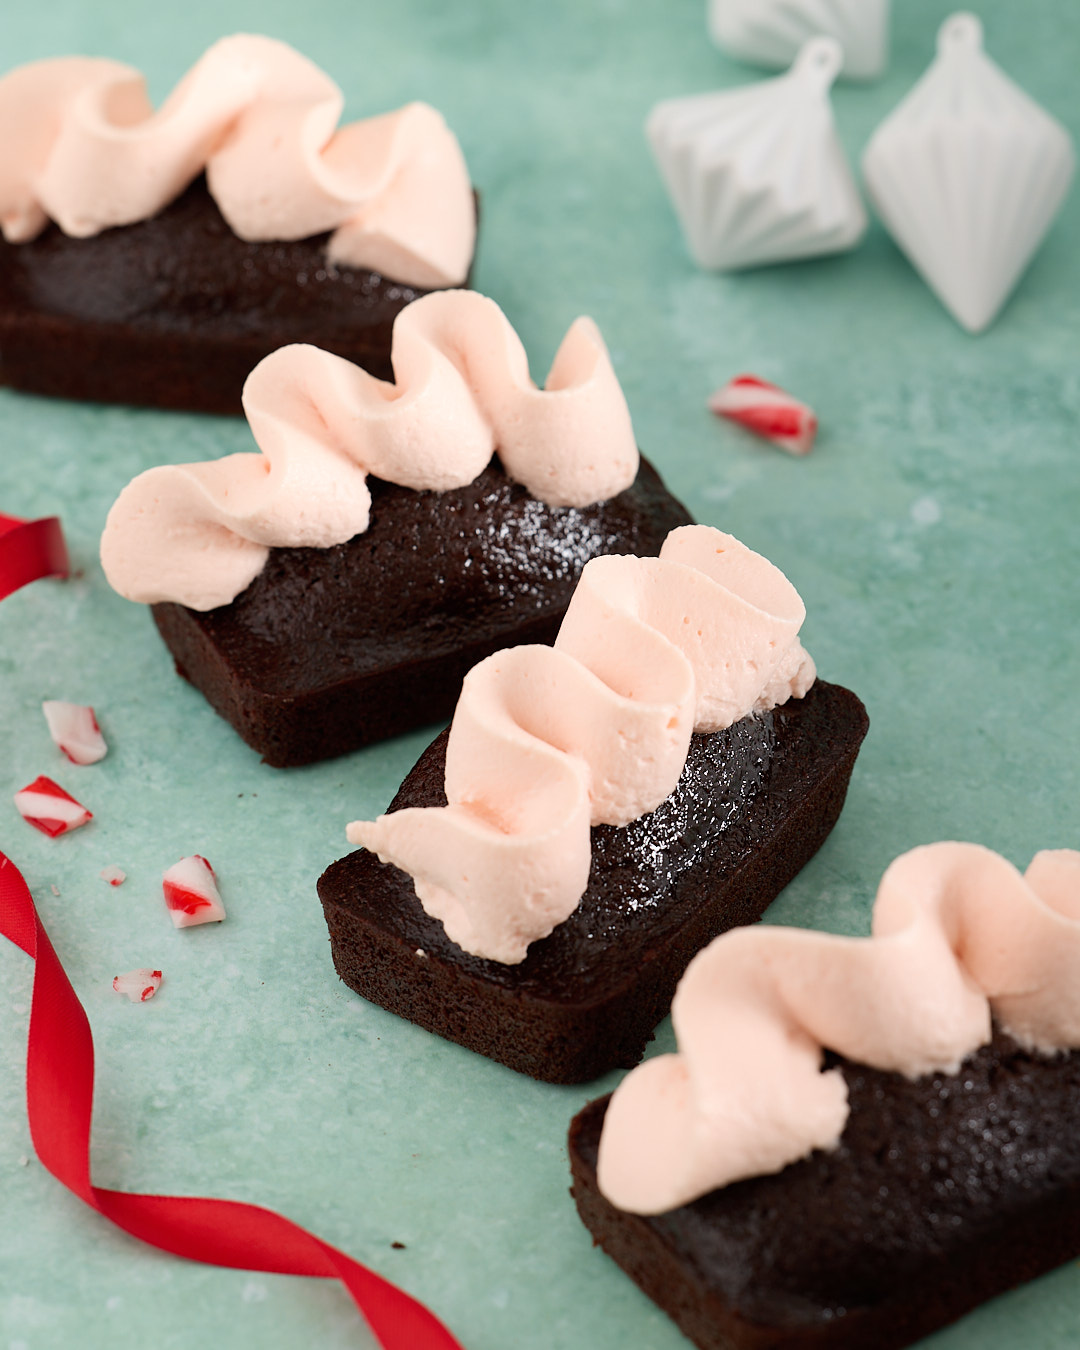
Four devil’s food mini cakes topped with piped whipped peppermint bark ganache on a teal background, scattered with crushed candy cane pieces and red Christmas ribbon.

Fill your piping bag and pipe the mini devil’s food cakes with the whipped peppermint bark ganache in your desired pattern, or simply frost the cakes generously with pillows of whipped ganache. 

Note: this ganache doesn’t hold up well at room temperature. Pipe just before serving, or keep it in the fridge in a sealed container until you’re ready to serve. I’ve purposely created this recipe using an oil-based devil’s food cake, so the cakes can be eaten cold from the fridge. Oil doesn’t set firm like butter, so the cakes keep a delicate mouthfeel even when cold. 

Devil’s Food Mini Cakes with Whipped Peppermint Bark Ganache

Close-up of a devil’s food mini cake topped with a swirl of whipped peppermint bark ganache, with crushed candy cane pieces scattered on a teal background.
I know—devil’s food mini cakes with whipped peppermint bark ganache is a whopping great big verbose recipe title for what is actually a petite and straightforward make-ahead Christmas dessert.
These mini devil’s food cakes are my Christmas answer to the “what are we going to do with all those candy canes?” situation: rich, deeply chocolatey little devil’s food mini cakes topped with whipped candy cane white chocolate ganache. It tastes like peppermint bark grew up and got its act together.
Prep Time 1 hour 30 minutes
Cook Time 14 minutes
Course Cake, Dessert
Cuisine American, Australian
Servings 14 -15 cakes

Equipment

  • 2 x 8-hole mini loaf pans (non-stick)
  • Digital scales
  • Large mixing bowl
  • 2–3 litre jug (for wet ingredients)
  • Coarse sieve
  • Large balloon whisk
  • Microwave-safe tall jug or container (for ganache)
  • Stick blender (or hand whisk)
  • Stand mixer with whisk attachment (or electric beaters)
  • cooling rack
  • Cake tester (or wooden skewer)
  • Piping bag (optional)
  • Loyal St Honore piping tip no. 880 (optional)
  • Electric spice grinder (optional, for crushing candy canes)

Ingredients  

Devil’s food mini cakes:

  • 240 g all-purpose flour
  • 75 g Dutch processed cacao powder
  • 2 teaspoons espresso powder
  • 275 ml boiling water
  • 150 g granulated white sugar
  • 125 g light brown sugar
  • 1 teaspoons baking powder
  • 1/4 teaspoon baking soda
  • 3/4 teaspoon table salt
  • 135 ml grapeseed oil
  • 1 teaspoon vanilla extract
  • 2 large eggs
  • 175 gm full fat sour cream

Candy cane white chocolate ganache:

  • 120 g white chocolate
  • 2 g gelatine sheet (gold)
  • 30 g crushed candy canes
  • 85 g pure cream - Cream A (35%)
  • 10 g glucose
  • 260 g pure cream - Cream b (35%)

Instructions 

Devil’s food mini cakes

  • Preheat the oven to 175°C conventional (or 155°C fan-forced).
  • Grease 2 mini loaf pans (8 holes each). Cut out baking paper to snuggly fit into the base of each hole, to prevent the cakes from sticking.
  • In a medium heatproof bowl, combine the cocoa powder and espresso powder. Pour over the boiling water and whisk to combine. Set aside to cool to room temperature.
  • In a large mixing bowl, sift together the flour, baking powder, baking soda, salt, white sugar, and brown sugar. I use a coarse sieve—it’s easier with the brown sugar. Pass the mix through the sieve at least twice until the texture is even and fine, like soft sand.
  • In a separate jug, whisk the sour cream, then add the eggs one at a time, beating well after each addition. Whisk in the grapeseed oil and vanilla extract. Then add the cooled cocoa and espresso mixture and whisk until fully combined.
  • Add the wet ingredients to the dry in three batches. Use a balloon to whisk in each addition, adding the next batch as soon as the previous is mostly incorporated. After the final addition, give it one last gentle whisk—don’t overmix.
  • Divide the batter evenly to create 14 mini cakes—around 80g per cake. Tap the pans gently on the bench to release any air bubbles.
  • Bake for 12-14 minutes (start checking at 12). The cakes are done when a skewer or cake tester comes out clean with a few moist crumbs.
  • Cool the cakes completely in their tins on a cooling rack until completely cool, then gently remove form the pan and chill until ready to decorate with ganache.

Whipped candy cane white chocolate ganache

  • Bloom 1 gelatine sheet in a bowl of ice water. Alternatively, bloom 1 teaspoon powdered gelatine in 1 tablespoon cold water.
  • Crush the candy canes just before you start (they get sticky fast in summer humidity). To end up with 30g crushed candy canes, start with about 50g whole candy canes and blitz (or bash) until you have a fine, sand-like dust. Measure out 30g and set aside.
  • Weigh 120g white chocolate into a microwave-safe container (a tall jug works best if you’re using a stick blender). Microwave on medium power in 15-second bursts, stirring between each burst, until the chocolate is warm and starting to melt (it does not need to be fully melted).
  • Squeeze out the gelatine leaf and add it to the warm chocolate (or add the bloomed powdered gelatine). Add the 30g crushed candy canes.
  • Heat 85g pure cream (Cream A) with 10g glucose in the microwave in 15 second bursts on high until very hot but not boiling.
  • Pour the hot Cream A mix over the chocolate mixture and leave it to sit for a few minutes so the heat finishes melting the chocolate and dissolves the gelatine. Then blend until smooth and fully emulsified using a stick blender (or whisk thoroughly by hand). Do not use electric beaters here.
  • Add 260g cold pure cream (Cream B) straight from the fridge and blend again until fully incorporated.
  • Cover with plastic wrap pressed directly onto the surface of the ganache and refrigerate for at least 6 hours, preferably overnight.
  • Just before serving, whip the chilled ganache using a stand mixer with whisk attachment or electric beaters until thick and dense, just past firm peaks (for piping).
  • Pipe or spoon onto the chilled mini cakes and serve immediately or keep the decorated cakes in the fridge until serving (the whipped ganache doesn’t hold its shape at room temperature).

Just before you cook with abandon…

Espresso powder vs instant coffee: This mini devil’s food cakes recipe includes espresso powder for a reason. It boosts the chocolate flavour without making the cake taste like coffee. If all you’ve got is instant granules, they’ll still do the job—just know the flavour won’t be quite as smooth or deep. Either way, they steep with the Dutch-processed cocoa to bring out that rich, bittersweet intensity these moist devil’s food mini cakes are all about.
Why Dutch-processed cocoa is worth it: This isn’t the place for skimping on the cocoa powder with no name brands. Dutch-processed cocoa powder gives these mini devil’s food cakes their signature dark crumb and rounded, complex flavour. It also bakes up beautifully with the baking powder in this recipe, helping keep the texture soft and luxurious. Natural cocoa will work but expect a sharper taste and lighter colour.
What if I don’t have grapeseed oil?: I use grapeseed oil here for its lightness and neutral flavour. But if you don’t have it, don’t panic. Canola, rice bran or sunflower oil will all work well in this devil’s food mini cakes recipe. Just steer clear of olive oil unless it’s very mild—you want the whipped peppermint bark ganache to shine, not fight with the grassy notes of EVOO.
All white chocolate is not created equal: A successful whipped peppermint bark ganache is honestly most dependent on the quality of the white chocolate you use. This isn’t the recipe for compound chocolate, melts, buttons, or chips. It’s the cocoa butter content that assists—along with the gelatine—to stabilise the ganache so it can be piped and maintain its shape. Before buying a block, check the ingredients: you’re looking for a minimum declaration of 23% cocoa solids. If it just lists vegetable oils, that’s not actually a bar of ‘chocolate’ and you should move on. For this candy cane white chocolate ganache recipe I used Cadbury Baking Chocolate (23% cocoa solids). Speciality stores may also carry Lindt couverture (36%), and if it’s in your budget you can’t go past Callebaut (32%–40.7% cocoa solids depending on the recipe you can source).
Gelatine will save the day in the summer: Gelatine plays an important role in stabilising the whipped peppermint bark ganache and I promise it doesn’t end up mouth feel like jelly—it’s a subtle supporting role only. I use McKenzie’s gelatine leaves [LINK] because they’re readily available in Australian supermarkets, and for this candy cane white chocolate ganache you need one McKenzie gelatine leaf. If you only have McKenzie’s powdered gelatine you can substitute ½ teaspoon gelatine powder bloomed in 1 tablespoon of cold water.
Wrangling candy canes in Christmas humidity: If you’re baking in Australia in December—in our full-throttle summer humidity—there’s a bit of strategy involved in wrangling candy canes. As soon as you peel off the plastic, they start absorbing moisture and turning tacky, so don’t pre-prepare the crushed candy canes. Do that step just before you start melting the chocolate. And before you even touch the candy canes, bloom your gelatine (leaf in ice water, or powdered gelatine in cold water) so you’re not trying to multitask while everything gets sticky.
How much candy cane do I start with?: To get 30g net crushed candy canes, I start with around 50g of whole candy canes to account for wastage. I also weigh them in their plastic wrapping because they start getting sticky in Queensland on a hot, humid summer day in the lead up to Christmas.
Room temperature eggs and sour cream: For this recipe the 2 large eggs and 175g full fat sour cream need to be at room temperature. Cream B is used cold straight from the fridge.
Why blooming cocoa and espresso matters: Blooming the cocoa and espresso in boiling water isn’t just theatre—it helps dissolve and intensify the flavour so you get that deeper, more complex chocolate result without any dry pockets or streaks through the batter. It also contributes to the moist texture that makes devil’s food cakes so good.
Don’t overmix the batter: The easiest way to ruin all your hard work is to overmix when the wet meets the dry. Water is the main fluid in this cake, which means gluten can develop quickly if you get overenthusiastic. Hand mixing in batches is deliberate here—incorporate gently, stop as soon as it’s combined, and let the oven do the rest.
Weighing the batter helps: I weigh the batter into the pans so the cakes bake evenly (and so I’m not left with one heroic cake and thirteen runts). Around 80g per cake is my benchmark, but the real visual cue is filling the cavities to about 1cm below the rim so they rise nicely without spilling.
Why the ganache needs an overnight rest: This isn’t me being dramatic or trying to force you into a “planned dessert” lifestyle. The fridge rest is what turns this from warm, pourable white chocolate soup into a ganache that will actually whip. You’re giving the cocoa butter time to crystallise and the gelatine time to fully set into the mix, and you’re also chilling Cream B properly so it can hold air when you whip it. If you try to rush it, the ganache will either stay loose and won’t thicken, or it’ll whip into a sad, grainy mess that refuses to hold a pipe. Six hours is the minimum, overnight is ideal—and yes, this is one of those rare moments where patience is the whole technique.
When to pipe and how to store the ganache: This ganache does not stand up at room temperature particularly well, so pipe just before serving or keep it in the fridge in a sealed container until you’re ready. I also prefer piping onto cold cakes—it encourages the ganache to stay put as you pipe.
Why these cakes work eaten cold: I’ve purposely created this as an oil-based devil’s food cake so the cakes can be eaten cold from the fridge. Oil doesn’t set firm like butter, so you still get a delicate mouthfeel even when the cakes are chilled.

Keyword candy canae white chocolate ganache, mini devil's food cakes

Leave a Reply

Your email address will not be published. Required fields are marked *

Recipe Rating


Hi, I'm Sandra!

I live by the words of Harriet Van Horne and I will be exploring every possible way to bring Harriet’s words to life in my kitchen.

Recipes

Discover delicious featured food recipes! From quick meals to gourmet delights, Sandra offer inspiring dishes for every occasion. Explore, cook, and enjoy flavorful creations today.

You might also like..

Vietnamese-style Pork and Chicken Meatloaf Bánh Mì

Easy Apple Fruit Mince Filo Tarts

Blueberry Rosemary Crumble Cheesecake

BBQ Massaman Curry Lamb Shanks

Subscribe

Subscribe to my newsletter for a chance to win a FREE APRON (drawn monthly) as well as cooking tips, recipes, offers and exclusive content.

"*" indicates required fields