Recipes

Peppermint Bark Shortbread Biscuits

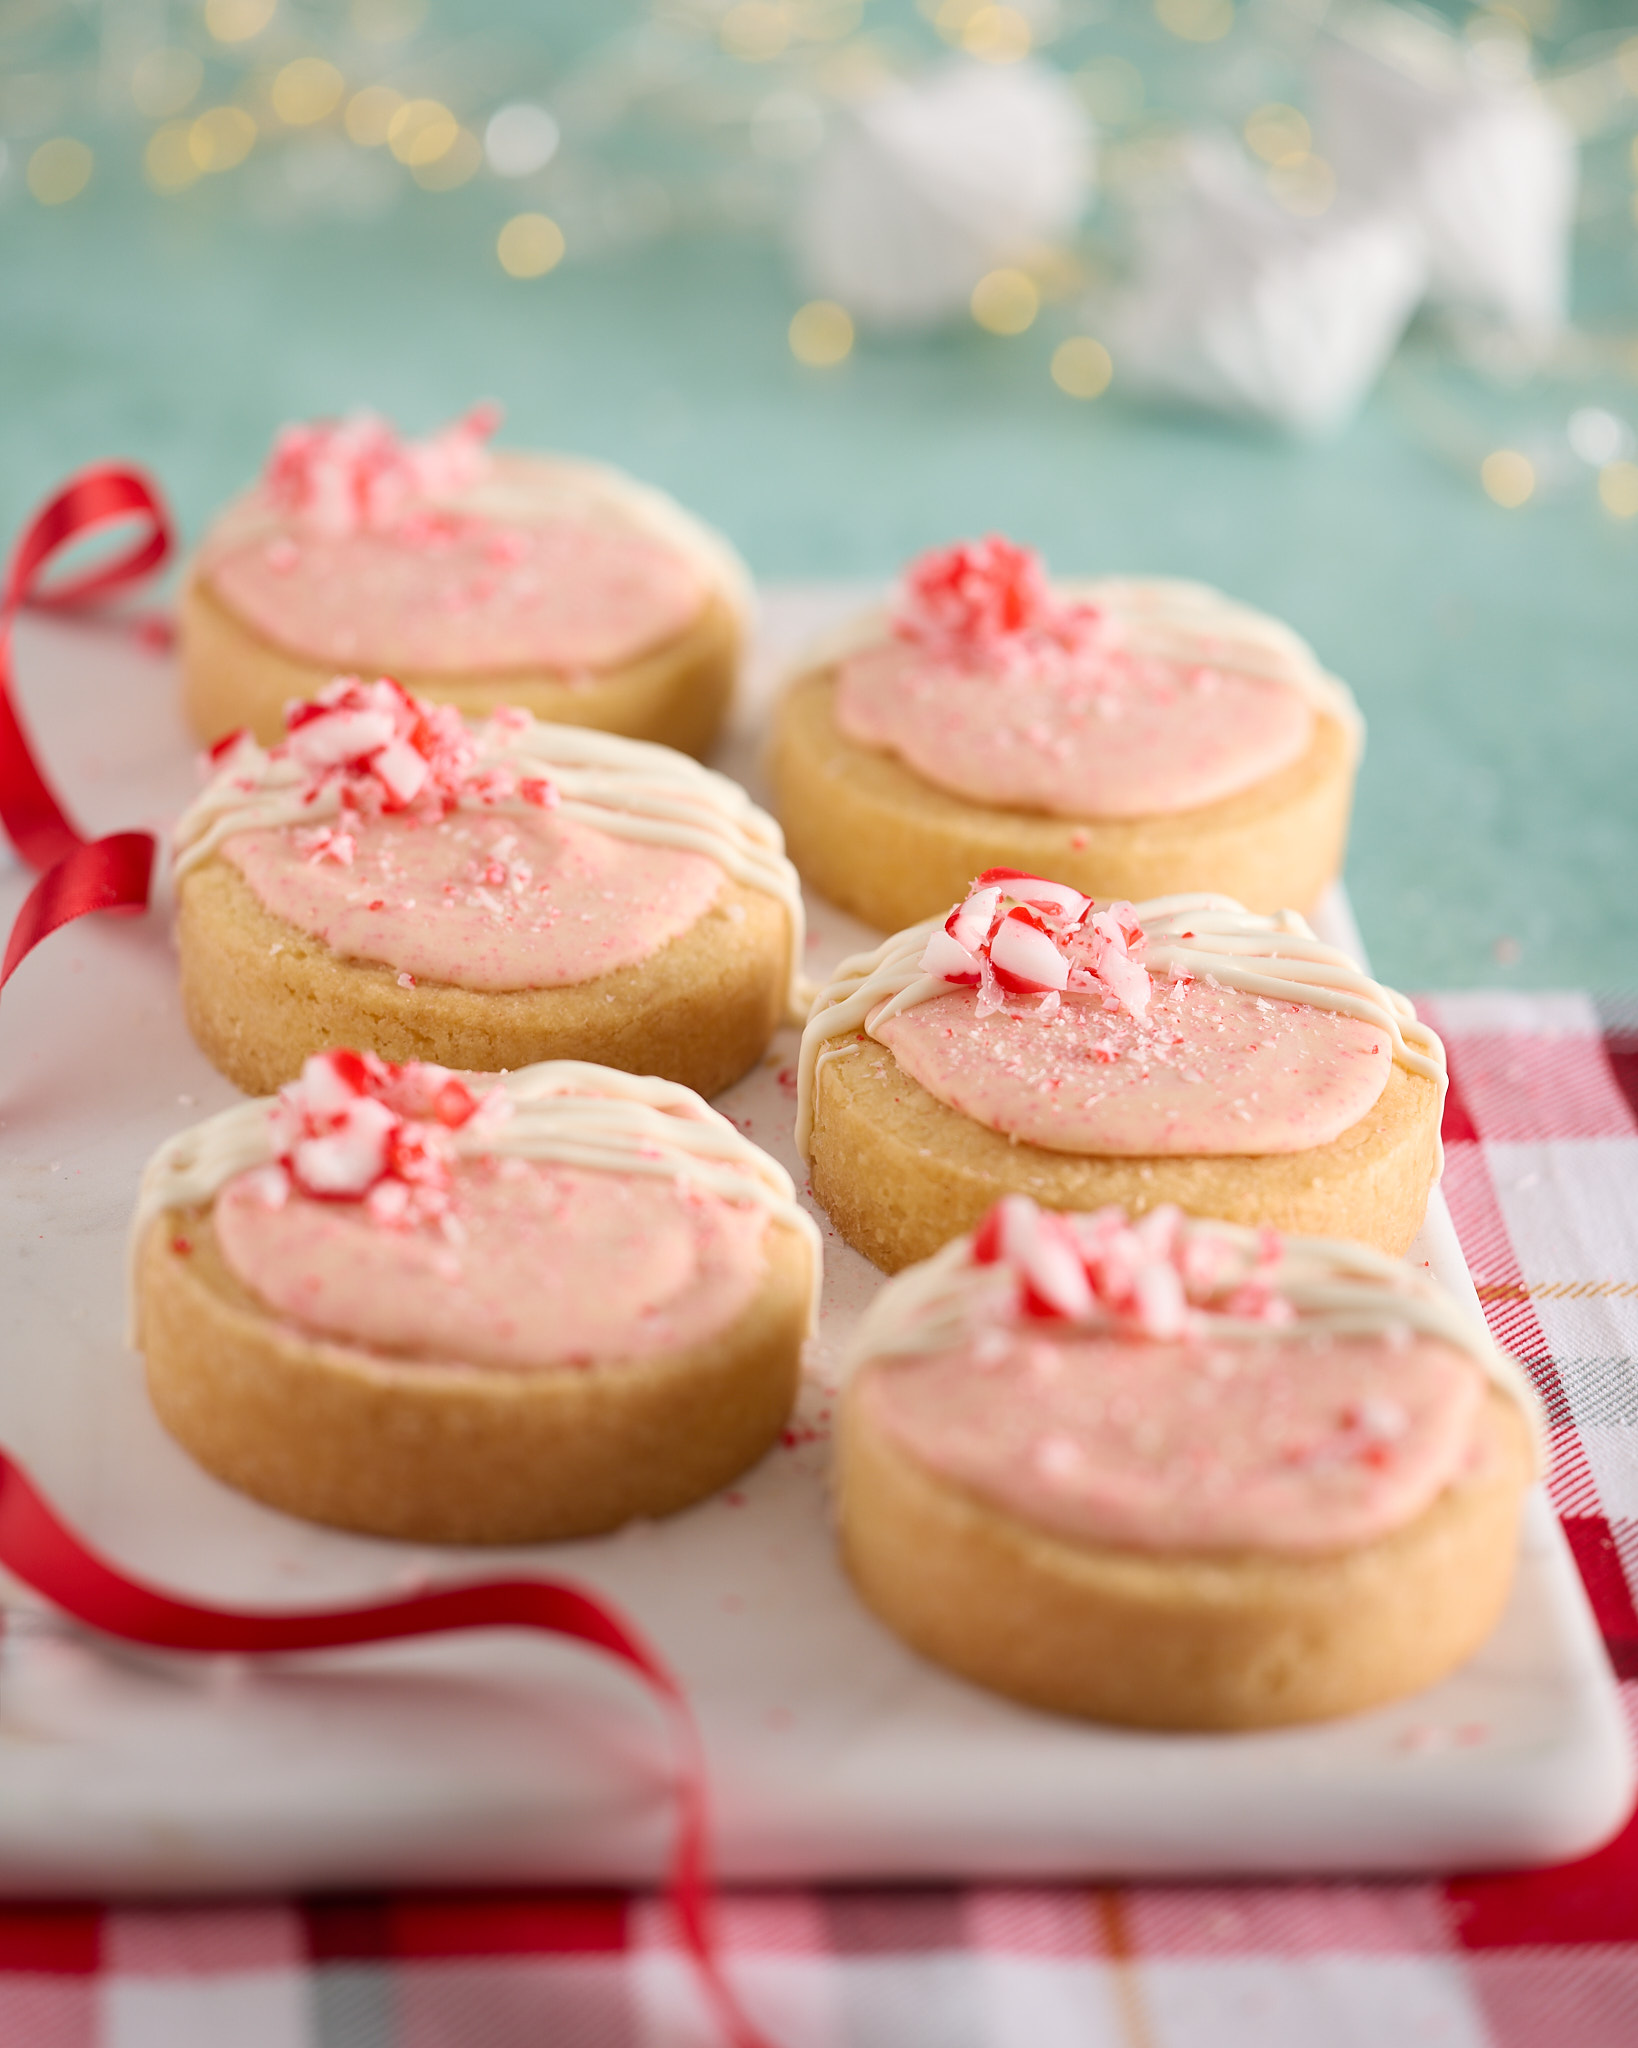
Six round peppermint bark shortbread biscuits on a white platter, topped with pale pink frosting, a drizzle of white chocolate and crushed candy cane, styled with red ribbon, a red check tea towel and soft festive lights in the background.

This Christmas I’m celebrating the magic that is candy cane peppermint bark. Check out my candy cane peppermint chocolate bark recipe to hear the origin story of my love of the union of white chocolate and candy canes. Shortbread biscuits have a permanent place in my family’s Christmas celebrations, but this year I’ve dressed them up a bit in my peppermint bark shortbread biscuits. 

I’ve used a few chefy tricks and tweaked the traditional Scottish shortbread recipe so these Christmas shortbread biscuits come out of the oven patisserie-window worthy. But don’t worry if you don’t have all the equipment. I’ll give you some workarounds to get a pretty upstanding result from your candy cane shortbread biscuits. 

Let me break it down for you. 

Peppermint bark shortbread biscuit ingredients

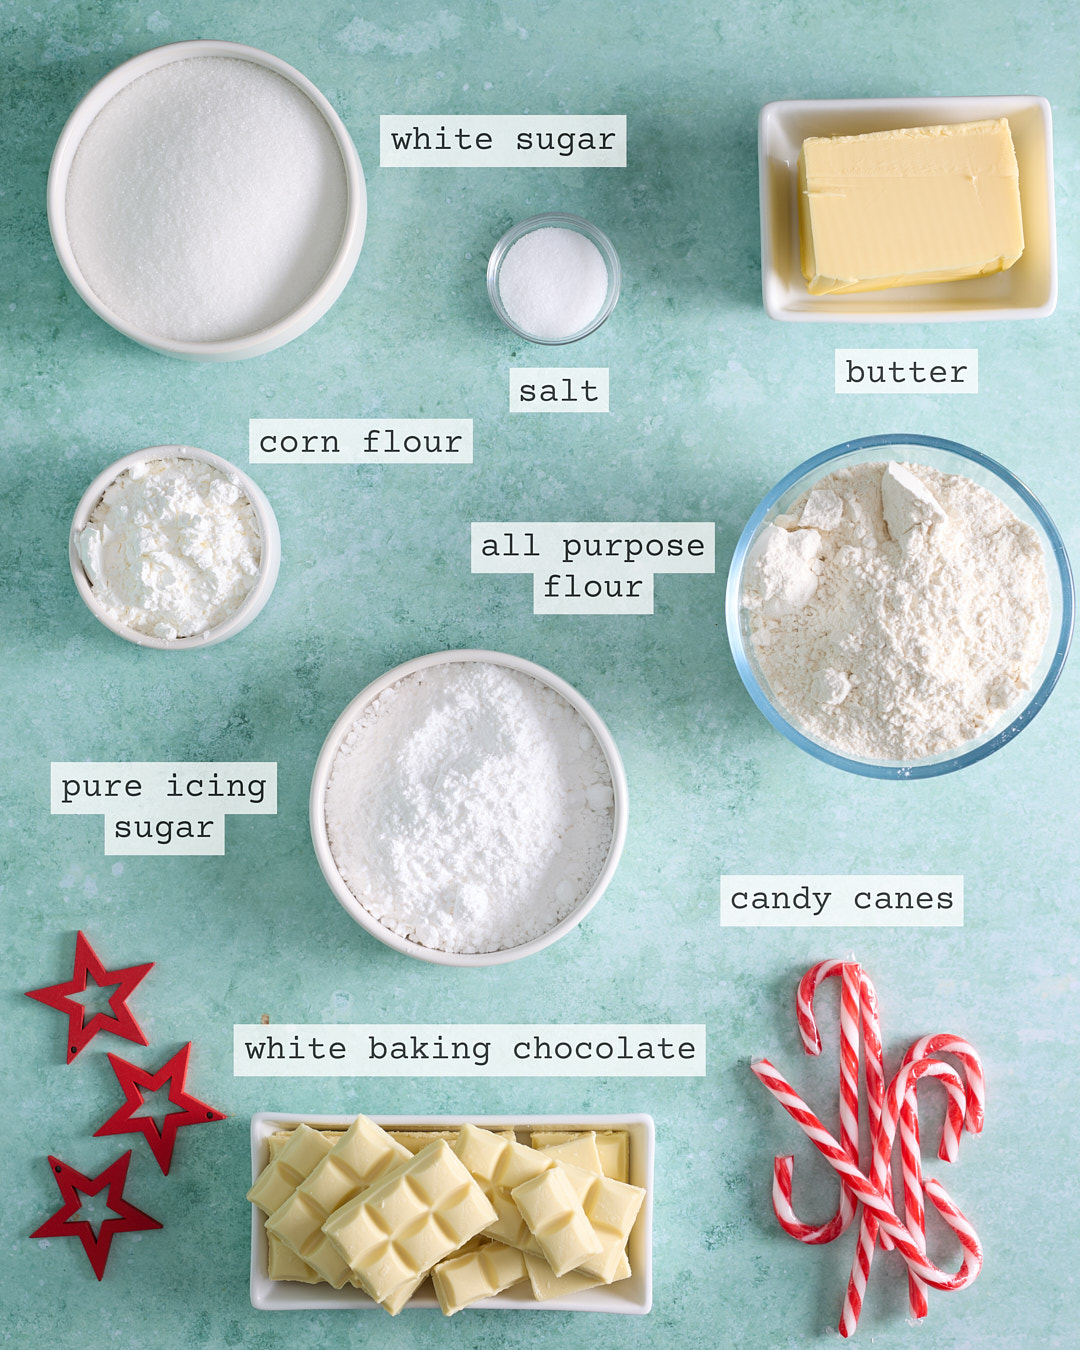
Flat lay of labelled ingredients for peppermint bark shortbread biscuits on a turquoise background: bowls of white sugar, pure icing sugar, cornflour and all-purpose flour, a dish of butter, a small bowl of salt, chopped white baking chocolate, and whole candy canes, styled with red star decorations.
  • 345g unsalted butter (room temperature) 
  • 90g granulated white sugar 
  • 75g pure icing sugar 
  • 375g all-purpose flour 
  • 120g corn flour  
  • 1 ½ teaspoons table salt 
  • 320g white chocolate 
  • 100g candy canes 

For this peppermint bark shortbread biscuits recipe, the ingredients list is refreshingly short—which is exactly why quality matters. Shortbread is all about buttery flavour, and there’s nowhere to hide, so this isn’t the place for substitutions. Use the best unsalted butter you can justify; it’s the main flavour and it’s what makes these Christmas shortbread biscuits taste properly rich rather than merely sweet. 

I use both 90g granulated white sugar and 75g pure icing sugar because they behave differently in the dough. Pure icing sugar dissolves quickly and gives the shortbread that fine, melt-away crumb, while granulated sugar adds a touch of structure and snap—important when you’re baking cut-out biscuits free-standing on a tray, not pressed into a tin. The 120g cornflour is the other quiet trick: it keeps the texture tender by limiting gluten development, and it helps the biscuits hold their shape in the oven, so you keep clean edges instead of spread. 

On the chocolate front: I portion the peppermint white chocolate frosting and piped décor at 320g because it matches the size of my favourite good-quality baking chocolate block— Nestlé Plaistowe premium baking chocolate. This is not a recipe where I’d recommend swapping in compound chocolate or chocolate melts, buttons, or chips. If you’re going to the trouble of making all-butter peppermint bark shortbread biscuits, they deserve the best chocolate when frosted. 

Get organised

I’m an adherent to the French cooking principle of mise en place—everything in its place. Having your ingredients and equipment ready before you start isn’t just for professional kitchens; it’s how you keep home baking calm and consistent.  

Measuring, prepping and setting everything out before the first step really does put the “easy” into any recipe. 

For this recipe the 345g unsalted butter needs to be at room temperature.

Making the shortbread dough

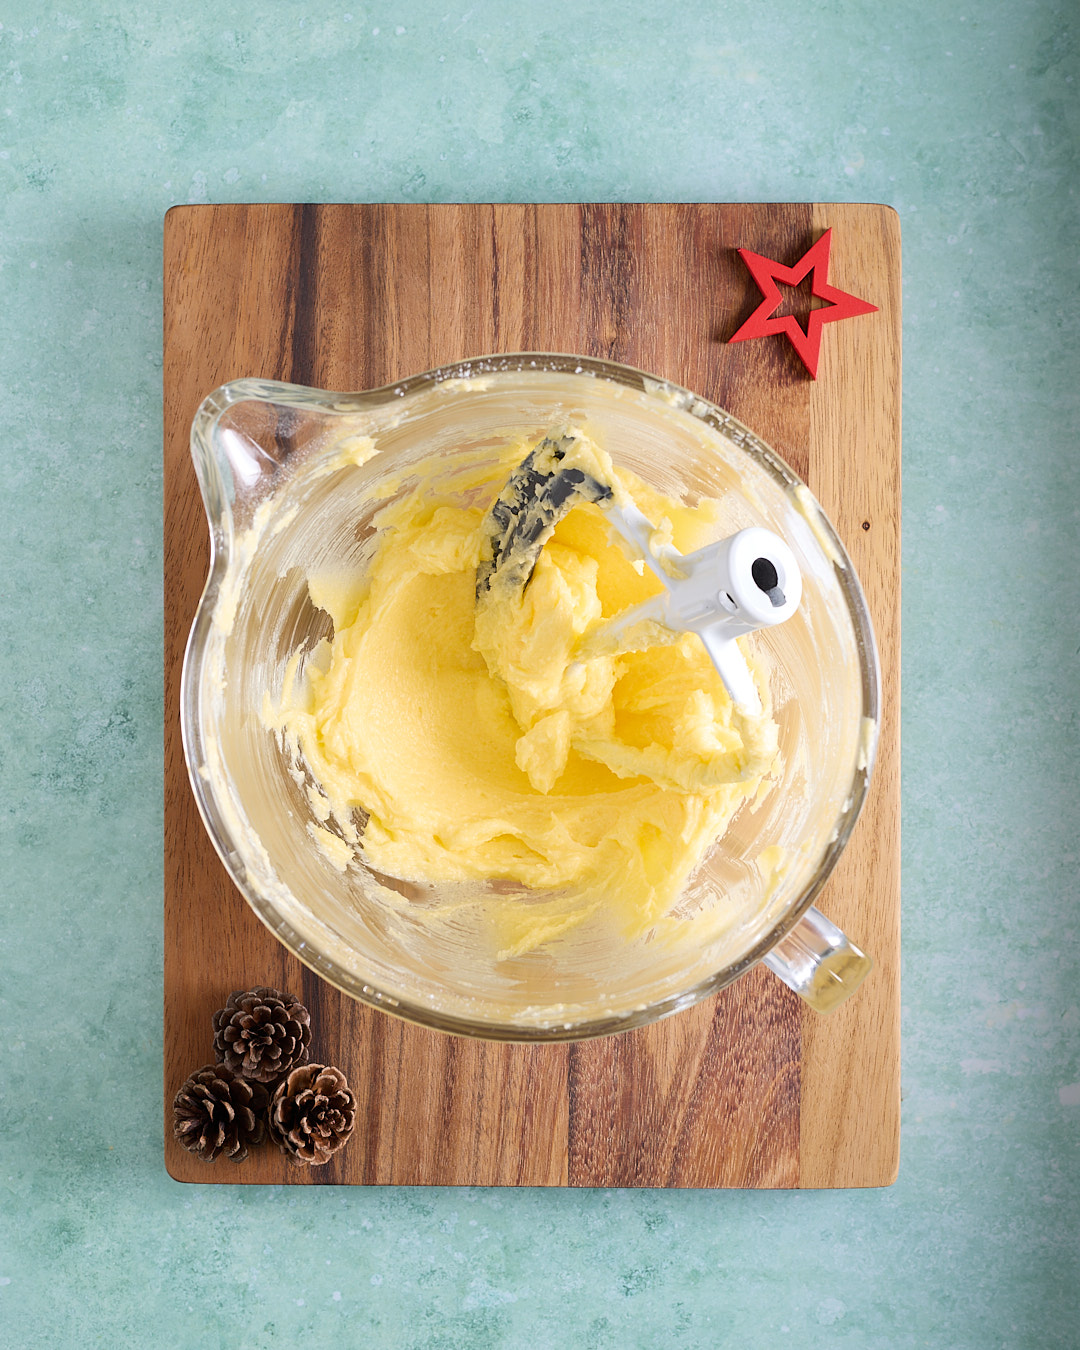
Overhead shot of a stand mixer bowl with butter and sugars beaten to a glossy pale yellow, with the paddle attachment resting in the bowl, styled on a wooden board with pinecones and a red star on a turquoise background.

These Christmas shortbread biscuits can absolutely be made by hand. My first attempts at replicating my great grandmother’s Scottish shortbread were a bowl, a wooden spoon, and a slightly heroic forearm. But if I can use a stand mixer instead of giving myself a sore arm, I’m choosing the stand mixer every time. And no, you’re not going to end up with tough shortbread, because we’re not doing the full creaming method here. 

Weigh 345g room temperature unsalted butter into the stand mixer bowl, then weigh in 90g granulated white sugar and 75g pure icing sugar. Sift the pure icing sugar first, because those little hard clumps won’t magically disappear once they’re in the dough. Using the paddle attachment on low speed, beat the butter and sugars just until smooth, glossy, and evenly combined. This is shortbread, not sponge cake—aim for buttery yellow and cohesive, not pale and whipped. 

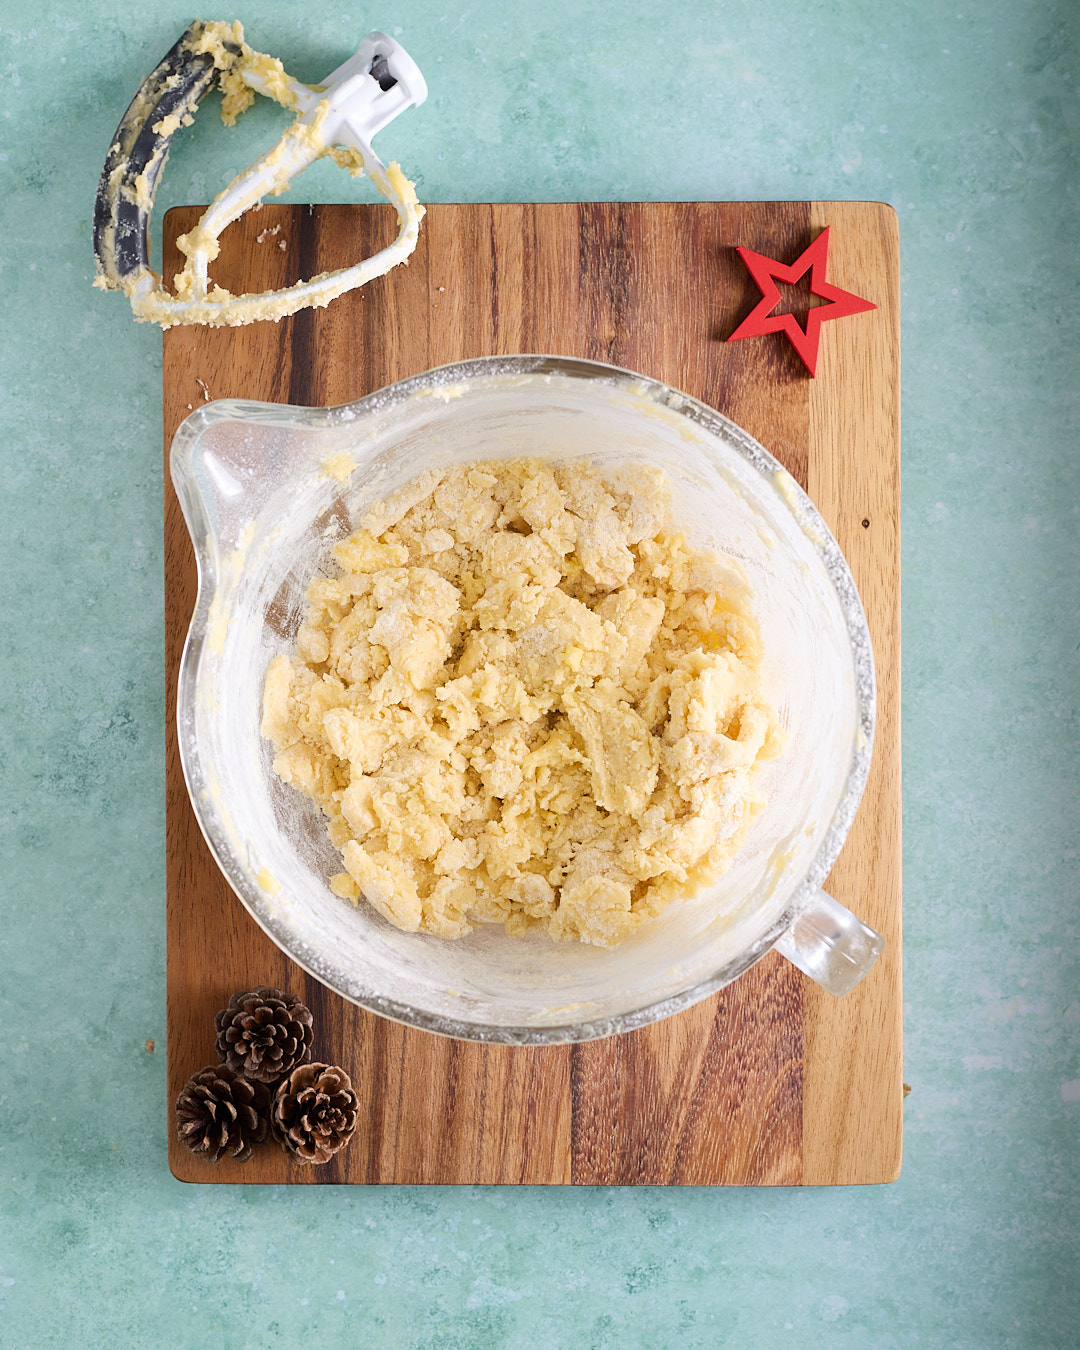
Overhead shot of a glass mixing bowl filled with crumbly shortbread dough after the flour has been added, with the paddle attachment resting above the bowl on a wooden board.

In a separate bowl, sift together 375g all-purpose flour, 120g cornflour, and 1½ teaspoons table salt. Add the flour mixture to the butter and sugar in three additions on low speed, scraping down the bowl between each addition. Add the next batch while you can still see a little flour from the previous one—this keeps mixing time short and helps your candy cane shortbread biscuits stay tender, instead of getting overworked. 

Stop the mixer when the dough is still a little shaggy, then tip it onto the bench and bring it together by hand. I use a bench scraper to gather, then cut-and-stack the dough a few times before pressing it into a rectangle about 5cm thick. 

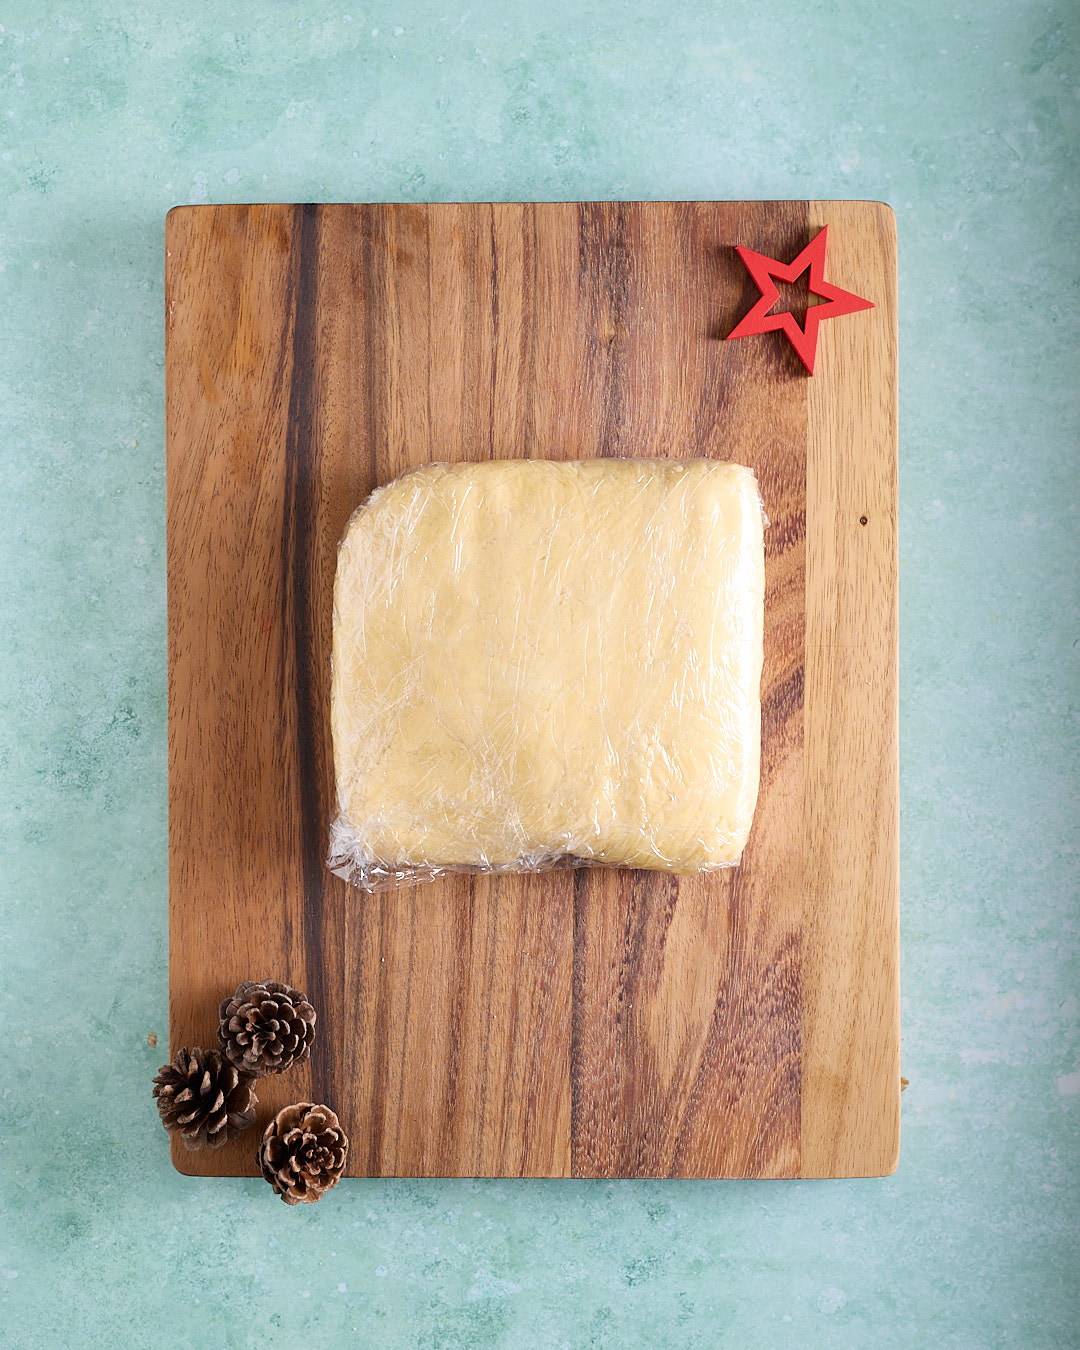
A rectangular block of shortbread dough wrapped tightly in plastic wrap, resting on a wooden board with pinecones and a red star, on a turquoise background.

Wrap the dough tightly in plastic wrap and chill for at least 1 hour, preferably overnight. This rest is what makes rolled and cut-out peppermint bark shortbread biscuits behave: the butter firms up so the biscuits hold their shape in the oven, the dough becomes easier to roll and cut cleanly, and you get neat edges instead of spread.

Rolling and cutting the shortbread dough

My chefy tricks - rolling the dough

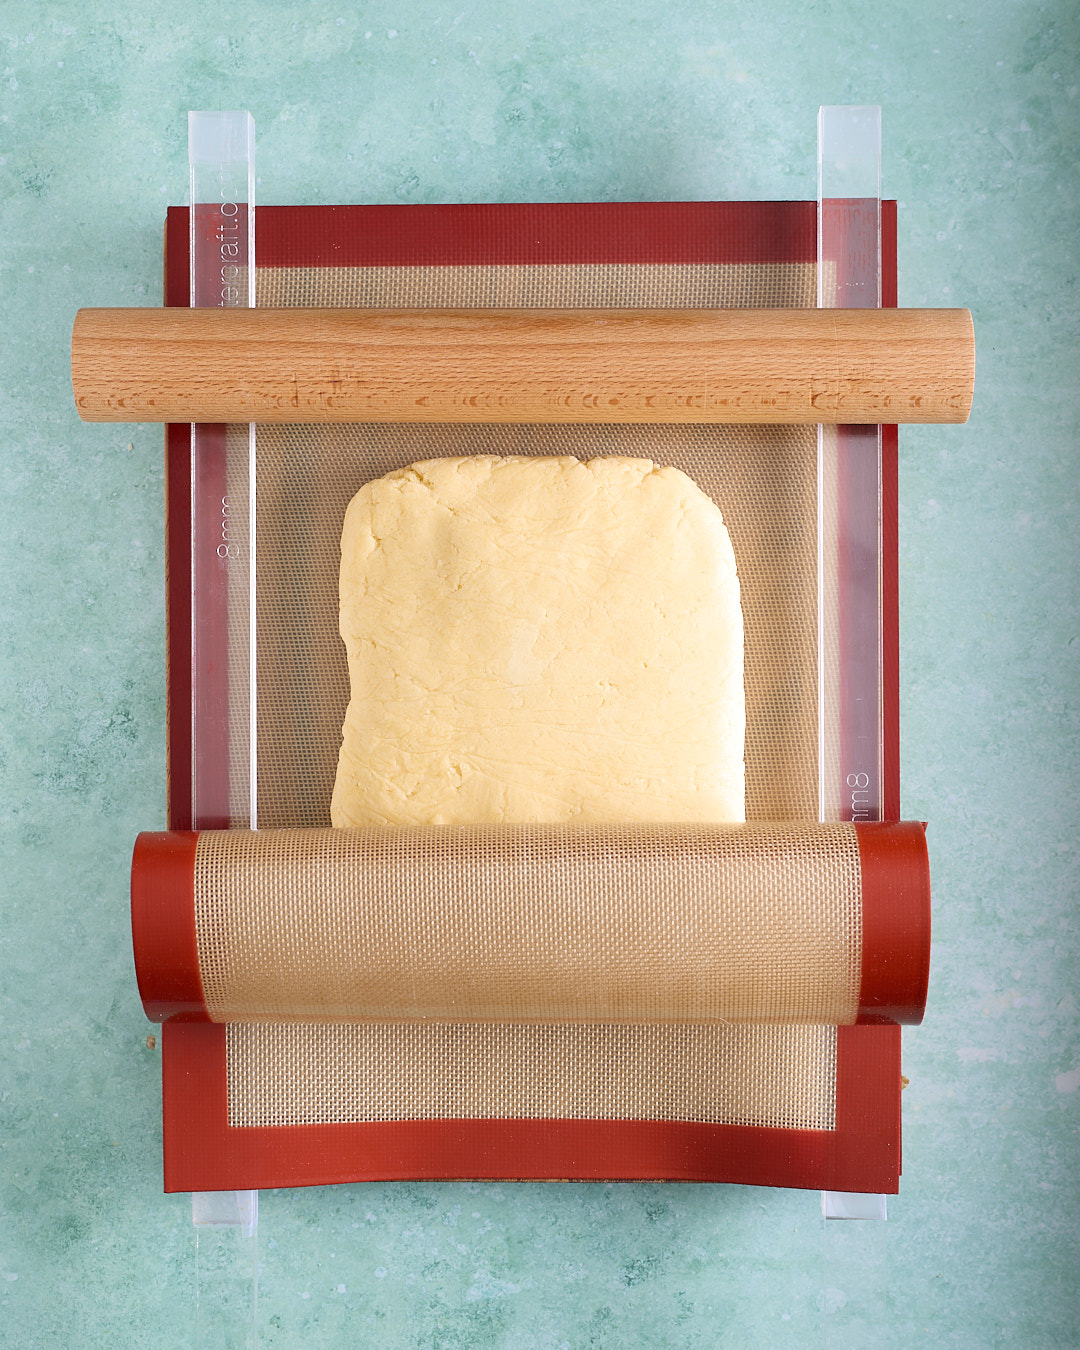
Overhead shot of a firm slab of shortbread dough set up for rolling between silicone mats with clear rolling guides and a wooden rolling pin on top.

My method for cut-out shortbread with no spread involves a short stint in the freezer, so plan ahead and make space for a tray. It’s the difference between thick, clean-sided peppermint bark shortbread biscuits and a tray of “rustic” circles. 

My rolling set-up is shown in the image above, and I’ll give you a couple of good workarounds if you don’t have the same gear. I roll the dough between two silicone baking mats with 16mm rolling guides on either side, because it keeps the thickness even and stops you from slowly rolling the middle thinner than the edges. Once it’s rolled, I slide the whole sheet of dough—still sandwiched between the mats—onto the biscuit tray and put it in the freezer for about 15 minutes until very firm. It doesn’t need to be frozen solid; it just needs to be cold enough that it feels stiff when you press it. 

Equipment and substitutions: Use a large rolling pin (no real substitute), two silicone baking mats (swap for non-stick baking paper), two 1.8cm rolling guides (swap for two 20 x 20mm hobby wood strips from Bunnings), and a rimless biscuit sheet (swap for a rimmed biscuit sheet).

Cutting out the biscuits

Overhead shot of shortbread dough rolled out on a silicone baking mat and being cut into rounds with a metal cutter, with several thick cut biscuits arranged around the mat on a turquoise background.

Fill a shallow bowl with a little all-purpose flour for dredging the cutter. Using a 7cm stainless steel round cutter, cut as many biscuits as you can from the chilled dough, working quickly so it stays cold. Dip the cutter into flour between each cut and tap off the excess—too much flour will bake onto the surface and dull the finish.  

If the dough is very firm and you’re struggling to press straight down, use the flat side of a bench scraper to apply even pressure across the cutter, or press down with the base of a small pot. Try not to twist the cutter; twisting can drag the edges and you lose that sharp, patisserie-style side. 

As you cut, transfer each biscuit to your prepared tray with an offset spatula so you don’t mark the dough with your fingers. Once the tray is filled, put the cut biscuits back into the freezer while you deal with the scraps. Let the remaining dough sit for a few minutes so it’s pliable again, then gently press it back into a rectangle and repeat the roll, chill, cut sequence. It’s a bit of a rhythm—roll, chill, cut, freeze, bake—and it’s exactly what keeps these Christmas shortbread biscuits thick, neat, and worthy of the white chocolate and a candy cane finish. 

Baking these Christmas shortbread biscuits

You definitely don’t have to try this hard!

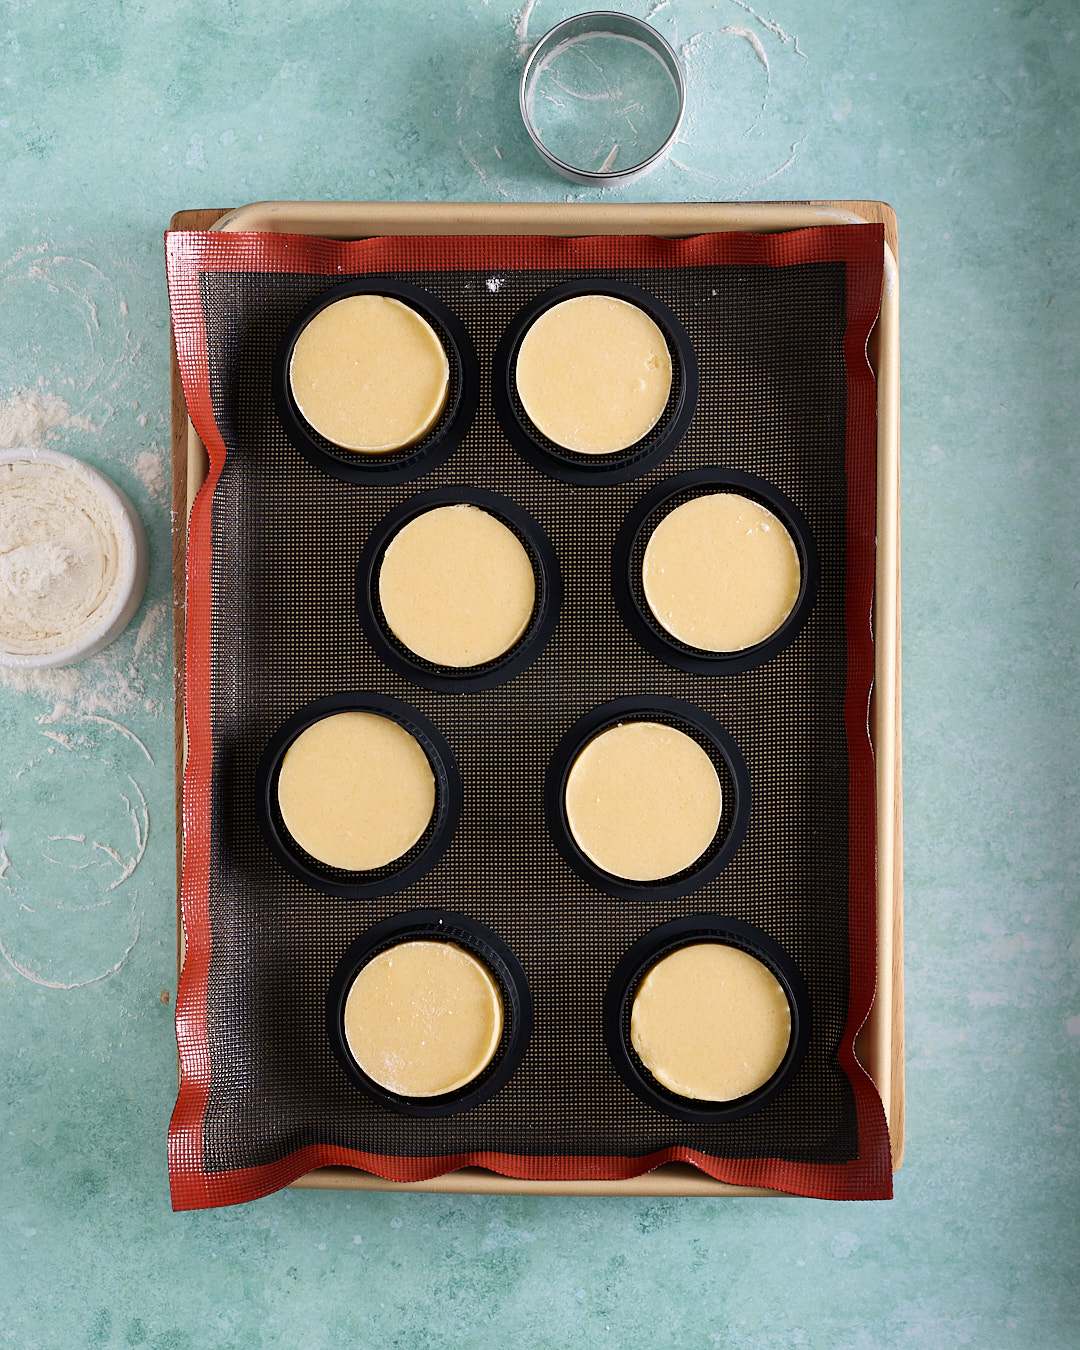
Overhead shot of shortbread biscuit discs on a silicone baking mat, each one enclosed in a black tart ring on a baking tray, with a metal cutter and flour dusting nearby on a turquoise surface.
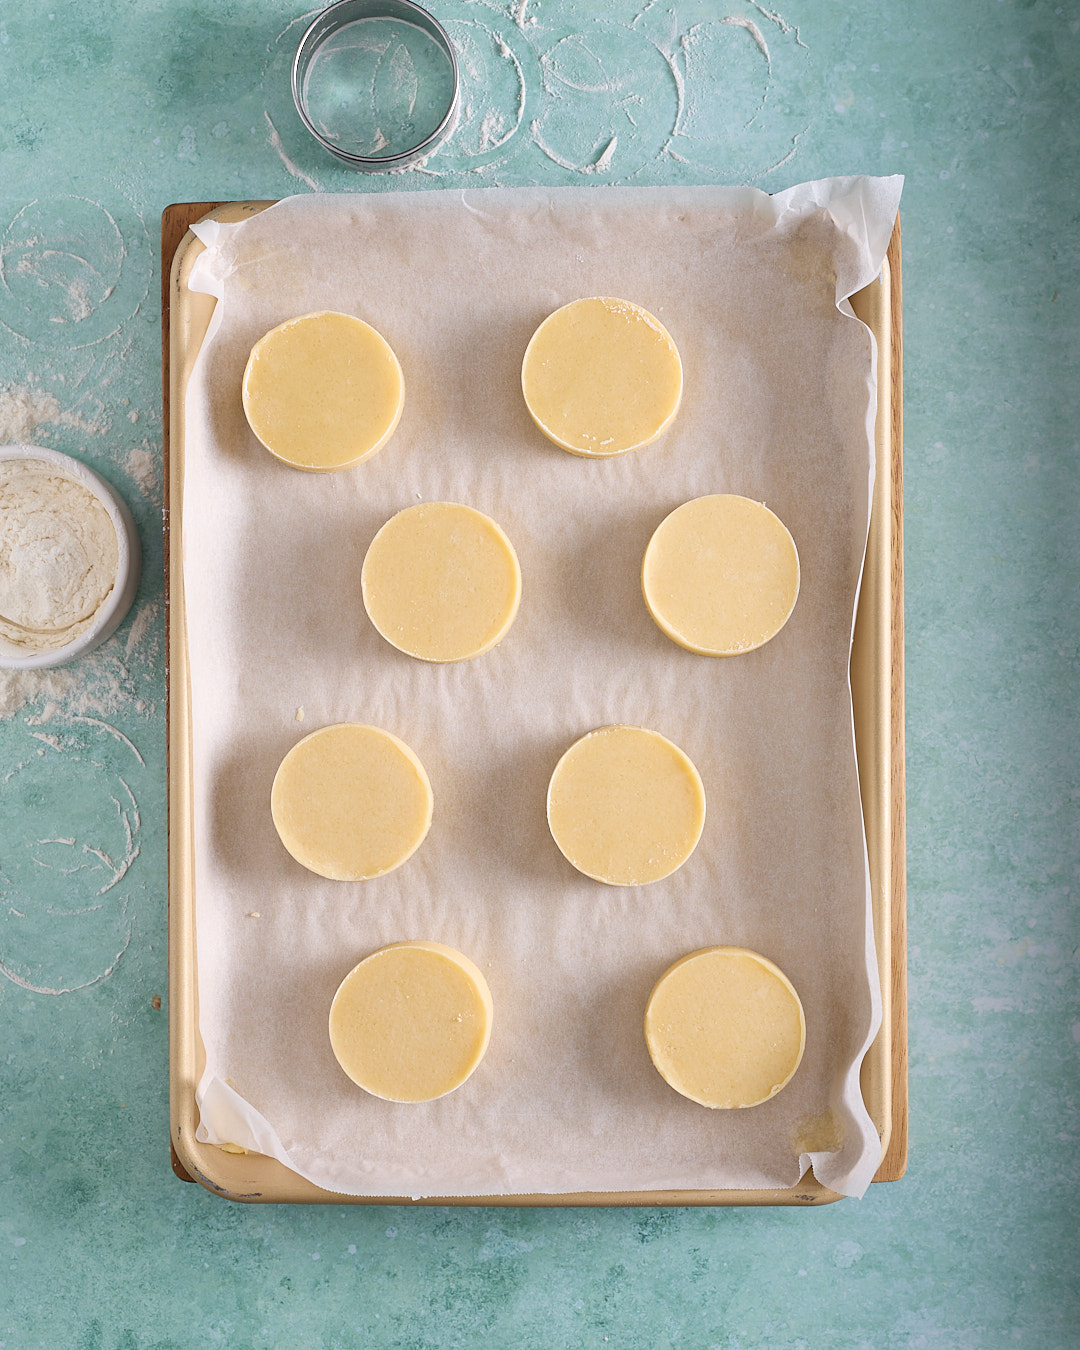
Overhead shot of eight round shortbread biscuit discs spaced on a baking tray lined with baking paper, with a metal cutter, flour dusting and a small bowl of flour nearby on a turquoise surface.

Preheat the oven to 165°C conventional or 155°C fan forced and position the rack in the middle of the oven. 

As you can see in the first image, I bake my peppermint bark shortbread biscuits on a tray lined with a professional air mat (a perforated-style baking mat designed to improve airflow and heat circulation under the dough). It gives the base of the biscuit a subtle textured finish, which adds that slightly more polished, patisserie-window look to a batch of festive shortbread biscuits. 

But the real “chefy” technique is the 7cm x 2cm tart rings placed around the frozen shortbread discs. The rings limit sideways spread and encourage the biscuit to bake up taller instead. The result is perfectly straight sides, sharp edges, and a beautifully level top—basically the kind of finish that makes people assume you’ve got a pastry chef hiding in your pantry. 

That said, please don’t feel you need to rush out and buy extra equipment to make beautiful Christmas shortbread biscuits. Baking the frozen cut-out biscuits on a tray lined with baking paper will still give you a neat, minimal-spread biscuit. Just keep them evenly spaced apart, like you see in the image above, so the heat can circulate, and the biscuits bake evenly—and so they don’t touch if they spread just that little bit. 

Baking and releasing (if using tart rings)

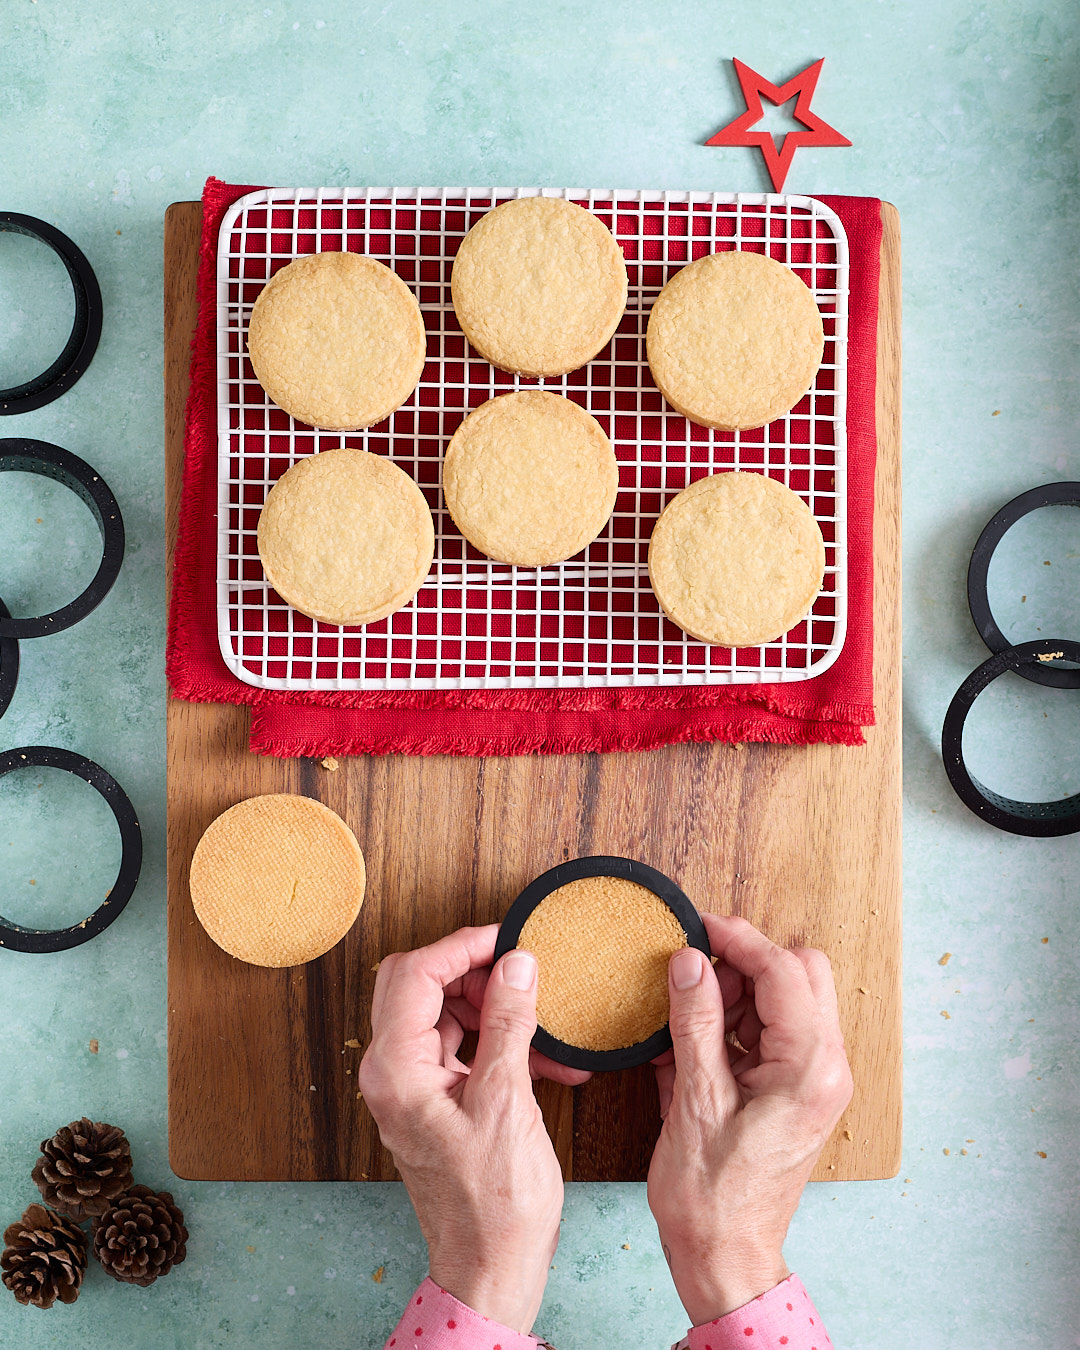
Overhead shot of baked shortbread biscuits cooling on a white rack over a red cloth, with tart rings scattered around and hands gently pushing a biscuit out of a black tart ring on a wooden board, styled with pinecones and a red star on a turquoise background.

Bake for 25–28 minutes at 165°C conventional or 155°C fan forced. This timing is based on biscuits rolled to 16mm and cut to 6–7cm rounds—if you change the thickness or shape, the bake time will change too. 

If you’re using tart rings, leave the biscuits in the rings on the tray to cool completely at room temperature. To release, flip one biscuit upside down at a time and gently press on both sides of the ring with your fingers until the biscuit drops out. Doing this over a wooden cutting board helps soften the landing and keeps everything close while you work. 

If you’re not using tart rings, leave the biscuits on the tray until they’re completely cool before moving them. These Christmas shortbread biscuits are fragile while warm, and they firm up properly as they cool. Pop the biscuits into the fridge before frosting them.

Even their bottoms are worth a close up!

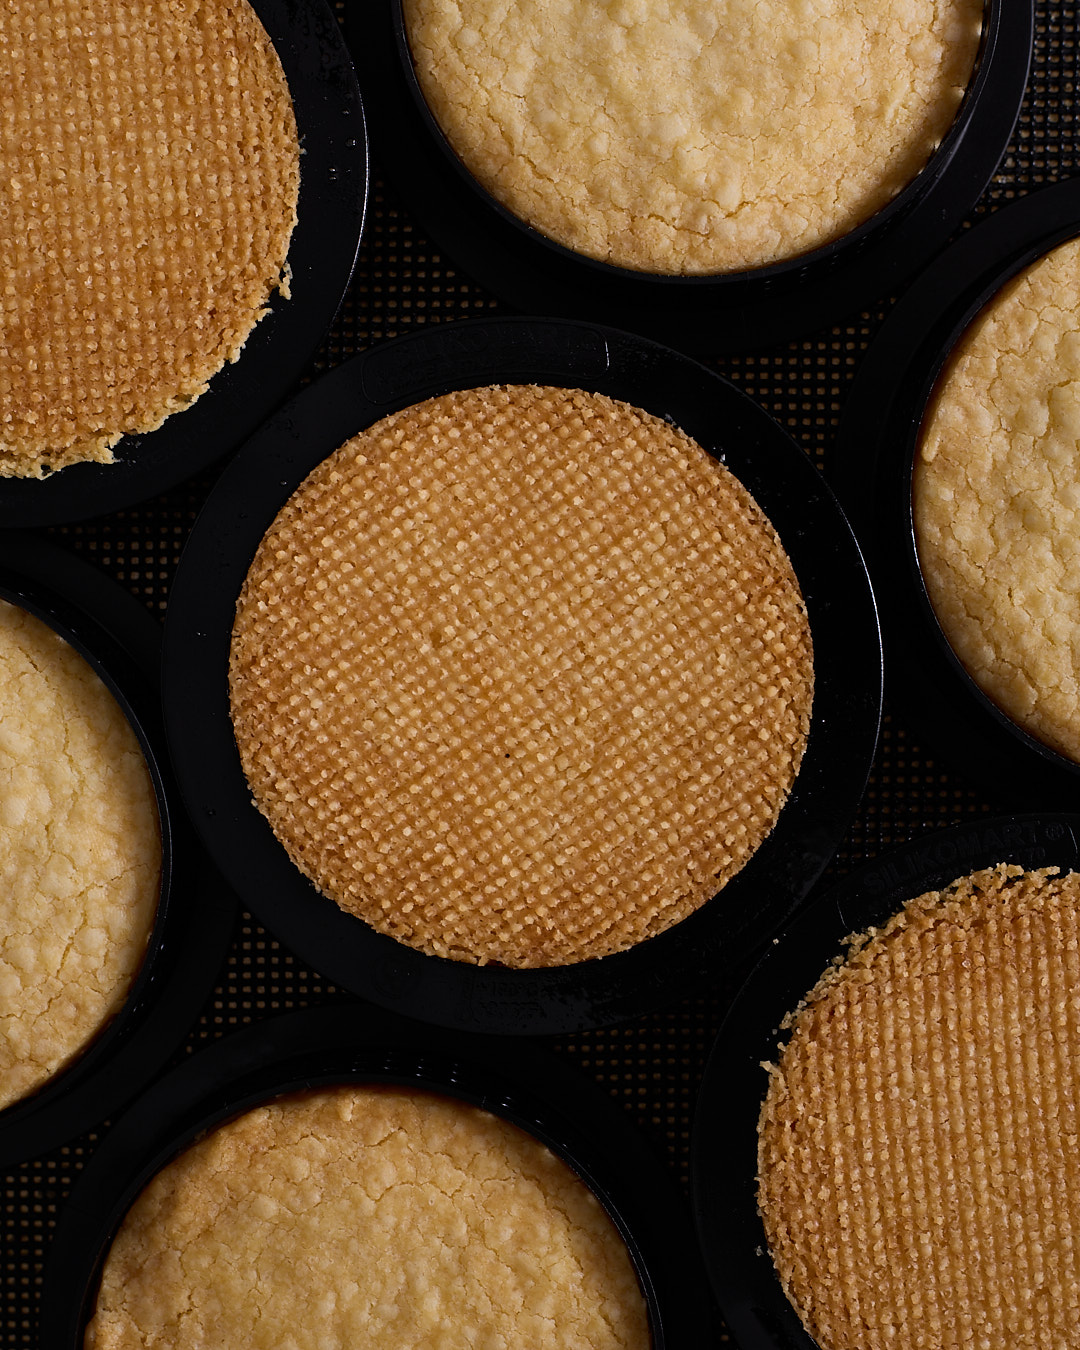
Close-up of baked shortbread biscuits in black tart rings on a dark textured baking mat, showing the smooth tops and the fine, even crosshatch texture on the biscuit bases.

Look, I know it’s a slightly unhinged thing to say about a biscuit, but here we are. That fine, even crosshatch on the base is what the air mat gives you, and it’s the kind of quiet detail that makes these Christmas shortbread biscuits look professionally finished—before they’ve even met the white chocolate and candy cane. 

Decorating your Christmas shortbread biscuits

Wrangling candy canes

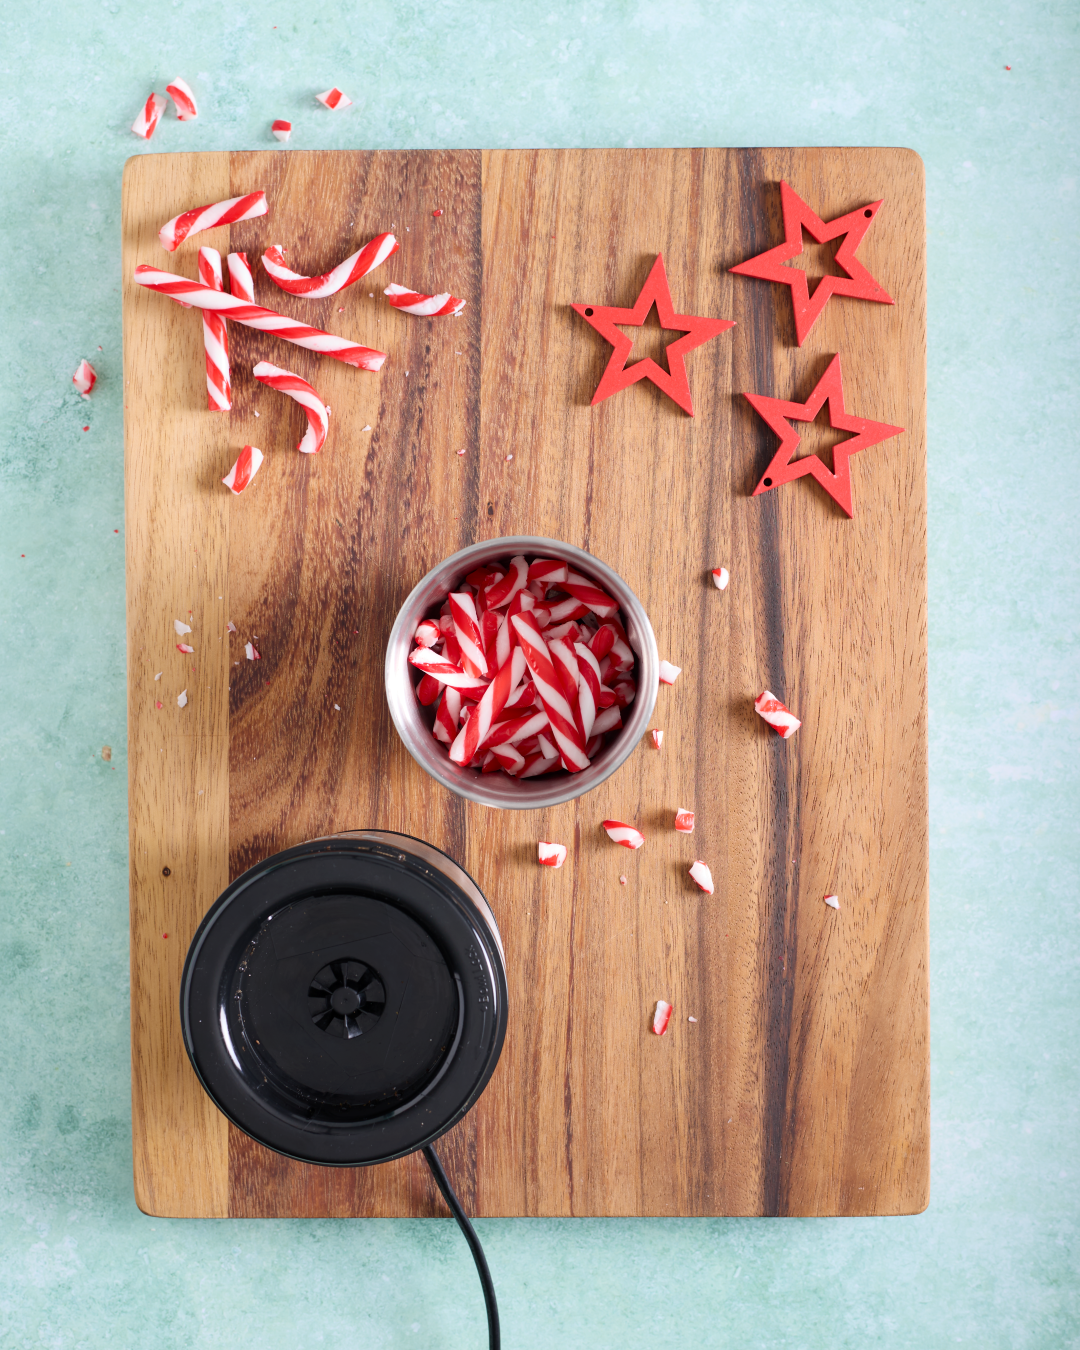
Overhead image of whole and broken red-and-white candy canes on a wooden board, with pieces collected in a small metal cup next to a black electric spice grinder and red star decorations.
Overhead image of finely ground pink candy cane powder in a small cup on a wooden board, with a black electric spice grinder nearby, stray candy crumbs on the board and red star decorations to the side.

If you’re baking these Christmas shortbread biscuits in Australia in December – in our full-throttle summer humidity – there’s a bit of strategy involved in wrangling the candy canes. As soon as you peel off the plastic, they start absorbing moisture and turning tacky. So don’t be tempted to pre-prepare the crushed and chopped candy canes. Do this step just before you’re ready to start melting the chocolate for your candy cane white chocolate topping. 

How to crush candy canes for peppermint bark shortbread biscuits

For the 220g of white chocolate topping (reserving 100g for piping), I use about 30g of crushed candy canes. To allow for wastage, I start with 45g of candy canes while they’re still in their wrappers. Then unwrap and blitz them in a small electric spice grinder until you’ve got a fine, even, sand-like dust that will fold neatly into the chocolate. You can also use a mini food processor, a high-speed blender, or go low-tech with a doubled up Ziplock bag and a rolling pin or meat mallet. Whatever you use, aim for fine and consistent rather than chunky. 

Measure out 30g of the candy cane dust into a sealed container and set aside until you’re ready to use it in this peppermint bark shortbread biscuits recipe. 

For the chopped décor pieces, you can decide how generous you want to be on the topping. My big tip is not to unwrap the décor candy canes before you break them up. Keep them contained in their wrappers and use something with a bit of weight. I use the granite pestle from my mortar and pestle and gently pound them on a wooden chopping board. You’re aiming for irregular pieces, not dust, so go easy. 

Once you’re happy with the size of the pieces, use kitchen scissors to snip through the plastic wrapping, tearing it open as you go. I do this over the plastic container I plan to store them in. Tip the candy cane pieces into the container, break up any larger chunks, then seal the lid. They can sit there—safely contained and only mildly sticky—until it’s time to decorate your peppermint bark shortbread biscuits. 

A simple white chocolate topping

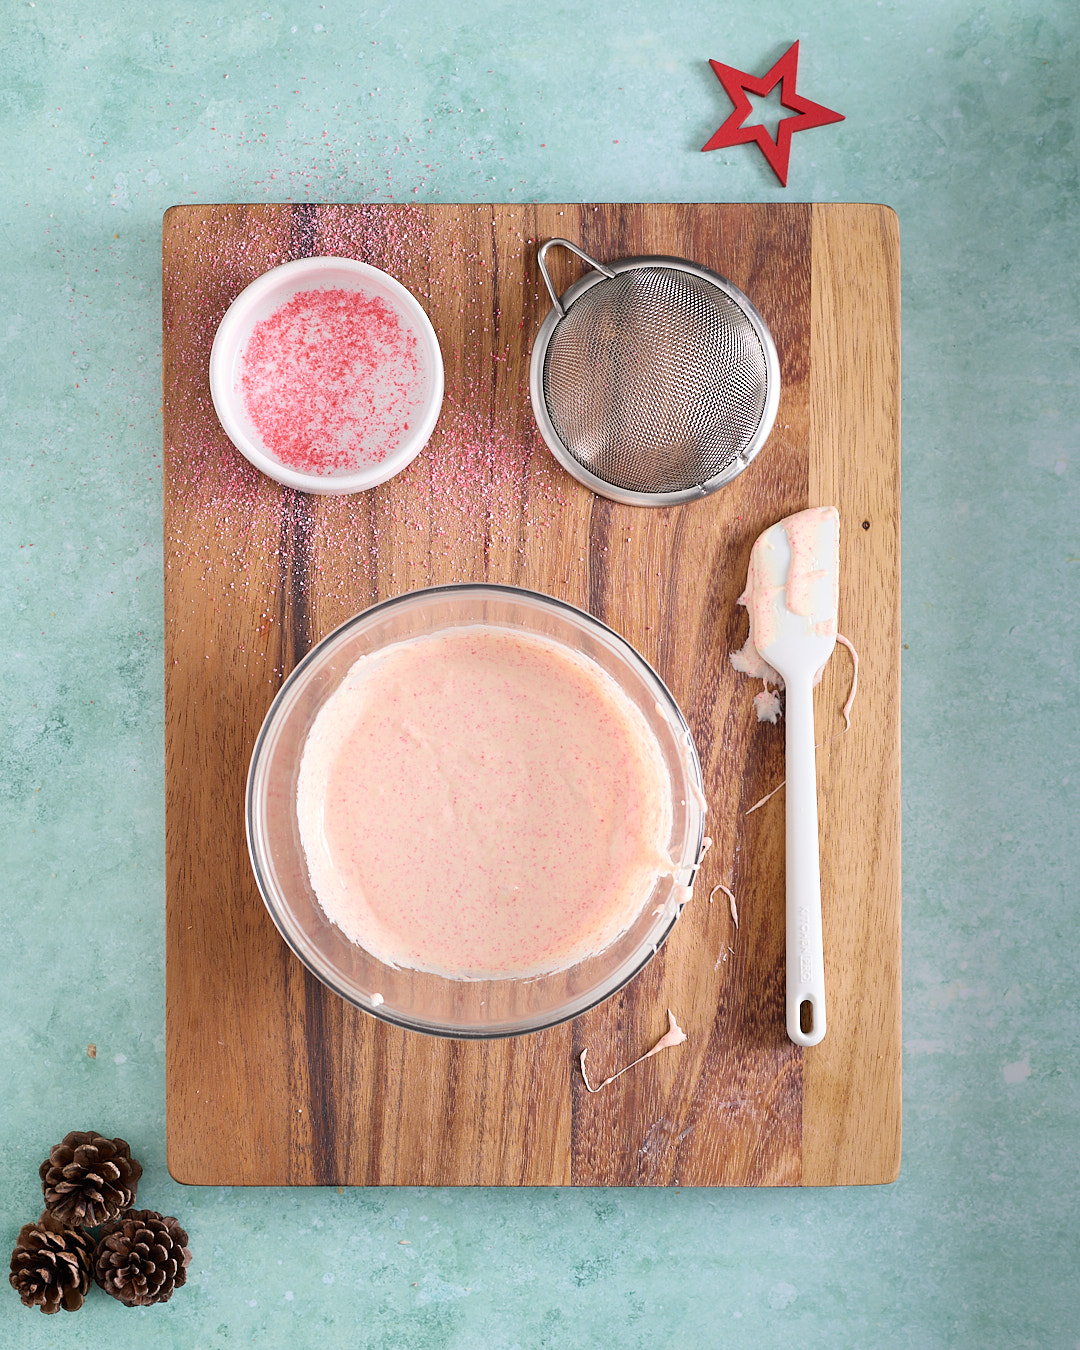
Overhead shot of a bowl of pale pink, white chocolate mixture on a wooden board, with a small dish of crushed candy cane, a fine mesh sieve, and a white silicone spatula nearby, with candy cane dust scattered on the board, pinecones and a red star on a turquoise background.

I’ve made sure the white chocolate topping for my candy cane peppermint bark shortbread biscuits is as straightforward as possible, avoiding all the hassles of chocolate tempering fails. 

It really is as simple as melting 220g white chocolate, adding 30g crushed candy cane dust, and stirring. That’s it. 

OK—but a few important tips. 

I recommend using the microwave for this. Setting up a bain marie is the fallback if you’re running a microwave-free kitchen. A bain marie is just a heatproof bowl set over a saucepan of gently simmering water—making sure the base of the bowl doesn’t touch the water—so the chocolate melts slowly and evenly from the steam. 

White chocolate burns easily, so keep the microwave to short bursts on medium power. You can start with 30 seconds per burst, then shorten the bursts as the chocolate starts to melt. Stir thoroughly with a silicone spatula between each burst.  

Once the chocolate is almost melted, stop microwaving and just stir until the residual heat finishes the job. Then let the chocolate sit on the bench for 5 minutes, stirring every minute or two. You’re cooling it slightly before adding the candy cane, which helps the crushed candy cane hold its colour and stay as visible flecks in the topping—rather than dissolving completely and turning the whole thing a bit too monochromatic. 

Frosting candy cane shortbread biscuits

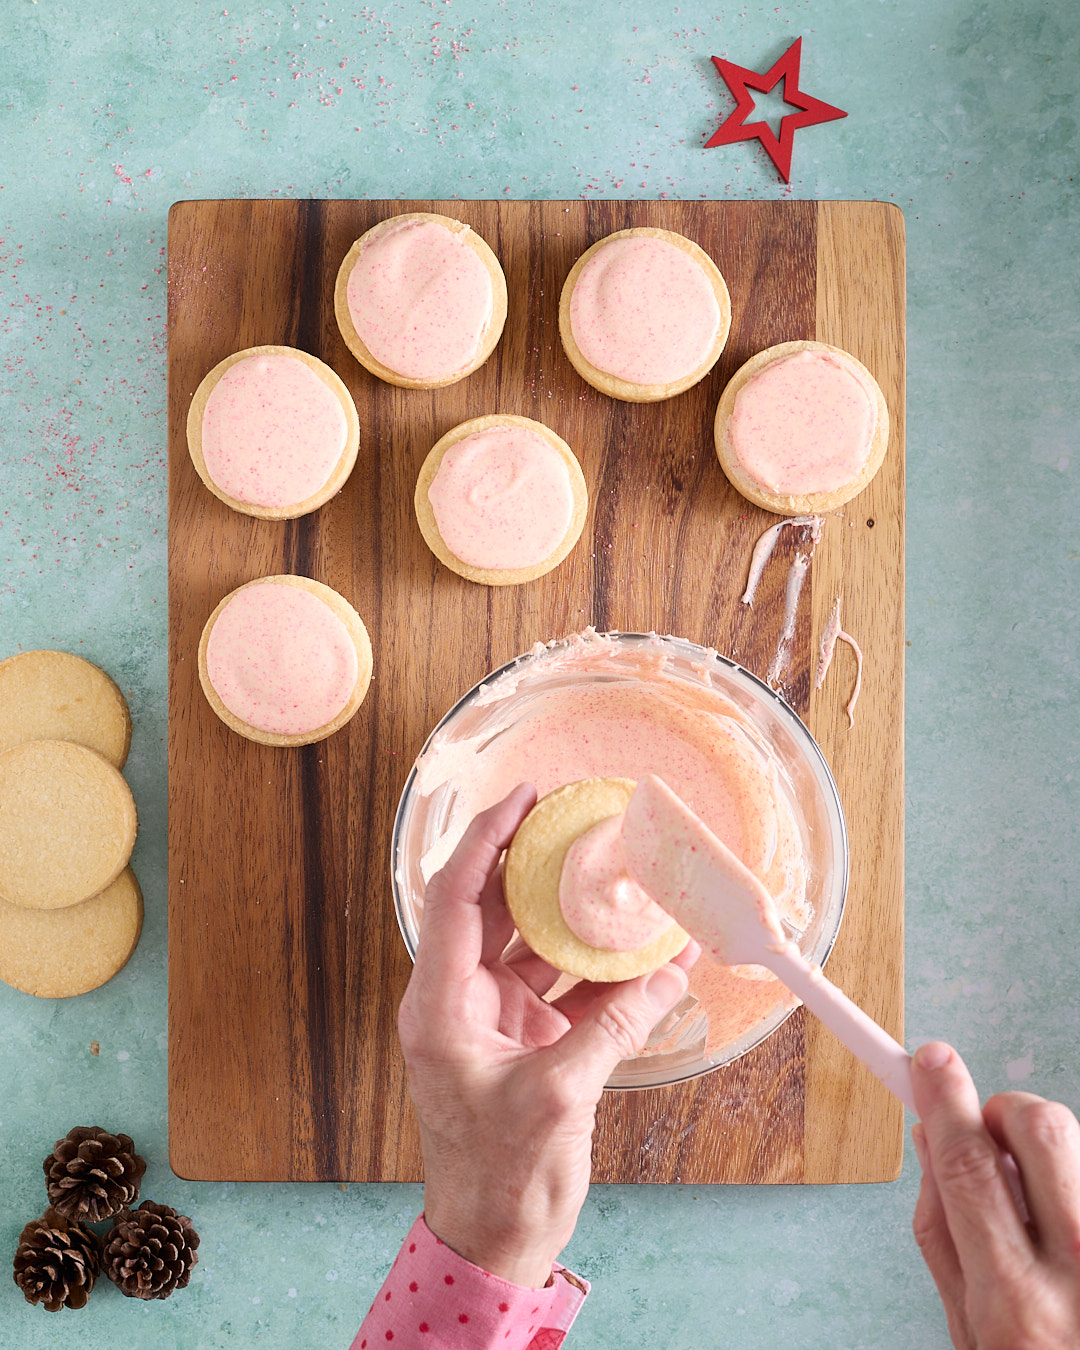
Overhead shot of shortbread biscuits being frosted with pale pink candy cane white chocolate, with a bowl of melted topping on a wooden board, a hand spreading the topping with a silicone spatula, and several frosted biscuits set aside, styled with pinecones and a red star on a turquoise background.

Timing is the whole game here if you want that neat, even “frame” of biscuit still showing around the edge of the topping. You want the white chocolate mixture cool enough that it holds its shape, but still soft enough to spread without dragging or tearing the surface. 

My test is simple: put a teaspoon of topping onto a plate and let it sit for a minute. If it stays put in a little mound and you can nudge it with a spatula into a smooth circle without it running, you’re in the right zone. If it slowly puddles outward on its own, it’s too warm—give it a few more minutes on the bench and stir again. If it feels stiff and starts setting the moment you touch it, it’s too cool and you’ll end up with a rough, patchy finish. 

And because nobody’s timing is perfect, this is where the extremely glamorous tool comes in: a blow dryer or a heat gun. I use a heat gun (yes, it’s a Makita from Bunnings), but a standard blow dryer works too. Warm the bowl very gently from a distance for a few seconds, stir well, then repeat the plate test. You’re not trying to heat the chocolate back up—you’re just nudging it into that spreadable-but-not-runny window. 

To frost, spoon a small mound of topping onto each fully cooled biscuit (fridge-cold is even better), then use the spatula to coax it out toward the edges. If you’re going for patisserie-perfect, aim for about 15g of topping per biscuit. It’s enough to spread into a neat circle with a clean border of shortbread still showing. Otherwise, riff away. 

Final touches

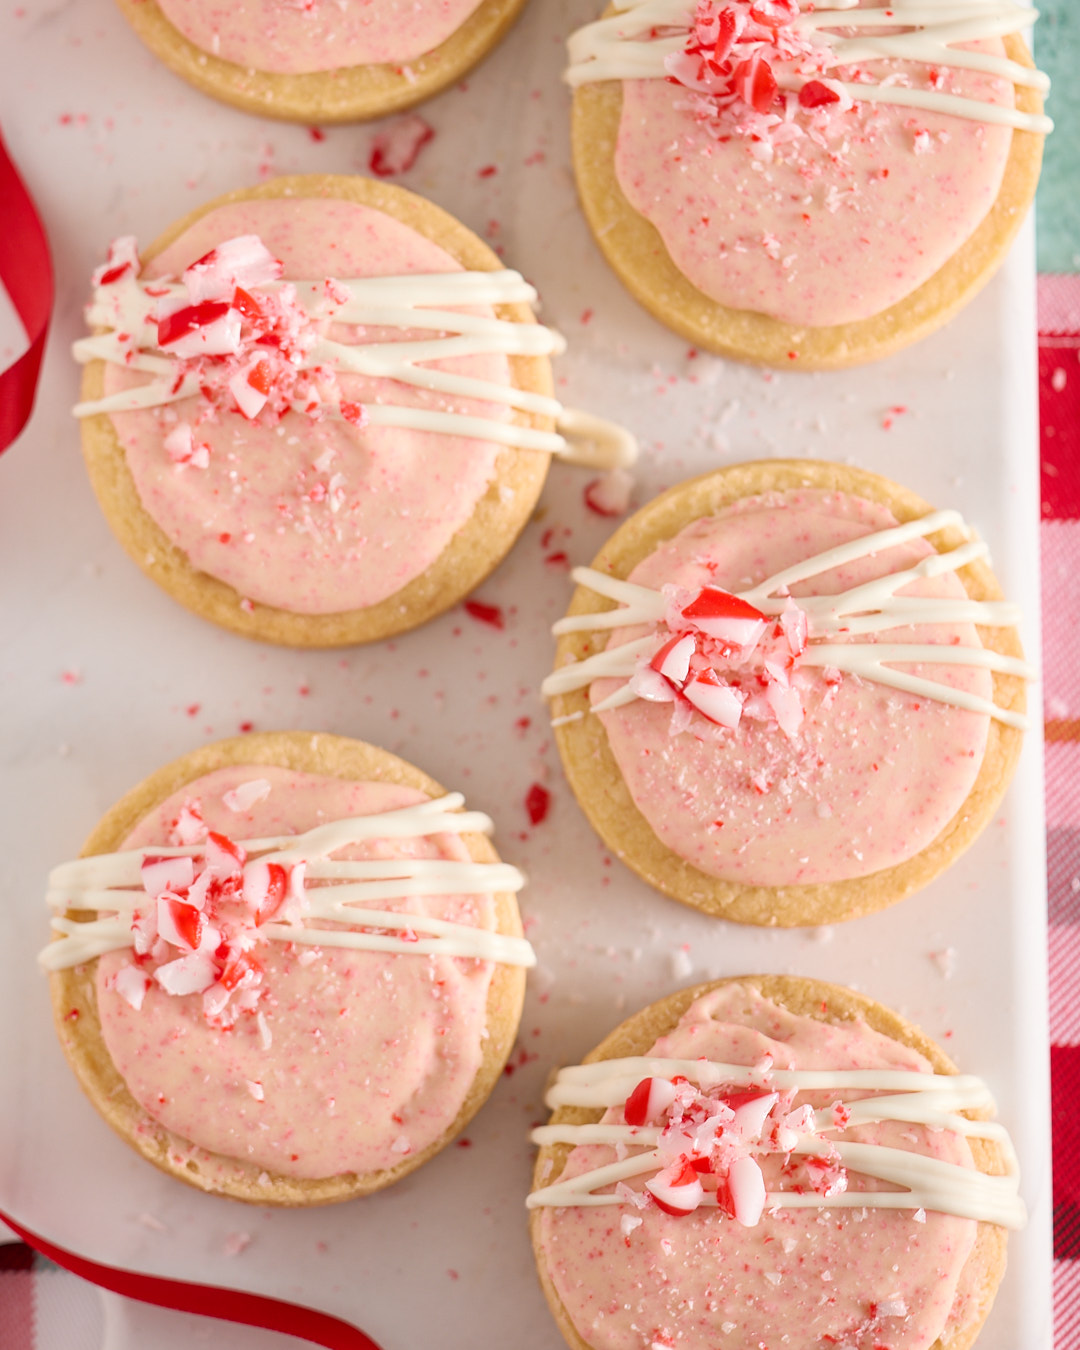
Overhead close-up of peppermint bark shortbread biscuits on a white platter, each topped with a pale pink candy cane white chocolate frosting, drizzled with piped white chocolate and finished with crushed candy cane pieces, styled with a red ribbon and a red-and-white plaid cloth.

I’m a big believer in the décor telling the story of your baking. So the finishing touches on these peppermint bark shortbread biscuits are a simple drizzle of piped white chocolate and a few deliberately random pieces of candy cane. 

Pipe the white chocolate first, then—before it sets—decorate one biscuit at a time with the broken candy cane pieces. The chocolate gives you a short window where the candy cane will actually stick, so don’t pipe all the biscuits – finish one biscuit at a time.  

And that’s it. Your patisserie-window peppermint bark shortbread biscuits are done… unless you choose to riff your way through, in which case they’re still done—just with more personality. 

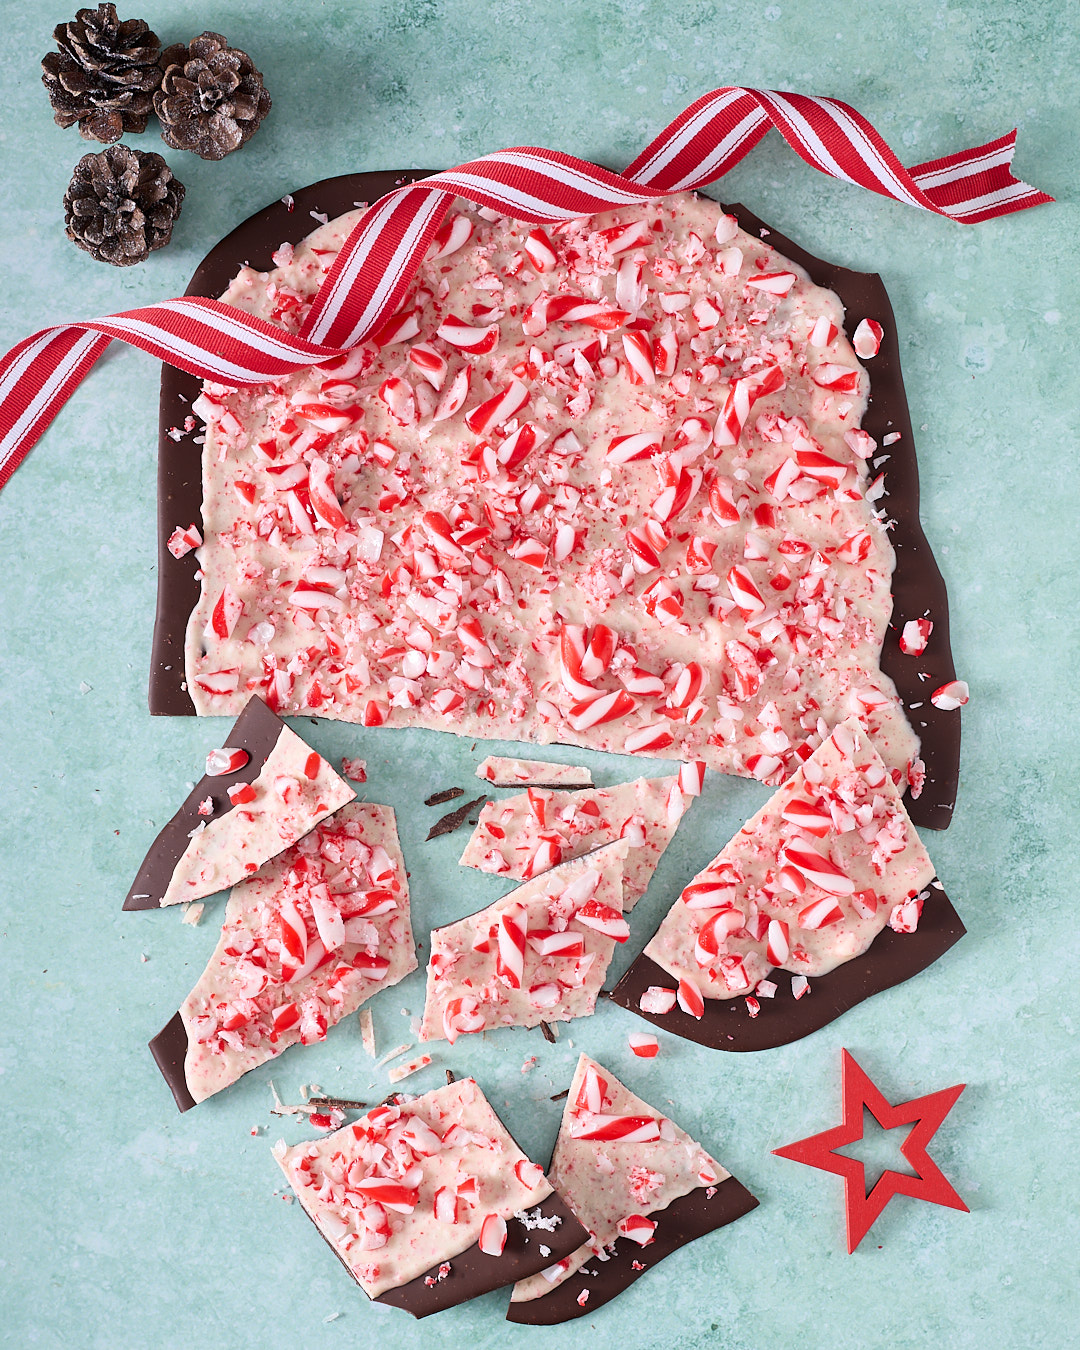
Overhead image of a large slab of candy cane peppermint chocolate bark on a mint-green background, dark chocolate base topped with a thick layer of peppermint-speckled white chocolate and crushed red-and-white candy canes, with broken shards scattered below, frosted pinecones, a red-and-white striped ribbon and a red star decoration completing the Christmas scene.

And if you want to keep exploring the candy cane and white chocolate theme, why not start with the origin story—my Candy Cane Peppermint Chocolate Bark. No baking required.

Peppermint Bark Shortbread Biscuits

Six round peppermint bark shortbread biscuits on a white platter, topped with pale pink frosting, a drizzle of white chocolate and crushed candy cane, styled with red ribbon, a red check tea towel and soft festive lights in the background.
This Christmas I’m celebrating the magic that is candy cane peppermint bark. Check out my candy cane peppermint chocolate bark recipe to hear the origin story of my love of the union of white chocolate and candy canes. Shortbread biscuits have a permanent place in my family’s Christmas celebrations, but this year I’ve dressed them up a bit in my peppermint bark shortbread biscuits.
I’ve used a few chefy tricks and tweaked the traditional Scottish shortbread recipe so these Christmas shortbread biscuits come out of the oven patisserie-window worthy.
Prep Time 1 hour
Cook Time 30 minutes
Course Biscuit
Cuisine American, European
Servings 15 biscuits

Equipment

  • Biscuit trays (rimless preferred)
  • Digital scales
  • 7cm Round stainless steel cookie cutter
  • Large rolling pin
  • Baking paper
  • cooling rack
  • Fine mesh sieve
  • Silicone spatula
  • Offset spatula
  • Bench scraper
  • Heatproof microwave-safe bowl
  • 16mm Rolling guides or 20 x 20mm hobby wood strips (optional)
  • 2 x Silicone baking mats (optional)
  • Stand mixer or electric hand mixer (optional)
  • Electric spice grinder (optional)
  • Tart rings, 7cm x 2cm (optional)
  • Professional air mat (optional)
  • Piping bag (optional)
  • Heat gun or blow dryer

Ingredients  

  • 345 g unsalted butter (room temperature)
  • 90 g granulated white sugar
  • 75 g pure icing sugar
  • 375 g all-purpose flour
  • 120 g corn flour
  • 1 ½ teaspoons table salt
  • 320 g white chocolate
  • 100 g candy canes

Instructions 

Make the shortbread dough:

  • Weigh 345g room temperature unsalted butter into a stand mixer bowl (or a large mixing bowl) and add 90g granulated white sugar and 75g pure icing sugar.
  • Sift the pure icing sugar first so any hard lumps don’t end up in your dough.
  • Mix on low with the paddle (or stir with a wooden spoon) just until combined and glossy—this isn’t a “cream until pale” situation.

Add the dry ingredients:

  • In a separate bowl, sift together 375g all-purpose flour, 120g cornflour, and 1½ teaspoons table salt.
  • Add the dry ingredients to the butter mixture in three additions, mixing on low and scraping down the bowl between each.
  • Stop when you’re just shy of fully incorporated, then tip the dough onto the bench and bring it together gently into a neat block.

Rest the dough:

  • Wrap the dough tightly in plastic wrap and refrigerate for at least 1 hour (overnight is even better for clean rolling and cutting).

Prep the candy canes:

  • For the 220g of white chocolate topping (reserving 100g for piping), blitz candy canes into a fine dust, then measure out 30g for the topping.
  • To allow for wastage, start with 45g candy canes while they’re still in their wrappers, unwrap, then blitz to a fine, sand-like consistency using an electric spice grinder (optional), mini food processor, high-speed blender, or a doubled-up Ziplock bag and rolling pin.
  • For the décor pieces, keep the candy canes in their wrappers while you break them up, then snip the wrapper open over a container and seal until needed.

Roll the dough:

  • Set up two 16mm rolling guides (or improvised guides) and roll the chilled dough between two or silicone mats (or sheets of baking paper) to an even 16mm thickness.
  • Slide the rolled dough (still sandwiched) onto a biscuit tray and freeze for about 15 minutes until very firm.

Cut the biscuits:

  • Lightly flour a 7cm round cookie cutter and cut the dough into rounds, moving quickly so the dough stays cold.
  • Transfer each round to a lined biscuit tray, spacing them well apart so they don’t touch if they spread slightly.

Freeze before baking:

  • Freeze the cut biscuits until very firm. This is what keeps the edges neat and the biscuits thick and tidy—exactly what you want for peppermint bark shortbread biscuits.

Bake:

  • Preheat the oven to 165°C conventional or 155°C fan forced with the rack in the middle.
  • Bake the frozen biscuits for 25–28 minutes (based on 16mm thickness and a 7cm round), until set and lightly golden.
  • If using tart rings (optional), bake with the rings on and leave the biscuits in the rings to cool completely before releasing.

Cool completely:

  • Cool the biscuits on the tray until fully set, then transfer to a cooling rack. Pop the biscuits into the fridge before frosting them.

Make the white chocolate topping:

  • Melt 220g white chocolate in a microwave-safe bowl in short bursts on medium power, stirring well with a silicone spatula between each burst.
  • Stop microwaving when it’s almost melted and let residual heat finish the melt as you stir.
  • Let the melted chocolate sit for 5 minutes, stirring every minute or two, then stir in 30g candy cane dust.
  • Plate-test a small spoonful: it should hold its shape but still spread smoothly.

Frost the biscuits:

  • To frost, spoon a small mound of topping onto each fully cooled biscuit (fridge-cold is even better), then use the spatula to coax it out toward the edges.
  • If you’re going for patisserie-perfect, aim for about 15g of topping per biscuit. It’s enough to spread into a neat circle with a clean border of shortbread still showing.

Pipe and finish:

  • Melt the remaining 100g white chocolate for piping, transfer to a piping bag (or Ziplock), and drizzle over each biscuit.
  • Before the drizzle sets, finish one biscuit at a time with the broken candy cane pieces so they actually stick.

Set:

  • Leave the biscuits at cool room temperature (or briefly in the fridge) until the topping and piping are fully set.

Just before you cook with abandon…

Use pure icing sugar: In Australia, “pure icing sugar” is the one you want for peppermint bark shortbread biscuits. Don’t swap in soft icing mixture (the one with cornflour already added) because it changes the texture and can make the biscuit taste a bit flat and powdery.
Why use two sugars: The mix of 90g granulated white sugar and 75g pure icing sugar gives you that classic shortbread snap, but keeps the crumb tender. Granulated sugar brings structure and bite; icing sugar dissolves fast and keeps things finer and more delicate.
Cornflour is the quiet trick: The 120g cornflour softens the texture and helps limit spread in cut-out biscuits by weakening gluten structure, so the edges stay cleaner once baked.
Don’t “cream” like a cake: This isn’t the creaming method where you’re building air. Mix the 345g butter with the sugars just until combined and glossy, then stop. Overworking here heads you straight toward puffier biscuits and less of that tight shortbread bite.
Resting and chilling matters: A proper fridge rest makes the dough easier to roll cleanly, helps the cut edges stay sharp, and you’re far less likely to end up with cracked tops and ragged sides.
Candy cane humidity strategy: If you’re making these Christmas shortbread biscuits in Australian December humidity, don’t prep candy canes early. They start absorbing moisture the minute they’re unwrapped. Blitz the candy cane dust right before you melt the chocolate, and keep the chopped décor pieces sealed until the last minute.
Use real white chocolate: This isn’t the recipe for compound chocolate, melts, buttons, or chips. Your all-butter peppermint bark shortbread biscuits deserve proper baking chocolate so the topping sets cleanly and tastes like it should.
Getting the topping consistency right: The topping should be cool enough to hold its shape but still spreadable. Plate-test a teaspoon: if it stays put and spreads smoothly when nudged, you’re good. If it puddles, it’s too warm; if it drags and tears, it’s too cool. A blow dryer or heat gun can nudge the bowl back into the right zone.
Pop the biscuits into the fridge before frosting: Chilling the baked biscuits firms them up for handling and helps the topping set neatly without slumping.
Flexible shapes and bake times: This peppermint bark shortbread biscuits recipe is flexible—change the cutter shape or size if you like, but thickness is what drives bake time. The 25–28 minutes is based on biscuits rolled to 16mm and cut at around 6–7cm. Smaller or thinner biscuits will bake faster; larger or taller biscuits will take longer. Watch the surface: you want a dry, matte finish with the faintest hint of colour at the edges.
Can be frozen: These peppermint bark shortbread biscuits freeze well. You can freeze the cut out dough in an airtight container (layered with baking paper) for up to 2 months. Also the baked, unfrosted biscuits can be frozen, then thaw at room temperature before frosting and decorating. You can also freeze the fully decorated biscuits, but the candy cane pieces are more likely to turn a little tacky as they thaw, especially in humid weather.
Storage: Store peppermint bark shortbread biscuits in an airtight container with baking paper between layers. Humidity is the enemy here—candy cane will go sticky if left exposed—so keep the lid on and don’t leave them sitting out on a platter for half a day “just to look pretty.” In Australia, the biscuits can stay at room temperature for a day or two, if keeping longer store in the fridge for up to two weeks.

Keyword candy cane shortbread biscuits, Christmas shortbread biscuits, festive shortbread biscuits, peppermint bark shortbread biscuits

Leave a Reply

Your email address will not be published. Required fields are marked *

Recipe Rating


Hi, I'm Sandra!

I live by the words of Harriet Van Horne and I will be exploring every possible way to bring Harriet’s words to life in my kitchen.

Recipes

Discover delicious featured food recipes! From quick meals to gourmet delights, Sandra offer inspiring dishes for every occasion. Explore, cook, and enjoy flavorful creations today.

You might also like..

Butterflied Leg of Lamb with Greek-style Finishing Sauce

Truffled Mushroom Cannelloni

Easy Moroccan Preserved Lemons

Blueberry Rosemary Jam

Subscribe

Subscribe to my newsletter for a chance to win a FREE APRON (drawn monthly) as well as cooking tips, recipes, offers and exclusive content.

"*" indicates required fields