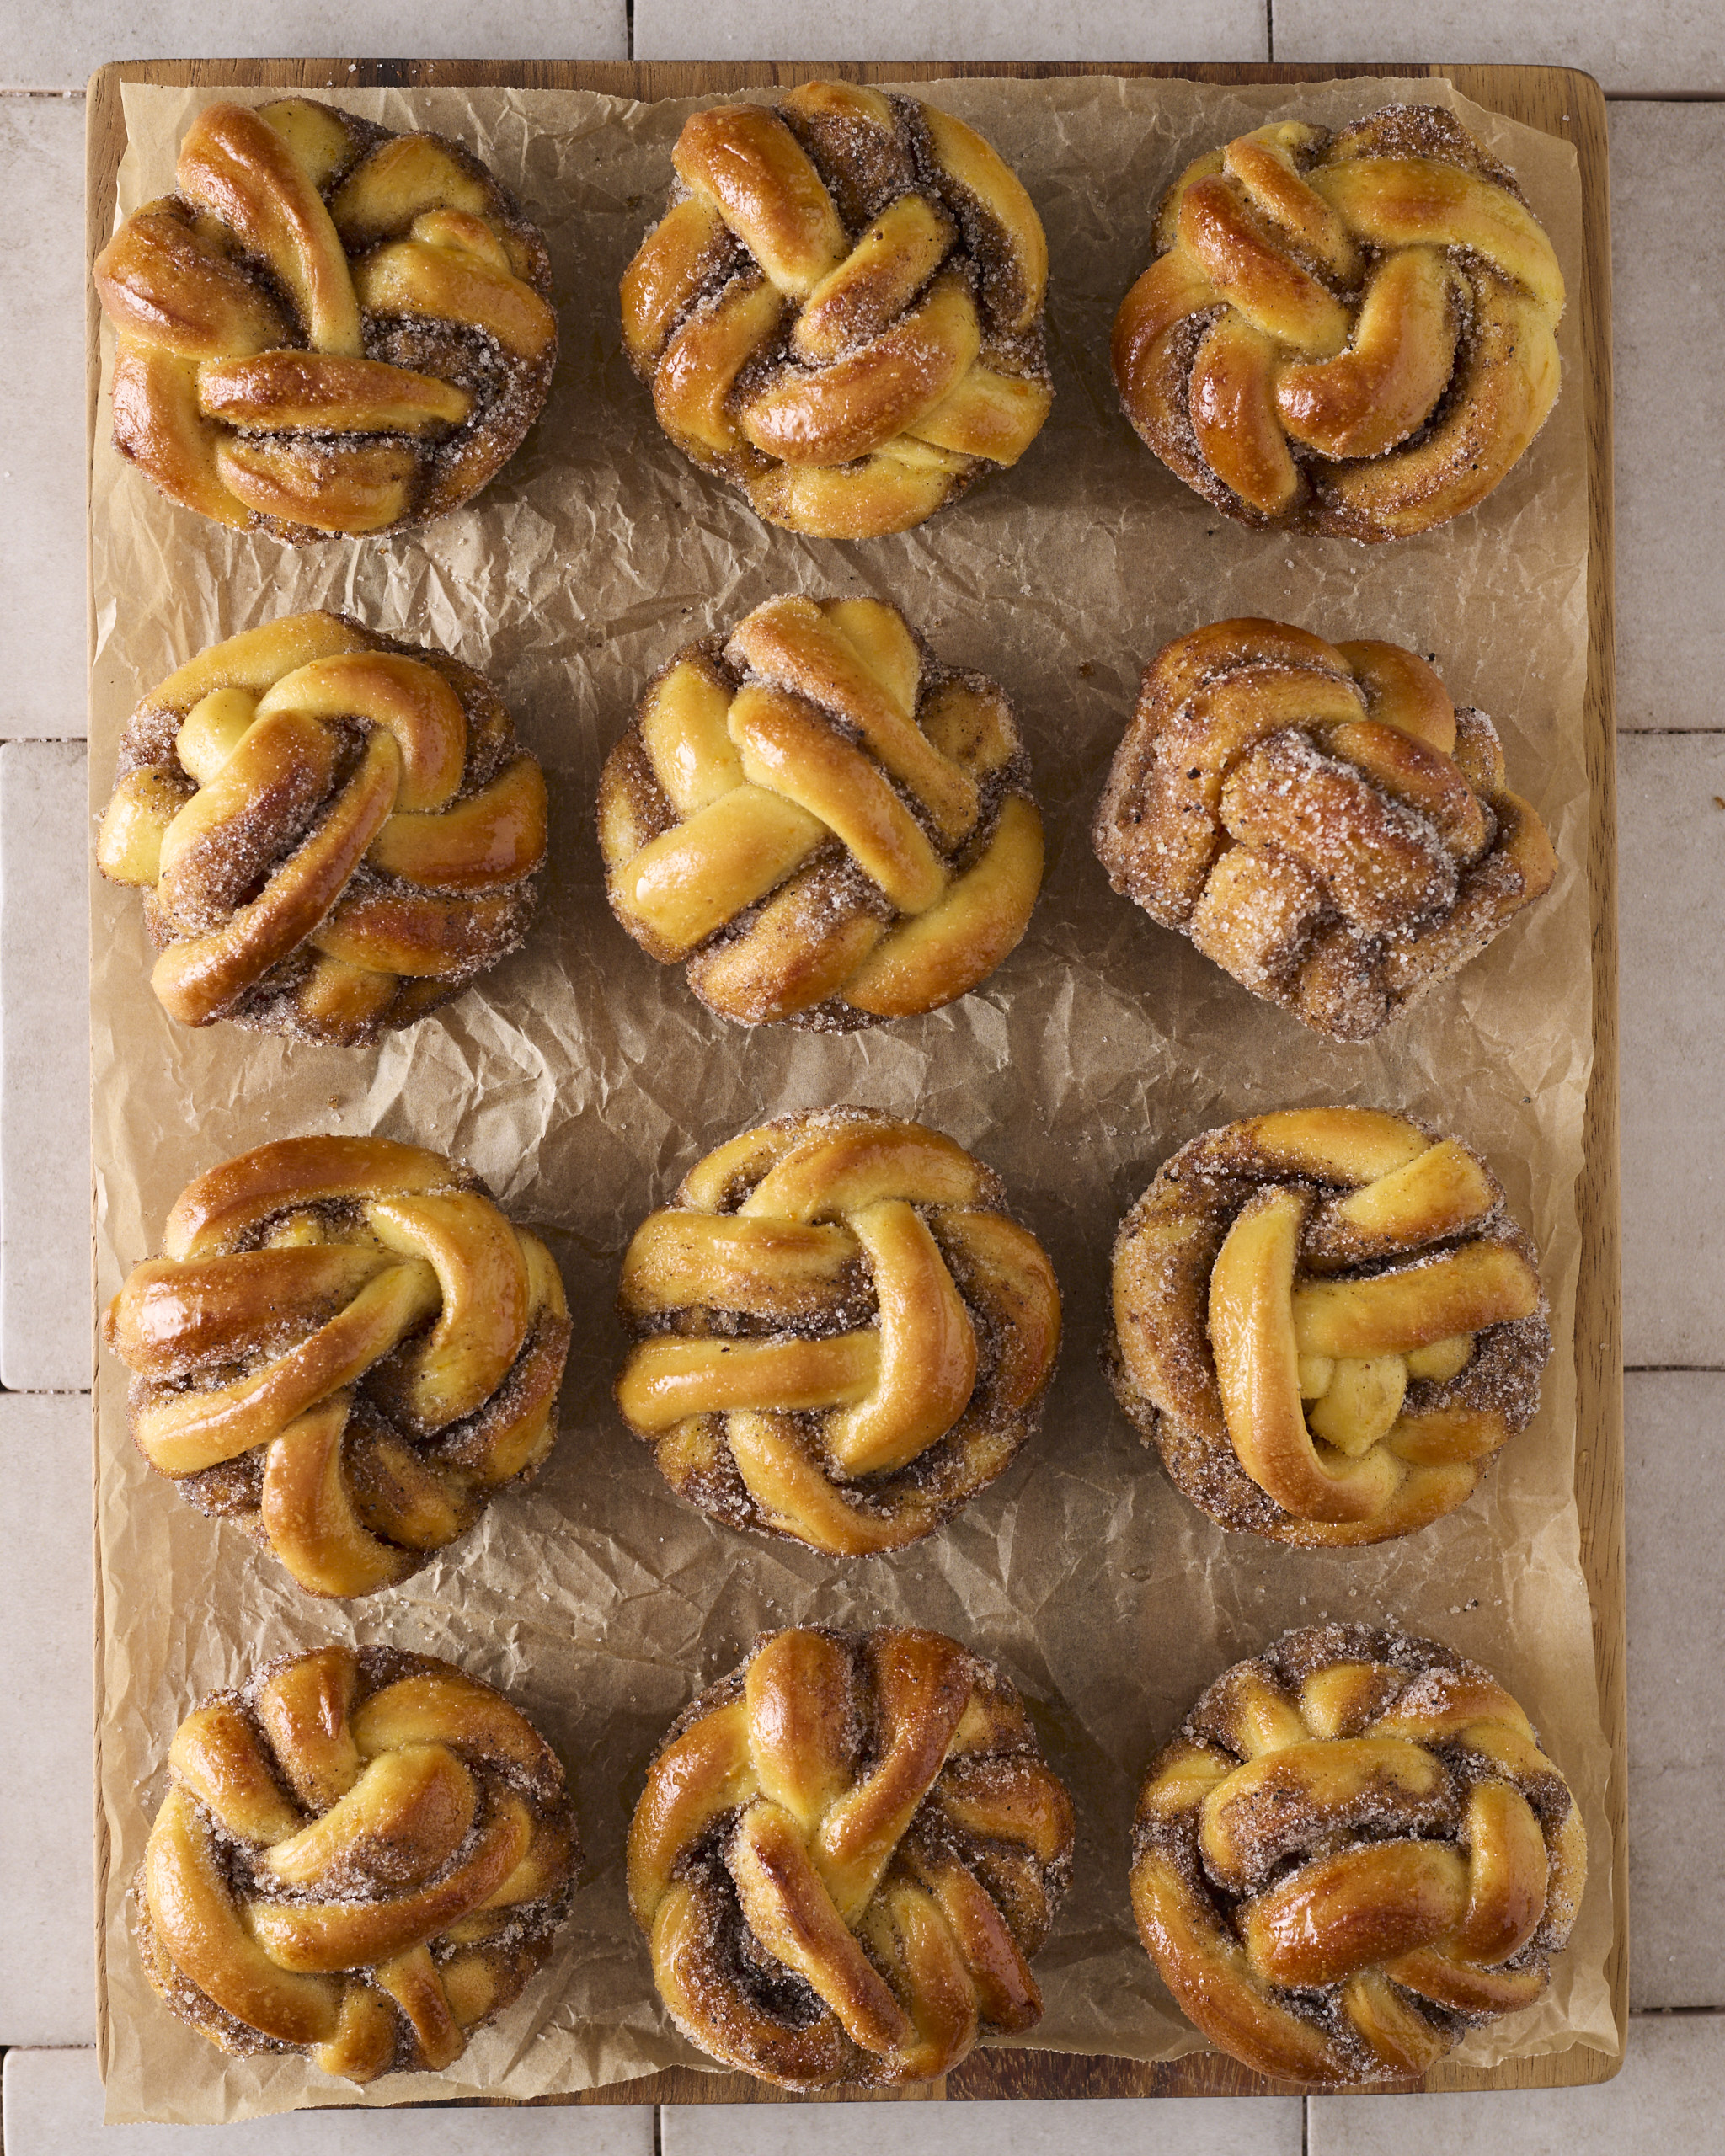
I came to Australia with the sweet dough recipe from my Mom’s Encyclopedic Cookbook: Culinary Art Institute (Berolzheimer, Ruth (ed), G P Putnam’s Sons, New York, 1976). The cookbook she bought from the door-to-door salesman – the Amazon of my youth! And yes, my Mom’s 1976 edition is still available on Amazon. This was the recipe that produced hundreds of cinnamon rolls in our household. It was a basic enriched dough, using eggs, milk and shortening. I’m not sure if shortening was specified by the Institute but, in our house, butter was too expensive for Mom to waste hidden in a dough!
Despite my fond memories of Crisco-enriched cinnamon rolls, my dough recipe has matured with me. There’s no doubt it’s much improved by the use of butter and, importantly, the now widely used tangzhong technique. This method involves precooking some of the flour and milk to form a paste that’s added to the dough mixture. The impact on the final baked product is really impressive, with a softer, fluffier crumb and a sweet bun that stays fresh for a couple of days.
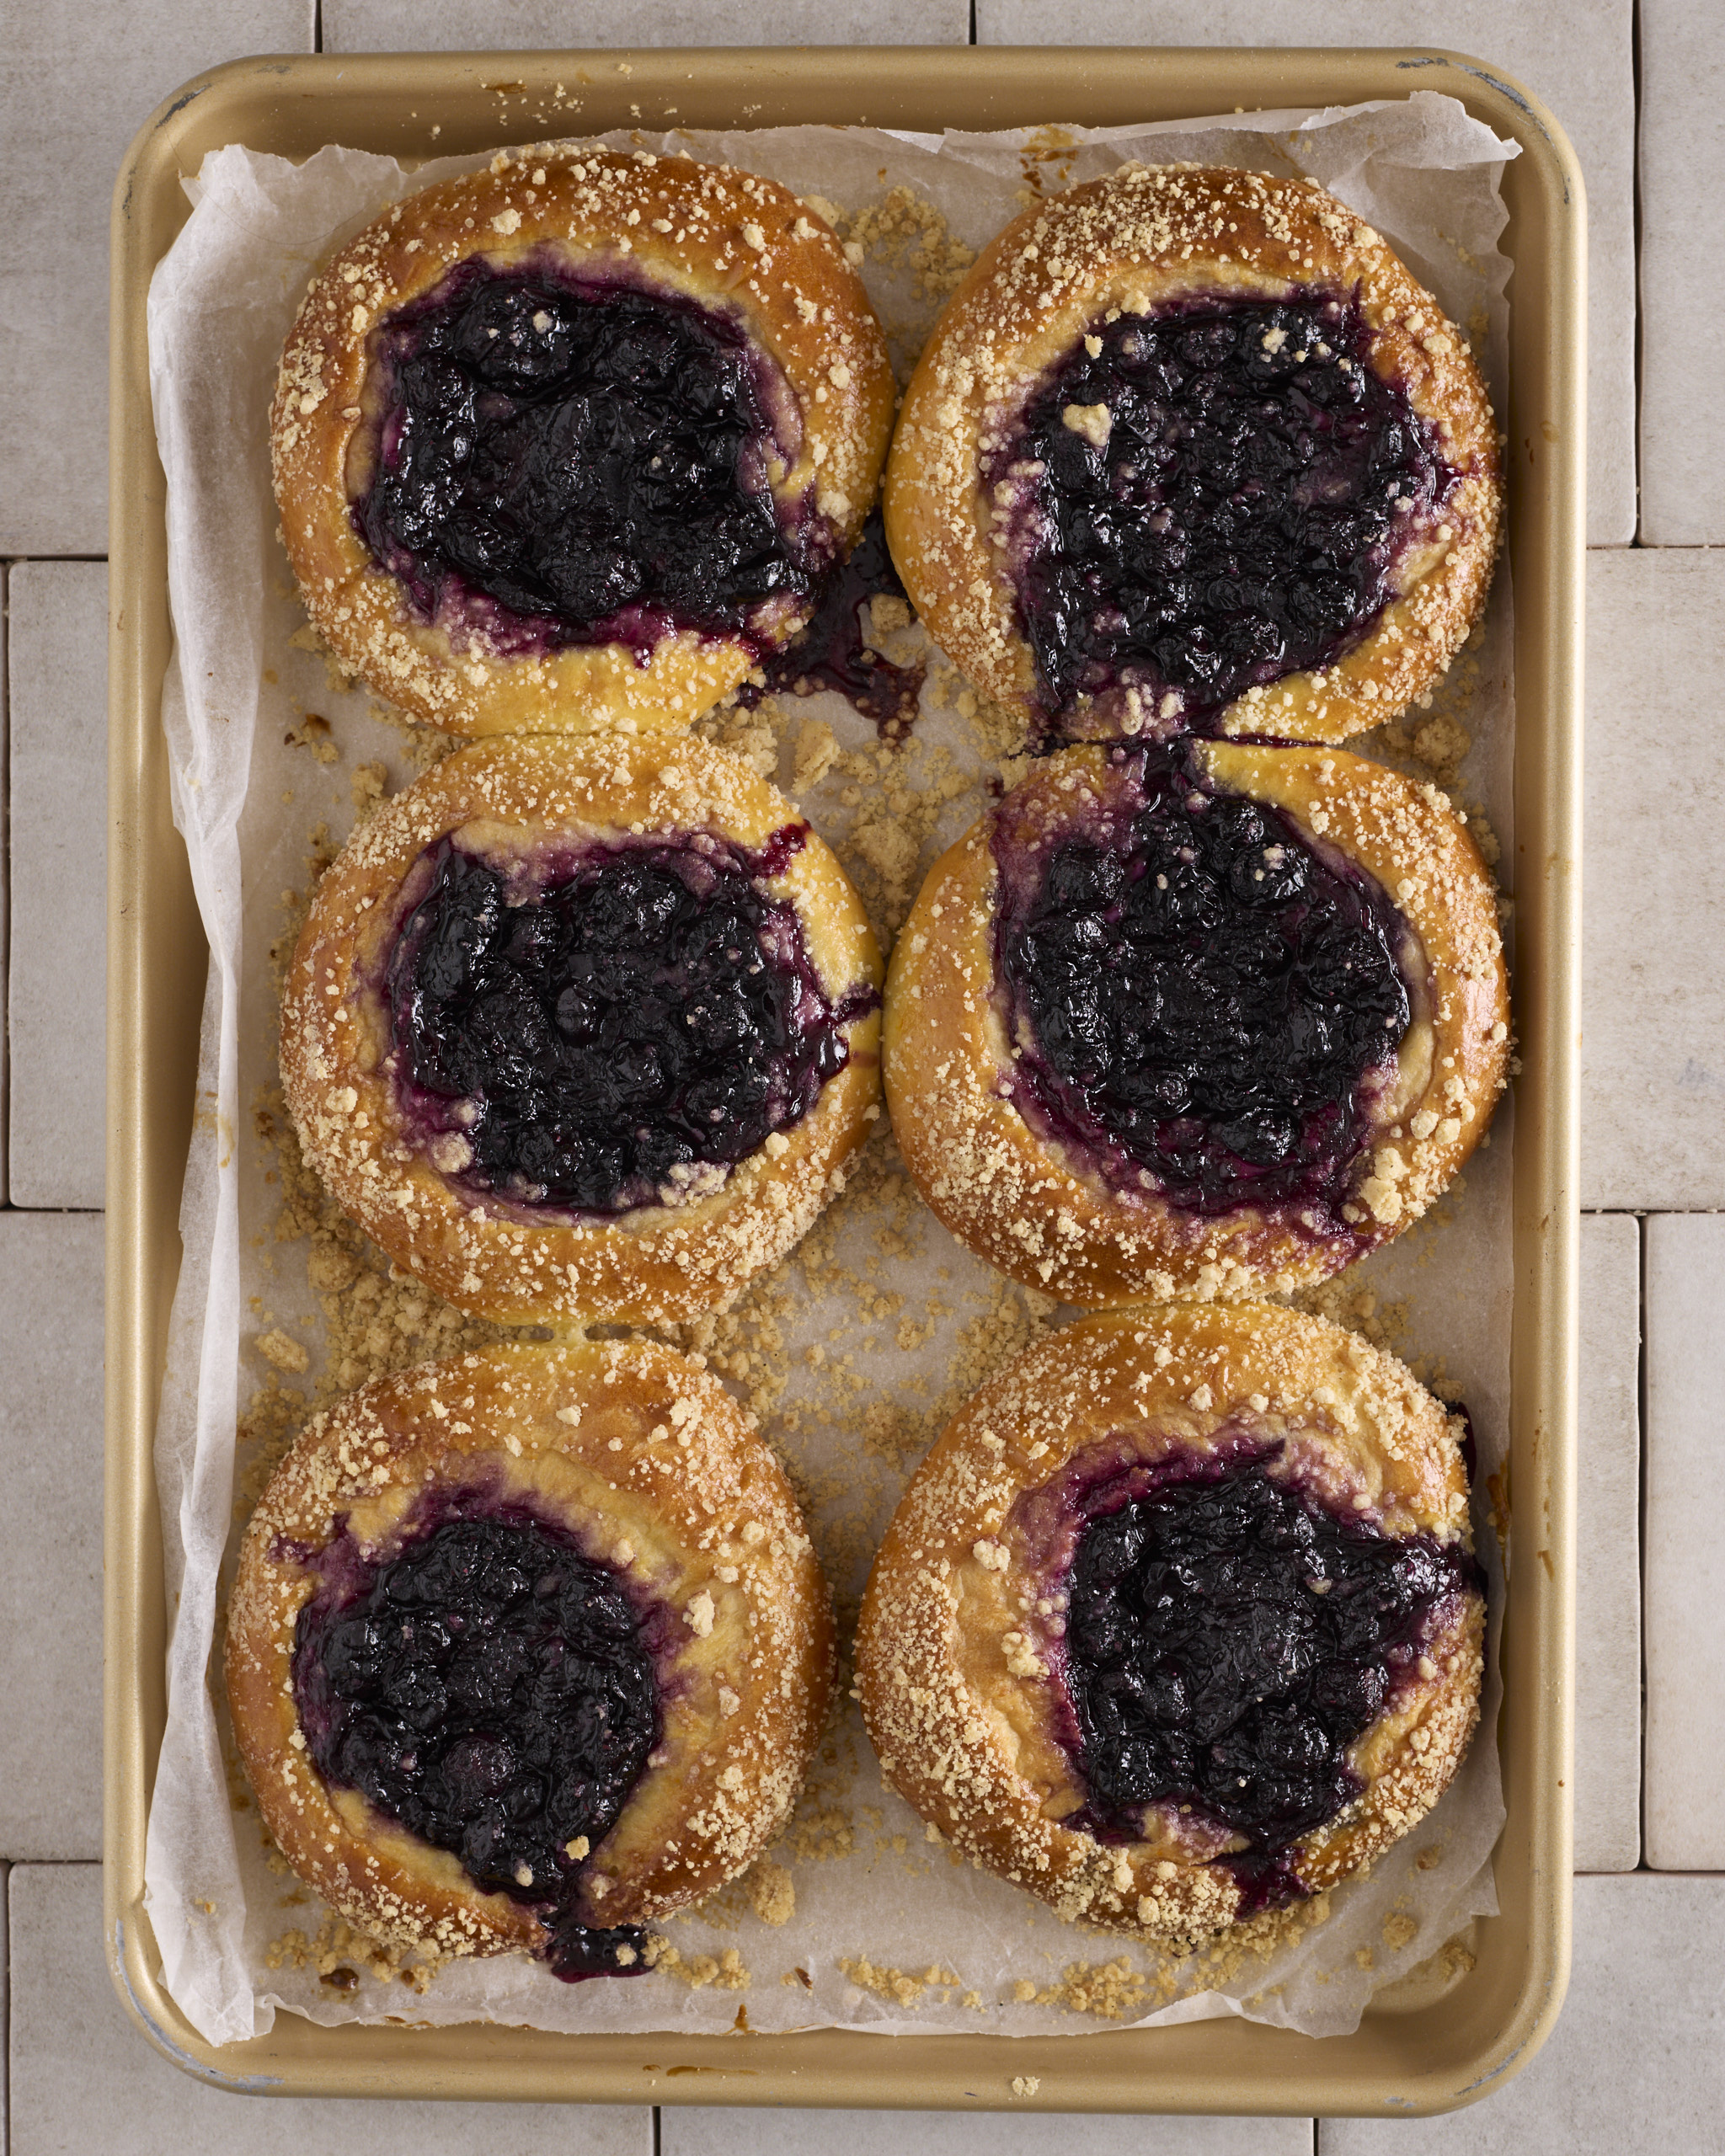
You’ll find my updated foundation sweet dough as the base for sweet yeasted buns across Cooking is Like Love. Why not start with Blueberry Cheesecake Kolaches.
Let me step it out for you.
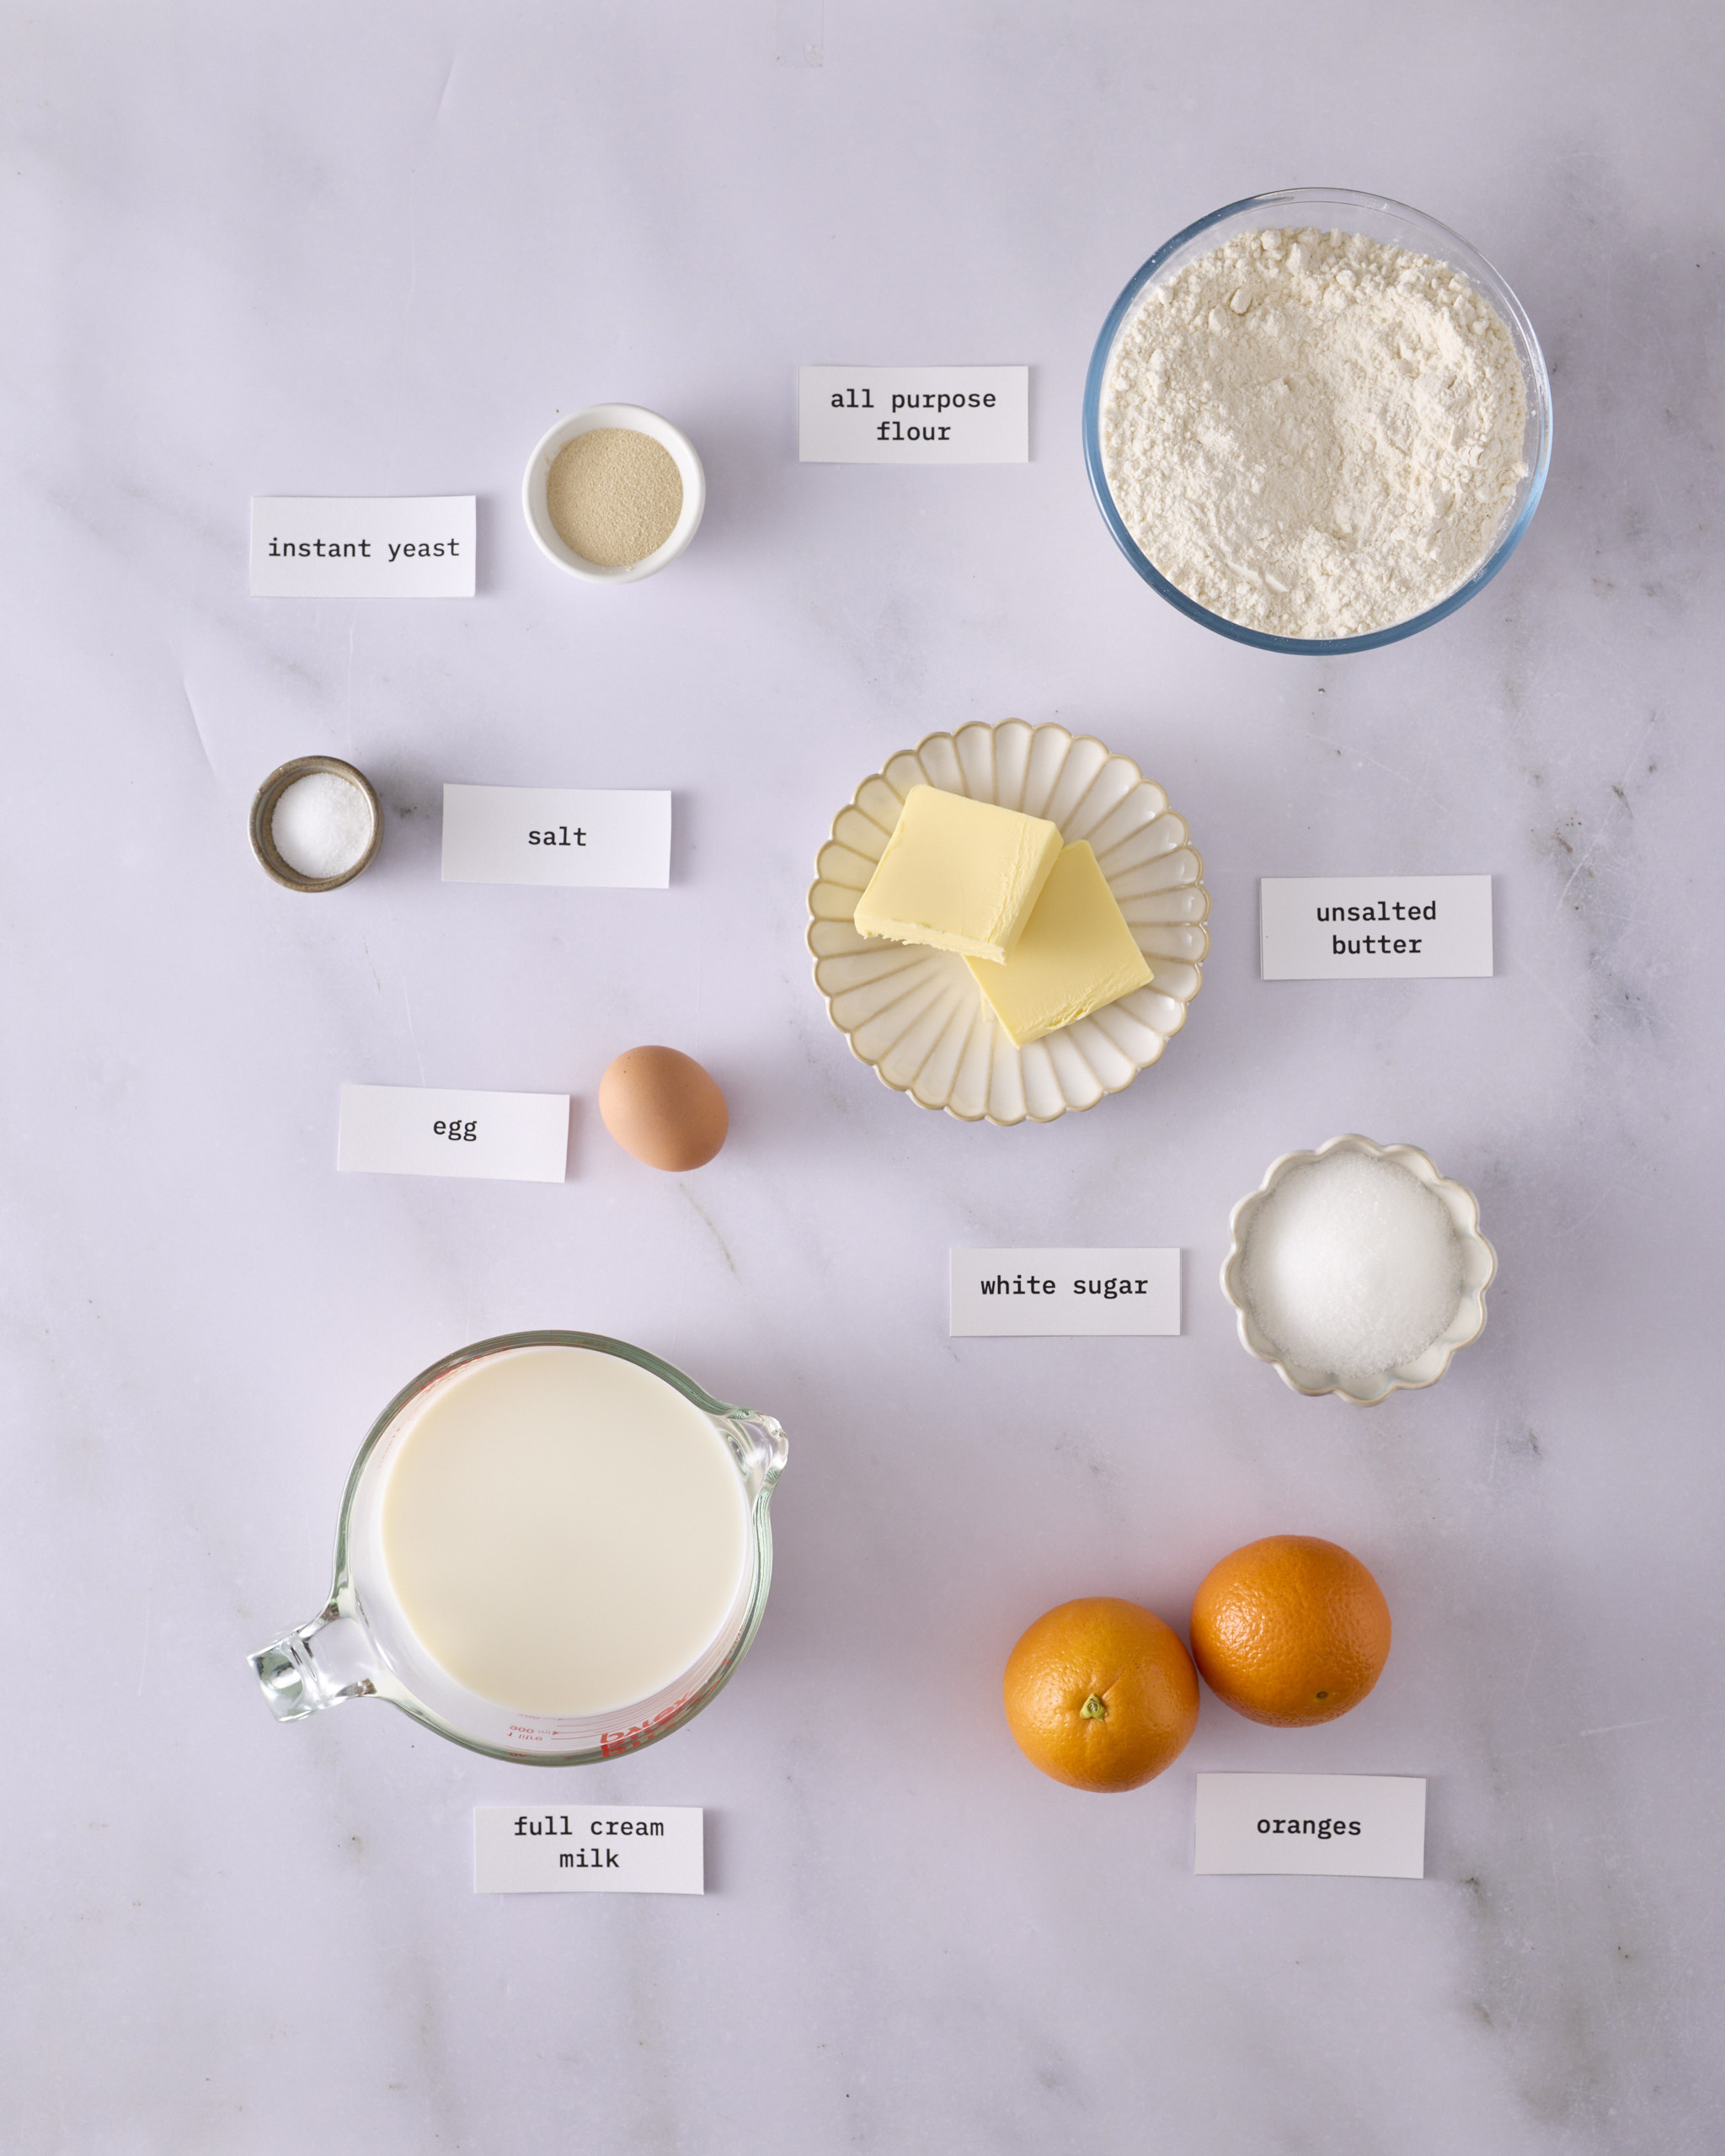
Ingredients
Tangzhong:
- 35g all-purpose flour
- 120g full cream milk
- ½ teaspoon table salt
Dough:
- 60g white sugar
- 2 oranges
- 350g full cream milk
- 1 large egg
- 575g all-purpose flour
- 1 tablespoon instant yeast
- 115g unsalted butter
In a rush?
You can absolutely make the foundation sweet dough on the day you want to bake the sweet bun recipe you’ve chosen. But that’ll prove to be a long day of baking and isn’t conducive to serving them up to your brunch guests before noon. All in all, better to start the dough the night before you want to bake.
But if you’ve decided not to make the dough the night before and refrigerate it overnight, you can instead leave the kneaded dough on the bench at room temperature for about 2 hours, or until doubled in size, and then proceed with shaping the buns.
There are really good reasons to refrigerate an enriched dough during what’s called the bulk fermentation stage. Slowing down the activity of the yeast develops the flavour of the dough, and the gluten becomes more relaxed, making the dough easier to handle and producing a more tender crumb. Practically, for the novice baker, that time in the fridge firms up the butter and you don’t end up in a big slippery mess trying to shape the buns.
The night before you bake
Make the tangzhong
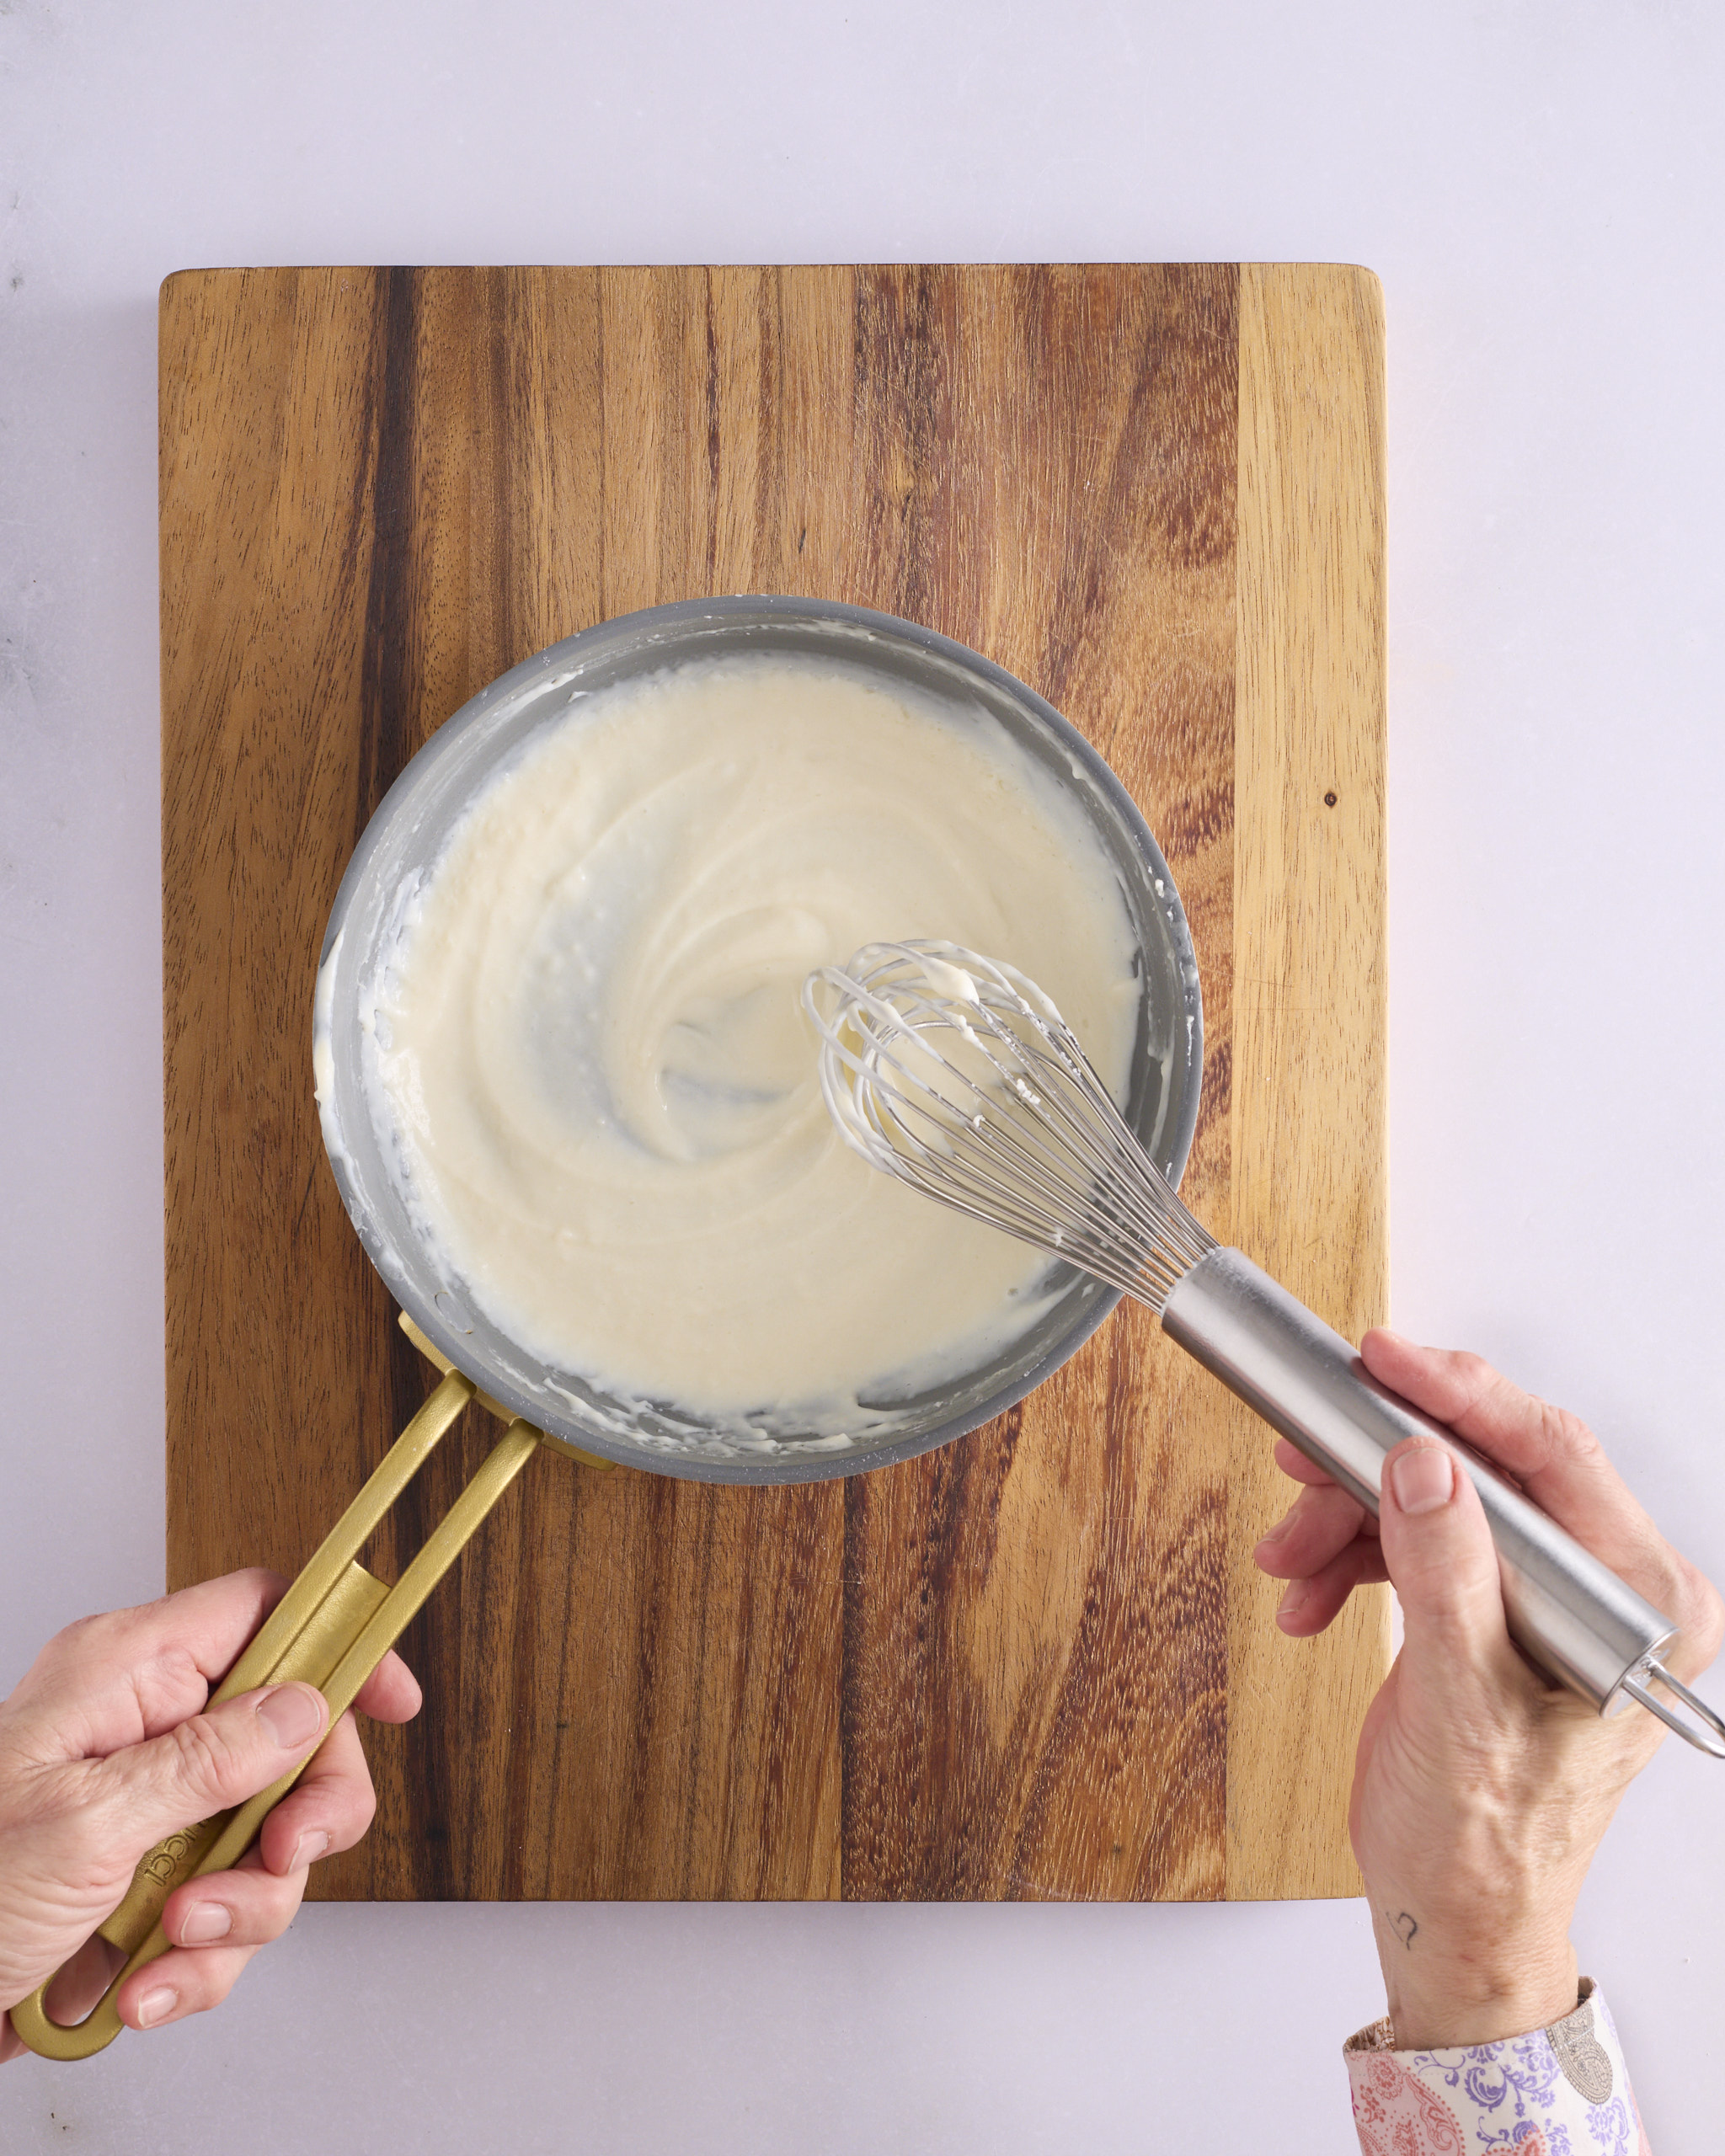
For the tangzhong, weigh 35g all-purpose flour and 120g full cream milk into a small pan and add ½ teaspoon table salt. Heat over medium low heat while whisking until the mixture forms a thick paste or roux. Remove from the heat and transfer to a small bowl or container. Most recipes call for the tangzhong to be brought to room temperature but I’ve found that if you chill it awhile and add it slightly chilled to the dough mix, it helps form a nice cohesive dough during the kneading process.
Make and knead the foundation sweet dough
My foundation sweet dough ingredients list calls for 2 oranges. I’ve used navel oranges. They only need to be medium sized but really, the bigger the better. We are only using the zest of the oranges for this kolache recipe. But don’t think of it as the orange juice going to waste, think of it as an opportunity to have that sugar hit of beautiful fresh squeezed orange juice without any of the guilt.
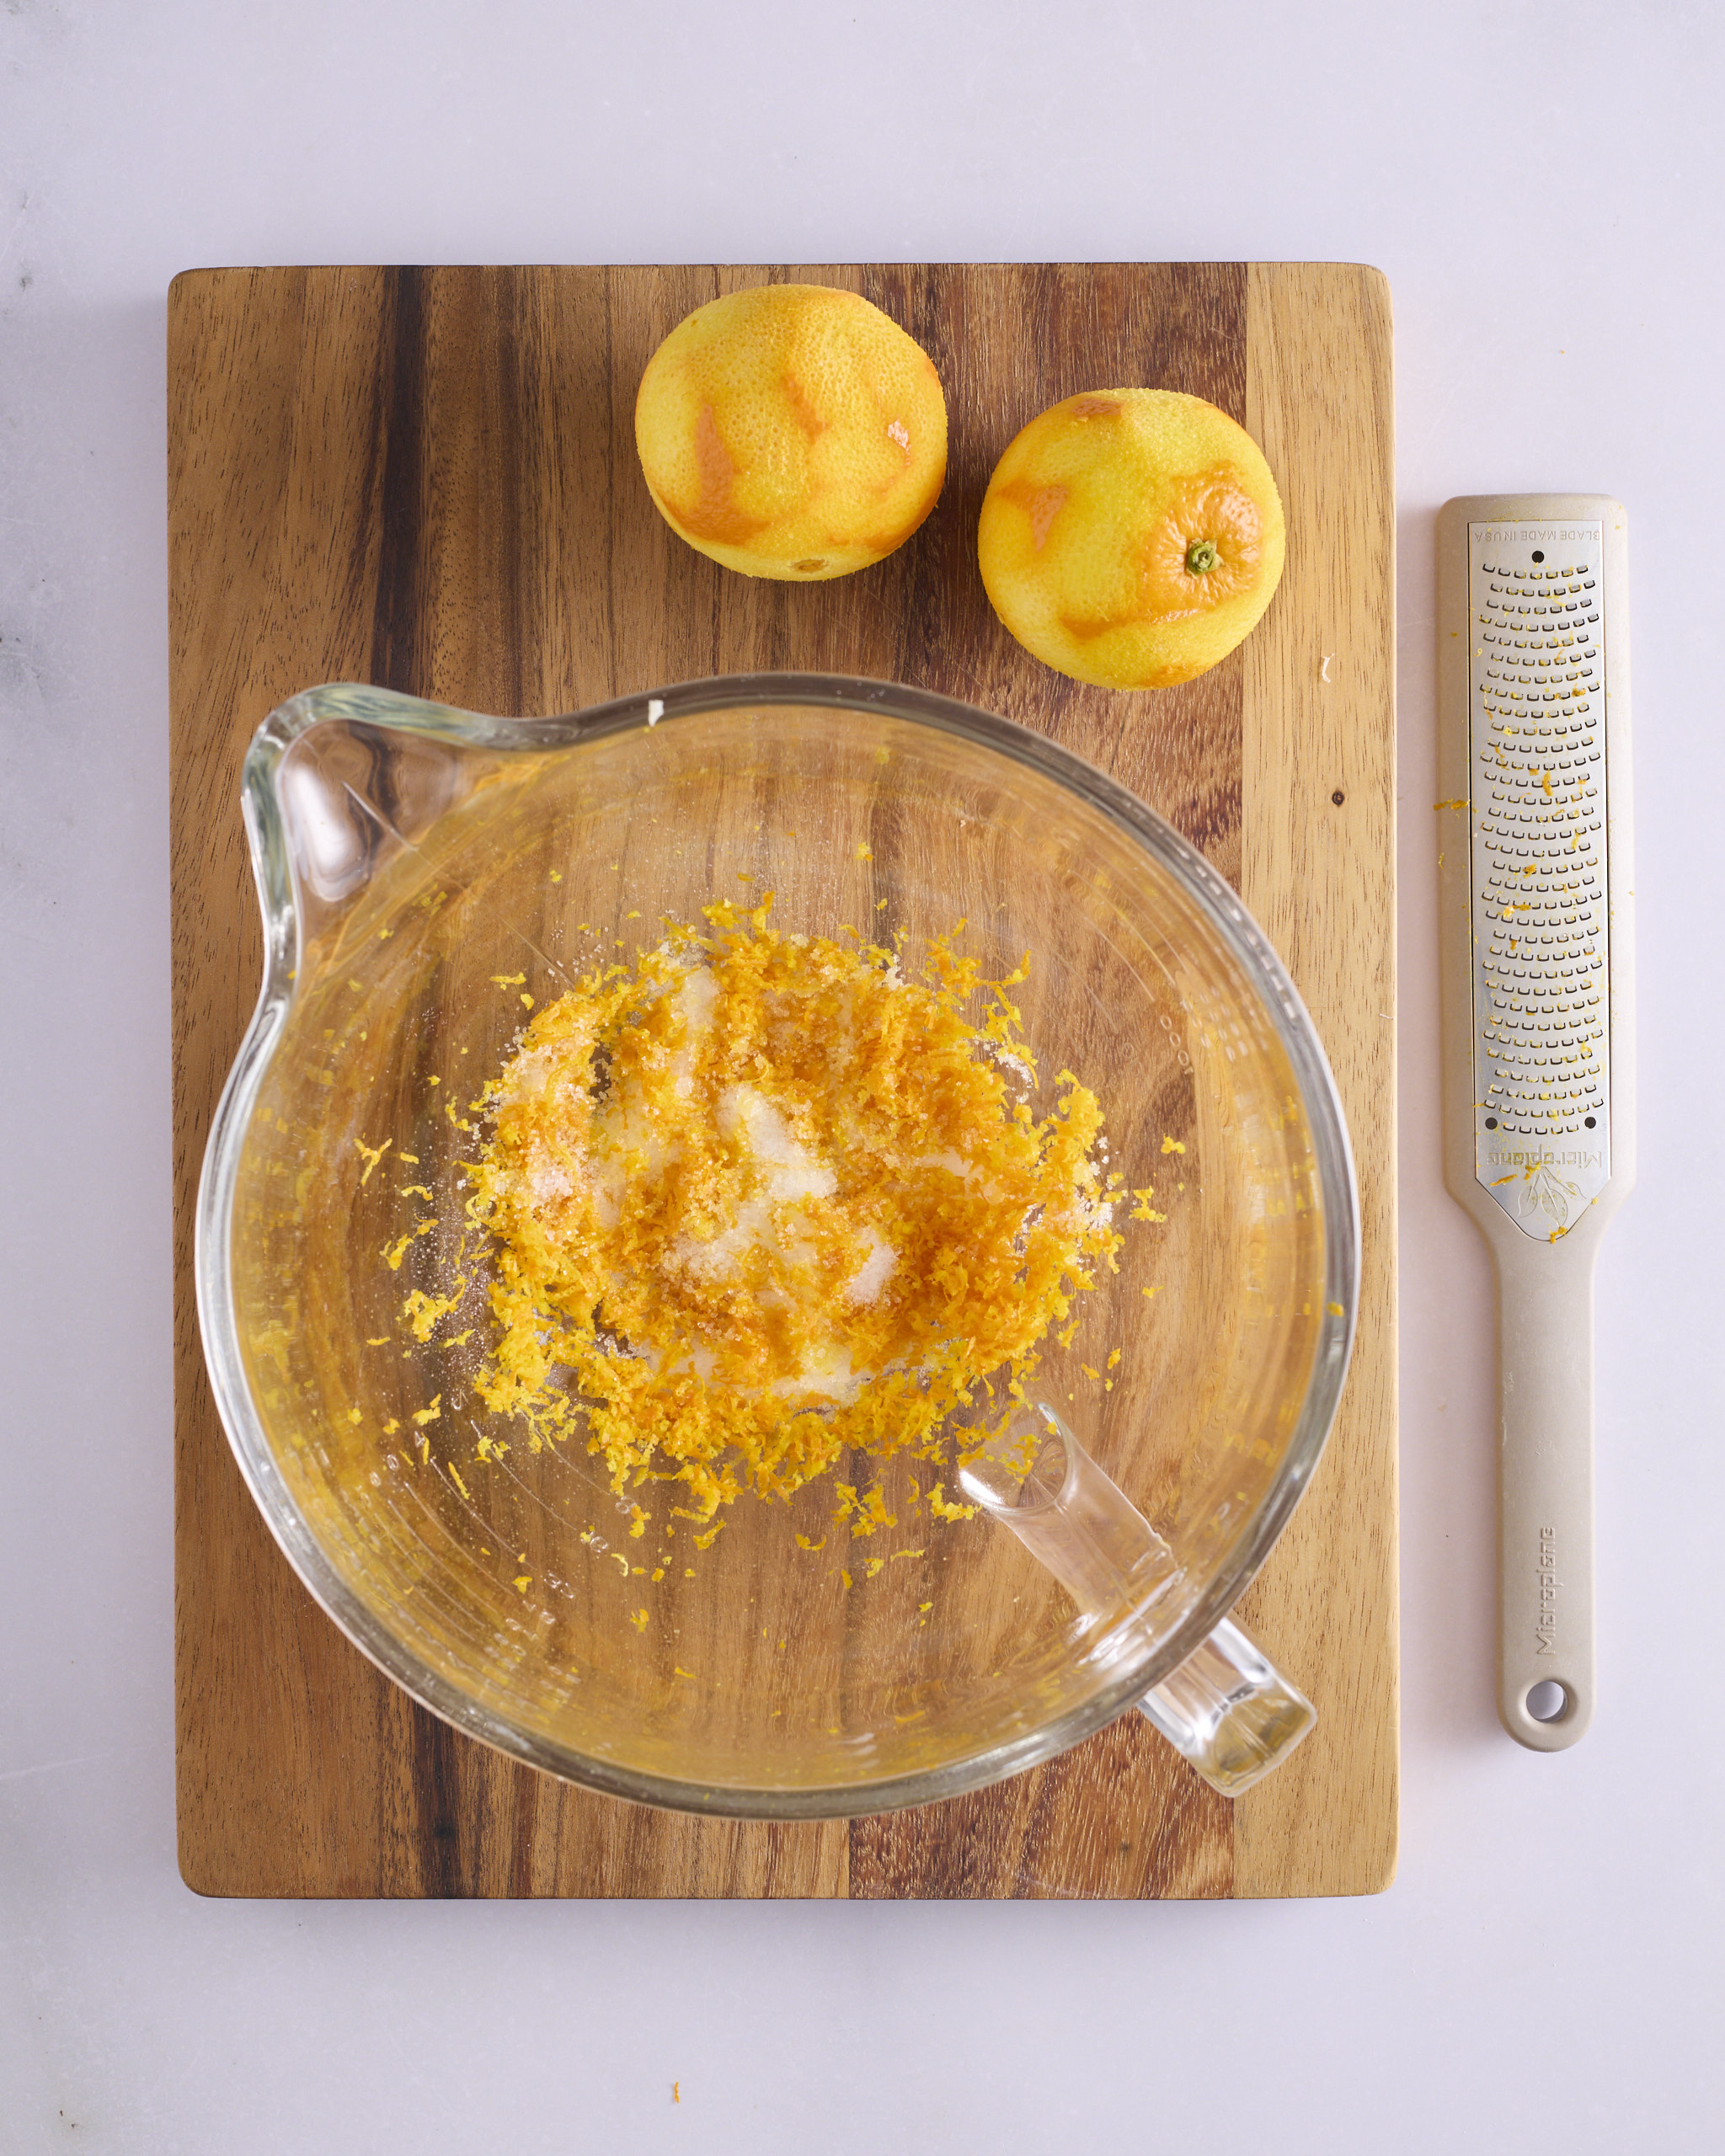
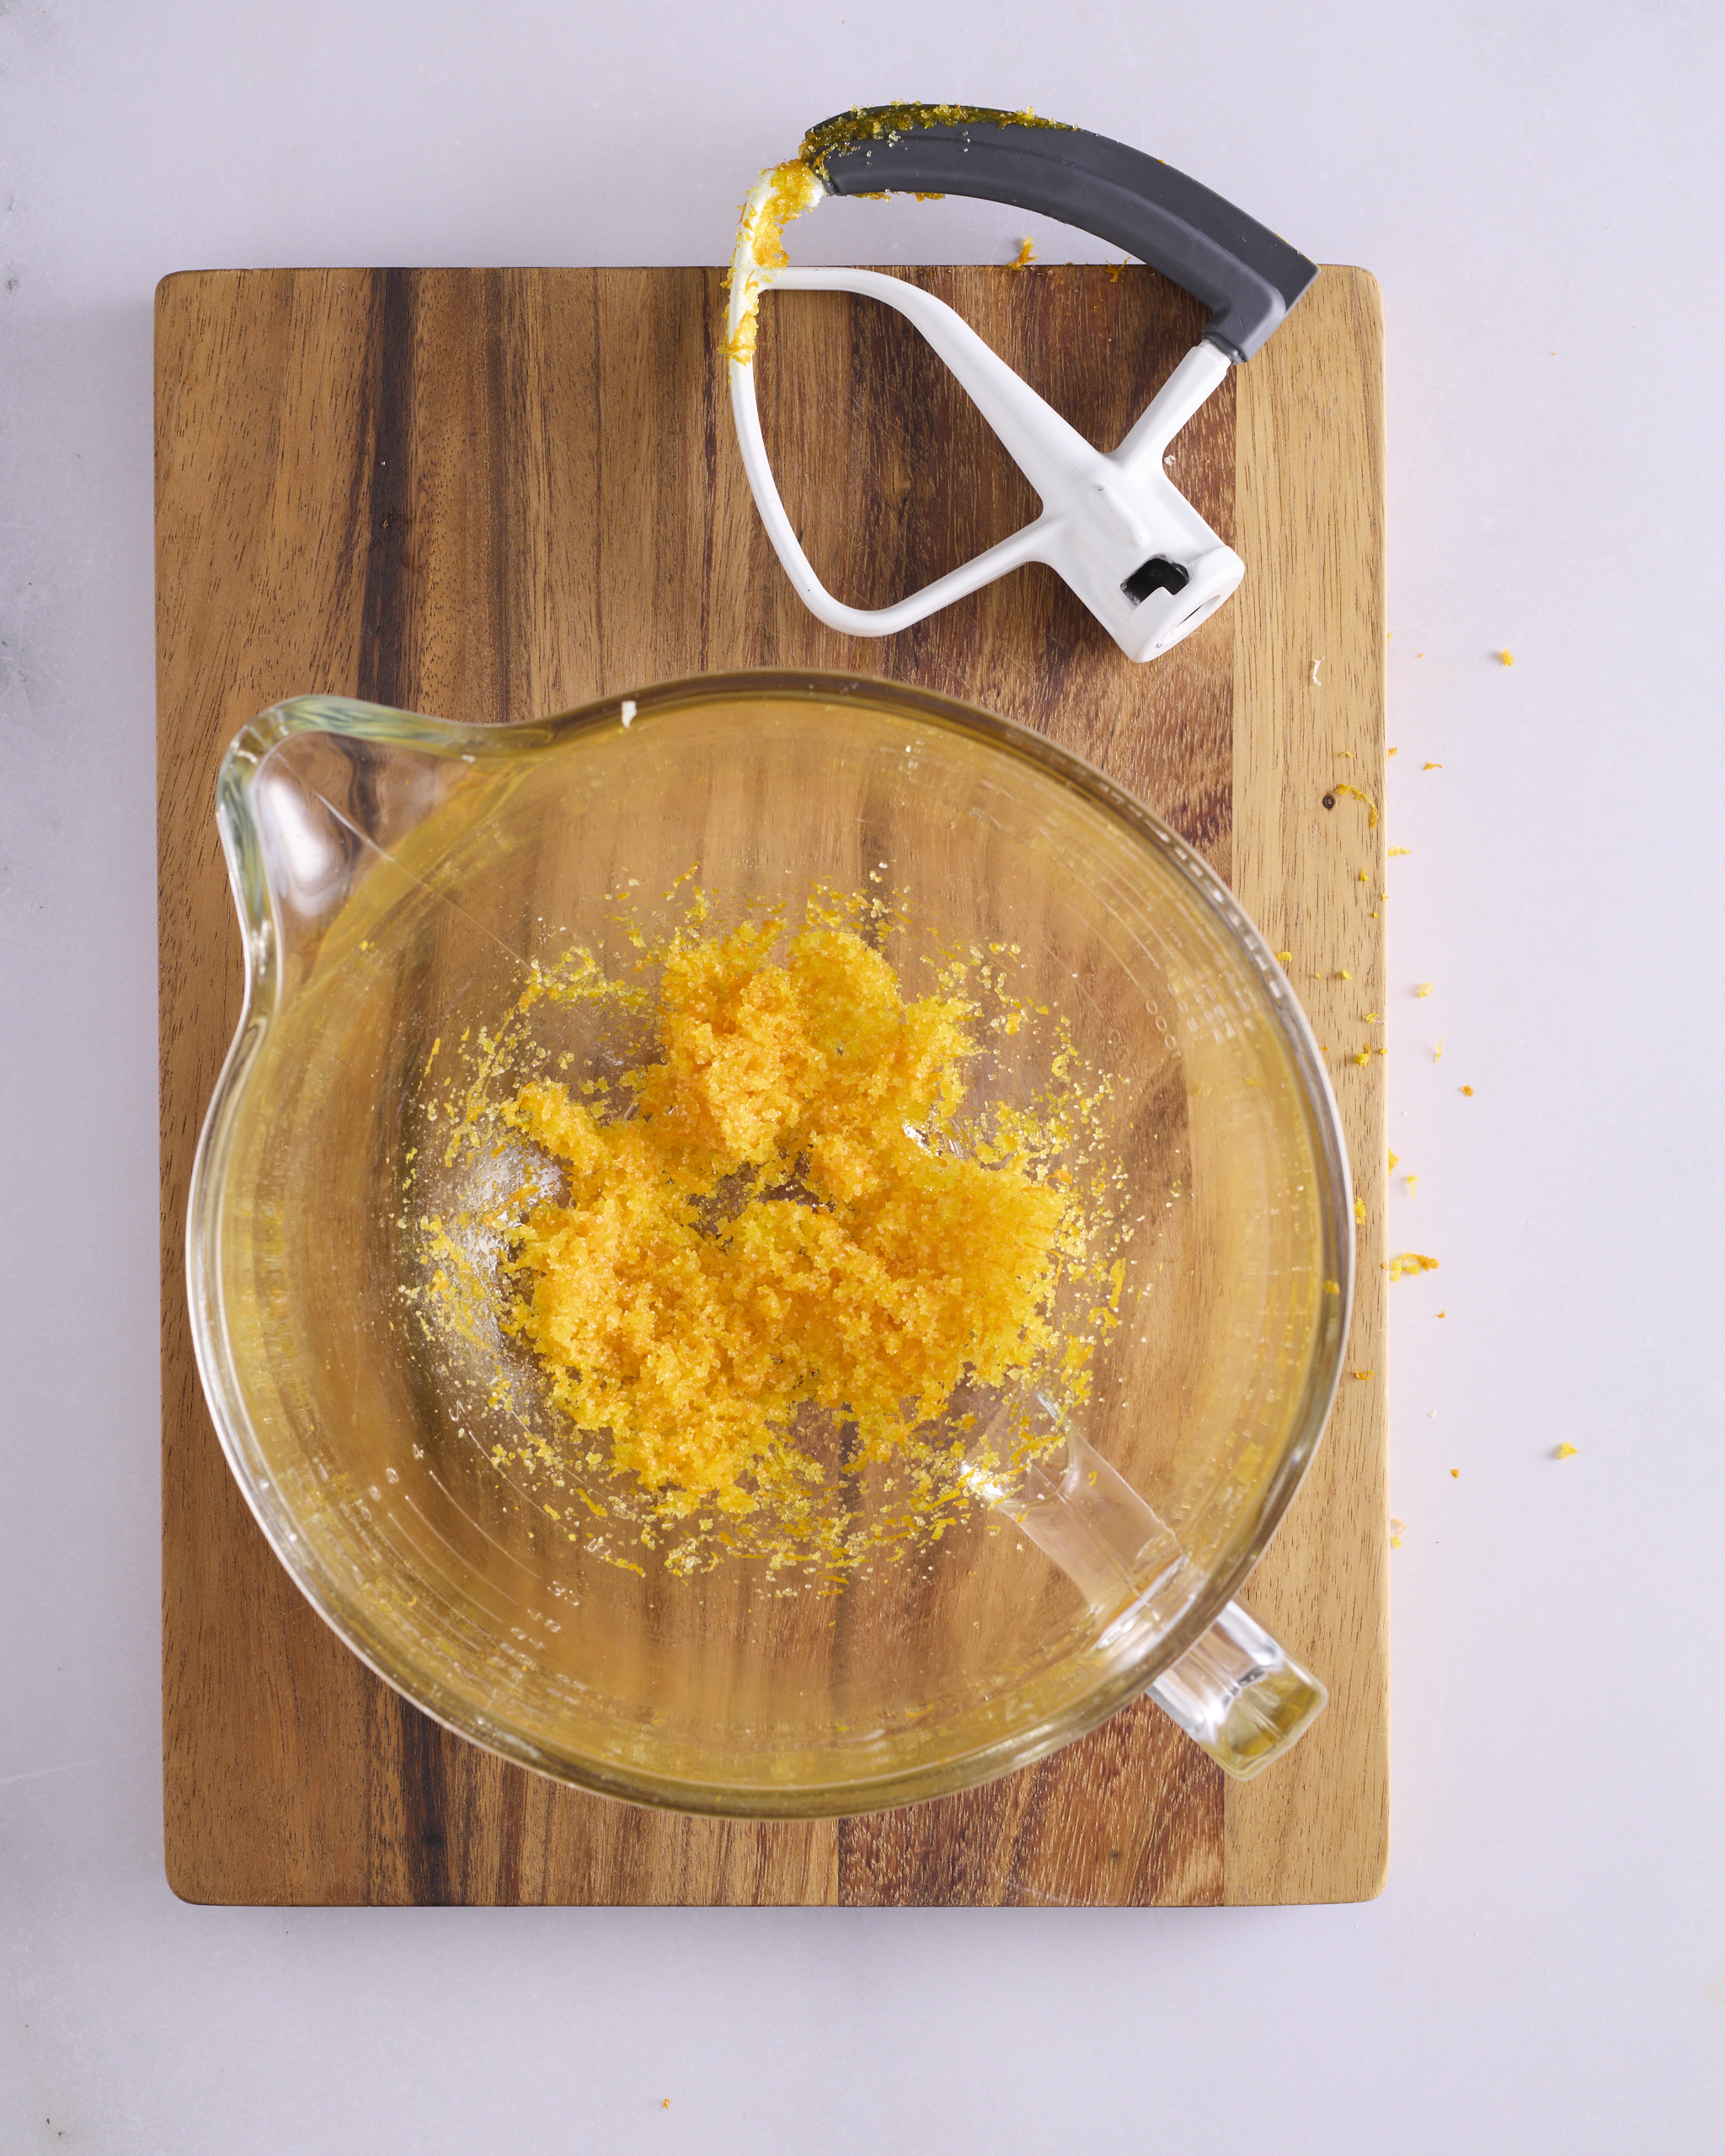
Weigh 60g white sugar into the bowl of a stand mixer and zest the 2 oranges over the bowl using a Microplane. Using the paddle attachment, mix the sugar and zest on medium for 2 minutes. This step is crucial, in fact mandatory, in all my baking recipes using citrus zest. Whether it is a cake, loaf or bun starting the recipe with this step will ensure an even distribution of the zest through your dough or batter. But, more importantly, you’ll actually notice the flavour and perfume of the orange zest in the baked buns. How often are you left looking for the citrus when a recipe treats the zest as an afterthought?
Note
For this foundation sweet dough recipe I don’t bring the butter to room temperature. While I do take it out of the fridge before adding it to the dough mixture, I like it to be just a bit firm when I add it in. You may want to bring it to whatever room temperature you have on the day and, if it’s really soft, pop it back in the fridge for 10 minutes or so to firm up a bit.
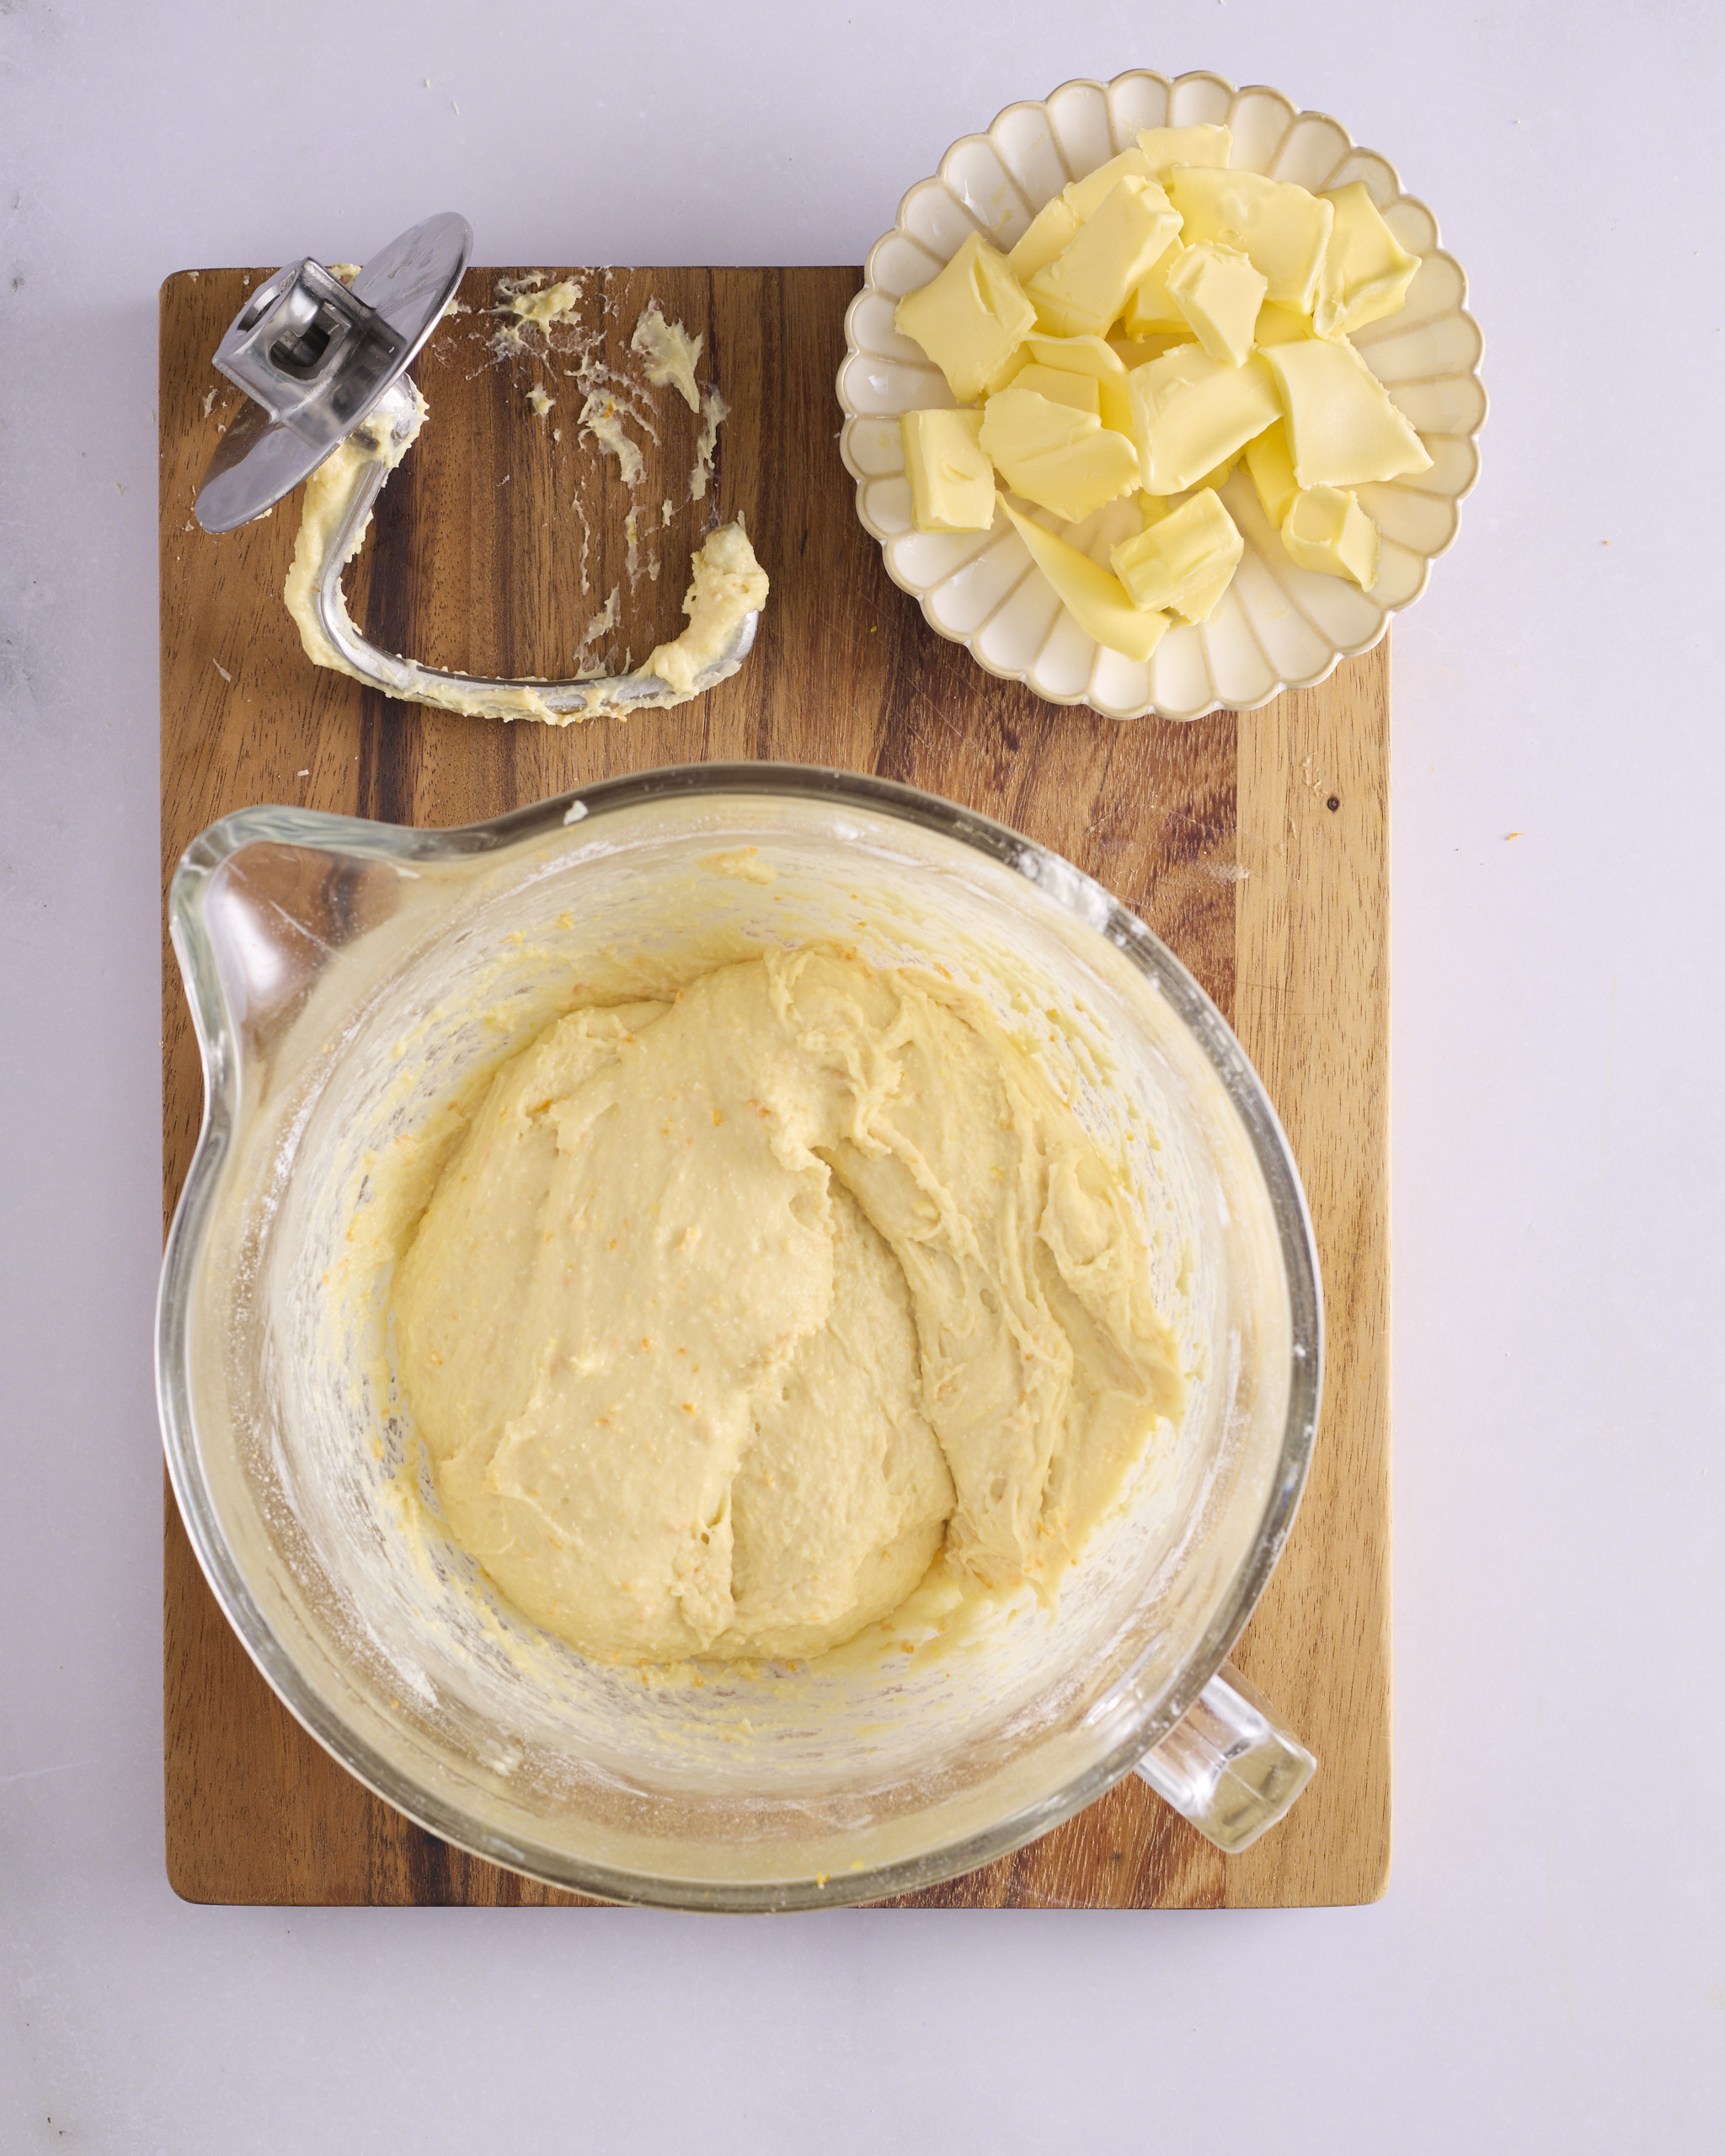
Add the reserved tangzhong paste, 350g full cream milk, 1 large egg, 575g all-purpose flour, and 1 tablespoon instant yeast to the bowl of the stand mixer. Mix on low with the dough hook attachment until the ingredients are combined. Turn the speed up to medium and knead the dough for at least 5 minutes. It’s a high hydration enriched dough so it’s not going to form a neat dough ball at this stage, that’ll happen later. You want to develop the gluten so it won’t tear immediately if you take a piece and stretch it out between your fingers.
Turn the mixer back down to low and start adding 115g unsalted butter that you’ve kept just slightly chilled. I cut the butter into tablespoon sized pieces as I weigh it out. They’re easier to keep at a consistent temperature and incorporate quickly into the dough. Add a couple of pieces at a time and wait until they’re incorporated before adding more butter. This process can take up to 10 minutes. The consistency of the dough that forms will vary according to the temperature of the ingredients as they went in and the warming effect of the friction that occurs while the dough is kneaded. And that’s OK, as you’ll be sorting that out shortly.
While the butter is being incorporated, assemble the tools you need for the next step. You can reuse the stand mixer bowl for the bulk fermentation but it’ll likely need a wash out and dry off before reuse. Grease a large bowl (or the clean stand mixer bowl), I use a spray oil. You may need some flour for the bench top while working the dough. I like to use a stainless steel flour shaker. You also need a dough scraper, but you could sub in a stiff pancake turner, egg slice or whatever it’s called in your kitchen.
Forming the dough ball
The next step in the method for my foundation sweet dough recipe is to transform the sticky dough sitting in the stand mixer bowl looking back at you with attitude into a dough ball, showing off a nice bit of surface tension that lets you know it’s ready to go into the fridge for a nice long rest overnight.
Start by tipping the dough onto the kitchen bench. Hold the bowl up high and let gravity do the work for you. You don’t need to flour the bench but it might make the dough wrangling a bit easier, at least at the start. As the dough starts to stiffen up, you should be able to finish the job with no flour.
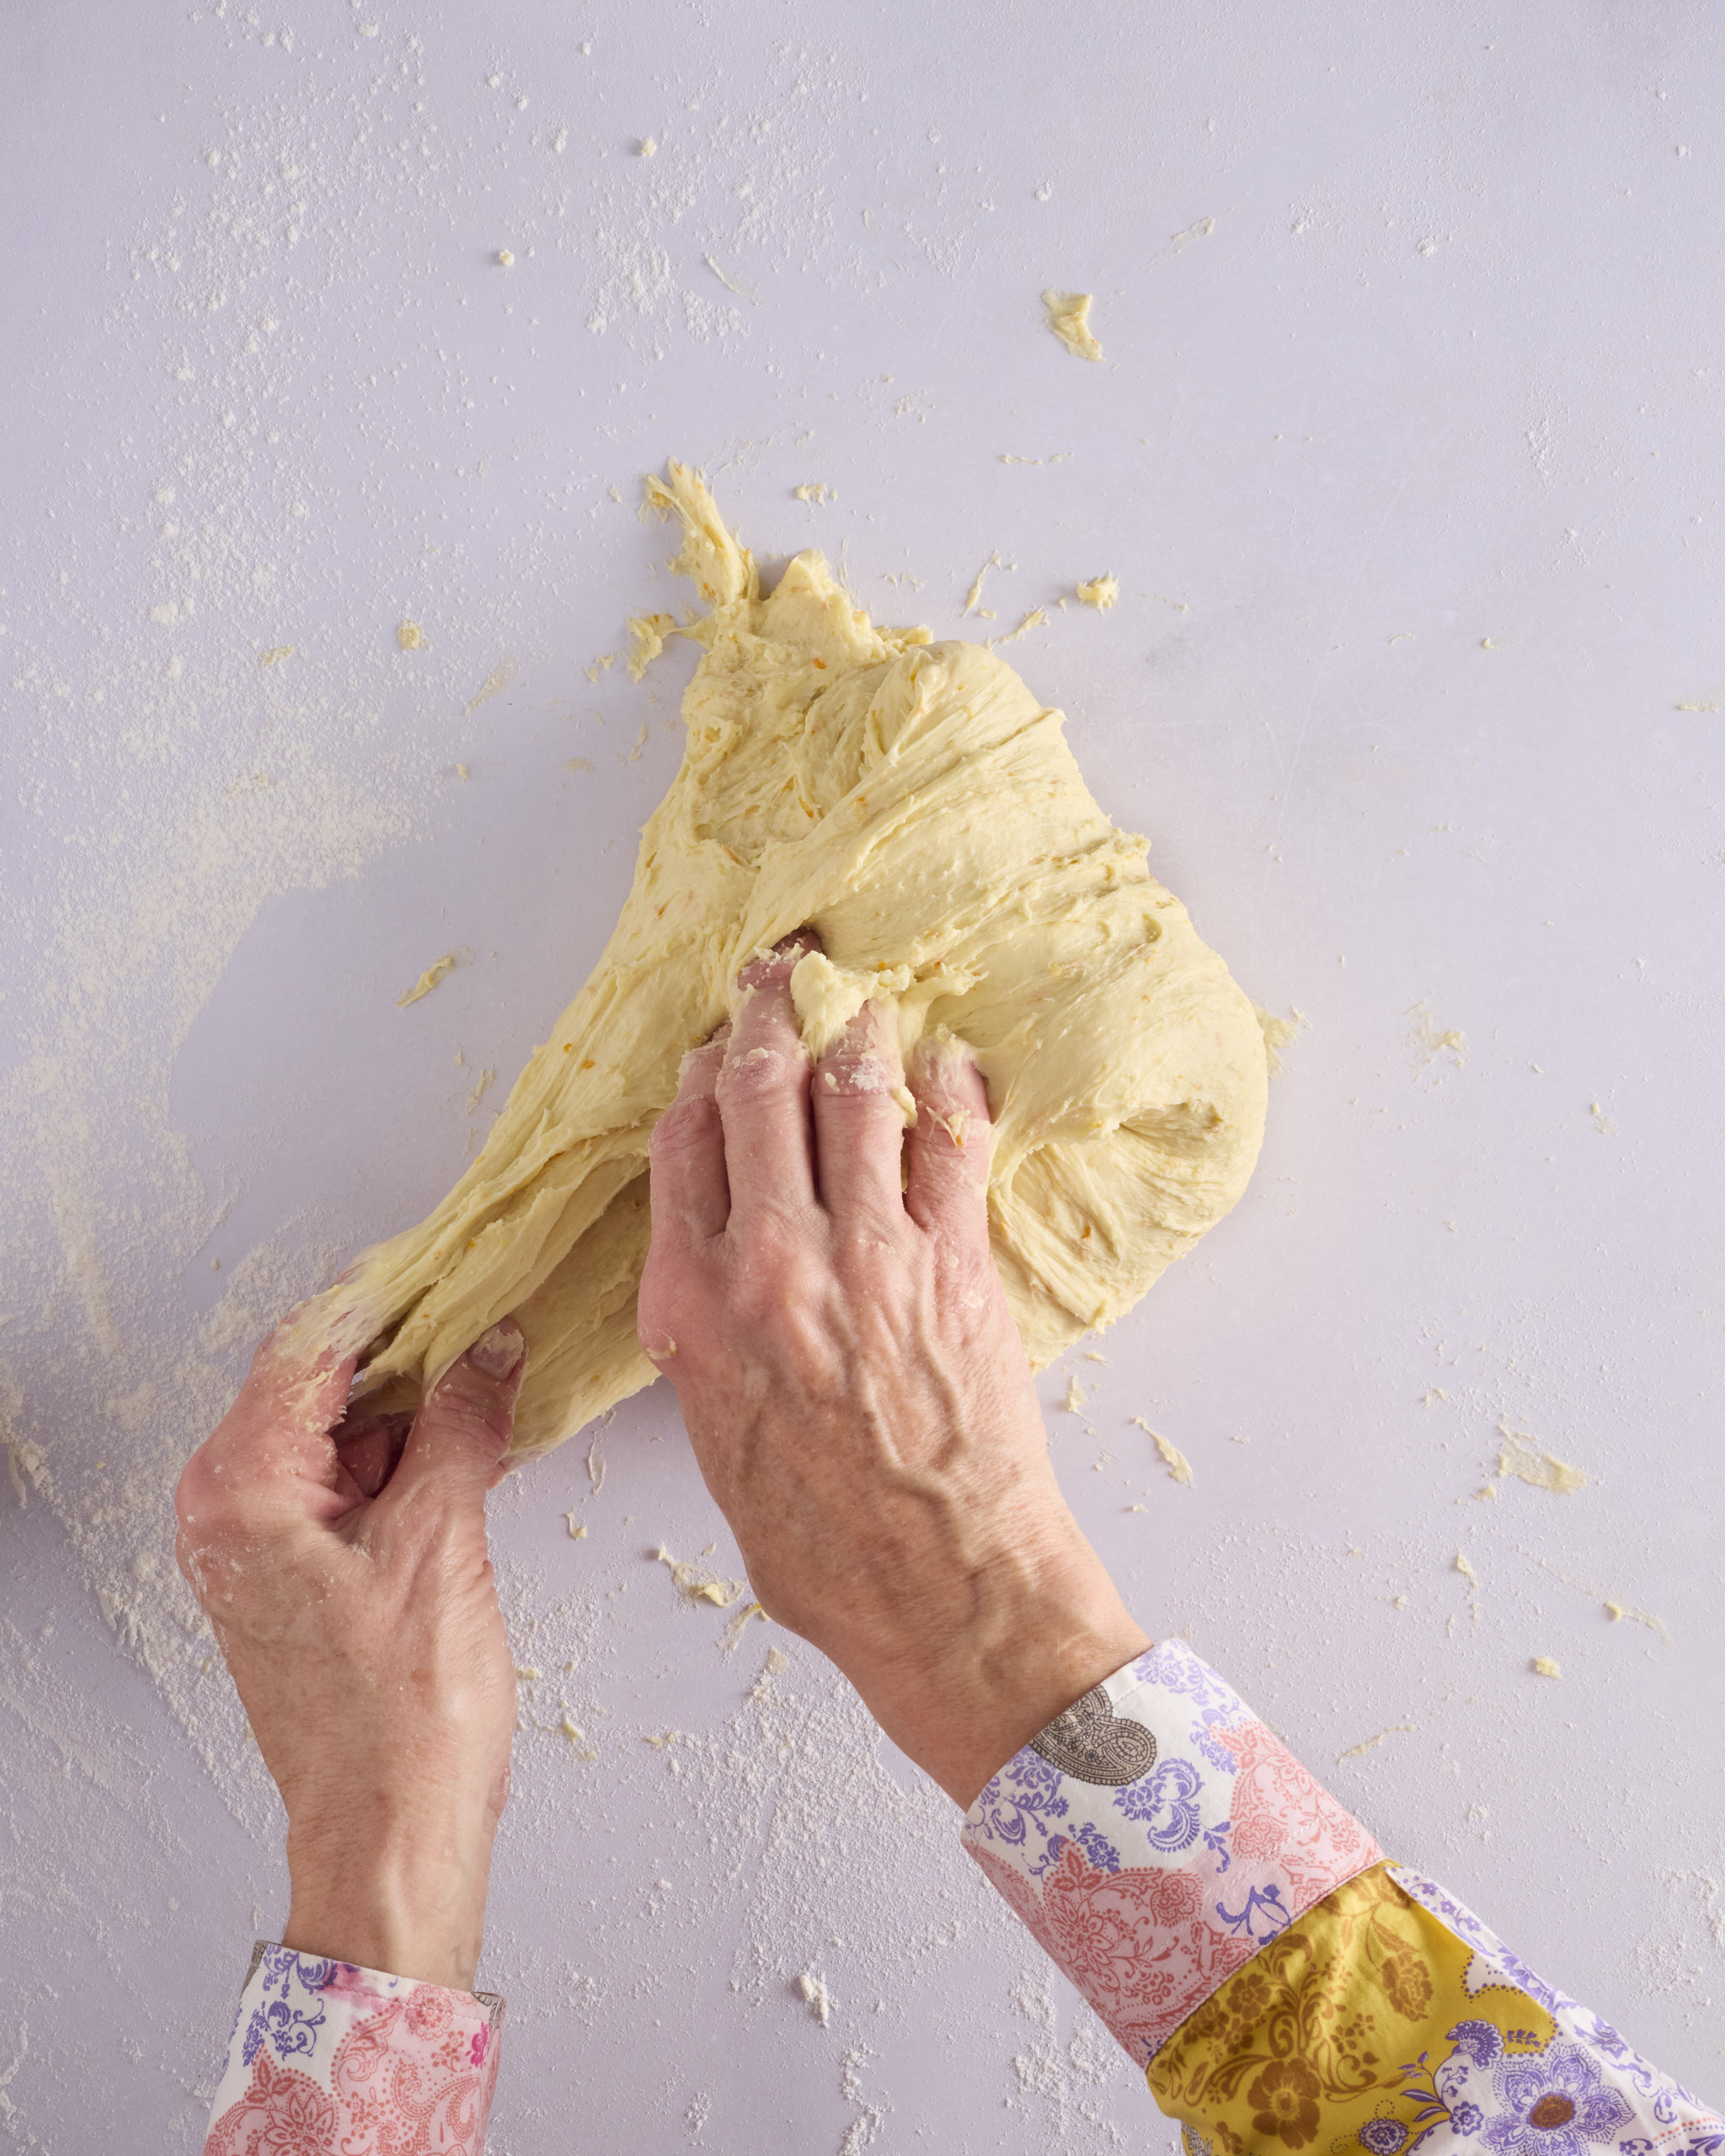
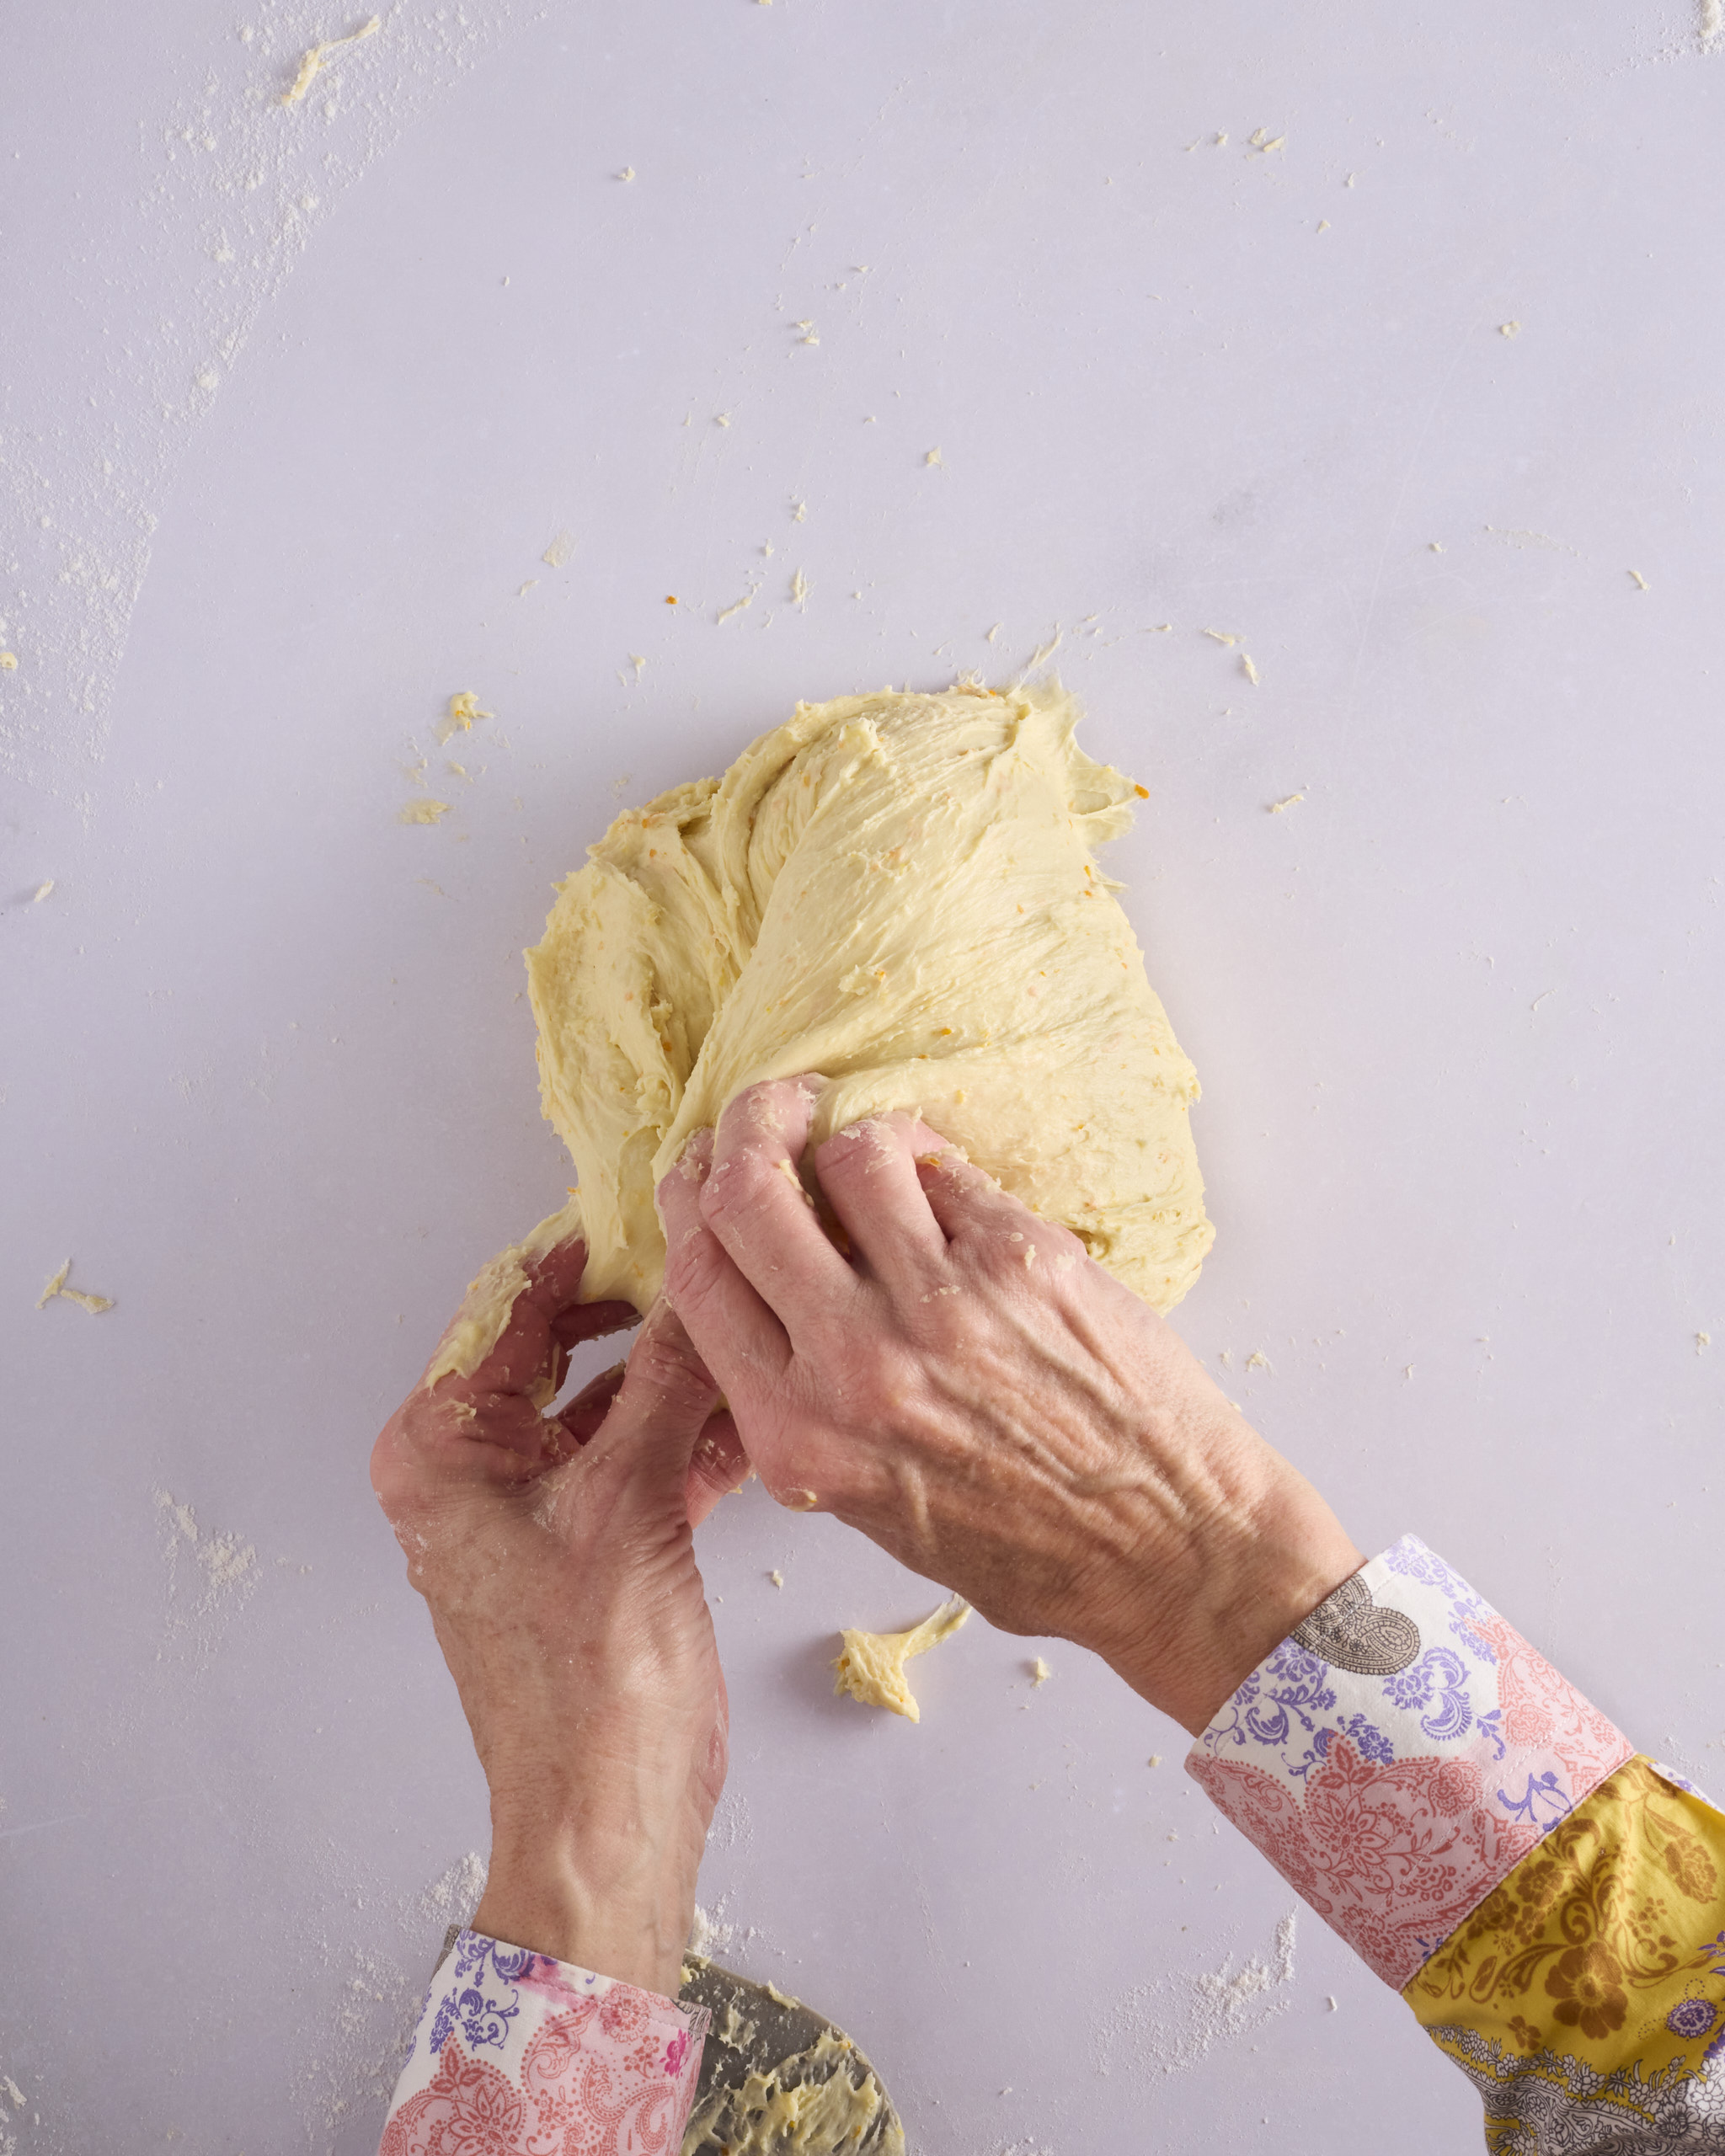
Home bakers and professional bakers have numerous ways to manage shaping their dough into a ball. I don’t profess to be an expert in dough wrangling and have developed a method that works for me. This dough is very forgiving at this point, so don’t worry about a bit of trial and error – nothing will be a fail, I promise. We’re going to work the dough by stretching it, pinching it into the centre of the forming ball, and then lifting and stretching it while we slap it back onto the bench, tucking it back into a ball.
Start by working around the pile of dough. Stretch out a handful of dough and press it down into the middle of the pile. Repeat at least six times, working around the pile of dough like a clock.
As you work, you should notice the dough becoming less sticky and more resistant to your stretching, pulling and slapping down. Pick a side that’ll be the top of the dough ball and keep it that way. Use the dough scraper to help tuck in the bottom around the ball of dough.
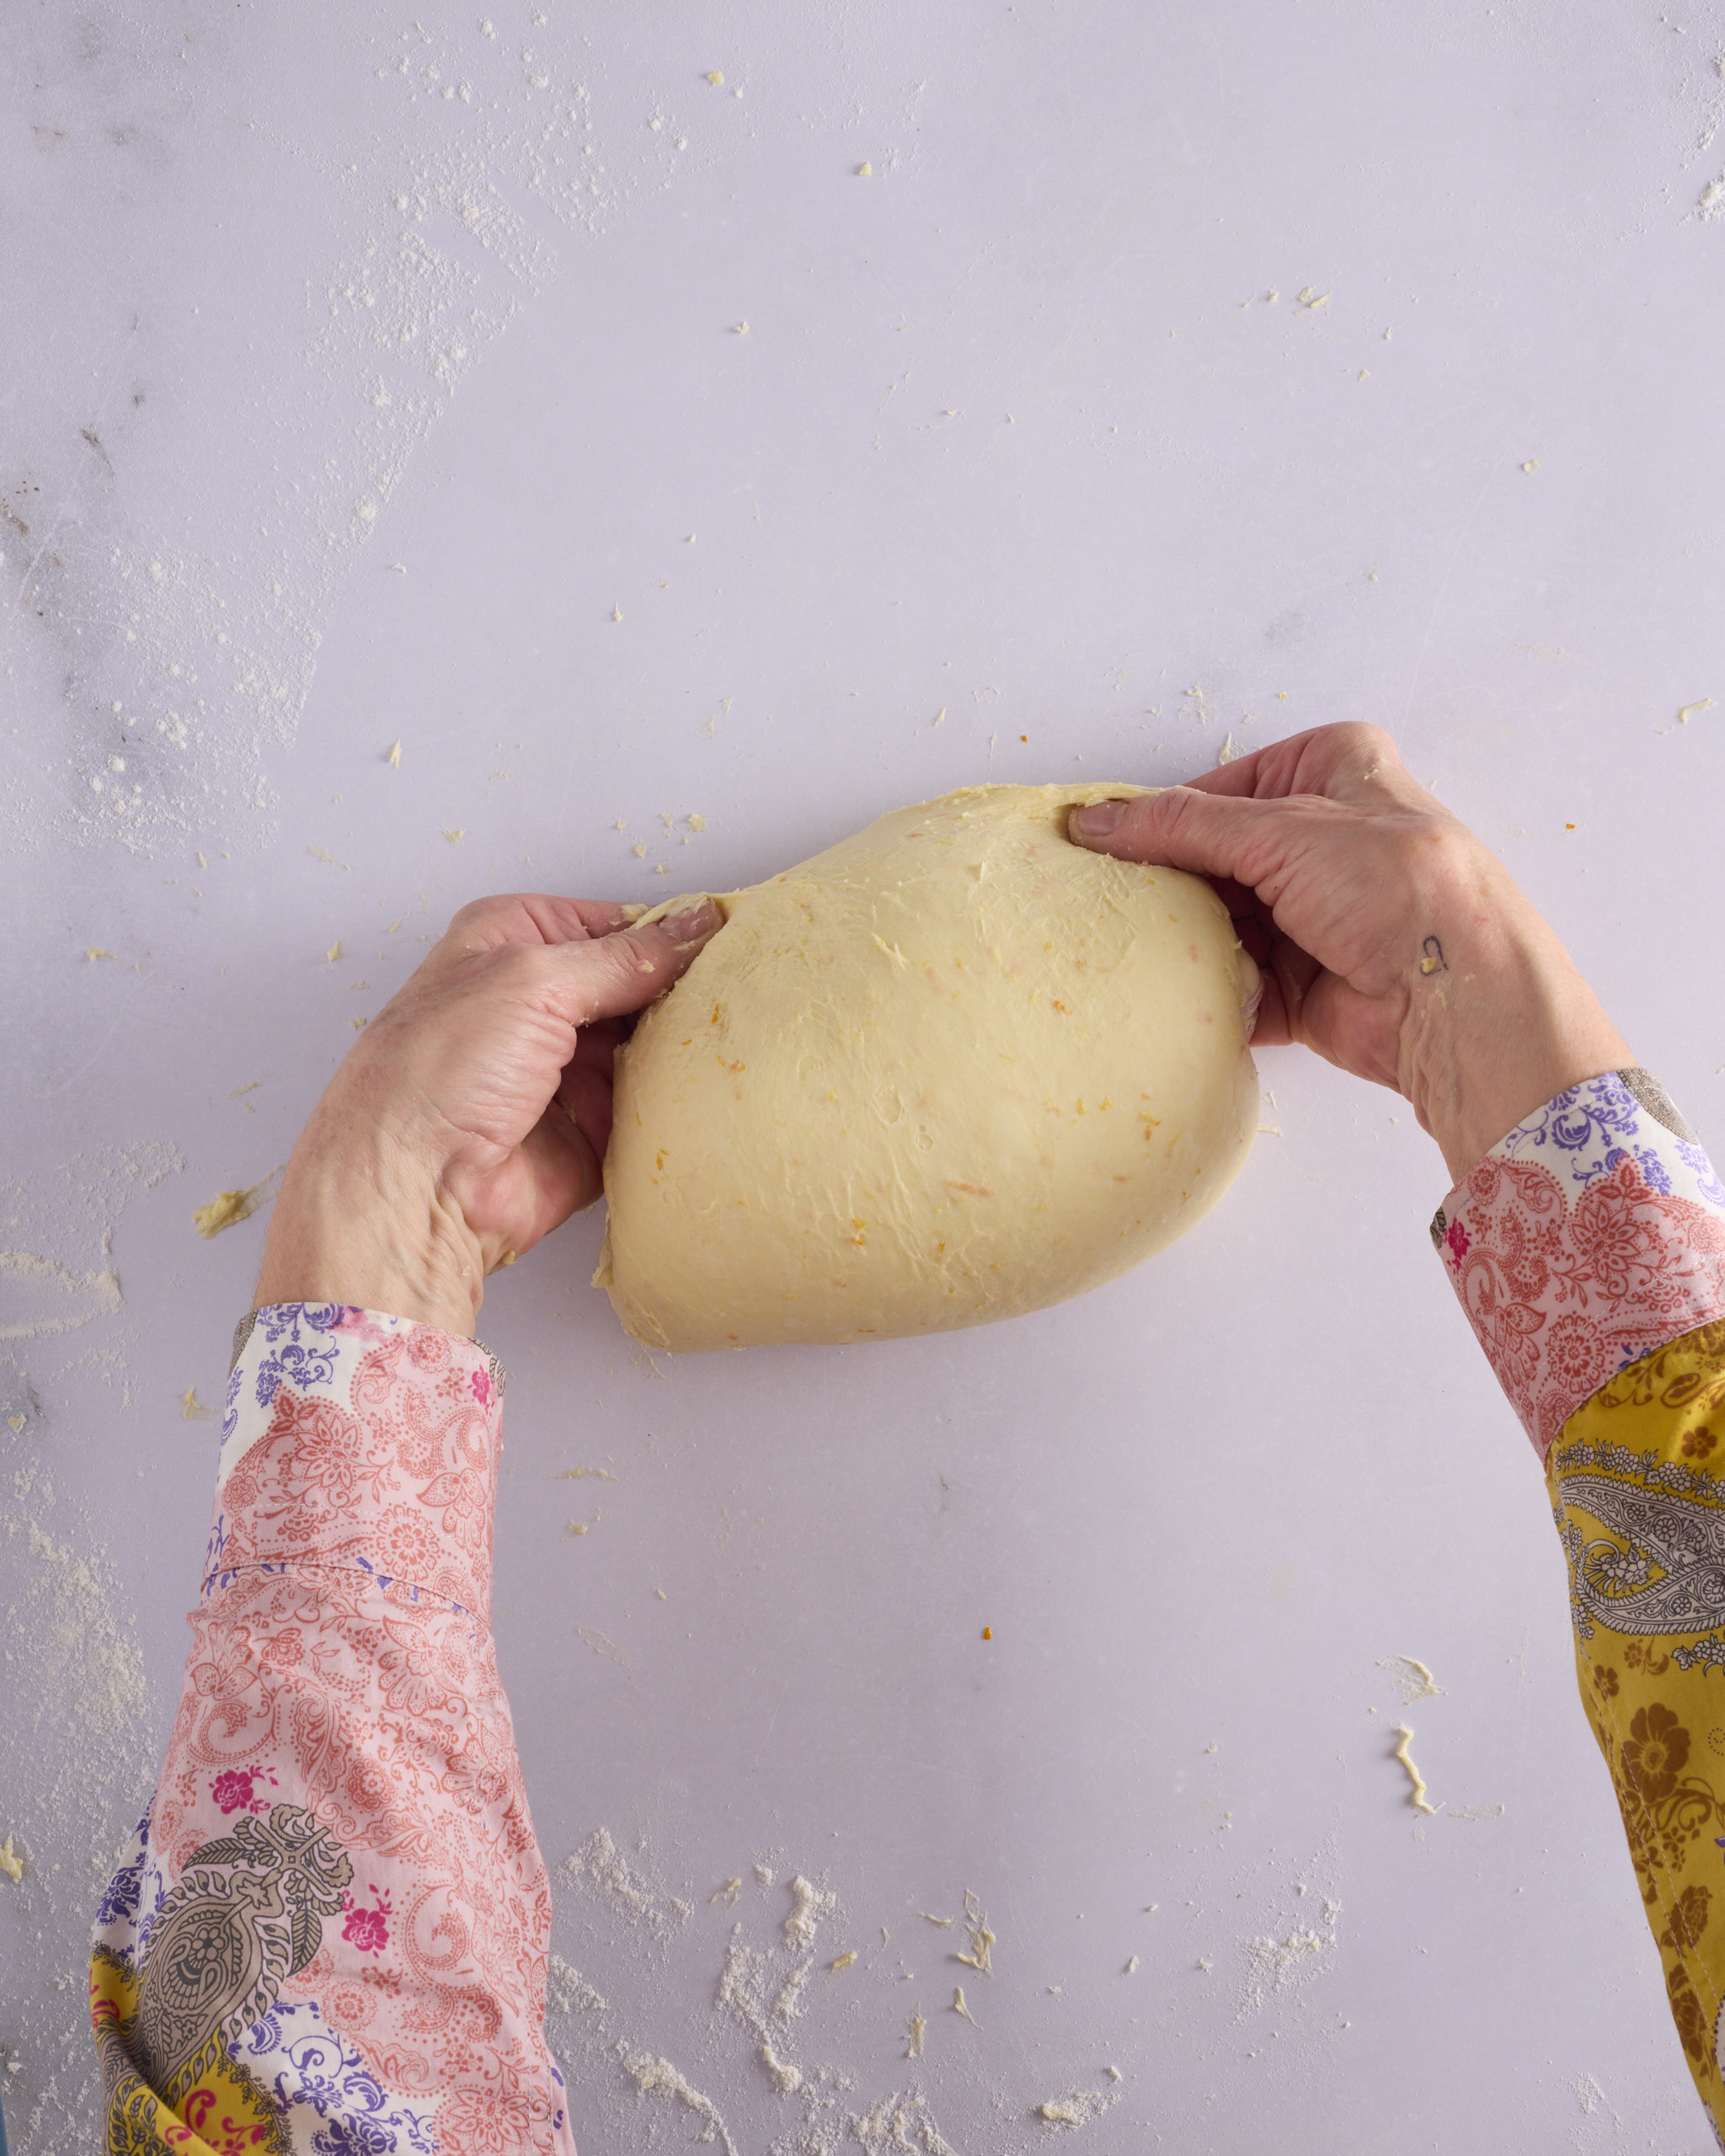
Start lifting the dough ball off the bench, stretching it out and dropping it back onto the bench. Gather it back into a ball with the dough scraper and keep repeating until you feel the ball starting to become less sticky and more resistant.
Next, as you lift the dough about 30cm up off the bench let it stretch downwards and create a tail. Flip the tail forward as you land it and then roll the dough over and tuck it in, leaving the top of the dough ball always facing up. Tuck in again around the base of the ball with the scraper and repeat a couple of times.
You really can’t overwork the dough at this stage. I’m a one woman show, so I had to set the timer on my camera, run around to the dough and then try to capture the next step. Most of them were either blurry or not centred. I kept going and that dough got the longest work out in the history of this recipe. And yet, the baked cheesecake kolache had the tenderest crumb I’ve produced to date. So don’t hesitate, keep going, the dough can take it.
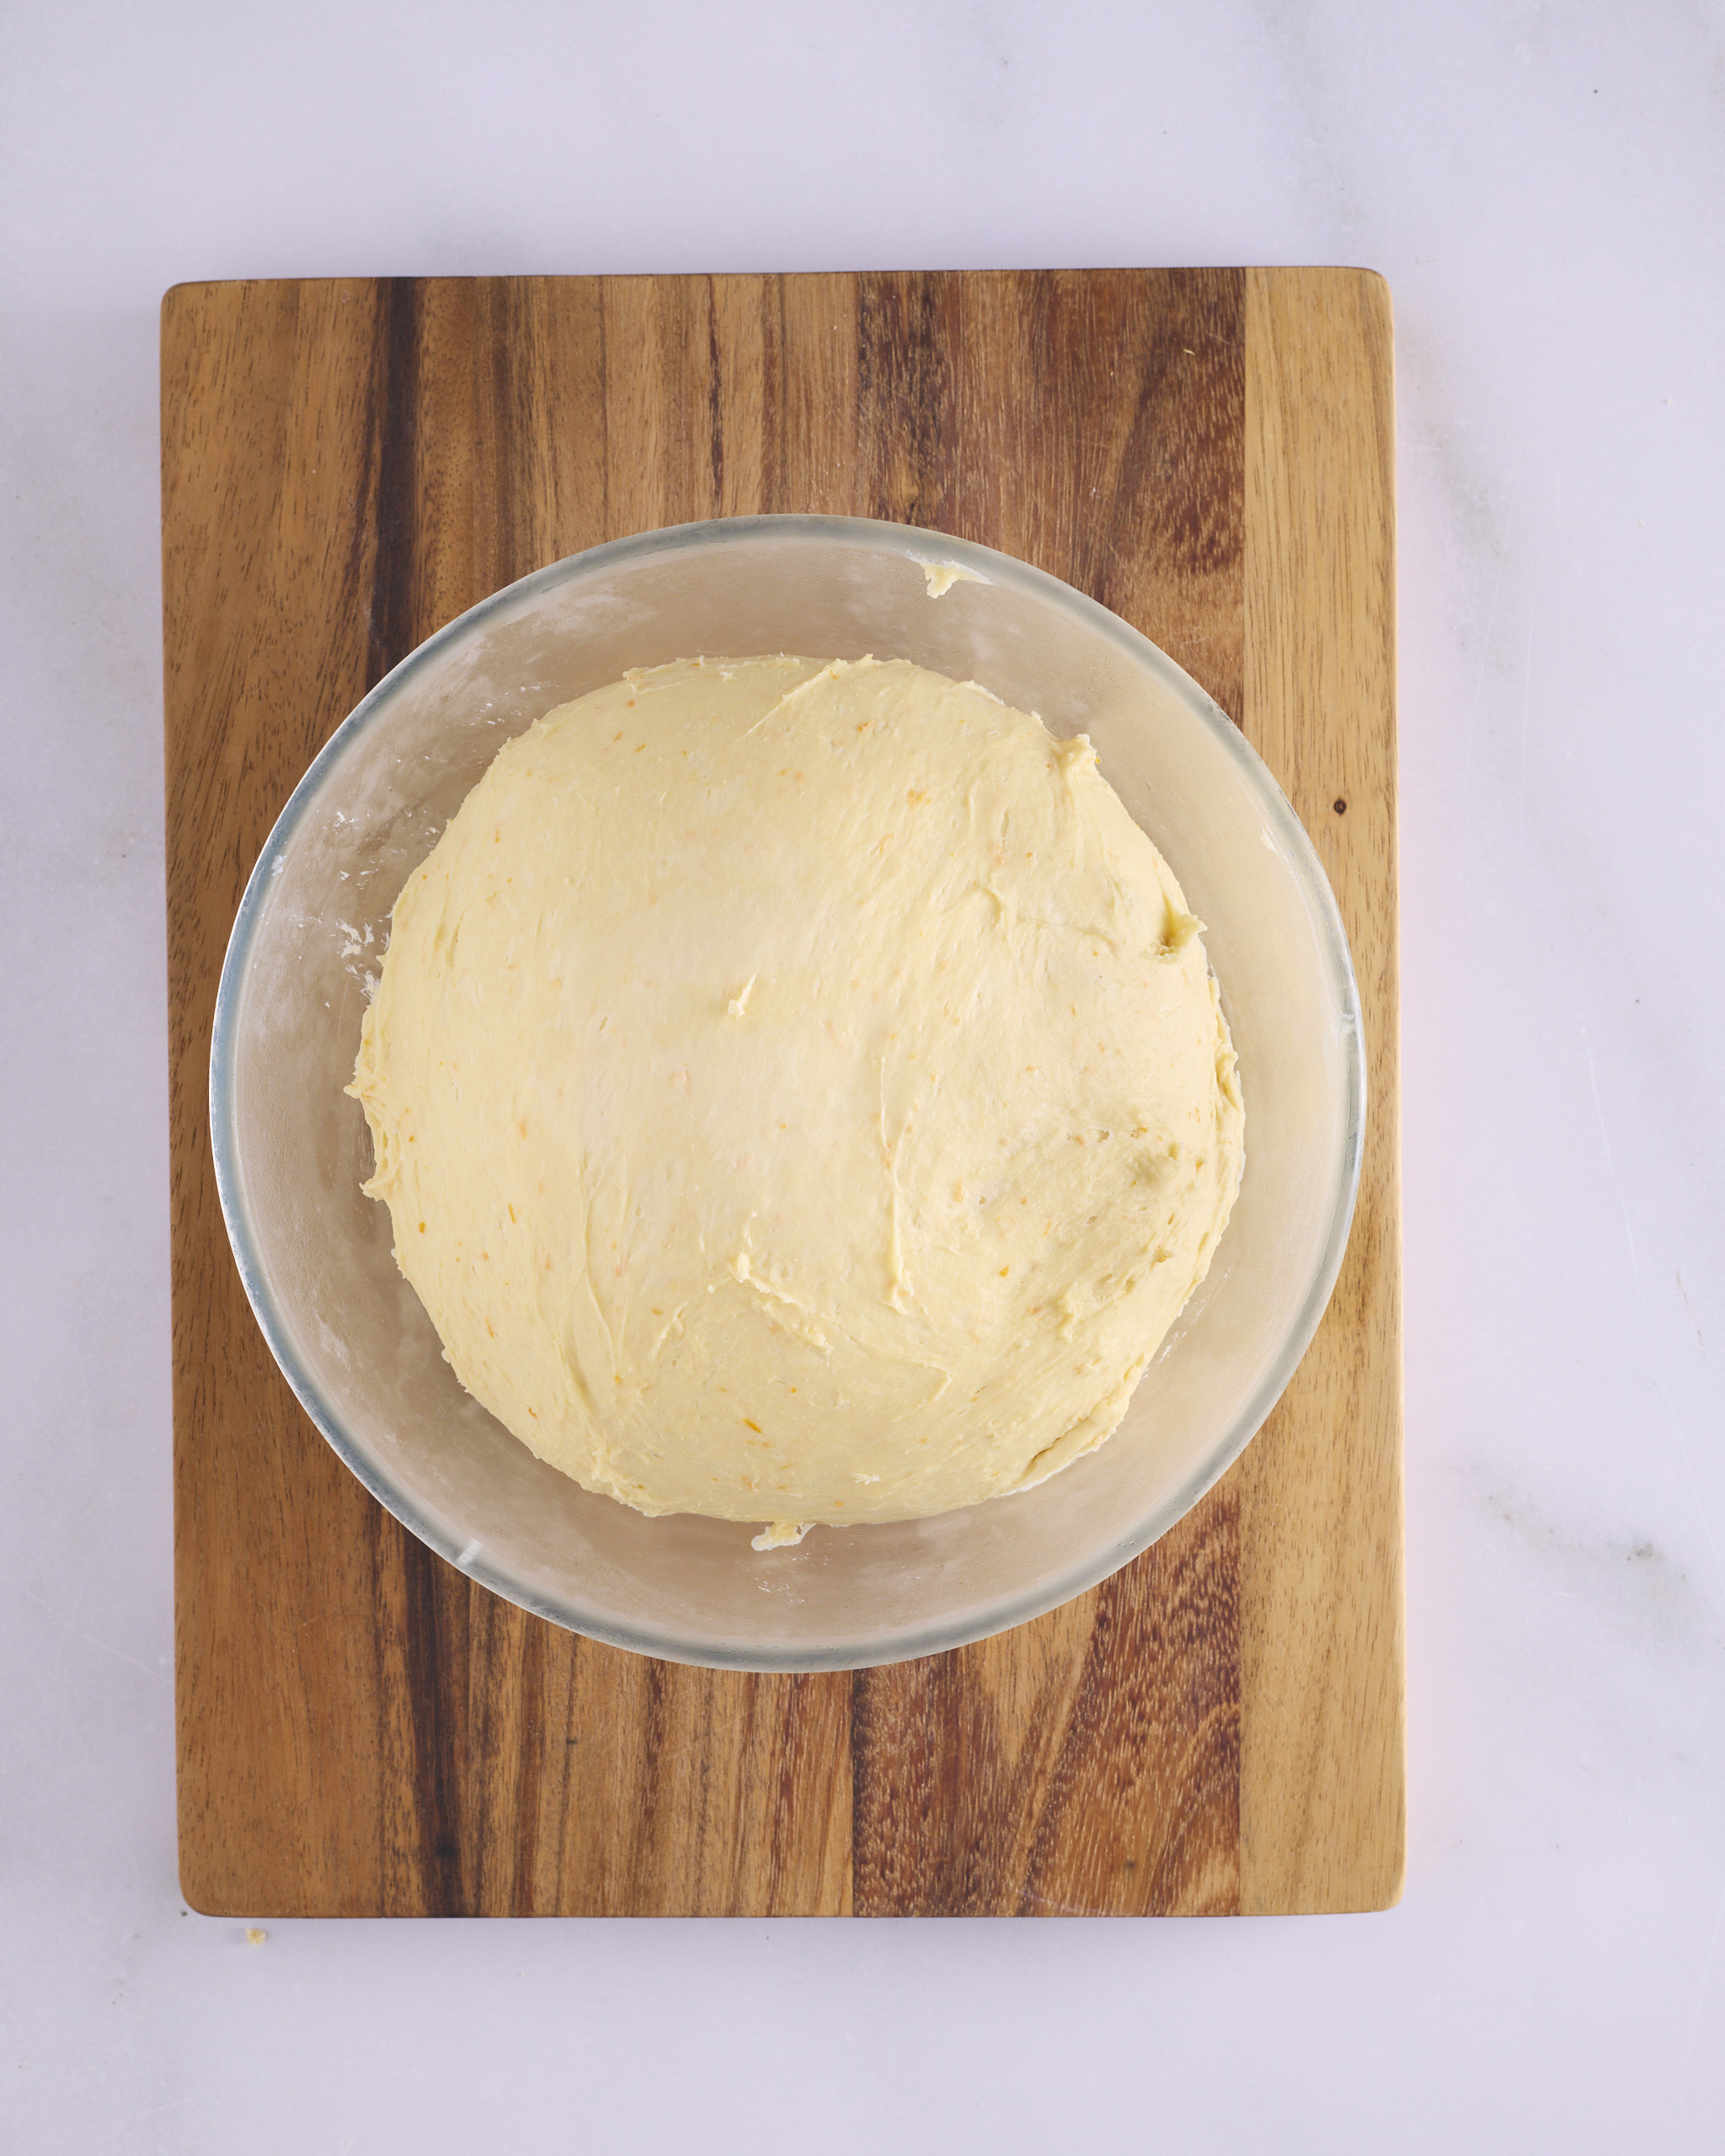
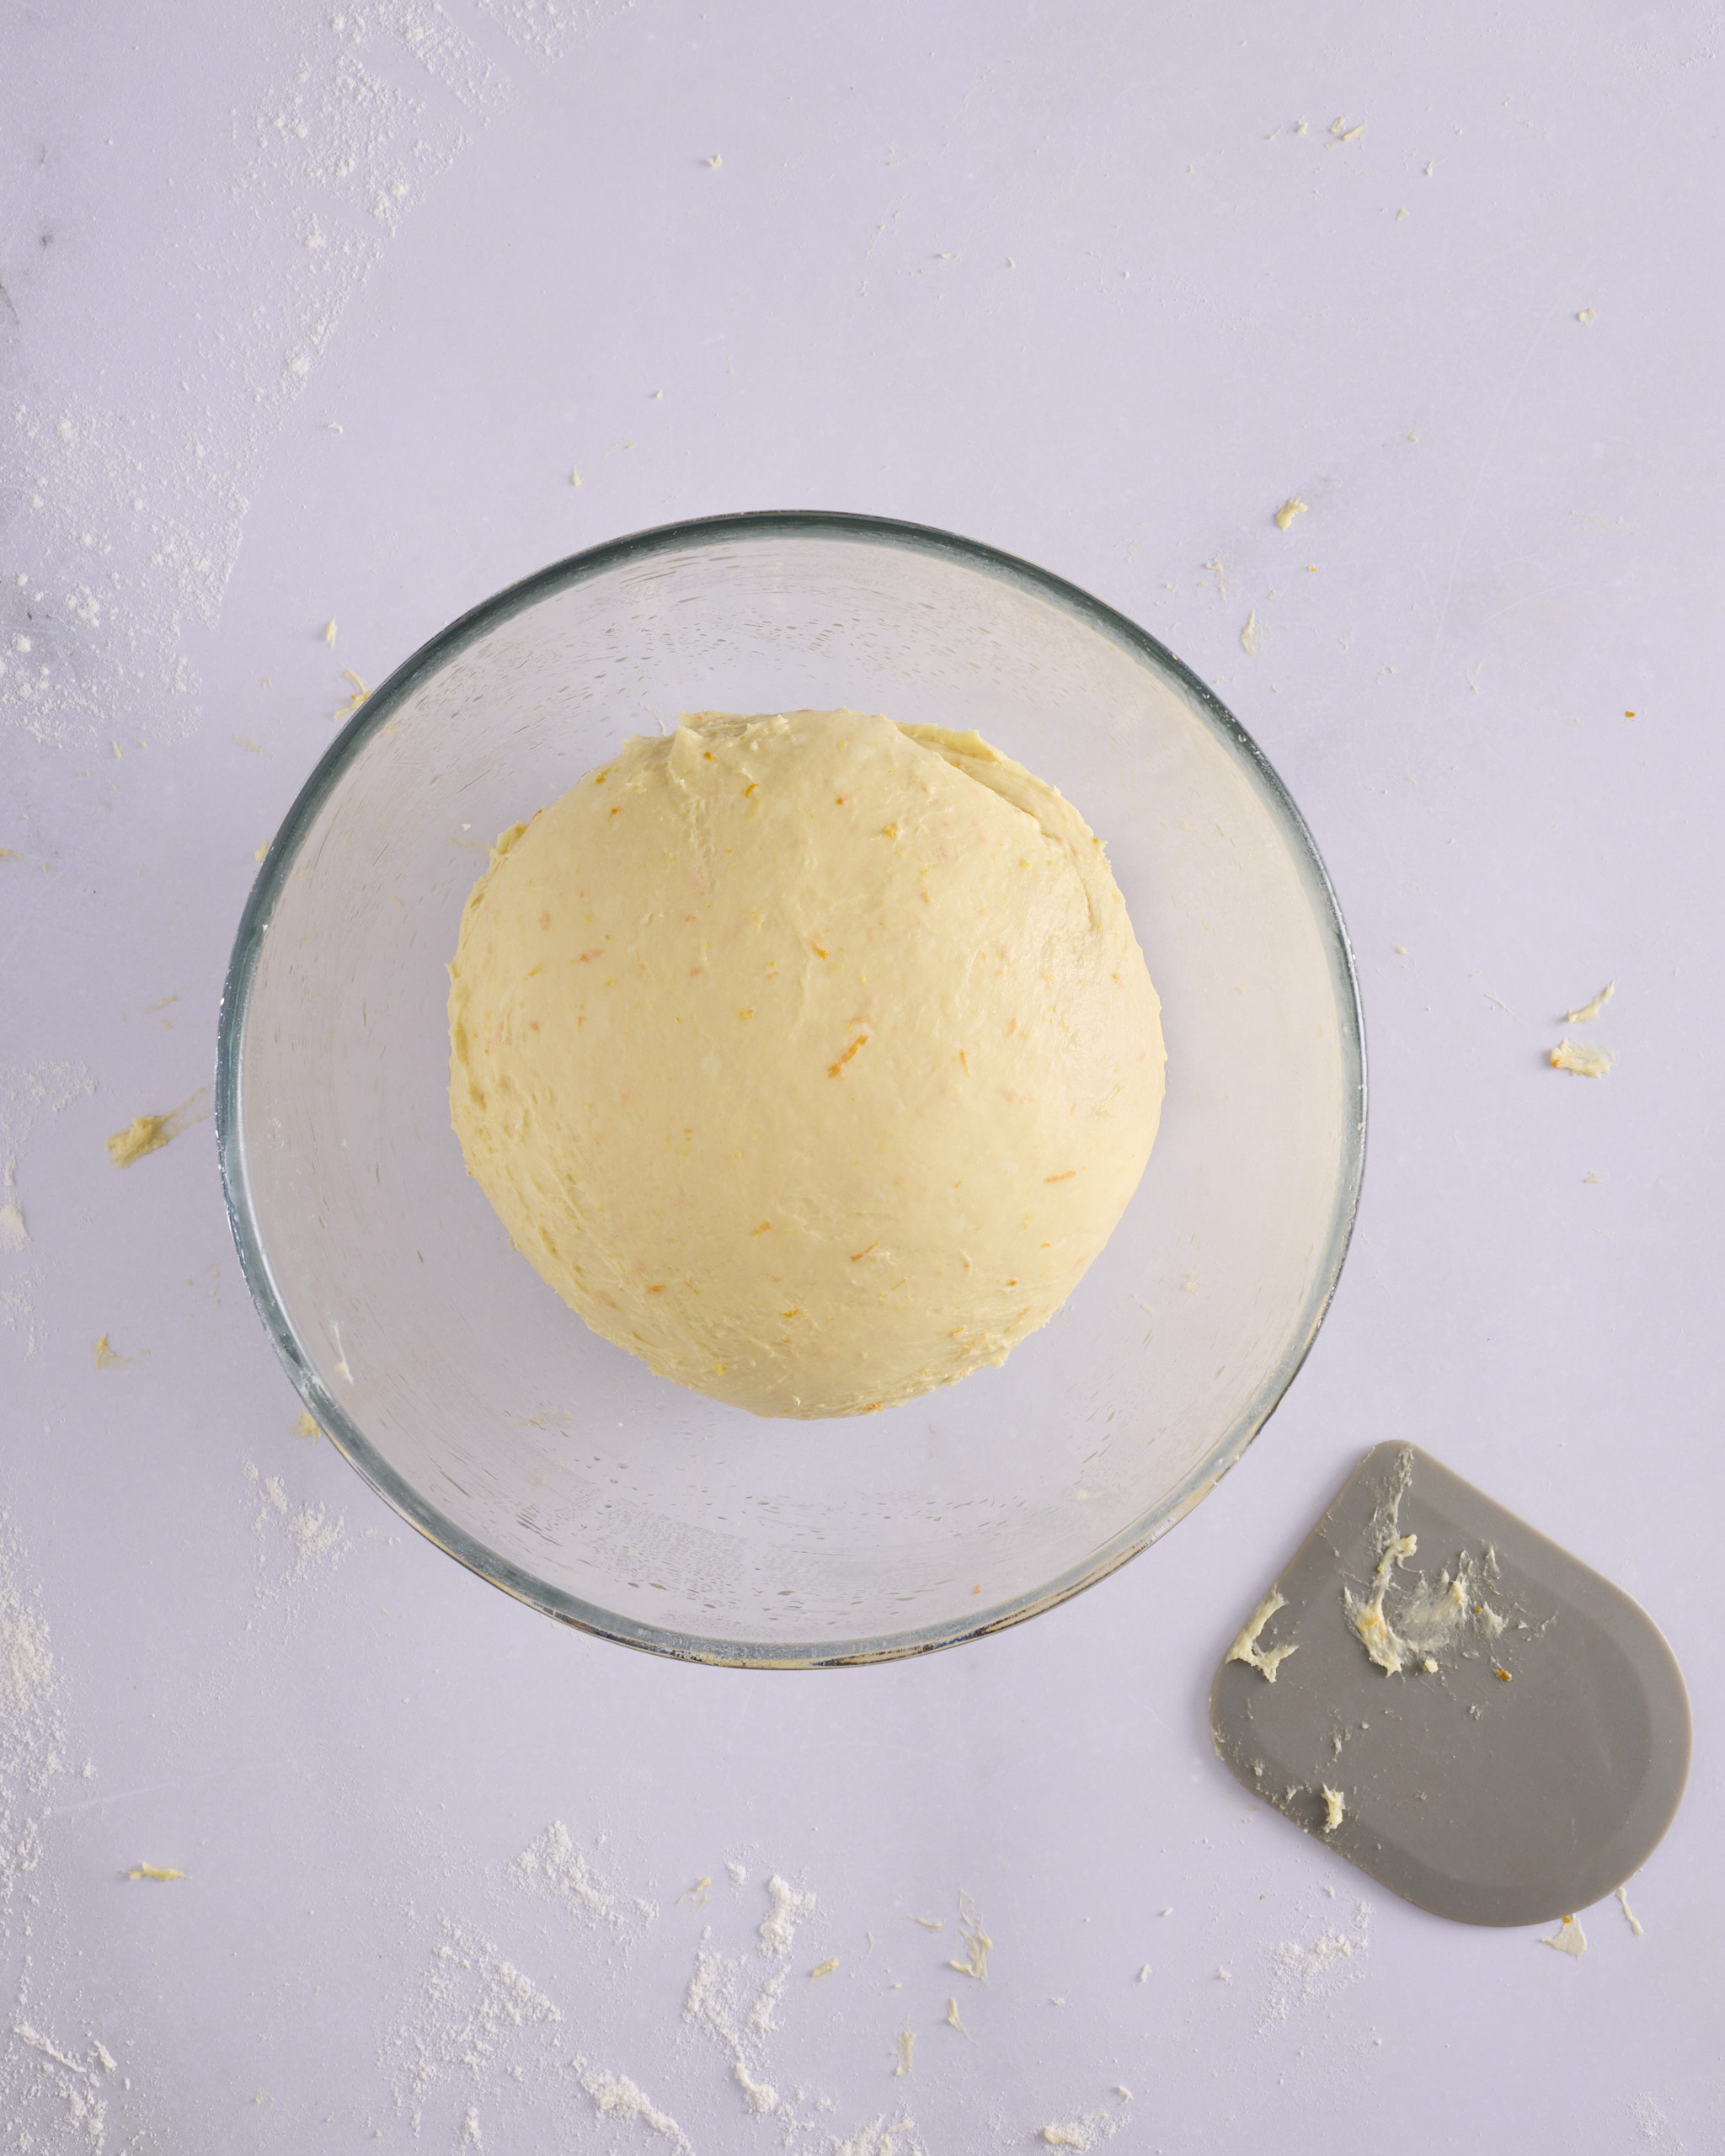
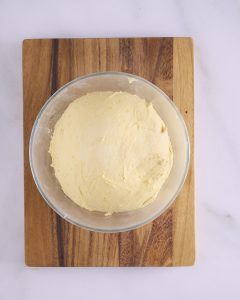
By the time the dough ball is releasing nicely from the bench and you can press the top of the ball and it bounces back, you’re done. Lift the dough ball into the greased bowl with the help of the dough scraper, trying not to rupture the surface. Cover the bowl with a sealed lid or plastic wrap that you’ve sprayed with oil.
Place the foundation sweet dough in the fridge overnight, up to 12 hours. A few hours over won’t hurt.
On the day you bake
Get organised
Before pulling the foundation sweet dough out of the fridge to start forming you’re the sweet buns or rolls you planning to make, you need to decide what proving environment you’re able to set up in your kitchen. Commercial bakeries have purpose made proving cabinets with precise settings for temperature and humidity to achieve perfectly risen dough. Proving in a sealed environment also prevents moisture evaporating and airflow causing a skin forming over the dough.
I have a dough setting on my double oven and set both ovens to 30°C. This higher temperature helps the dough that comes out of the fridge get going faster than if it’s sitting on the bench at room temperature. Unless of course it’s January in Australia, then the bench is fine!
To help create a moist environment in the oven, I’ve used two very large sturdy plastic bags (70cm x 80cm) that can hold a tray of buns or rolls. As I seal up the bag with the tray inside, I blow up the bag with a hair dryer and seal it with a bag clip. This is why I use both my ovens.
Your trays will be fine in a warm oven without the plastic bag on two racks. If you want to add a bit of humidity you can add a bowl of just boiled water in the corner of the oven.
Odds are you don’t, like me, have fifty 70cm x 80cm plastic bags tucked up on the top shelf in the pantry. Have we had the Sandra is a hoarder conversation yet? No bother, another method used by home bakers is proving their bread in large sealed plastic storage containers on the kitchen bench.
So make your plan and assemble your proving equipment before taking the foundation sweet dough out of the fridge.
What to bake next
I promise this foundation sweet dough is going to become your best friend. After a couple of goes tucking a batch of dough into the fridge before you call it a night won’t seem like a chore. You and the entire family will be dreaming about the fresh out of the oven sweet yeasted bakes they will be devouring in the morning.
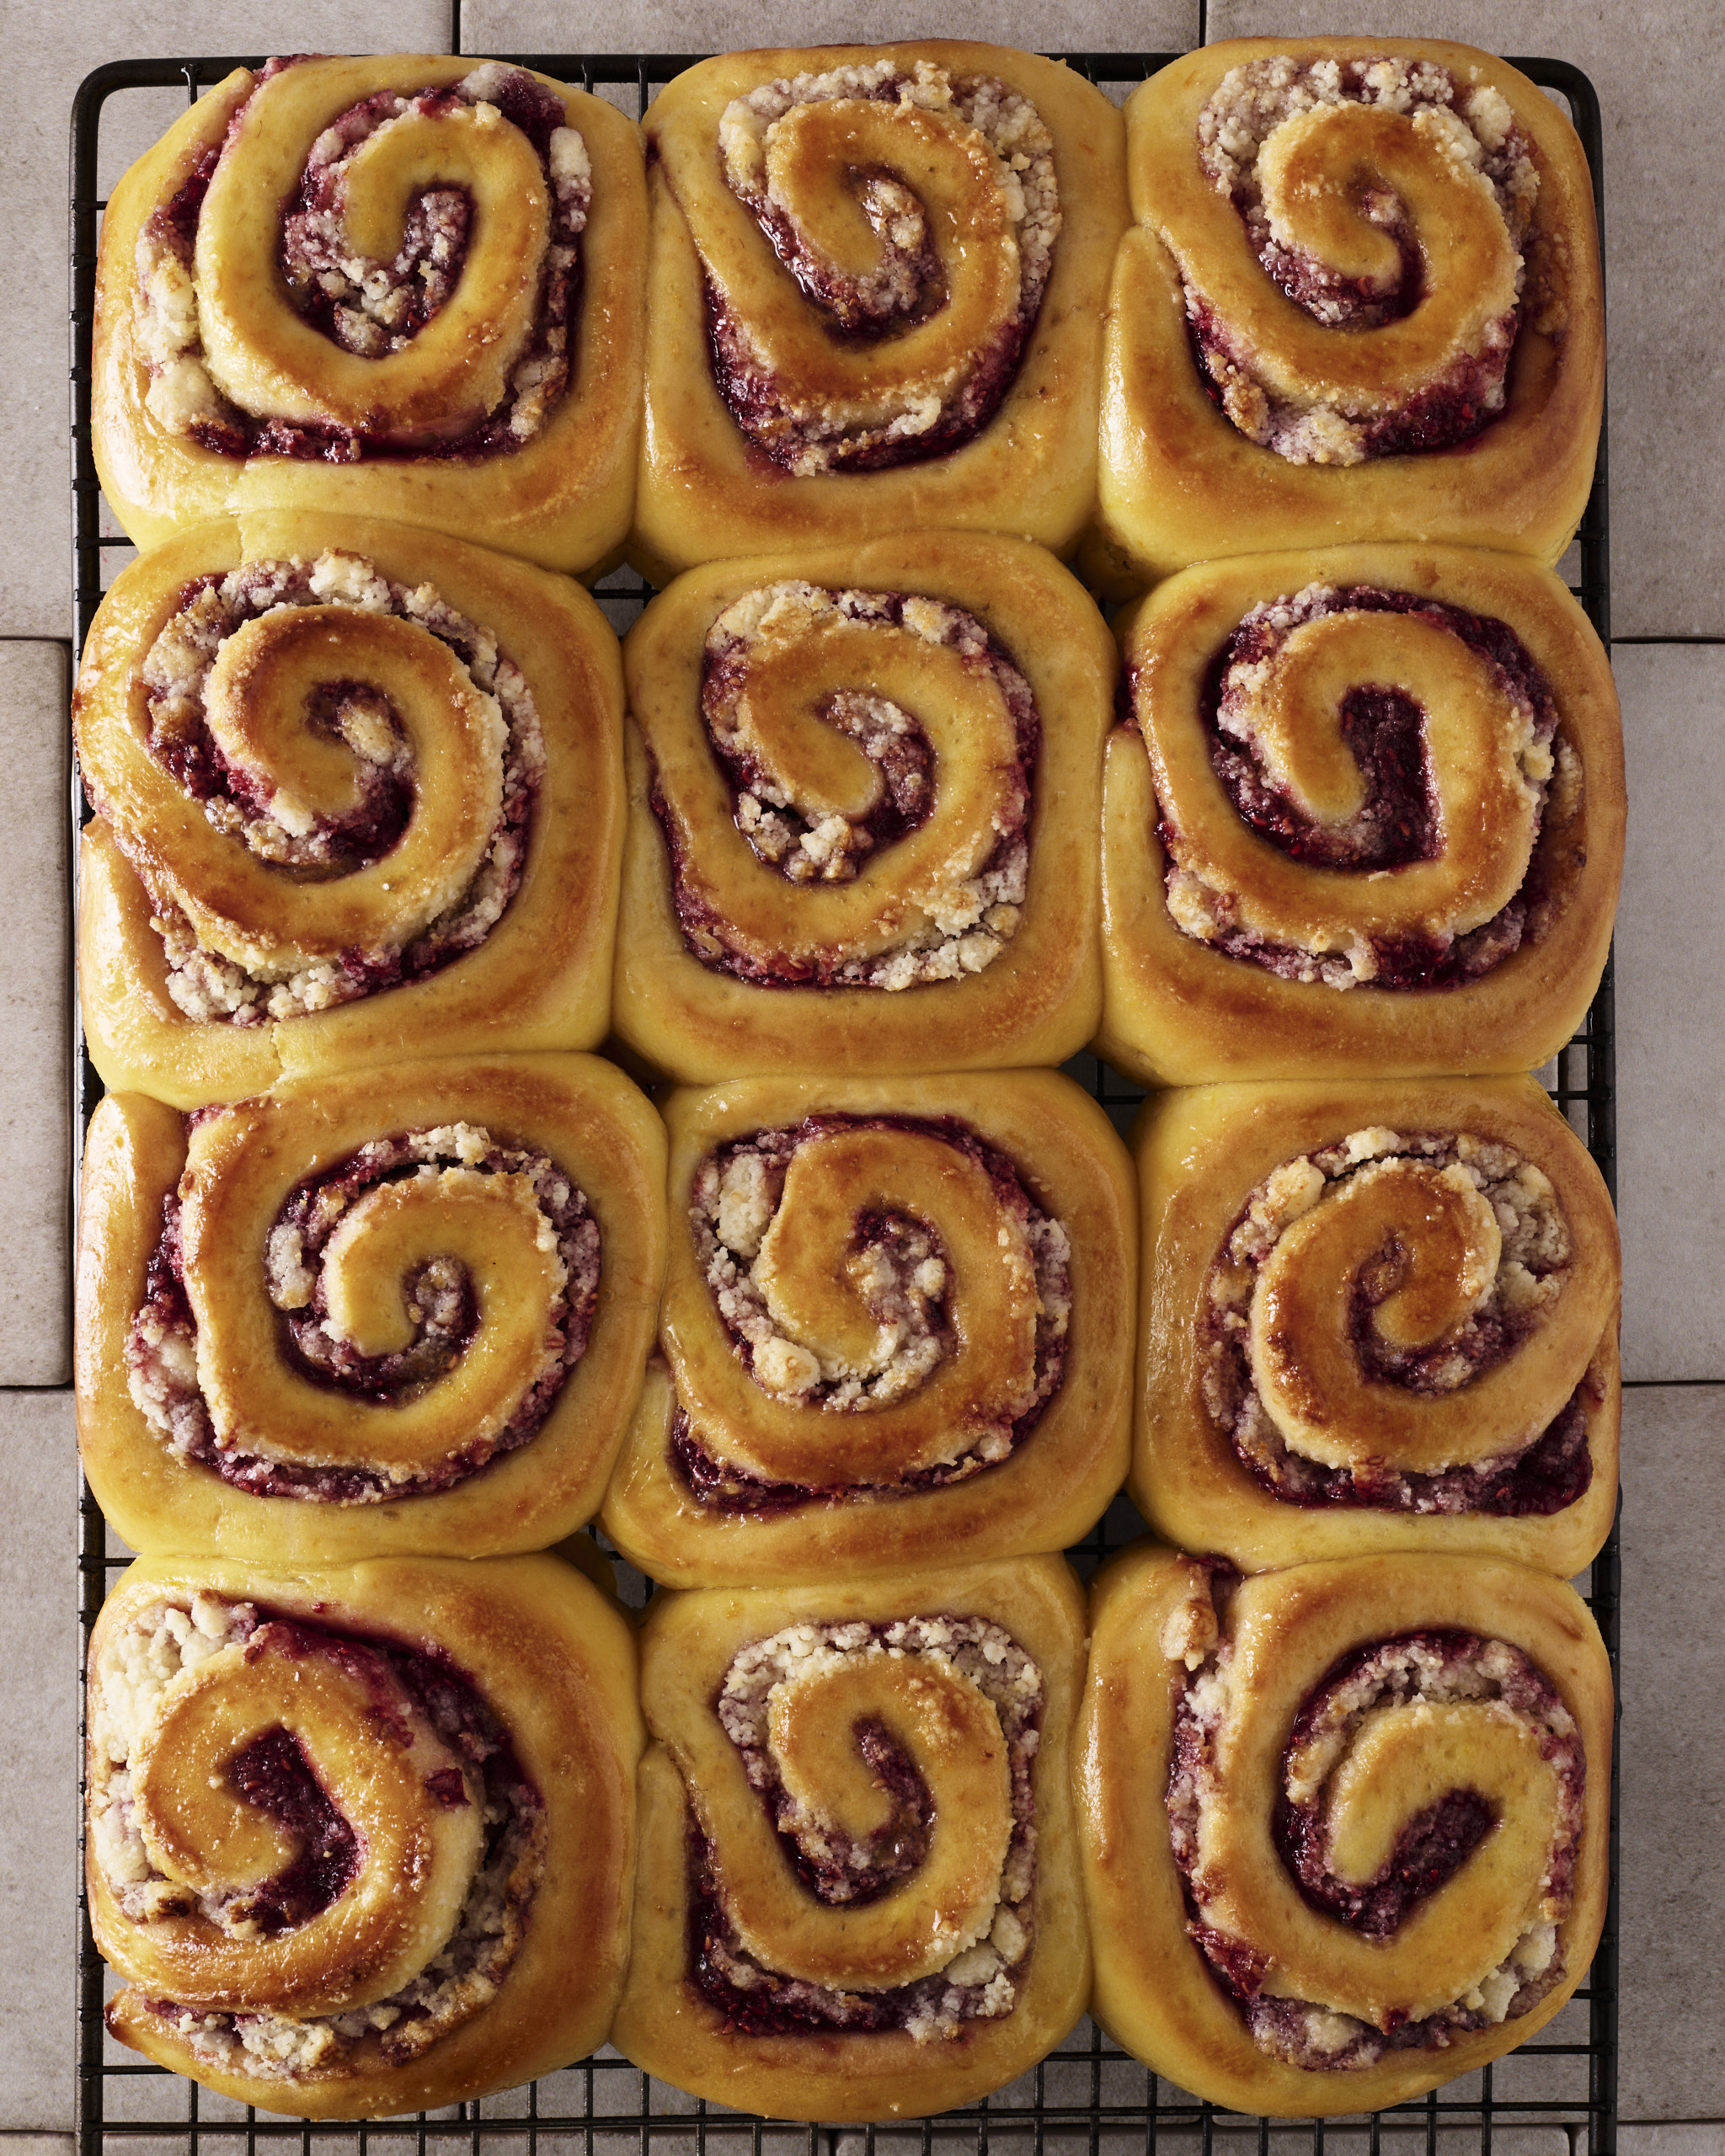
After you’ve worked your way through the Blueberry Cheesecake Kolaches, why not have a go at the Raspberry Macadamia Scrolls recipe.
You will have a hard time picking which recipe is your favourite after you’ve tried all three including my Cardamom Orange Knots.
Foundation Sweet Dough
Equipment
- Stand mixer (with paddle and dough hook attachments)
- Microplane
- Digital kitchen scales
Ingredients
Tangzhong:
- 35 g all-purpose flour
- 120 g full cream milk
- ½ teaspoon table salt
Dough:
- 60 g white sugar
- 2 oranges
- 350 g full cream milk
- 1 large egg
- 575 g all-purpose flour
- 1 tablespoon instant yeast
- 115 g unsalted butter
Instructions
Make the tangzhong:
- Weigh 35g all-purpose flour and 120g full cream milk into a small pan and add ½ teaspoon table salt.
- Heat over medium low heat while whisking until the mixture forms a thick paste.
- Remove from the heat, transfer to a small bowl or container and chill until slightly cold.
Make and knead the foundation sweet dough:
- Weigh 60g white sugar into the bowl of a stand mixer and zest 2 oranges over the bowl using a Microplane.
- Using the paddle attachment, mix on medium for 2 minutes until zest is well incorporated into the sugar.
- Add the tangzhong, 350g full cream milk, 1 large egg, 575g all-purpose flour, and 1 tablespoon instant yeast.
- Mix on low with the dough hook until combined.
- Increase speed to medium and knead for at least 5 minutes to develop the gluten. You want it to stretch and not tear immediately if you test a small piece of the dough.
- Turn the speed back to low and add 115g slightly chilled unsalted butter, cut into tablespoon sized pieces, a couple of pieces at a time. Wait until each addition is incorporated before adding more. This can take up to 10 minutes.
Forming the dough ball:
- Tip the dough onto the bench. Pick a side to be the top of the dough ball and keep it that way.
- Lift the dough off the bench, stretch it out and drop it back down, gathering it back into a ball with a dough scraper.
- Repeat until the dough becomes less sticky and more resistant.
- Then lift the dough about 30cm off the bench, letting it stretch into a tail, flip the tail forward as you land it, roll the dough over and tuck it in, keeping the top facing up. Tuck in around the base with the scraper and repeat a couple of times.
- The dough is ready when it releases cleanly from the bench and springs back when pressed.
- Lift into a greased bowl, cover with an oiled sealed lid or oiled plastic wrap.
- Refrigerate overnight, up to 12 hours.